こんばんは!スージーです!
最近、学習し始めたReactにてフォームの扱い方で苦労したので備忘録。
やりたい事
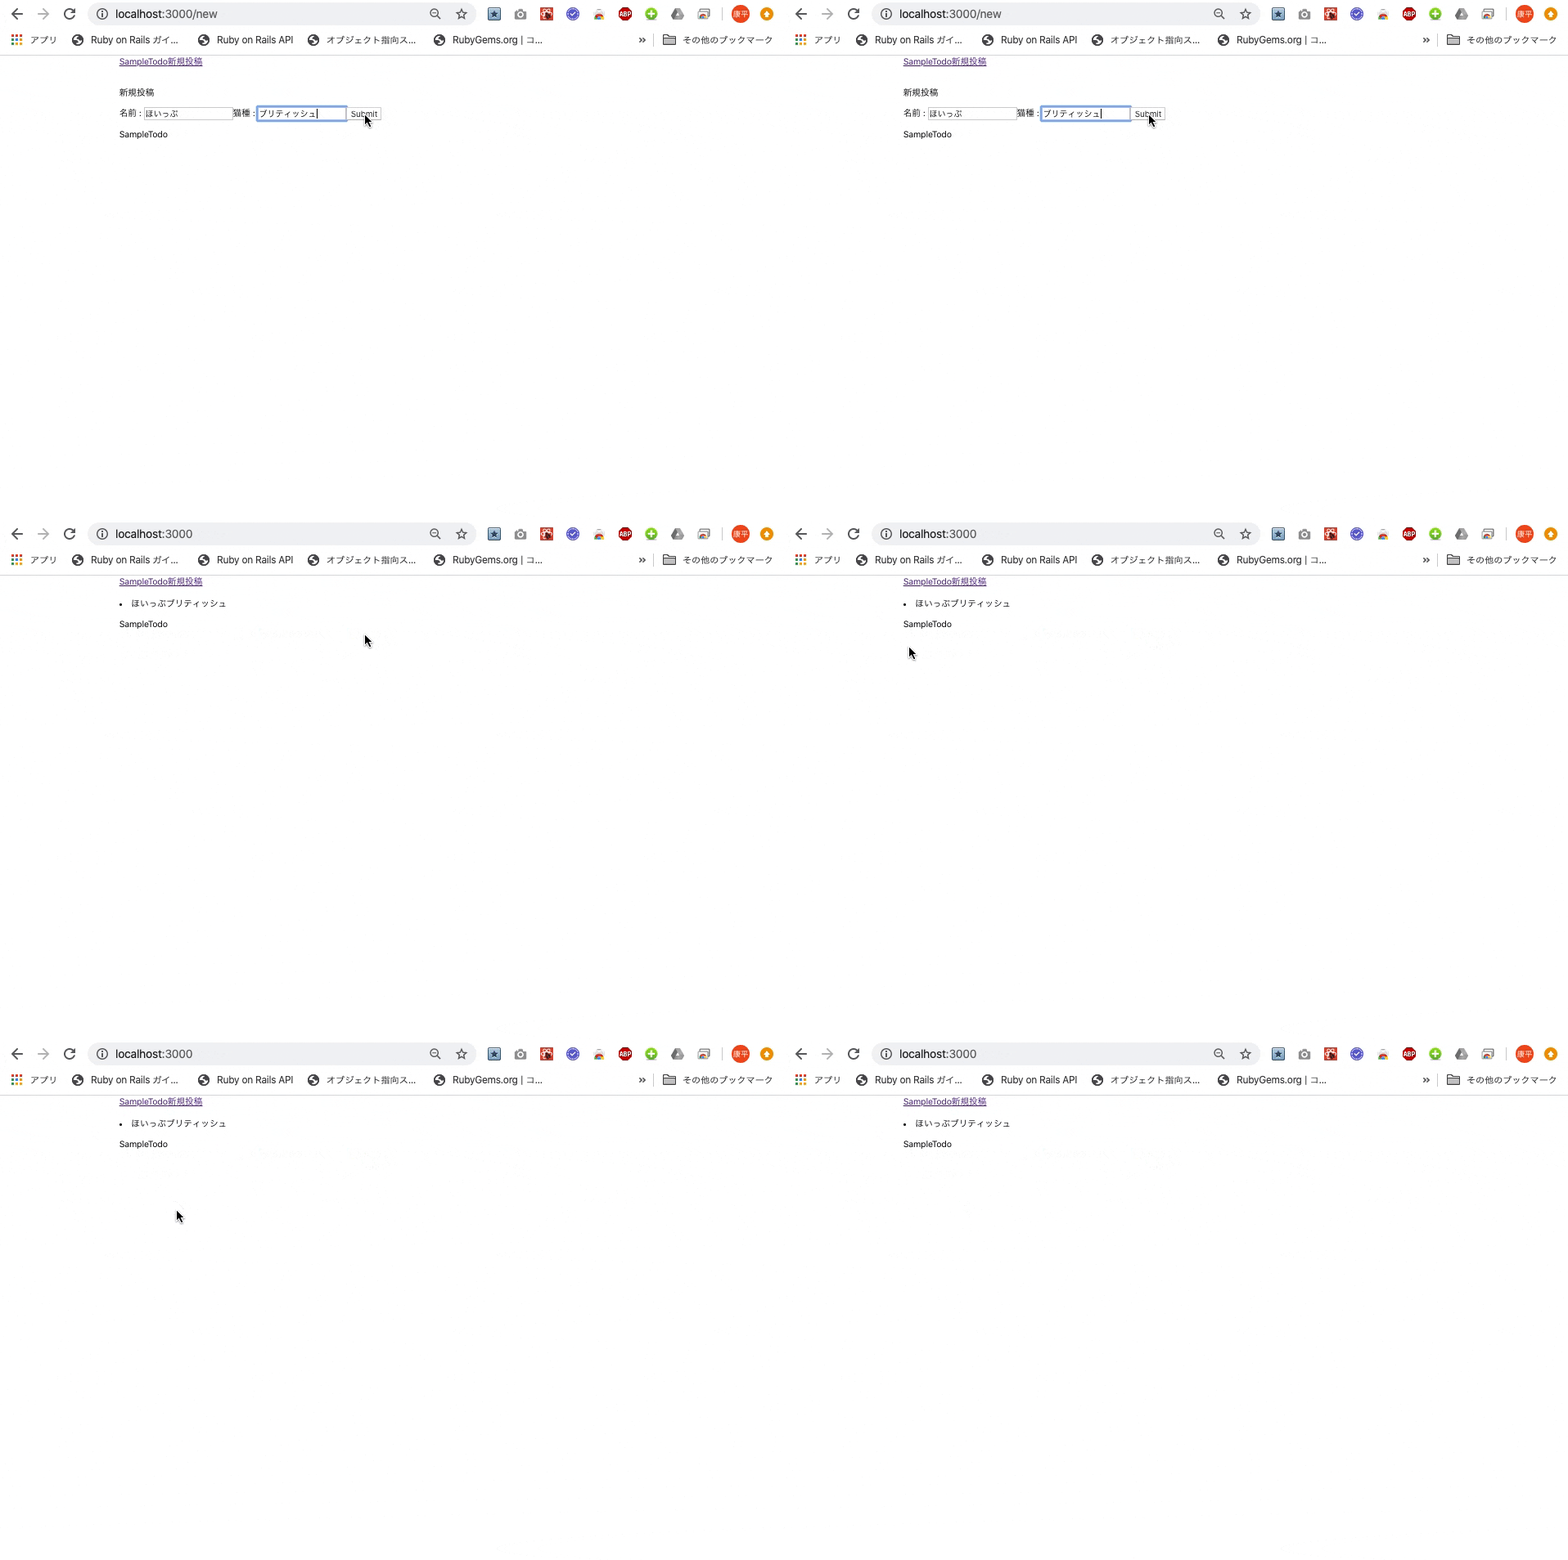
railsのcreateアクションにてフォームに2つのデータを入力してDBへ保存しビューで一覧表示する。
汚いレイアウトは勘弁して下さい。今回はCRUDの新規作成(Create)と一覧表示(Read)の実装をする。
開発環境
Ruby 2.5.1
Rails 5.2.4
React 16.13.1
参考
Ruby on Rails+ReactでCRUDを実装してみた
https://qiita.com/yoshimo123/items/9aa8dae1d40d523d7e5d
[Rails API][React]axiosを用いて"POST"したい!
https://teratail.com/questions/166335
Ruby on Rails+ReactでCRUDを実装してみた
https://qiita.com/yoshimo123/items/9aa8dae1d40d523d7e5d
MacにNode.jsをインストール
https://qiita.com/kyosuke5_20/items/c5f68fc9d89b84c0df09
まずはRails側から実装開始
apiモードでrails newする
$ rails new neko -d mysql --api
// 「--api」→オプションをつける事でapiモードで作成
// 「-d mysql」→DBにはMySQLを利用
gem 'rack cors'をインストールとモデル・コントローラを作成
# Use Rack CORS for handling Cross-Origin Resource Sharing (CORS), making cross-origin AJAX possible
gem 'rack-cors'# 注目! 29行目あたりにコメントアウトされているのでコメントアウトを外す
$ cd neko
// アプリ階層へ移動
neko $ bundle install
// rack-corsをbundle installする
neko $ rails g model post name:string neko_type:string
// モデルを作成する
neko $ rails db:create
neko $ rails db:migrate
neko $ rails g controller posts
// コントローラー作成。apiモードなのでviewは作成されない
class PostsController < ApplicationController
  def index
    @post = Post.all
    render json: @post
  end

  def create
    @post = Post.create(name: params[:name], neko_type: params[:neko_type])
    render json: @post
  end

end
通常railsではprivate以下にpost_paramsなどメソッド作ってPost.create(post_params)としますが、Reactを使って実装すると以下のエラーが出てしまいました。
Started POST "/posts" for ::1 at 2020-04-06 20:37:54 +0900
Processing by ProductsController#create as HTML
  Parameters: {"name"=>"たま", "neko_type"=>"雑種"}
Completed 500 Internal Server Error in 5ms (ActiveRecord: 0.0ms)


NoMethodError (undefined method `permit' for "たま":String):
なので、今回は一旦@post = Post.create(name: params[:name], neko_type: params[:neko_type])で実装を進めていきます。
ルーティングを設定
Rails.application.routes.draw do
  resources :posts
end
Railsを起動
Reactが3000番ポート、Railsは3001番ポートを使います。
Rails API=>neko直下でrails s -p 3001
React=>neko>react_front直下でnpm start
$ rails s -p 3001
=> Booting Puma
=> Rails 5.2.4.2 application starting in development
=> Run `rails server -h` for more startup options
Puma starting in single mode...
* Version 3.12.4 (ruby 2.5.1-p57), codename: Llamas in Pajamas
* Min threads: 5, max threads: 5
* Environment: development
* Listening on tcp://localhost:3001
* Use Ctrl-C to stop

// Getのエンドポイントにアクセス。
// ターミナルで新しいタブを開いて以下コマンドを叩いてみてjsonでレスポンスあるか確認
neko $ curl -G http://localhost:3001/posts/
=>[ ]
// 空の[]が返ってくるが、DBにデータが入っていないのでここはこのままでOK
Rails側で3000ポートのアクセスを許可する
# Be sure to restart your server when you modify this file.

# Avoid CORS issues when API is called from the frontend app.
# Handle Cross-Origin Resource Sharing (CORS) in order to accept cross-origin AJAX requests.

# Read more: https://github.com/cyu/rack-cors
8行目~16行目あたりにある以下のソースのコメントアウトを外す
Rails.application.config.middleware.insert_before 0, Rack::Cors do
  allow do
    origins 'http://localhost:3000'# 注目! 3000番ポートを許可する為に'http://localhost:3000'に変更する

    resource '*',
      headers: :any,
      methods: [:get, :post, :put, :patch, :delete, :options, :head]
  end
end
ここまででRails側の実装は終了です。次はReact側を実装していきます。
次にReact側の実装開始
Node.jsをまだインストールしていなければインストールして下さい。
neko $ npm install -g create-react-app
// create-react-appをインストール
neko $ create-react-app react_front
// プロジェクトを作成
neko $ cd react_front
react_front $ npm start
// reactのデフォルトTOP画面がブラウザに表示される
ディレクトリ構造
ディレクトリ構造は以下のようになります。
.
|_app
|_bin
|_config
|_db
|_lib
|_log
|_public
|_react_front # 注目 ここがこれから実装するディレクトリ
| |_node_modules
| |_public
| |_src
| |_.gitignore
| |_package-lock.json
| |_package.json
| |_yarn.lock
|_storage
|_test
|_tmp
|_vender
|_.gitignore
|_.ruby-version
|_config.ru
|_Gemfile
|_Gemfile.lock
|_package-lock.json
|_README.md
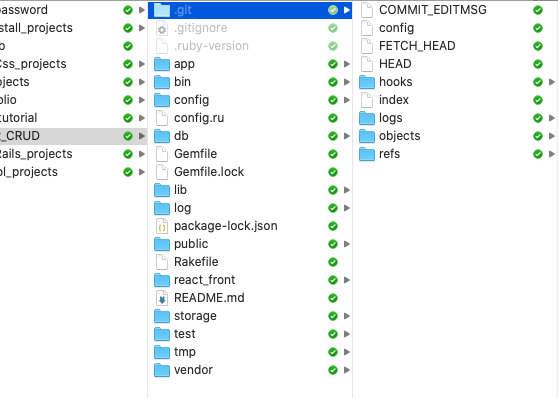
ちなみにgitでバージョン管理する場合にリモートリポジトリにpushする時にエラーが起きるかもしれません(エラー内容忘れた)。macのFinderでディレクトリに潜っていくと分かるのですが、Railsの.gitディレクトリとReactの.gitディレクトリが存在します。それぞれプロジェクト作成した時に作成されてしまうからです。
キャプチャは既に片方削除していますが、React(react_front内)の.gitディレクトリは削除して下さい。それでエラーは解決できます。
App.js
コードはこちらを参考にカラム名やパスを自分の環境に合わせて変更して利用させて頂きました。
import React from 'react';
import { BrowserRouter as Router, Link, Switch, Route } from 'react-router-dom';
import List from './Components/List';
import New from './Components/New';
import './App.css';

const App = () => {
  return (
    <Router>
      <div id="App">
        <Header />
          <Switch>
            <Route exact path='/' component={ List }/>
            <Route exact path='/new' component={ New } />
          </Switch>
      </div>
    </Router>
  );
}
const Header = () => (
  <nav>
    <div>
      <Link to="/">SampleTodo</Link>
      <Link to="/new">新規投稿</Link>
    </div>
  </nav>
)

export default App;
Components/List.jsx
画面遷移を簡単に実装する為に***axios***をインストールしておきます。
neko $ npm install axios --save
// 「--save」オプションでpackage.jsonにも反映
import React, { Component } from 'react';
import axios from 'axios'

class List extends Component {
  constructor(props) {
    super(props)
    this.state = {
      posts: []
    };
  }

  componentDidMount() {
    axios.get('http://localhost:3001/posts')
    .then((results) => {
      this.setState({posts: results.data})
    })
    .catch((data) =>{
      console.log(data)
    })
  }

  render() {
    const {posts} = this.state
    return (
      <div>
        {posts.map((list) => {
            return <li key={list.id}> { list.name }{ list.neko_type }</li>
            // postsに格納されているdataをmapメソッドを使い1つ1つ取り出し表示させる
          })}
      </div>
    );
  }
}
export default List;
Components/New.jsx
import React, { Component } from 'react';
import axios from 'axios'

class New extends Component {
  constructor(props){
    super(props);
    this.state = {
      name: '',
      neko_style: ''
    };
  }

  handleInputValue = (event) => {
    this.setState({
    // setStateメソッドで更新するstateと新しいstateの値を指定する
      [event.target.name]: event.target.value
    // フォームのname="neko_type"のnameを参照
       // this.setState({title: event.target.value})と同じ書き方となる
    });
  }

  handleSubmit = (e) => {
    e.preventDefault();
    axios({
      method : "POST",
      url : "http://localhost:3001/posts",
      data : { name: this.state.name, neko_type: this.state.neko_type }
    })
    .then((response)=> {
      console.log(this.props)
      this.props.history.push('/');
    })
    .catch((error)=> {
      console.error(error);
    });
  }

  render() {
    const { name, neko_type } = this.state;
    return (
      <div>
        <p>新規投稿</p>
        <div>
          <label>名前 : </label>
          <input type="text" name="name" value={ name } onChange={ this.handleInputValue } />
          // 2つ以上のフォームを扱う場合はname=""を書く
      // これで1つのhandleInputValueイベントで複数のstateの値を更新できる
          <label>猫種 : </label>
          <input type='text' name="neko_type" value={ neko_type } onChange={ this.handleInputValue } />
      // 2つ以上のフォームを扱う場合はname=""を書く
      // これで1つのhandleInputValueイベントで複数のstateの値を更新できる
          <input type="button" onClick={this.handleSubmit} value="Submit" />
        </div>
      </div>
    );
  }
}


export default New;
まとめ
最初は1つのデータだけ送るフォームでCRUDを実装してキャッキャウフフしていましたが、フォームって複数のデータを扱えないと使えない事に気づき、色々な参考記事をかいつまみながら実装しました。
まだまだReactとRails APIの連携に対して理解力が足ないので、もっともっと勉強が必要と感じました。
次は残りの更新(update)と削除(delete)を実装して開発中のアプリに載せ替えしようと思います。

