Ruby on Rails+ReactでCRUDを実装してみた
ReactとRailsの勉強を兼ねて、CRUDを実装してみました!Viewはテキトーです。
(React歴2ヶ月目なのでコードの品質は大目にみてください。)
読者の対象レベル
Reactのコンポーネントを理解している人
RailsでCRUDを実装できるくらいの人
実行環境
Reduxを使わずReactだけで実装しています。
バックエンド Ruby on Rails 5.1.5
フロントエンド React 16.2.0
RailsでReactを使う方法はいくつかありますが、今回はwebpack + babel-loaderを利用してバックエンドとフロントエンドを切り離して作成し巻いた。RailsはAPIだけです。
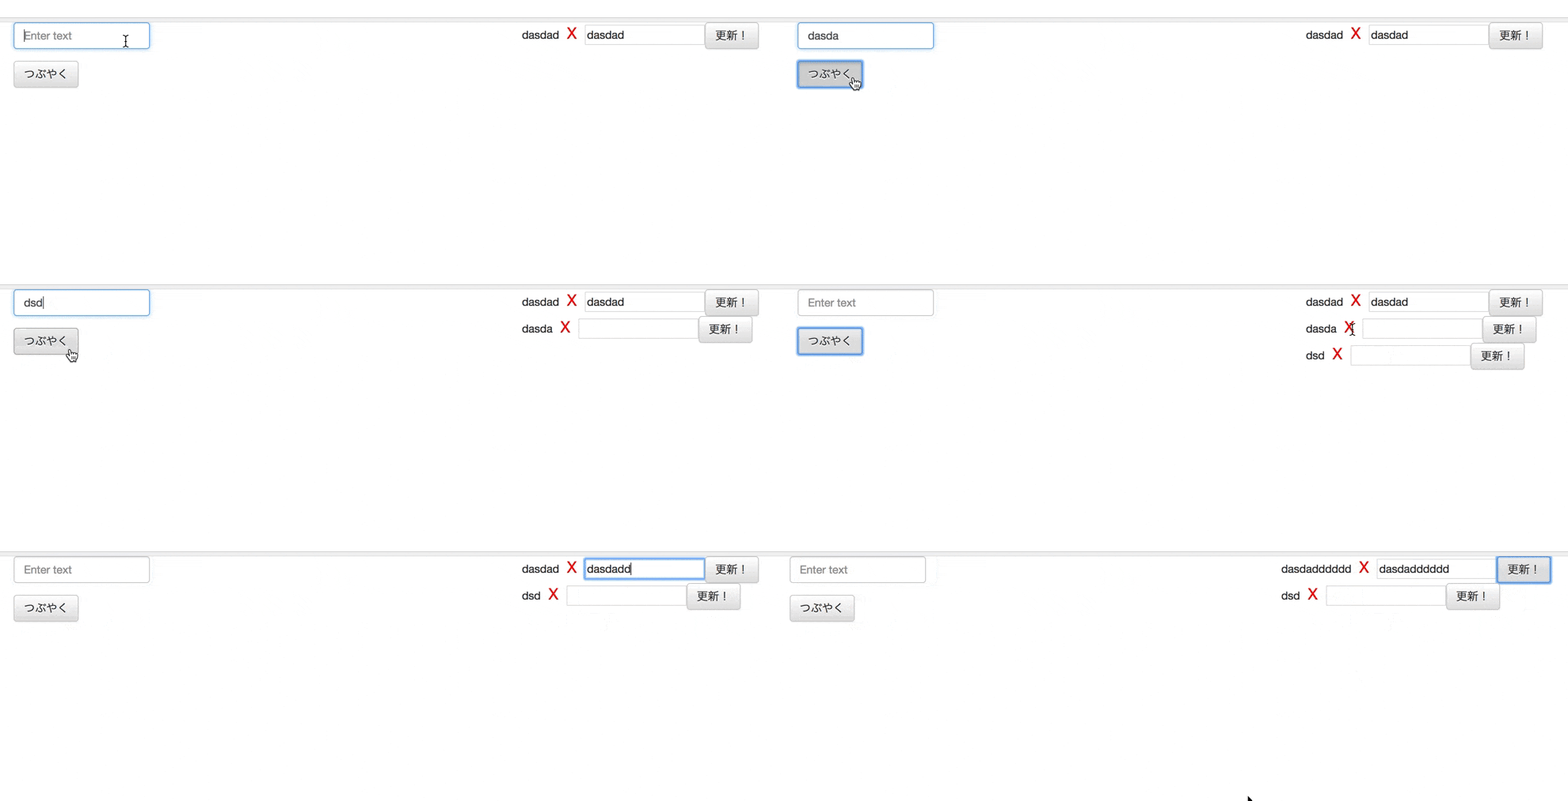
デモ
ディレクトリ構成
ディレクトリ構成はこのような感じです。webpackの環境はcrud_frontにあります。
.
├── Gemfile
├── Gemfile.lock
├── README.md
├── Rakefile
├── app
├── bin
├── config
├── config.ru
├── crud_front
├── db
├── lib
├── log
├── public
├── test
├── tmp
└── vendor
ちなみにcrud_frontはこんな感じ。
.
├── README.md
├── node_modules
├── package-lock.json
├── package.json
├── public
├── src
└── yarn.lock
RailsでAPIを作る
rails new app -d mysql --api
gemfileのrack-corsのコメントアウトを外し、
bundle install
次にapp階層に移動し、モデルの作成を行います。
rails g model product product:text

rake db:create
rails db:migrate
何もないと寂しいのでdb/seeds.rbにseedデータを作っていきます。
Product.create([
  {product: "犬"},
  {product: "猫"},
  {product: "馬"}
])
productは何でもいいので、実行します。
rake db:seed
コントローラーの作成
今回はAPIモードなのでViewファイルは作成されません。
rails g controller products
app/controllers/products_controller.rbの中身はこんな感じ
class ProductsController < ApplicationController

  def index
    @product = Product.all
    render json: @product
  end

  def create
    @product = Product.create(product: params[:product])
    render json: @product
  end

  def update
    @product = Product.find(params[:id])
    @product.update_attributes(product: params[:product])
    render json: @product
  end

  def destroy
    @product = Product.find(params[:id])
    if @product.destroy
      head :no_content, status: :ok
    else
      render json: @product.errors, status: :unprocessable_entity
    end
  end

end
ついでにconfig/routesルーティングの設定も行います。
Rails.application.routes.draw do
  resources :products
end
Railsを起動させてJsonで返ってきてるか確認
React側で3000番ポートを使用するので、RailsのAPIサーバーは3001番ポートに設定します。
rails s -p 3001
ではGetのエンドポイントにアクセスします。
$ curl -G http://localhost:3001/products/

# 出力
[{"id":1,"product":"犬","created_at":"2018-02-16T11:49:35.000Z","updated_at":"2018-02-16T11:49:35.000Z"},{"id":2,"product":"猫","created_at":"2018-02-16T11:49:35.000Z","updated_at":"2018-02-16T11:49:35.000Z"},{"id":3,"product":"馬","created_at":"2018-02-16T11:49:35.000Z","updated_at":"2018-02-16T11:49:35.000Z"}]%
ちゃんとJsonで返ってきました。ですがRails側で3000番ポートのアクセスが許可されていないのでapplication.rbに以下を記述しましょう。
class Application < Rails::Application
    config.load_defaults 5.1

    config.api_only = true
    config.middleware.insert_before 0, Rack::Cors do
      allow do
        origins 'http://localhost:3000'
        resource '*',
        :headers => :any,
        :methods => [:get, :post, :patch, :delete, :options]
      end
    end
  end
Reactの環境開発
めんどくさいReactの環境開発を構築してくる便利なツール「create-react-app」があるのでそちらを使用していきます。
npm install -g create-react-app
これで「create-react-app」が使用できるようになったので、crud_frontという名でプロジェクトを作成していきます。
create-react-app crud_front
ではcrud_frontの階層に移動しサーバーを起動してみます。
cd crud_front
npm start
http://localhost:3000 にアクセスすると以下のような画面が出てきます。

ページのコンテンツは、src/App.jsファイルのReactコンポーネントを通してレンダリングします。
import React, { Component } from 'react';
import logo from './logo.svg';
import './App.css';

class App extends Component {
  render() {
    return (
      <div className="App">
        <header className="App-header">
          <img src={logo} className="App-logo" alt="logo" />
          <h1 className="App-title">Welcome to React</h1>
        </header>
        <p className="App-intro">
          To get started, edit <code>src/App.js</code> and save to reload.
        </p>
      </div>
    );
  }
}

export default App;
Reactコンポーネントを使ったデータの表示
コンポーネント構成はこのような感じにしてみました。

メインコンポーネントの上につぶやきフォームとつぶやきリスト。つぶやきリストの上に消去ボタンと編集フォームという構成です。
親と子の関係を表すとこんな感じ

crud_front/src/にComponentsディレクトリを作り、Reactをここに記述していきます。最終的なディレクトリ構成はこのようになります。
.
├── App.css
├── App.js
├── App.test.js
├── Components
│   ├── FormContainer.jsx
│   ├── MainContainer.jsx
│   ├── ProductsContainer.jsx
│   └── ViewProduct.jsx
├── index.css
├── index.js
├── logo.svg
└── registerServiceWorker.js
ではsrc/App.jsに以下を記述していきましょう。
import React, { Component } from 'react';
import MainContainer from './Components/MainContainer'
import './App.css';


class App extends Component {
  render() {
    return (
      <div className="App">
        <MainContainer/>
      </div>
    );
  }
}

export default App;
このMainContainerにRailsと通信するAjax部分を記述していきます。今回はAPIと通信する便利なライブラリaxiosを使用していきます。あとbootstrapとreact-addons-updateをインストールしていきましょう。
yarn add axios
yarn add react-addons-update
yarn add react-bootstrap
そしてbootstrapもインストールしていきます。
npm i bootstrap@3 --save
src/ComponentsディレクトリにMainContainerを作成し以下を記述していきます。ここでaxiosを使いRailsAPIと通信を行い、結果はresultsに格納されます。ではrailsとwebpackを起動させみてみましょう。
import React from 'react'

class MainContainer extends React.Component {
  constructor(props) {
    super(props)
    this.state = {
      products: []
    }
  }


componentDidMount() {
    axios.get('http://localhost:3001/products')
    .then((results) => {
      console.log(results)
      this.setState({products: results.data})
    })
    .catch((data) =>{
      console.log(data)
    })
  }

  render() {
    return (
      <div className='app-main'>
      </div>
    );
  }
}

export default MainContainer
rails s -p 3001
npm start
もしnpm startでwebpackが起動しなければ一度npm installを行なってみてください。
おそらく何も表示されませんが、ブラウザのコンソールを開いてみるとconsole.log(results)の結果が表示されているはずです。

この中のdataにデータベースのデータが格納されています。result.dataとするとデータを取得することができますので、これをproductsに保存しています。
ではsrc/components/ProductsContainer.jsxとViewProduct.jsxにデータを表示させるコンポーネントを作成していきます。
まずはProductsContainer.jsxに以下を記述しましょう。
import React from 'react'
import ViewProduct from './ViewProduct'

class ProductsContainer extends React.Component {
  render() {
    return(
      <div className='productList'>
         {this.props.productData.map((data) => {
           return(
               <ViewProduct data={ data } key={ data.id } />
           )
         })}
      </div>
    )
  }
}

export default ProductsContainer
次にViewProduct.jsxに以下を記述します。
import React from 'react'

class ViewProduct extends React.Component {

  render() {
    return(
      <div>
        <span>{ this.props.data.product }</span>
      </div>
    )
  }
}

export default ViewProduct
最後に親のコンポーネントであるMainContainer.jsxにProductsContainerを付け加えます。
import ProductsContainer from './ProductsContainer'

class MainContainer extends React.Component {
  // 略
  render() {
    return (
      <div className='app-main'>
        <ProductsContainer productData={ this.state.products } />
      </div>
    );
  }
}
ブラウザを見てみるとこんな感じに表示されていると思います。

Product作成フォームの作成
src/Components/FormContainer.jsxを作成し以下を記述していきます。
import React from 'react'
import {Button,FormGroup,FormControl} from 'react-bootstrap'

class FormContainer extends React.Component {
  render(){
    return(
      <div>
      <form>
        <FormGroup controlId="formBasicText">
          <FormControl
            type="text"
            value={this.state.product}
            placeholder="Enter text"
            onChange={ e => this.onChangetext(e)}
          />
        </FormGroup>

      </form>
      <Button type="submit" onClick={this.hundleSubmit}>つぶやく</Button>
      </div>
    )
  }
}

export default FormContainer
次にMainContainer.jsxにFormContainerを記述しましょう。
import FormContainer from './FormContainer'

class MainContainer extends React.Component {
  // 略
  render() {
    return (
      <div className='app-main'>
        <FormContainer />
        <ProductsContainer productData={ this.state.products } />
      </div>
    );
  }
}
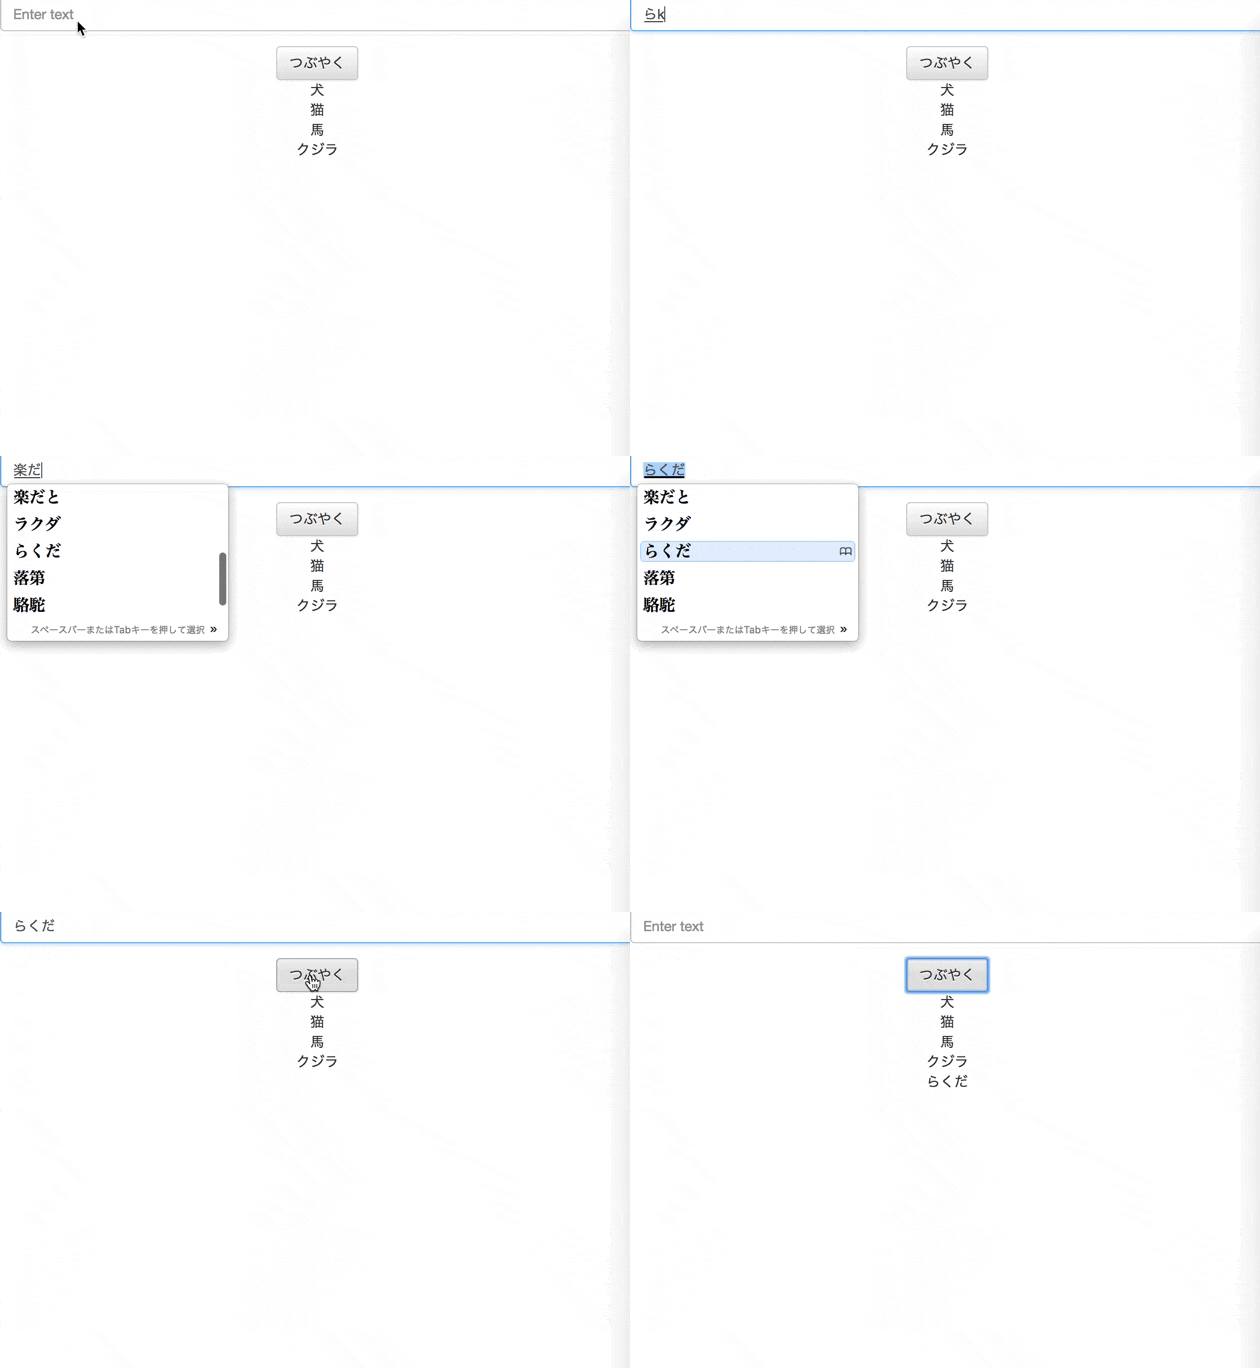
おそらくブラウザをみるとこんな感じで表示されているはずです。

まだフォームの中に文字を打っても何も変更できないはずなので、変更可能になるようにコードを書いていきます。
FormContainer.jsxに以下を記述しましょう。
import React from 'react'
import {Button,FormGroup,FormControl} from 'react-bootstrap'

class FormContainer extends React.Component {
  constructor(props) {
    super(props)
    this.state = {
      product: ''
    }
  }

  onChangetext(e) {
    this.setState({product: e.target.value})
  }


  render(){
    return(
      <div>
      <form>
        <FormGroup controlId="formBasicText">
          <FormControl
            type="text"
            value={this.state.product}
            placeholder="Enter text"
            onChange={ e => this.onChangetext(e)}
          />
        </FormGroup>

      </form>
      <Button type="submit" onClick={this.hundleSubmit}>つぶやく</Button>
      </div>
    )
  }
}

export default FormContainer
これでフォームを変更することができるようになったはずです。最後にbootstrapを適用させるためにMainContainer.jsxにコードを書いていきます。
import 'bootstrap/dist/css/bootstrap.css';
import 'bootstrap/dist/css/bootstrap-theme.css';

フォーム内容を適用させる
つぶやきフォームコンポーネントで入力したデータをつぶやきリストコンポーネントに表示させたいので、親コンポーネントであるMainContainerを経由してデータを反映させていきます。

その関係上RailsAPIと通信するAjaxはMainContainer.jsxに記述していきます。
import update from 'react-addons-update' ←ここも追加

class MainContainer extends React.Component {
  //略
  createProduct = (product) => {
    axios.post('http://localhost:3001/products',{product: product} )
    .then((response) => {
      const newData = update(this.state.products, {$push:[response.data]})
      this.setState({products: newData})
    })
    .catch((data) =>{
      console.log(data)
    })
  }

  render() {
    <div className='app-main'>
        <FormContainer createProduct={this.createProduct}/>
        <ProductsContainer productData={ this.state.products } />
    </div>
  }
}
このcreateProduct関数をつぶやきフォームコンポーネントに渡してやり実行させます。その結果をメインコンポーネントで保存し、そのデータをつぶやきリストに渡します。
ではFormContainer.jsxを編集していきます。
class FormContainer extends React.Component {
  //略
  hundleSubmit = () => {
    this.props.createProduct(this.state.product)
    this.setState({product:''})
  }

  render(){
    return(
    //略
    )
  }
}
これで以下のようなことができると思います。
データの削除と更新
次にデータの削除と更新を書いていこうと思います。削除と更新も作成の時と同じようにメインコンポーネントでRailsAPIと通信する関数を定義して消去コンポーネントと更新コンポーネントをに渡して実行します。
src/components/MainContainer.jsxに以下のコードを記述します。
class MainContainer extends React.Component {
  //略
  deleateProduct = (id) => {
    axios.delete(`http://localhost:3001/products/${id}`)
    .then((response) => {
      const productIndex = this.state.products.findIndex(x => x.id === id)
      const deletedProducts = update(this.state.products, {$splice: [[productIndex, 1]]})
      this.setState({products: deletedProducts})
      console.log('set')
    })
    .catch((data) =>{
      console.log(data)
    })
  }

  updateProduct = (id, product) => {
    axios.patch(`http://localhost:3001/products/${id}`,{product: product})
    .then((response) => {
      const productIndex = this.state.products.findIndex(x => x.id === id)
      const products = update(this.state.products, {[productIndex]: {$set: response.data}})
      this.setState({products: products})
    })
    .catch((data) =>{
      console.log(data)
    })
  }

  render() {
    return (
      <div className='app-main'>
        <FormContainer  hendleAdd={this.hendleAdd} createProduct={this.createProduct}/>
        <ProductsContainer productData={this.state.products} deleateProduct={this.deleateProduct} updateProduct={this.updateProduct}/>
      </div>
    );
  }
}
src/Components/ProductsContainer.jsxにも以下のように記述します。
class ProductsContainer extends React.Component {
  render() {
    return(
      <div className='productList'>
         {this.props.productData.map((data) => {
           return(
               <ViewProduct data={data} key={data.id} onDelete={this.props.deleateProduct} onUpdate={this.props.updateProduct}/>
           )
         })}
      </div>
    )
  }
}
次にsrc/Components/ViewProduct.jsx以下のように記述します。
import React from 'react'
import {Button} from 'react-bootstrap'

class ViewProduct extends React.Component {
  constructor(props) {
    super(props)
    this.state = {
      updateText: '',
    }
  }


  handleDeleate = () => {
    this.props.onDelete(this.props.data.id)
  }

  handleUpdate = () => {
    this.props.onUpdate(this.props.data.id, this.state.updateText)
  }

  handleInput = (e) => {
    this.setState({updateText: e.target.value})
  }


  render() {
    return(
      <div>
        <span>{this.props.data.text}</span>
        <span className='deleteButton' onClick={this.handleDeleate}>X</span>
        <span>
          <input type="text" value={this.state.updateText} onChange={e => this.handleInput(e)} />
        </span>
        <span>
          <Button type="submit" onClick={this.handleUpdate}>更新!</Button>
        </span>
      </div>
    )
  }
}

export default ViewProduct
最後にデモと同じ見た目になるようにApp.cssを編集していきます。
.app-main{
  width:auto;
  height: auto;
  display: flex;
  justify-content: space-around;
}

.deleteButton {
  padding: 10px;
  font-size: 20px;
  color: red;
}
これで完成です!!

まとめ
コンポーネント間のデータのやりとりがめんどくさかったので、次はReduxを勉強していこうと思います。
Github
https://github.com/yoshimoto8/React_CRUD
参照
http://techlife.cookpad.com/entry/2016/07/27/101015
http://allprowebdesigns.com/2017/09/how-to-build-a-react-app-that-works-with-a-rails-5-1-api/

