こんばんは!スージーです。
こちらの記事の続きです。
やりたい事
-
reduxとredux-sagaを使って非同期処理を書き換える
開発環境
- Ruby 2.7.2
- Rails 6.1.4
- MySQL
- node.js 16.6.2
- React 17.0.2
参考
-
Redux 入門 〜Reduxの基礎を理解する〜
※ reduxの各要素の説明についてはこちらの記事の説明を拝借しています。reduxについてとてもわかり易く書かれています -
React Redux Saga hooks - Live Coding Tutorial
-
redux-sagaを理解できない理由と使い方
※ redux-sagaについての説明についてはこちらの記事の説明を拝借しています。こちらの記事のお陰でcrud処理をreduxで書き直す事ができました
公式リファレンスとgithubを読んでみましたが、最初よく理解できませんでした。(incrementボタンとdecrementボタンの例がreduxではよくありますが、api処理が書かれていないので、私は公式だけでは理解できないです...)React Redux Saga hooks - Live Coding Tutorialのyoutubeが分かりやすかったです。その後、この動画のリポジトリをクローンして、自分のプロジェクトで同じ実装をしてみました。動作確認ができた後に、Qiitaを参考に非同期処理を書き換えていきました。
今回の記事ではRailsは触らないです
この規模のプロジェクトでreduxを使う必要はないです。今回は練習です
reduxを使わずにContextでグローバルにstateを管理する事も可能です。この記事で作成した認証周りは現在useContextでグローバルにstateを管理しています。次の記事あたりでreduxに書き換えます(練習のため)
ライブラリの追加
reduxで使うライブラリをインストールします
npm install redux
npm install redux-saga
npm install react-redux
reduxは同期処理しか扱えないので、redux-sagaやredux-thunkなどmiddlewareを使って非同期処理を実現します。今回redux-sagaを選んだ理由は、業務で使うので勉強のためです。まだまだ浅い知識で実装しているので、reduxで非同期処理を書くにはこんな感じでやるのかーくらいに読んで貰えれば幸いです
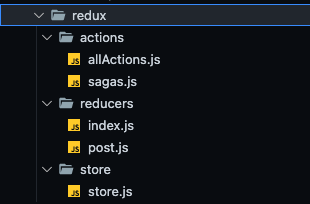
ディレクトリ作成
今回はsrcディレクトリ内にreduxディレクトリを作成し、その中にファイルを作成していきます
mkdir -p /src/redux/actions
touch /src/redux/actions/allActions.js /src/redux/actions/sagas.js
mkdir /src/redux/reduders
touch /src/redux/reduders/index.js /src/redux/reduders/post.js
mkdir /src/redux/store
touch /src/redux/store/store.js
ファイル名は記事によってマチマチなので何が適切か分かりません
以下のディレクトリ構造になっていればOK
store作成
// redux/store/store.js
import rootReducer from '../reducers';
import createSagaMiddleware from 'redux-saga';
import { createStore, applyMiddleware } from 'redux';
import rootSaga from '../actions/sagas';

const initialState = {
  asyncListData: '', // 一覧用
  asyncDetailData: '', // 詳細用
};
// redux-sagaはreduxのmiddlewareになるのでcreateStoreに設定する
const sagaMiddleware = createSagaMiddleware();

export const store = createStore(
  rootReducer,
  initialState,
  applyMiddleware(sagaMiddleware)
);
sagaMiddleware.run(rootSaga);
storeについては、Redux 入門 〜Reduxの基礎を理解する〜で以下のように説明されています
アプリケーションの全てのstateを保持するオブジェクト。ActionをStoreにdispatchする手段(store.dispatch())を提供する。また、stateとdispatchされたActionを、指定したReducerに渡してstateを変更する
storeをindex.jsxにimportする
// /src/index.jsx
import React from 'react';
import ReactDOM from 'react-dom';
import './index.css';
import App from './App';
// redux
import { Provider } from 'react-redux';
import { store } from './redux/store/store';

ReactDOM.render(
  <React.StrictMode>
    <Provider store={store}>
      <App />
    </Provider>
  </React.StrictMode>,
  document.getElementById('root')
);
これでどのディレクトリからもstateを呼び出せるようになります
actionを作成
// redux/actions/allActions.js
export const Types = {
  SET_DATA: 'SET_DATA',
  SET_DETAIL_DATA: 'SET_DETAIL_DATA',
  SET_DELETE_DATA: 'SET_DELETE_DATA',
  GET_ASYNC_LIST_DATA: 'GET_ASYNC_LIST_DATA',
  GET_ASYNC_DETAIL_DATA: 'GET_ASYNC_DETAIL_DATA',
  DELETE_ASYNC_DATA: 'DELETE_ASYNC_DATA',
  POST_ASYNC_DATA: 'POST_ASYNC_DATA',
  PATCH_ASYNC_DATA: 'PATCH_ASYNC_DATA',
};

const getAsyncListData = () => {
  return {
    type: Types.GET_ASYNC_LIST_DATA,
  };
};

const getAsyncDetailData = (id) => {
  return {
    id: id,
    type: Types.GET_ASYNC_DETAIL_DATA,
  };
};

const deleteAsyncData = (id) => {
  return {
    type: Types.DELETE_ASYNC_DATA,
    payload: {
      id: id,
    },
  };
};

const postAsyncData = (params) => {
  return {
    type: Types.POST_ASYNC_DATA,
    payload: {
      ...params,
    },
  };
};

const patchAsyncData = (id, params) => {
  return {
    type: Types.PATCH_ASYNC_DATA,
    id: id,
    payload: {
      ...params,
    },
  };
};

export default {
  getAsyncListData,
  getAsyncDetailData,
  deleteAsyncData,
  postAsyncData,
  patchAsyncData,
};
actionについては、Redux 入門 〜Reduxの基礎を理解する〜で以下のように説明されています
アクション(何が起きたのか)とそれに付随する情報を持つオブジェクト。ActionをStoreへdispatch(送信)すると、Storeのstateが変更される。stateの変更は必ずActionを経由して行う。Actionはstateの変更に必要だが、イベントとそれに付随する情報しか持たないため、stateがどのような変更をされるのかは知らない
reducerを作成
index.jsをrootReducerとしています。このファイルに各reducer(post.js)をimportして一括で管理します
// redux/reducers/index.js
import { combineReducers } from 'redux';
import { asyncListData, asyncDetailData } from './post';

const rootReducer = combineReducers({
  asyncListData, // post一覧用
  asyncDetailData, // post詳細用
});

export default rootReducer;
// redux/reducers/post.js
import { Types } from '../actions/allActions';

// 一覧
const asyncListData = (state = '', action) => {
  switch (action.type) {
    case Types.SET_DATA:
      return { ...state, payload: action.payload };
    default:
      return state;
  }
};

// 詳細
const asyncDetailData = (state = '', action) => {
  switch (action.type) {
    case Types.SET_DETAIL_DATA:
      return { ...state, payload: action.payload };
    default:
      return state;
  }
};
export { asyncListData, asyncDetailData };
reducerについては、Redux 入門 〜Reduxの基礎を理解する〜で以下のように説明されています。
Storeから受け取ったActionとstateに応じて、変更されたstateを返す純粋関数(同じ引数を渡されたら必ず同じ結果を返す関数)
sagaを作成
// redux/actions/sagas.js
import {
  put,
  takeEvery,
  all,
  call,
  take,
  takeLatest,
} from 'redux-saga/effects';
import {
  getList,
  getDetail,
  deletePost,
  createPost,
  updatePost,
} from '../../lib/api/post';
import { Types } from '../actions/allActions';

// 一覧
// function* => generator関数(ECMAScript6)
// 戻り値 => iterator
const runListAction = function* () {
  // call(関数またはPromiseを呼び出すとき、その関数またはPromiseの実行が完了するのを待ってから次のコード行を実行するとき / Promiseの完了を待つ)
  const result = yield call(getList);
  // put(actionをdispatchするとき)
  yield put({ type: Types.SET_DATA, payload: result.data });
};
function* getAsyncListDataWatcher() {
  // takeEvery(actionがdispatchされる度に監視させたい処理)
  yield takeEvery(Types.GET_ASYNC_LIST_DATA, runListAction);
}

// 詳細
const runDetailAction = function* (arg) {
  // call(apiClient, argument)
  const result = yield call(getDetail, arg.id);
  yield put({ type: Types.SET_DETAIL_DATA, payload: result.data });
};
function* getAsyncDetailDataWatcher() {
  yield takeEvery(Types.GET_ASYNC_DETAIL_DATA, runDetailAction);
}

// 削除
function* deleteAsyncData({ id }) {
  yield call(deletePost, id);
}

function* deleteAsyncDataWatcher() {
  // take(実行中のsagaが完了するまで、そのactionがdispatchされるタイミングを監視するとき)
  const action = yield take(Types.DELETE_ASYNC_DATA);
  yield call(deleteAsyncData, {
    id: action.payload.id,
  });
}

// 新規作成
function* createAsyncData({ payload }) {
  yield call(createPost, payload);
  const result = yield call(getList);
  yield put({ type: Types.SET_DATA, payload: result.data });
}

function* postAsyncData() {
  //takeLatest(actionが複数回dispatchされる可能性があるとき、現在実行中の最新のsagaのみを取得する処理)
  yield takeLatest(Types.POST_ASYNC_DATA, createAsyncData);
}

// 更新
function* updateAsyncData({ id, payload }) {
  yield call(updatePost, id, payload);
  const result = yield call(getList);
  yield put({ type: Types.SET_DATA, payload: result.data });
}

function* patchAsyncData() {
  yield takeLatest(Types.PATCH_ASYNC_DATA, updateAsyncData);
}

// rootSagaでsagaの処理を配列で管理する
// allはPromiseAllと同様の処理
export default function* rootSaga() {
  yield all([
    getAsyncListDataWatcher(),
    getAsyncDetailDataWatcher(),
    deleteAsyncDataWatcher(),
    postAsyncData(),
    patchAsyncData(),
  ]);
}
このファイルで叩くapiエンドポイントは以前の記事で作成したものです
// src/lib/api/post.js
import client from './client';
import Cookies from 'js-cookie';

// 一覧
export const getList = () => {
  return client.get('/posts');
};

// 詳細
export const getDetail = (id) => {
  return client.get(`/posts/${id}`);
};

// 新規作成
export const createPost = (params) => {
  return client.post('/posts', params, {
    headers: {
      'access-token': Cookies.get('_access_token'),
      client: Cookies.get('_client'),
      uid: Cookies.get('_uid'),
    },
  });
};

// 更新
export const updatePost = (id, params) => {
  return client.patch(`/posts/${id}`, params, {
    headers: {
      'access-token': Cookies.get('_access_token'),
      client: Cookies.get('_client'),
      uid: Cookies.get('_uid'),
    },
  });
};

// 削除
export const deletePost = (id) => {
  return client.delete(`/posts/${id}`, {
    headers: {
      'access-token': Cookies.get('_access_token'),
      client: Cookies.get('_client'),
      uid: Cookies.get('_uid'),
    },
  });
};
これでreduxの一連の処理の実装は終了です(エラーハンドリング等できていない事が多いですが...)
各画面でactionをdispatchしてstateを取得
List.jsx(一覧画面)
// List.jsx
import React, { useEffect, useContext } from 'react';
import { useHistory } from 'react-router-dom';
// style
import { Button } from '@material-ui/core';
// component
import ListTable from './commons/ListTable';
import SpaceRow from './commons/SpaceRow';
// context
import { AuthContext } from '../App';
// redux
import { useSelector, useDispatch } from 'react-redux';
import allActions from '../redux/actions/allActions';

const List = () => {
  const dispatch = useDispatch(); // 追加
  // dispatchして取得したstateを保持
  const postList = useSelector((state) => state.asyncListData).payload; // 追加
  const { currentUser } = useContext(AuthContext);

  useEffect(() => {
    // actionをdispatchしてstateを取得
    dispatch(allActions.getAsyncListData());
  }, []);

  const history = useHistory();

  const handleDelete = async (item) => {
    const id = item.id;
    // actionをdispatchして削除する非同期処理を実行
    dispatch(allActions.deleteAsyncData(id));
    history.go(0); // 追加
  };

  return (
    <>
      <h1>HOME</h1>
      <Button
        variant='contained'
        color='primary'
        onClick={() => history.push('/new')}
      >
        新規作成
      </Button>
      <SpaceRow height={20} />
      <ListTable
        // propsで子コンポーネントにpostListを渡します
        dataList={postList}
        handleDelete={handleDelete}
        currentUser={currentUser}
      />
    </>
  );
};
export default List;
非同期処理でデータ取得が終わるまでpostListはundefinedになり、mapでループ処理を実行すると、エラーになるのでListTableコンポーネントを修正します
// ListTable.jsx
// 54行目あたり
- {dataList.map((item, index) => (
+ {dataList?.map((item, index) => (
前回の記事までと同様に一覧が表示できればOK
また削除ボタン押下でレコードを削除できればOK
続いて詳細画面
Detail.jsx
// Detail.jsx
import React, { useEffect } from 'react';
import { useHistory, useParams } from 'react-router-dom';
import SpaceRow from './commons/SpaceRow';
// style
import {
  Button,
  TableContainer,
  Table,
  TableBody,
  TableCell,
  TableRow,
  Paper,
} from '@material-ui/core';
import { makeStyles } from '@material-ui/core/styles';
// redux
import { useSelector, useDispatch } from 'react-redux';
import allActions from '../redux/actions/allActions';

const useStyles = makeStyles({
  table: {
    minWidth: 300,
  },
  fontWeight: {
    fontWeight: 900,
  },
});

const Detail = () => {
  const dispatch = useDispatch();
  // dispatchして取得したstateを保持
  const postDetail = useSelector((state) => state.asyncDetailData).payload;
  const classes = useStyles();

  const query = useParams();

  const history = useHistory();

  useEffect(() => {
    const id = query.id;
    // 引数にidを渡しアクションをdispatchして非同期処理を実行
    dispatch(allActions.getAsyncDetailData(id));
  }, []);

  return (
    <>
      <h1>DETAIL</h1>
      <Button
        variant='contained'
        color='primary'
        onClick={() => history.push('/')}
      >
        戻る
      </Button>
      <SpaceRow height={20} />
      <TableContainer component={Paper} className={classes.table}>
        <Table className={classes.table} aria-label='simple table'>
          <TableBody>
            <TableRow>
              <TableCell align='right' className={classes.fontWeight}>
                ID:
              </TableCell>
              <TableCell align='center'>{postDetail?.id}</TableCell>
            </TableRow>
            <TableRow>
              <TableCell align='right' className={classes.fontWeight}>
                名前:
              </TableCell>
              <TableCell align='center'>{postDetail?.name}</TableCell>
            </TableRow>
            <TableRow>
              <TableCell align='right' className={classes.fontWeight}>
                猫種:
              </TableCell>
              <TableCell align='center'>{postDetail?.nekoType}</TableCell>
            </TableRow>
            <TableRow>
              <TableCell align='right' className={classes.fontWeight}>
                好きな食べ物:
              </TableCell>
              <TableCell align='center'>
                {postDetail?.detailInfo.favoriteFood}
              </TableCell>
            </TableRow>
            <TableRow>
              <TableCell align='right' className={classes.fontWeight}>
                好きなおもちゃ:
              </TableCell>
              <TableCell align='center'>
                {postDetail?.detailInfo.favoriteToy}
              </TableCell>
            </TableRow>
          </TableBody>
        </Table>
      </TableContainer>
    </>
  );
};
export default Detail;
一覧画面とやっている事はほぼ同じです。一覧と違い、該当するレコード1件なので、dispatchする時に引数にidを渡してあげて、エンドポイント/api/v1/posts/${id}からレスポンスを受け取ります
続いて登録画面
New.jsx
// New.jsx
import React, { useState } from 'react';
import FormBody from '../commons/Form';
import { useHistory } from 'react-router-dom';
// redux
import { useDispatch } from 'react-redux';
import allActions from '../../redux/actions/allActions';

const New = () => {
  const dispatch = useDispatch();
  // パラメータ用stateに初期値を設定
  const [value, setValue] = useState({
    name: '',
    nekoType: '',
    favoriteFood: '',
    favoriteToy: '',
  });
  const history = useHistory();

  const handleChange = (e) => {
    setValue({
      ...value,
      [e.target.name]: e.target.value,
    });
  };

  const handleSubmit = (e) => {
    e.preventDefault();

    const params = generateParams();
    // actionをdispatchして新規作成する非同期処理を実行
    dispatch(allActions.postAsyncData(params));
    history.push('/');
  };

  const generateParams = () => {
    const params = {
      name: value.name,
      nekoType: value.nekoType,
      detailInfo: {
        favoriteFood: value.favoriteFood,
        favoriteToy: value.favoriteToy,
      },
    };
    return params;
  };

  return (
    <>
      <h1>NEW</h1>
      <FormBody
        handleChange={handleChange}
        handleSubmit={handleSubmit}
        // 修正
        name={value.name}
        nekoType={value.nekoType}
        favoriteFood={value.favoriteFood}
        favoriteToy={value.favoriteToy}
        // ここまで
        buttonType='登録'
      />
    </>
  );
};
export default New;
// Form.jsx
import React from 'react';
import { useHistory } from 'react-router-dom';
import SpaceRow from '../layout/SpaceRow';
import { makeStyles } from '@material-ui/core/styles';
import { Button, TextField } from '@material-ui/core';

const useStyles = makeStyles((theme) => ({
  root: {
    '& > *': {
      margin: theme.spacing(1),
      width: '25ch',
    },
  },
}));

const Form = (props) => {
  const classes = useStyles();
  const history = useHistory();
  const {
    handleChange,
    handleSubmit,
    // 修正
    name,
    nekoType,
    favoriteFood,
    favoriteToy,
    // ここまで
    buttonType,
  } = props;
  return (
    <>
      <Button
        type='submit'
        variant='contained'
        color='primary'
        onClick={(e) => handleSubmit(e)}
        style={{ marginRight: 10 }}
      >
        {buttonType}
      </Button>
      <Button variant='contained' onClick={() => history.push('/')}>
        戻る
      </Button>
      <SpaceRow height={20} />
      <form className={classes.root} noValidate autoComplete='off'>
        <TextField
          id='name'
          label='猫の名前'
          type='text'
          name='name'
          onChange={(e) => handleChange(e)}
      // 修正
          value={name}
        />
        <TextField
          id='nekoType'
          label='猫種'
          type='text'
          name='nekoType'
          onChange={(e) => handleChange(e)}
      // 修正
          value={nekoType}
        />
        <TextField
          id='favoriteFood'
          label='好きな食べ物'
          type='text'
          name='favoriteFood'
          onChange={(e) => handleChange(e)}
      // 修正
          value={favoriteFood}
        />
        <TextField
          id='favoriteToy'
          label='好きなおもちゃ'
          type='text'
          name='favoriteToy'
          onChange={(e) => handleChange(e)}
      // 修正
          value={favoriteToy}
        />
      </form>
    </>
  );
};
export default Form;
非同期処理をredux-sagaに書き換える中で、New.jsxとEdit.jsxで共通で使っているForm.jsxに渡すpropsを修正しました。以前はvalue={value}とpropsを渡していましたが、
// New.jsx
// 52行目あたり
name={value.name}
nekoType={value.nekoType}
favoriteFood={value.favoriteFood}
favoriteToy={value.favoriteToy}
各プロパティを分けてpropsに渡すように修正しています。
上記の修正は、Edit.jsxの方でreduxで非同期にて取得した/api/v1/posts/${id}のデータをローカルstateのvalueで管理しようと思って処理を書いてみたのですが、想定しない挙動が起きてしまいました。
一覧 => 編集の画面遷移時にはvalueにreduxで取得したデータが入るのですが、画面をリロードするとundefinedになってしまいました。
useEffectでdispatchでactionを呼び出すのですが、一覧 => 編集の画面遷移時以降の画面リロード時にはdispatchされない為、undefinedになってしまうと考えられます。依存配列に正しい値を入れて副作用を起こしたかったのですが、うまくいかず...jsx側でハンドリングするのか、saga側でハンドリングするのか、よく分からず...(調べます)
上記の症状があり、以下の方針でEdit.jsxとForm.jsxを修正する事にしました。(やり方が正しいか分からないですが...ひとまず動く状態にした)
-
reduxで取得したデータは初期値として表示
-
テキストフィールドに変更があった場合(
e.target.valueで取得したテキストフィールドの変更後の値)、ローカルstatevalueのプロパティを表示 -
Submitされ、サーバ側に渡すパラメータを加工する処理内で、変更が無いテキストフィールドは初期値、変更があるテキストフィールドはローカルstateの値を使う
// Edit.jsx
import React, { useEffect, useState } from 'react';
import { useHistory, useParams } from 'react-router-dom';
import FormBody from '../commons/Form';
// redux
import { useSelector, useDispatch } from 'react-redux';
import allActions from '../../redux/actions/allActions';

const Edit = () => {
  const dispatch = useDispatch();
  // dispatchして取得したstateを保持
  const asyncData = useSelector((state) => state.asyncDetailData).payload;
  // 変更後の値を保持するローカルstate
  const [value, setValue] = useState({
    name: '',
    nekoType: '',
    favoriteFood: '',
    favoriteToy: '',
  });

  const query = useParams();

  const history = useHistory();

  useEffect(() => {
    const id = query.id;
    // 引数にidを渡しアクションをdispatchして非同期処理を実行
    dispatch(allActions.getAsyncDetailData(id));
  }, []);

  const handleChange = (e) => {
    setValue({
      ...value,
      [e.target.name]: e.target.value,
    });
  };

  const handleSubmit = (e) => {
    e.preventDefault();

    const params = generateParams();
    const id = query.id;
    dispatch(allActions.patchAsyncData(id, params));
    history.push('/');
  };

  const generateParams = () => {
    // 修正
    const params = {
      name: value.name || asyncData.name,
      nekoType: value.nekoType || asyncData.nekoType,
      detailInfo: {
        favoriteFood: value.favoriteFood || asyncData.detailInfo.favoriteFood,
        favoriteToy: value.favoriteToy || asyncData.detailInfo.favoriteToy,
      },
    };
    // ここまで
    return params;
  };

  return (
    <>
      <h1>Edit</h1>
      <FormBody
        handleChange={handleChange}
        handleSubmit={handleSubmit}
        // 修正
        name={value.name ? value.name : asyncData?.name}
        nekoType={value.nekoType ? value.nekoType : asyncData?.nekoType}
        favoriteFood={
          value.favoriteFood
            ? value.favoriteFood
            : asyncData?.detailInfo.favoriteFood
        }
        favoriteToy={
          value.favoriteToy
            ? value.favoriteToy
            : asyncData?.detailInfo.favoriteToy
        }
     // ここまで
        buttonType='更新'
      />
    </>
  );
};
export default Edit;
propsで渡すname、nekoType、favoriteFood、favoriteToyを三項演算子を使って渡す値を切り替えてます
更新処理まで流れは以下のイメージです
id: 1, name: 'にゃあ', nekoType: 'アメリカンショートヘア', favoriteFood: '魚', favoriteToy: '猫じゃらし'

// 名前:初期表示(61行目あたり)
{asyncData.name}
=> にゃあ
// 'にゃあにゃあ'に変更
// handleChangeがテキストフィールドを監視(27行目あたり)
setValue({ ...value, [e.target.name]: e.target.value })
// 名前:変更後(61行目あたり)
{value.name}
=> にゃあにゃあ
// 更新処理(43行目あたり)
{
name: value.name
=> 'にゃあにゃあ'
nekoType: asyncData.nekoType
=> 'アメリカンショートヘア'
detailInfo {
favoriteFood: asyncData.detailInfo.favoriteFood
=> '魚'
favoriteToy: asyncData.detailInfo.favoriteToy
=> '猫じゃらし'
}}
この記事では最低限の機能しか実装していないのでコードを追えますが、コードが肥大化したら破綻する匂いがプンプンするので、正しい表示方法と更新処理の書き方を調べます...
最後に
言語ができておらず参考記事に頼り切ってしまいました。またredux、redux-sagaともに理解がまだまだ浅いので、引続き勉強します