経緯
半年ほど前に AWS & Docker ド素人の状態から
なんとかインスタンスをたてて運用していました。
EC2の上にDockerで本番運用していましたが、だんだん辛くなってきたのでDockerから降ろすことにしました。
その作業ログです。
環境 / ツール
macOS Mojavi 10.14.6
AWS
参考にしたもの
マストドンGitHub
https://github.com/tootsuite/mastodon
公式ドキュメント
https://docs.joinmastodon.org/admin/prerequisites/
AWSでEC2インスタンスの作成
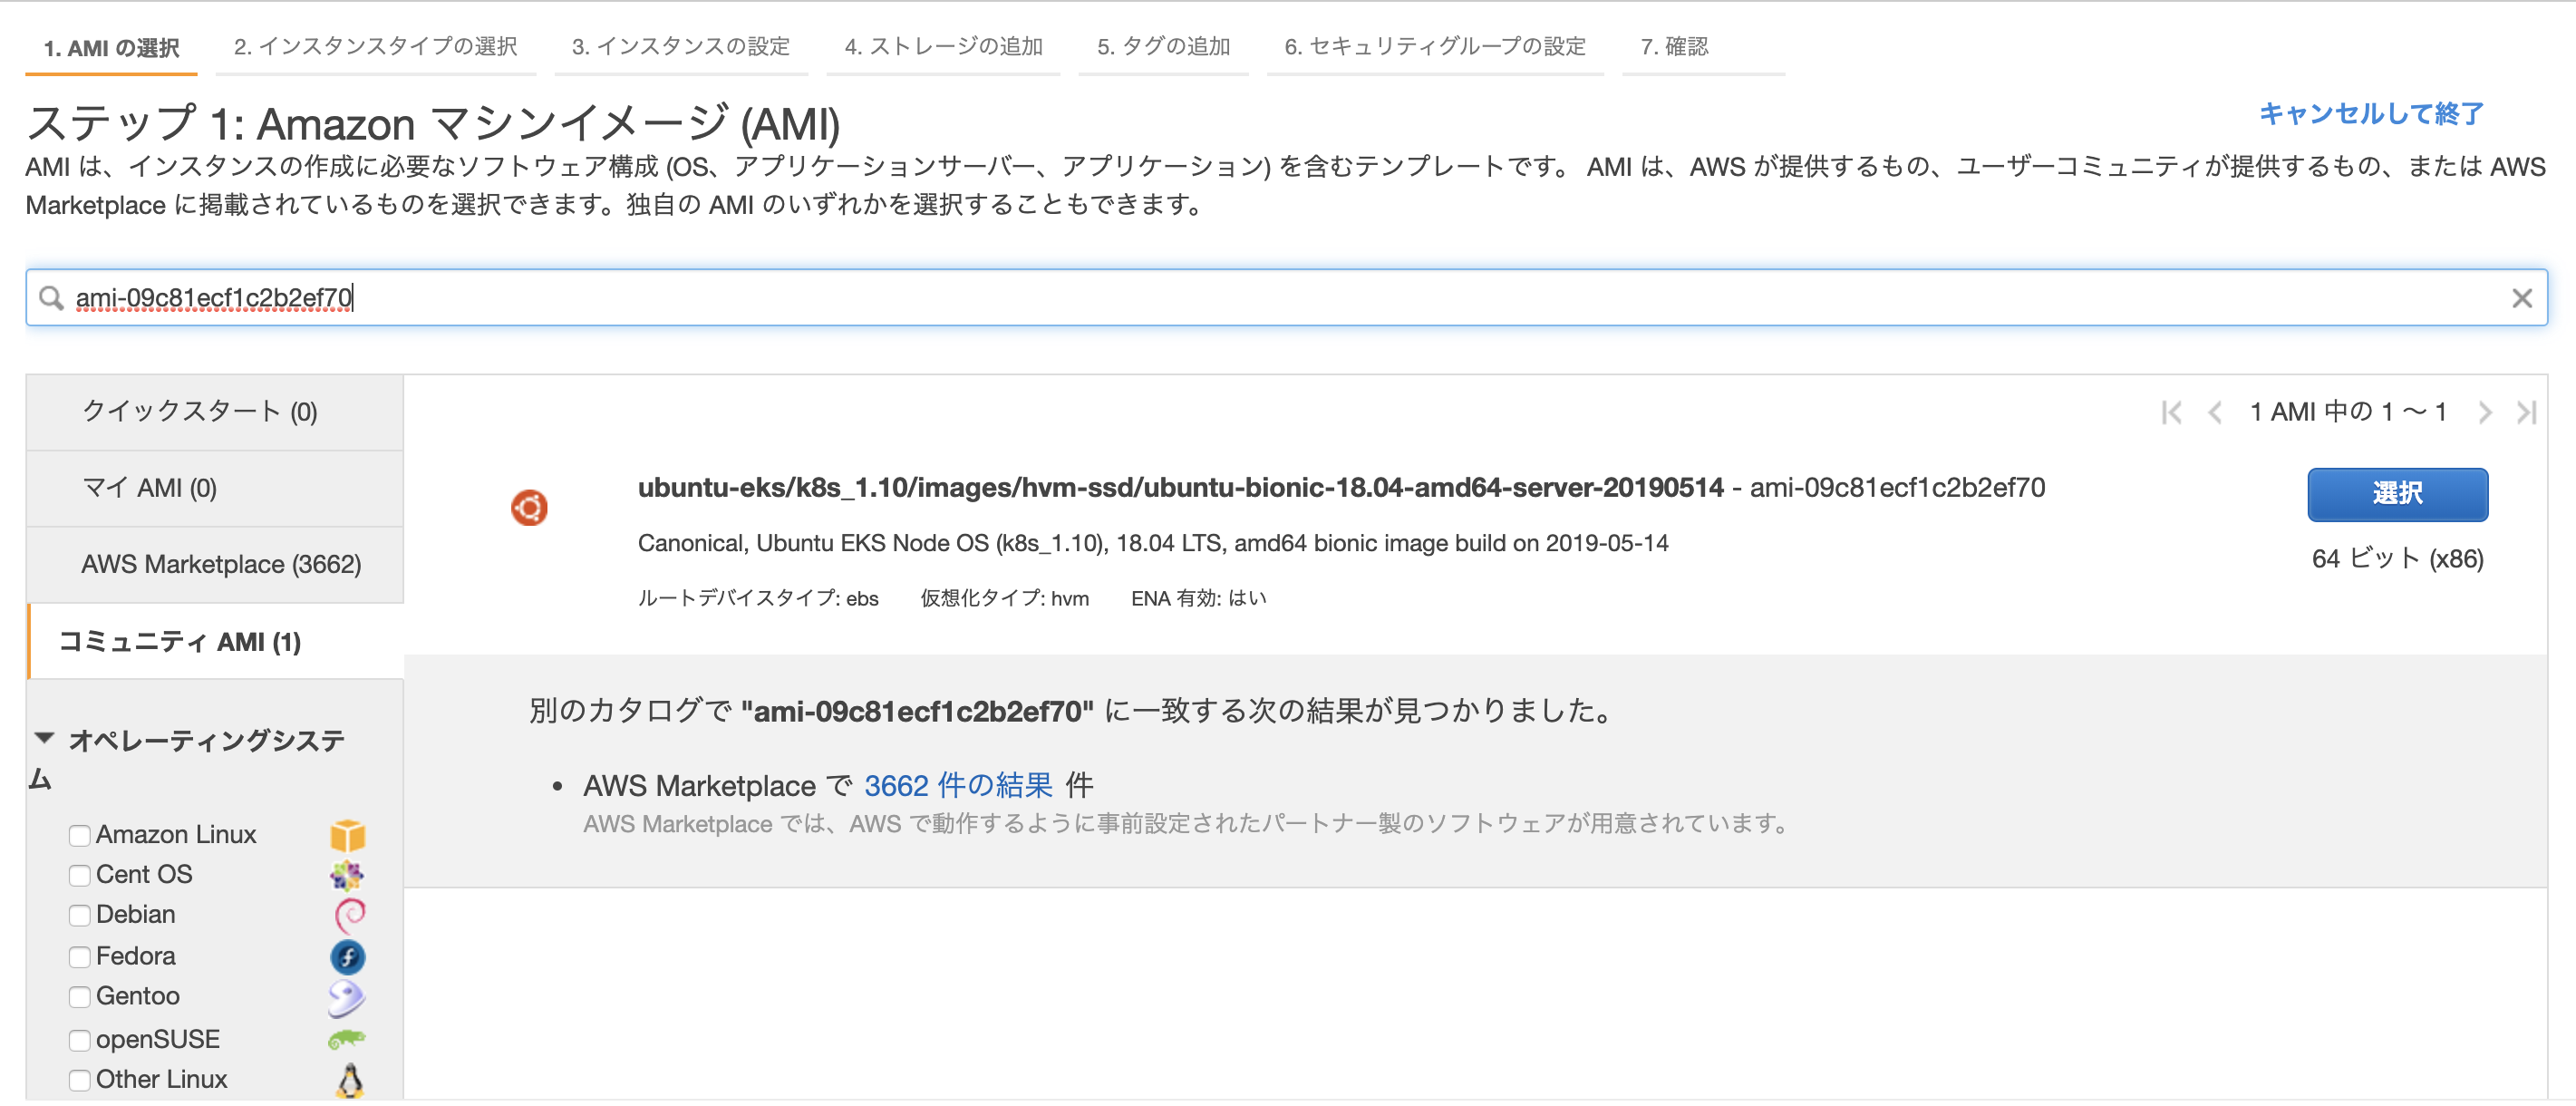
環境を合わせるため、以前の構築時に使用したAMIを利用します。
なぜeks用Ubuntuを利用したのかは謎です。半年前の自分に問い詰めたいです。
Ubuntuであれば大丈夫だと思います。
- あと半年間はAWS無料枠でいけるのでt2.microです。
- セキュリティグループは80番と443番と22番ポートをあけます。
- EC2インスタンスのたて方はAWSの公式チュートリアルが参考になります。
サーバー内での作業
$ ssh ubuntu@3.112.***.*** -i ~/.ssh/hoge.pem
rootユーザーで作業します。
$ sudo su -
以下、公式ドキュメントの手順通りに進めます。
https://docs.joinmastodon.org/admin/prerequisites/
システムパッケージを更新。
$ apt update && apt upgrade -y
viもvimも入っていなかったのでいれます。
$ apt install vim
fail2banをインストール
fail2banをインストールして、繰り返しログイン試行をブロック。
$ apt install fail2ban
/etc/fail2ban/jail.conf を編集。
[DEFAULT]
destemail = your@email.here
sendername = Fail2Ban
[sshd]
enabled = true
port = 22
[sshd-ddos]
enabled = true
port = 22
最後にfail2banを再起動。
$ systemctl restart fail2ban
ファイアウォールをインストールし、SSH、HTTP、HTTPSポートのみをホワイトリストに登録。
$ apt install -y iptables-persistent
rules.v4ファイルを編集します。
$ vim /etc/iptables/rules.v4
*filter
# Allow all loopback (lo0) traffic and drop all traffic to 127/8 that doesn't use lo0
-A INPUT -i lo -j ACCEPT
-A INPUT ! -i lo -d 127.0.0.0/8 -j REJECT
# Accept all established inbound connections
-A INPUT -m state --state ESTABLISHED,RELATED -j ACCEPT
# Allow all outbound traffic - you can modify this to only allow certain traffic
-A OUTPUT -j ACCEPT
# Allow HTTP and HTTPS connections from anywhere (the normal ports for websites and SSL).
-A INPUT -p tcp --dport 80 -j ACCEPT
-A INPUT -p tcp --dport 443 -j ACCEPT
# Allow SSH connections
# The -dport number should be the same port number you set in sshd_config
-A INPUT -p tcp -m state --state NEW --dport 22 -j ACCEPT
# Allow ping
-A INPUT -p icmp -m icmp --icmp-type 8 -j ACCEPT
# Log iptables denied calls
-A INPUT -m limit --limit 5/min -j LOG --log-prefix "iptables denied: " --log-level 7
# Reject all other inbound - default deny unless explicitly allowed policy
-A INPUT -j REJECT
-A FORWARD -j REJECT

COMMIT
手動で読み込みます。
$ iptables-restore < /etc/iptables/rules.v4
以下のドキュメントを参考にして
必要なものをインストールしていきます。
Node.jsをインストール
$ curl -sL https://deb.nodesource.com/setup_8.x | bash -
Yarnをインストール
$ curl -sS https://dl.yarnpkg.com/debian/pubkey.gpg | apt-key add -
$ echo "deb https://dl.yarnpkg.com/debian/ stable main" | tee /etc/apt/sources.list.d/yarn.list
システムパッケージをインストール
$ apt update
$ apt install -y \
  imagemagick ffmpeg libpq-dev libxml2-dev libxslt1-dev file git-core \
  g++ libprotobuf-dev protobuf-compiler pkg-config nodejs gcc autoconf \
  bison build-essential libssl-dev libyaml-dev libreadline6-dev \
  zlib1g-dev libncurses5-dev libffi-dev libgdbm5 libgdbm-dev \
  nginx redis-server redis-tools postgresql postgresql-contrib \
  certbot python-certbot-nginx yarn libidn11-dev libicu-dev libjemalloc-dev
Mastodonユーザーを作成
$ adduser --disabled-login mastodon
ユーザーを切り替えます。
$ su - mastodon
Rubyのインストール
rbenvを使用してRubyのバージョンを管理します。
$ git clone https://github.com/rbenv/rbenv.git ~/.rbenv
$ cd ~/.rbenv && src/configure && make -C src
$ echo 'export PATH="$HOME/.rbenv/bin:$PATH"' >> ~/.bashrc
$ echo 'eval "$(rbenv init -)"' >> ~/.bashrc
$ exec bash
$ git clone https://github.com/rbenv/ruby-build.git ~/.rbenv/plugins/ruby-build
正しいRubyバージョンをインストール。
$ RUBY_CONFIGURE_OPTS=--with-jemalloc rbenv install 2.6.5
$ rbenv global 2.6.5
ruby_2.6.0に同梱されているデフォルトのgemバージョンは最新のバンドラーと互換性がないため、gemを更新。
$ gem update --system
Bundlerをインストール
$ gem install bundler --no-document
rootユーザーに戻る。
$ exit
番外 ~PostgreSQLのバージョンは9.6~
事情: Docker上にあったPostgreSQLのバージョンは9.6でした。
UbuntuにPostgreSQLをインストールするとデフォルトでバージョン10が入るため、いったん10を削除して
9.6バージョンを指定して入れる必要があります。
(その場合は、別途aptリポジトリ※後述を作成しなければいけませんでした)
以下これから新規でインスタンスを建てる場合には、不要な工程です。
需要が謎ですが、一応ハマりポイントだと感じたので自分用の備忘ログです。
/etc/postgresql 以下で
$  ls
10
=> 「9.6に揃えたいなぁ」
$ apt remove postgresql postgresql-contrib
(参照) https://www.postgresql.org/download/linux/ubuntu/
※ubuntuのaptリポジトリを追加。
18.04なので
$ vim /etc/apt/sources.list.d/pgdg.list
deb http://apt.postgresql.org/pub/repos/apt/ bionic-pgdg main
リポジトリ署名キーをインポートし、パッケージリストを更新。
$ wget --quiet -O - https://www.postgresql.org/media/keys/ACCC4CF8.asc | sudo apt-key add -
sudo apt-get update
9.6を指定してインストール。
$ apt-get install postgresql-9.6
PostgreSQLの設定
以下を参考にPostgreSQLの設定を行います。
https://pgtune.leopard.in.ua/#/
こんな便利なジェネレーターツールがあったんですね。
DBのバージョンやインスタンスのサイズを入力していきます。
PostgreSQLの設定については別途記事
『PostgreSQLの設定 ~PGTuneを使ってみて~』
に、まとめてみました。

$ vim /etc/postgresql/9.6/main/postgresql.conf
設定が完了したら、再起動です。
$ systemctl restart postgresql
Mastodonが使用できるPostgreSQLユーザーを作成。
$ sudo -u postgres psql
CREATE USER mastodon CREATEDB;
\q
次回予告
2日目はマストドンのセットアップです。
作業が進み次第、Qiitaに作業ログを残したいと思います。