はじめに
Slack の Slash コマンドは、チャット欄にスラッシュから始まる各種機能を利用する仕組みです。例えば、最初から使える /dm コマンドは、特定のアカウントにダイレクトメッセージを送るための コマンドです。
こんな感じに、チャット欄から直接DMを送れます。

Slash Command は独自にアプリケーションを開発できます。自分たちで作ったアプリケーションと連携することで、様々な自動化が実現できます。今回の記事では、独自の Slash Command から AWS の API Gateway と Lambda と連携する手順を紹介します。Hello World 的な、クイックスタートの手順です。
Create a Slack App
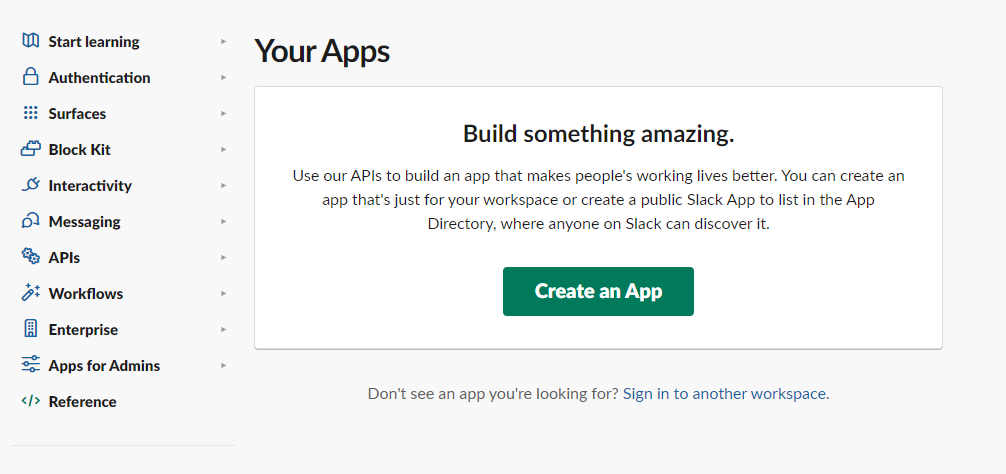
まず、Slack 上で、Slack App を作成します。次の URL にアクセスして、適当に作成しましょう。
Create an App を選びます。
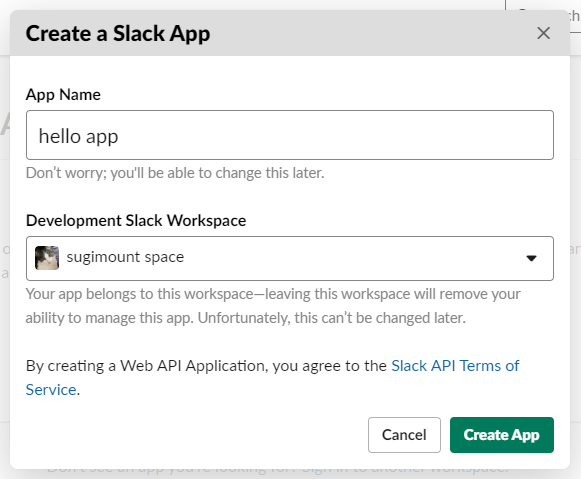
適当に名前や、対象の Slack Workspace を選びます。
App Credentials の Signing Secret をコピーします。この記事では、あとで Systems Manager の Parameter Store に保存するので、メモっておきます。

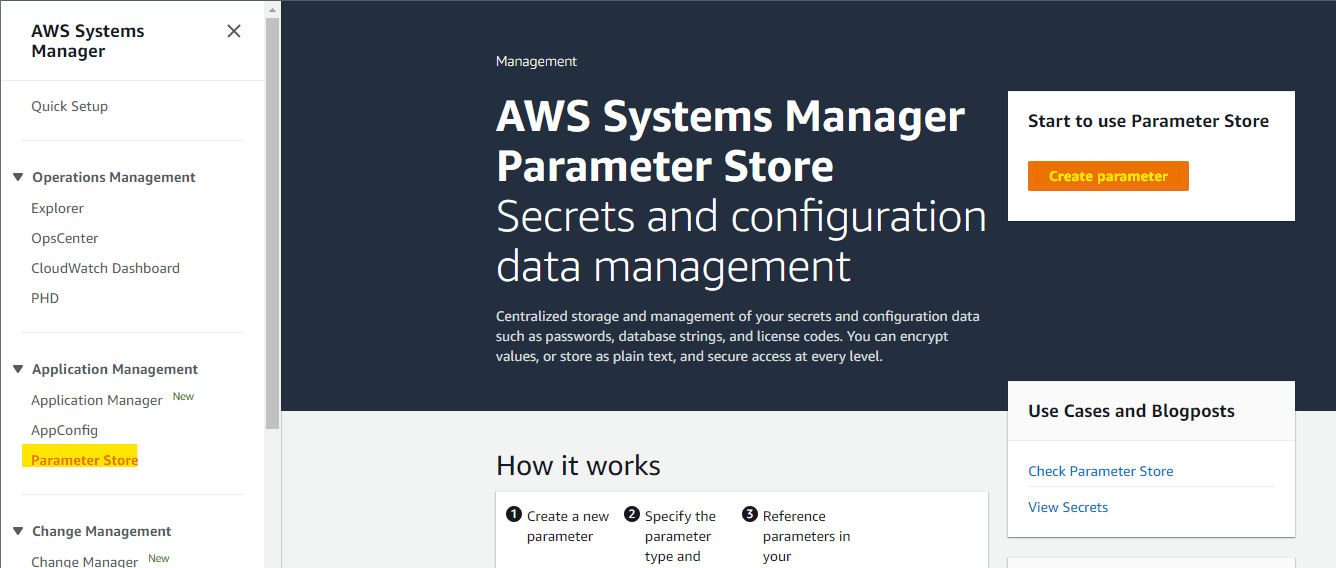
Systems Manager の Parameter Store に、Slack Signing Secret を保存
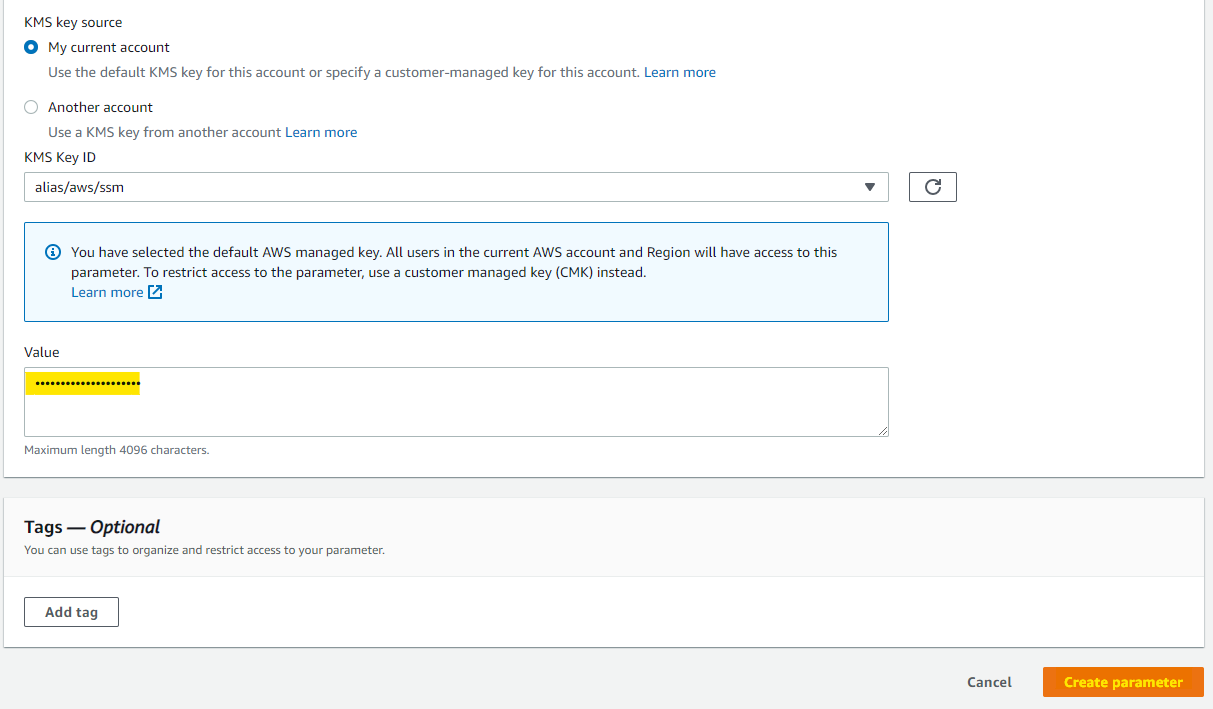
Systems Manager の Parameter Store に、先ほどメモした Signing Secret の値を格納します。他の方法で、Secret Manager を使う選択肢もありますが、1 Secret あたり 0.4 USD かかってしまうので、今回は、Systems Manager を使っていきます。
適当にパラメータ入力します slack-signing-secret
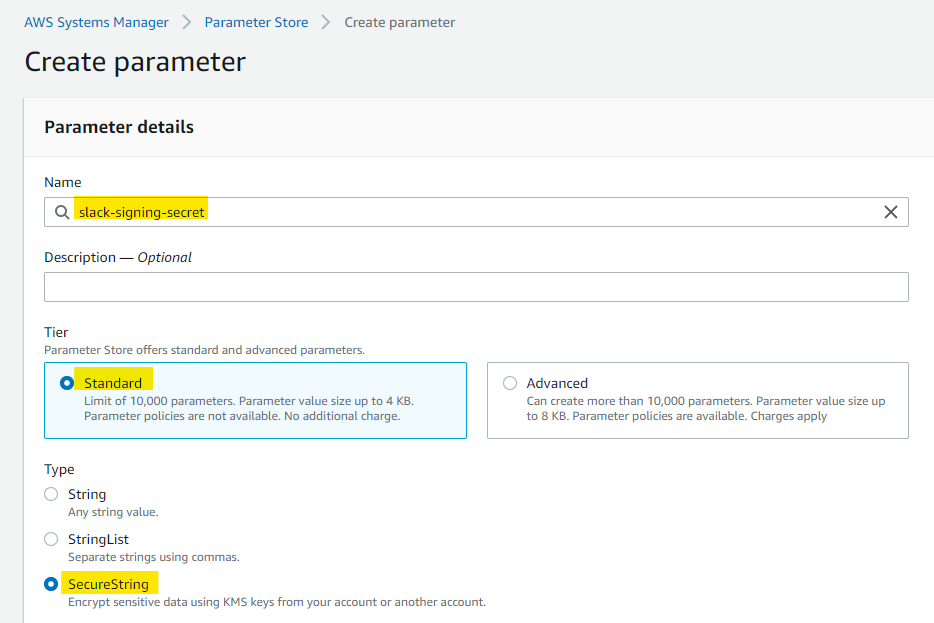
Slack の Signing Secret を入力して、Create parameter を押します
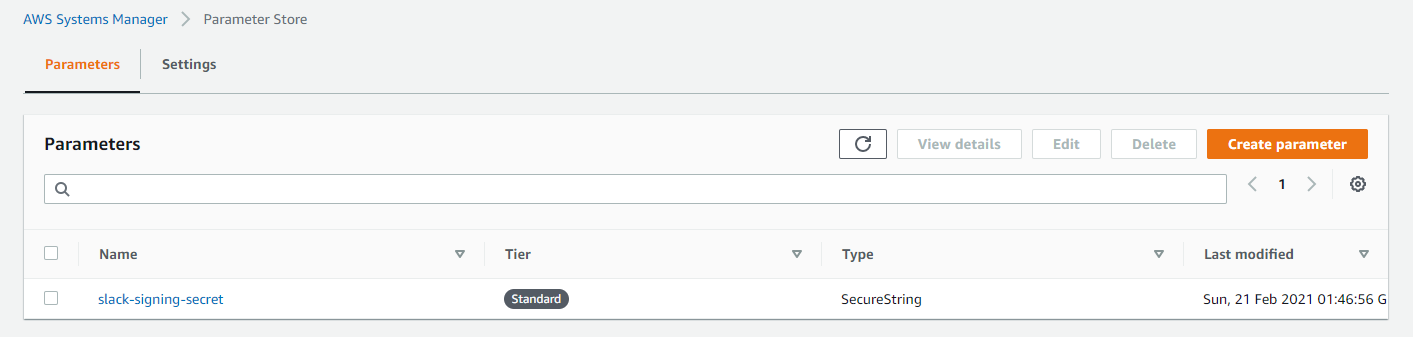
作成完了
Lambda の Python ソースコード
この記事では詳細は割愛しますが、SAM (Serverless Application Model) で作っていきます。Python のソースコードはこんな感じです。Slack 上の Slash Command で受け取ったユーザー名とテキストメッセージを、概ねそのまま返答する内容です。
print で debug を雑に入れていますが、気にしないでください・・・。
import os
import json
import boto3
import hmac
import hashlib
import datetime
from urllib import parse
import logging
logger = logging.getLogger(__name__)
logger.setLevel(logging.INFO)
TOKYO = 'ap-northeast-1'
# Get credentials
secret_name = os.environ['SLACK_API_SIGNING_SECRET']
ssm = boto3.client('ssm', region_name=TOKYO)
resp = ssm.get_parameters(
    Names=[secret_name],
    WithDecryption=True
    )
print("!!!!!!!!!!ssm!!!!!!!!!")
print(resp)
secret = resp['Parameters'][0]['Value']
print(secret)

def verify(headers, body):
    try:
        signature = headers["X-Slack-Signature"]
        request_ts = int(headers["X-Slack-Request-Timestamp"])
        now_ts = int(datetime.datetime.now().timestamp())

        print("!!!!!!!!!!!!!!!!!signature!!!!!!!!!!!!!!!!!")
        print(signature)
        print("!!!!!!!!!!!!!!!!!request_ts!!!!!!!!!!!!!!!!!")
        print(request_ts)
        print("!!!!!!!!!!!!!!!!!now_ts!!!!!!!!!!!!!!!!!")
        print(now_ts)

        message = "v0:{}:{}".format(headers["X-Slack-Request-Timestamp"], body)

        print("!!!!!!!!!!!!!!!!!message!!!!!!!!!!!!!!!!!")
        print(message)

        expected = "v0={}".format(hmac.new(
                        bytes(secret, 'UTF-8'),
                        bytes(message, 'UTF-8'),
                        hashlib.sha256).hexdigest())

        print("!!!!!!!!!!!!!!!!!expected!!!!!!!!!!!!!!!!!")
        print(expected)
    except Exception:
        print("!!!!!!!!!!!!!!iam exeption!!!!!!!!!!!!!!")
        return False
    else:
        print("!!!!!!!!!!!!!!iam else!!!!!!!!!!!!!!")
        if (abs(request_ts - now_ts) > (60 * 5)
                or not hmac.compare_digest(expected, signature)):
            print("!!!!!!!!!!!iam false!!!!!!!!!!!!!!")
            return False
        return True


def lambda_handler(event, context):
    print("!!!!!!!!event!!!!!!!!!!!")
    logger.info(json.dumps(event,indent=4))
    if verify(event['headers'], event['body']):
        username = parse.parse_qs(event['body'])['user_name'][0]
        text = parse.parse_qs(event['body'])['text'][0]
        payload = {
            "text": 'よお!' + username + '! あんた「' + text + '」って言ったか?',
        }
        response = {
            "statusCode": 200,
            "body": json.dumps(payload)
        }
        return response
    else:
        logger.info("Error: verify request")
        return {"statusCode": 400}
/hello-slack おっす!おらスギ! てな感じに、Slack 上で Slash Command を実行すると、次のように Bot が返ってくる実装です

SAM Template
SAM の template.yaml で気にするべきポイントが2点あります
- Systems Manager の Parameter Store に保存した、
slack-signing-secretという key 名を環境変数に指定 - API Gateway の Endpoint は、GET ではなく、POSTを指定 (Slack の Slash Command は、POST でリクエストされるので)
AWSTemplateFormatVersion: '2010-09-09'
Transform: AWS::Serverless-2016-10-31
Description: >
  hello-slash-command

  Sample SAM Template for hello-slash-command

# More info about Globals: https://github.com/awslabs/serverless-application-model/blob/master/docs/globals.rst
Globals:
  Function:
    Timeout: 10

Resources:
  HelloWorldFunction:
    Type: AWS::Serverless::Function # More info about Function Resource: https://github.com/awslabs/serverless-application-model/blob/master/versions/2016-10-31.md#awsserverlessfunction
    Properties:
      CodeUri: hello_slash_command/
      Handler: app.lambda_handler
      Runtime: python3.6
      Environment:
        Variables:
          SLACK_API_SIGNING_SECRET: slack-signing-secret
      Events:
        HelloWorld:
          Type: Api # More info about API Event Source: https://github.com/awslabs/serverless-application-model/blob/master/versions/2016-10-31.md#api
          Properties:
            Path: /hello_slash_command
            Method: post

Outputs:
  # ServerlessRestApi is an implicit API created out of Events key under Serverless::Function
  # Find out more about other implicit resources you can reference within SAM
  # https://github.com/awslabs/serverless-application-model/blob/master/docs/internals/generated_resources.rst#api
  HelloWorldApi:
    Description: "API Gateway endpoint URL for Prod stage for Hello World function"
    Value: !Sub "https://${ServerlessRestApi}.execute-api.${AWS::Region}.amazonaws.com/Prod/hello_slash_command/"
  HelloWorldFunction:
    Description: "Hello World Lambda Function ARN"
    Value: !GetAtt HelloWorldFunction.Arn
  HelloWorldFunctionIamRole:
    Description: "Implicit IAM Role created for Hello World function"
    Value: !GetAtt HelloWorldFunctionRole.Arn
Deploy
詳細は省略しますが、SAM で Deploy すると、API Gateway と Lambda が自動的に出来上がります
sam build
sam deploy
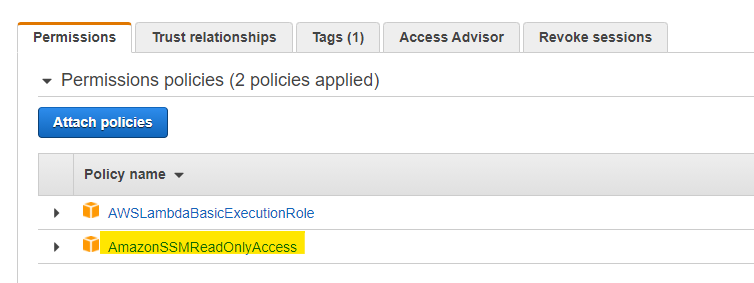
IAM Role の権限調整
SAM によって自動設定された、Lambda Function の IAM Role の権限を変更します。Systems Manager の Parameter Store に対して、読み取り権限を設定します。Attach policies から、AmazonSSMReadOnlyAccess を追加します。
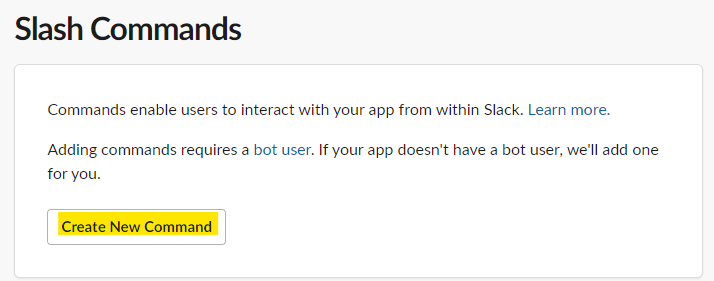
Slack App から、API Gateway を呼び出し設定
Slack の管理ページで、Slash Commands を選びます

Create New Command を押します
API Gateway の Endpoint を指定して、作成します。

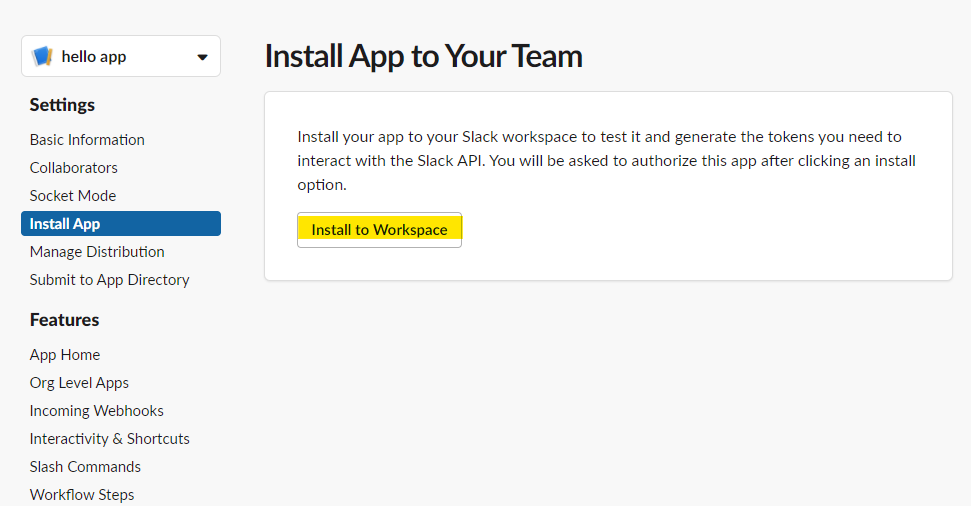
Slack Workspace に、作成した Slack App を Install
Install to Workspace を押して、自分の Workspace に作成した Application をインストールします
動作確認
これで設定完了です。Slack 上で動作確認をしてみましょう。こんな感じにチャット欄に打ちます

自動的に、hello app bot が返答をしてくれます。

付録 : Slack Slash Command Event
Slack の Slash Command を経由して、AWS Lambda が受け取る Event を JSON で出力します。X-Slack-Signature や body などの部分に、Slack 上のさまざまな情報が含まれています。本格的な実装をするときには、このあたりを確認してみるとよいでしょう。
{
    "resource": "/hello_slash_command",
    "path": "/hello_slash_command/",
    "httpMethod": "POST",
    "headers": {
        "Accept": "application/json,*/*",
        "Accept-Encoding": "gzip,deflate",
        "CloudFront-Forwarded-Proto": "https",
        "CloudFront-Is-Desktop-Viewer": "true",
        "CloudFront-Is-Mobile-Viewer": "false",
        "CloudFront-Is-SmartTV-Viewer": "false",
        "CloudFront-Is-Tablet-Viewer": "false",
        "CloudFront-Viewer-Country": "US",
        "Content-Type": "application/x-www-form-urlencoded",
        "Host": "xxxxxxxxxx.execute-api.ap-northeast-1.amazonaws.com",
        "User-Agent": "Slackbot 1.0 (+https://api.slack.com/robots)",
        "Via": "1.1 xxxxxxxxxxxxxxxxxxxxxxxxx.cloudfront.net (CloudFront)",
        "X-Amz-Cf-Id": "fLDItaNwCxQ0mdnsfuB6B8yfqDo1DAyiUaYOOyom203UAbOVa8XDsw==",
        "X-Amzn-Trace-Id": "Root=1-6031d5ad-10791ca3111bbf736ad507b7",
        "X-Forwarded-For": "18.206.59.21, 130.176.98.164",
        "X-Forwarded-Port": "443",
        "X-Forwarded-Proto": "https",
        "X-Slack-Request-Timestamp": "1613878701",
        "X-Slack-Signature": "v0=xxxxxxxxxxxxxxxxxxxxxxxxxxxxxxxxxxxxxxxxxxxxxxxxxxxxxxxxxxxxxxxxxxxxx"
    },
    "multiValueHeaders": {
        "Accept": [
            "application/json,*/*"
        ],
        "Accept-Encoding": [
            "gzip,deflate"
        ],
        "CloudFront-Forwarded-Proto": [
            "https"
        ],
        "CloudFront-Is-Desktop-Viewer": [
            "true"
        ],
        "CloudFront-Is-Mobile-Viewer": [
            "false"
        ],
        "CloudFront-Is-SmartTV-Viewer": [
            "false"
        ],
        "CloudFront-Is-Tablet-Viewer": [
            "false"
        ],
        "CloudFront-Viewer-Country": [
            "US"
        ],
        "Content-Type": [
            "application/x-www-form-urlencoded"
        ],
        "Host": [
            "xxxxxxxxxxx.execute-api.ap-northeast-1.amazonaws.com"
        ],
        "User-Agent": [
            "Slackbot 1.0 (+https://api.slack.com/robots)"
        ],
        "Via": [
            "1.1 xxxxxxxxxxxxxxxxxxxxxxxxxxxxxxxx.cloudfront.net (CloudFront)"
        ],
        "X-Amz-Cf-Id": [
            "fLDItaNwCxQ0mdnsfuB6B8yfqDo1DAyiUaYOOyom203UAbOVa8XDsw=="
        ],
        "X-Amzn-Trace-Id": [
            "Root=1-6031d5ad-10791ca3111bbf736ad507b7"
        ],
        "X-Forwarded-For": [
            "18.206.59.21, 130.176.98.164"
        ],
        "X-Forwarded-Port": [
            "443"
        ],
        "X-Forwarded-Proto": [
            "https"
        ],
        "X-Slack-Request-Timestamp": [
            "1613878701"
        ],
        "X-Slack-Signature": [
            "v0=xxxxxxxxxxxxxxxxxxxxxxxxxxxxxxxxxxxxxxxxxxxxxxxxxxxxxxxxxxxxxxx"
        ]
    },
    "queryStringParameters": null,
    "multiValueQueryStringParameters": null,
    "pathParameters": null,
    "stageVariables": null,
    "requestContext": {
        "resourceId": "kkohuo",
        "resourcePath": "/hello_slash_command",
        "httpMethod": "POST",
        "extendedRequestId": "bE5TIGpaNjMFjUg=",
        "requestTime": "21/Feb/2021:03:38:21 +0000",
        "path": "/Prod/hello_slash_command/",
        "accountId": "xxxxxxxxxxxx",
        "protocol": "HTTP/1.1",
        "stage": "Prod",
        "domainPrefix": "d2k8taas2f",
        "requestTimeEpoch": 1613878701501,
        "requestId": "5c4d6ad2-cdd2-4811-a702-c934f655ff9d",
        "identity": {
            "cognitoIdentityPoolId": null,
            "accountId": null,
            "cognitoIdentityId": null,
            "caller": null,
            "sourceIp": "18.206.59.21",
            "principalOrgId": null,
            "accessKey": null,
            "cognitoAuthenticationType": null,
            "cognitoAuthenticationProvider": null,
            "userArn": null,
            "userAgent": "Slackbot 1.0 (+https://api.slack.com/robots)",
            "user": null
        },
        "domainName": "xxxxxxxxxx.execute-api.ap-northeast-1.amazonaws.com",
        "apiId": "d2k8taas2f"
    },
    "body": "token=xxxxxxxxxxxxxxxxxxxxxxxx&team_id=T01N7S6GULB&team_domain=sugimountspace&channel_id=C01NNGPMUMR&channel_name=emoji&user_id=U01NXFH8HEC&user_name=sugi.mount&command=%2Fhello-slack&text=konnitiwa&api_app_id=xxxxxxxxxx&is_enterprise_install=false&response_url=https%3A%2F%2Fhooks.slack.com%2Fcommands%2FT01N7S6GULB%2F1775959830099%2FuZFJRIZzqXV1oGptZxNhmvEG&trigger_id=1772668744117.1755890572691.7dcc5fd41718fb89b0c75c6eb666bc26",
    "isBase64Encoded": false
}
参考URL
【入門】Slack のコマンドを作ってみよう!(同期実行版)
https://dev.classmethod.jp/articles/lets-make-slack-commands-synchronous-execution-version/
AWS SDK for Python (Boto3) で AWS Systems Manager パラメータストアから情報を取得する
https://dev.classmethod.jp/articles/get-data-from-system-manager-parameter-store-using-boto3-ja/
Slack の Slash Command をサーバーレスで実装
https://hacknote.jp/archives/39319/