はじめに
はじめまして。社会人になった後プログラミングに興味を持ち、現在Aidemyにてpython-機械学習を勉強している者です。
今回、学習した内容を実践するためCNNによる猫種判別モデルを構築し、Flaskを用いてアプリケーションを作成しました。
この記事はその過程を示したものです。
目次
学習データの準備
画像の前処理
モデル構築
アプリの作成
デプロイ・動作確認
考察・まとめ
Step1 学習データの準備
オックスフォード大学が公開している動物画像のデータセットを利用します。
利用したデータセット
猫の種類は以下の12種です。
-Abyssinian
-Bengal
-Bombay
-Maine Coon
-Persian
-Egyptian Mau
-Siamese
-Sphynx
-Birman
-British Shorthair
-Ragdoll
-Russian Blue
Step2 画像の前処理
ダウンロードした画像はGoogleドライブ上の"images"というディレクトリに保存しています。
まずは猫種ごとのディレクトリを作成し、そこに該当する猫画像を格納していきます。
ここで画像ファイルの名前は種類と番号の組み合わせになっています。ex)Abyssinian_1.jpeg
kind_list = ['Abyssinian','Bengal','Birman','Bombay','British_Shorthair','Egyptian_Mau',
             'Maine_Coon','Persian','Ragdoll','Russian_Blue','Siamese','Sphynx']

#kind_list別にディレクトリ作成
for i in kind_list:
#すでにディレクトリ存在する場合はpass
    if os.path.exists('/content/drive/MyDrive/images/'+str(i)+'/') ==True:
        pass
    else:
        os.mkdir('/content/drive/MyDrive/images/'+str(i)+'/')

#作成したディレクトリに画像を種別に格納
for i in kind_list:
    for j in range(1,300):
        if os.path.exists('/content/drive/MyDrive/images/'+str(i)+'_'+str(j)+'.jpg') ==False:
            pass
        else:
            shutil.move('/content/drive/MyDrive/images/'+str(i)+'_'+str(j)+'.jpg',
                        '/content/drive/MyDrive/images/'+str(i)+'/')
画像をnumpy配列に変換し、リストに格納します。
次に画像に対応するよう猫の種類(kind_listにおけるindexで示す)をラベルとしてリストに格納します。
#空の配列を作成
img_cat=[] #画像用
kind_label=[] #ラベル用
#リストに入れる際の画像のサイズを指定
img_size = 224

for i in  kind_list:
    for j in range(1,300):
        #画像がなければpass
        if os.path.exists('/content/drive/MyDrive/images/'+str(i)+'/'+str(i)+'_'+str(j)+'.jpg') ==False:
            pass
        #画像があれば
        else:
            #file_listのなかに画像ファイルのpathを取得
            file_list = glob.glob('/content/drive/MyDrive/images/'+str(i)+'/'+str(i)+'_'+str(j)+'.jpg')
            for file in file_list:
                img_path = file
                #画像を読み込む
                img = load_img(img_path, target_size=(img_size, img_size))
                #読み込んだ画像を配列に変換
                x = img_to_array(img)
                #作成したimg_catに配列に変換した画像データを格納
                img_cat.append(x)
                #猫の種類(kind_listのindex)をラベルとしてkind_labelのリストの中に入れる
                kind_label.append(kind_list.index(i))

X = np.array(img_cat)
X = X/224.0
#ラベルデータをダミー変数化
y = to_categorical(kind_label)
最後に学習と検証のため画像とラベルデータを学習用:80%, テスト用:20%に分割します。
分割の際には画像の順番をシャッフルする必要があることに注意が必要です。
(シャッフルなしの場合、猫種ごとにまとめて画像が格納されているため学習用データ、テスト用データそれぞれに猫種の偏りが発生してしまう)
X_train, X_test, y_train, y_test = train_test_split(
    X, y, test_size=0.2, random_state=0)
Step3 モデル構築
学習データとテストデータが揃ったので、機械学習モデルを定義して実際に学習させていきます。
今回はKerasのSequentialモデルと学習済モデルVGG16を使った転移学習を用います。
input_tensor = Input(shape=(img_size, img_size, 3))
base_model = VGG16(include_top=False, weights='imagenet', input_tensor=input_tensor)

#base_model(VGG16)のoutputを受け取り、クラス分類する層を定義
top_model = Sequential()
top_model.add(Flatten(input_shape=base_model.output_shape[1:]))
top_model.add(Dense(256,activation='sigmoid'))
top_model.add(Dense(len(kind_list), activation='softmax'))

# base_modelとtop_modelを連結
model = Model(base_model.inputs, top_model(base_model.output))

# base_modelの層の重みを固定
for layer in model.layers[:19]:
    layer.trainable = False

# コンパイル
model.compile(loss='categorical_crossentropy',
              optimizer=optimizers.SGD(lr=1e-4, momentum=0.9),
              metrics=['accuracy'])

model.summary()

# 学習
history=model.fit(X_train, y_train, batch_size=32, epochs=10, validation_data=(X_test, y_test))
print(history.history)

#可視化
plt.plot(history.history['accuracy'], label="acc", ls="-", marker="o")
plt.plot(history.history['val_accuracy'], label="val_acc", ls="-", marker="x")
plt.ylabel("accuracy")
plt.xlabel("epoch")
plt.legend(loc="best")
plt.show()

# 精度の評価
scores = model.evaluate(X_test, y_test, verbose=1)
print('Test loss:', scores[0])
print('Test accuracy:', scores[1])
当初は自分で追加したモデルの2層目(全結合層)の活性化関数に"Relu"を指定していましたがうまくいかず、その後層を追加してみたりしたものの精度を上げられませんでした。最終的に活性化関数に"sigmoid"を指定したところ一番精度が良かったため、今回はこちらを採用しています。
結果は以下のようになりました。

epoch数12前後で学習データに対する精度は100%近くに達し、テストデータに対しては70%近い精度が出ています。
Step4 アプリの作成
まずは構築したモデルを以下のコードで保存します。
#resultsディレクトリを作成
result_dir = 'results'
if not os.path.exists(result_dir):
    os.mkdir(result_dir)
# h5ファイルで保存
model.save(os.path.join(result_dir, 'model.h5'))

files.download( '/content/results/model.h5' )
次にFlaskのコードを作成します。
import os
from flask import Flask, request, redirect, render_template, flash
from werkzeug.utils import secure_filename
from tensorflow.keras.models import Sequential, load_model
from tensorflow.keras.preprocessing import image
import numpy as np

classes = ['Abyssinian','Bengal','Birman','Bombay','British_Shorthair','Egyptian_Mau','Maine_Coon','Persian','Ragdoll','Russian_Blue','Siamese','Sphynx']
image_size = 224

UPLOAD_FOLDER = "uploads"
ALLOWED_EXTENSIONS = set(['png', 'jpg', 'jpeg', 'gif'])

app = Flask(__name__)

def allowed_file(filename):
    return '.' in filename and filename.rsplit('.', 1)[1].lower() in ALLOWED_EXTENSIONS

model = load_model('./model.h5', compile=False)#学習済みモデルをロード

@app.route('/', methods=['GET', 'POST'])
def upload_file():
    if request.method == 'POST':
        if 'file' not in request.files:
            flash('ファイルがありません')
            return redirect(request.url)
        file = request.files['file']
        if file.filename == '':
            flash('ファイルがありません')
            return redirect(request.url)
        if file and allowed_file(file.filename):
            filename = secure_filename(file.filename)
            file.save(os.path.join(UPLOAD_FOLDER, filename))
            filepath = os.path.join(UPLOAD_FOLDER, filename)
            #受け取った画像を読み込み、np形式に変換
            img = image.load_img(filepath, grayscale=False, target_size=(image_size,image_size))
            img = image.img_to_array(img)
            data = np.array([img])
            data = data/image_size
            #変換したデータをモデルに渡して予測する
            result = model.predict(data)[0]
            predicted = result.argmax()
            per = int(result[predicted]*100)
            pred_answer = "この猫は " + classes[predicted] + "です(確率: {}%)".format(per)
            return render_template("index.html",answer=pred_answer)

    return render_template("index.html",answer="")

if __name__ == "__main__":
    port = int(os.environ.get('PORT',8080))
    app.run(host = '0.0.0.0',port = port)
上記のFlask.pyとモデルを保存したh5ファイル、html,cssをRenderにてデプロイするため、前段階としてローカルリポジトリをGitHubにpushします。
ところがこのGitHubにpushする作業にてエラーが発生してしまいました。
モデルが保存されているh5ファイルの容量が100MBを超えていることが原因のようです。
対策としてh5ファイルにはモデルすべてを保存するのではなく重みのみ保存することでデータ容量 100MBを削減しました。
#resultsディレクトリを作成
result_dir = 'results'
if not os.path.exists(result_dir):
    os.mkdir(result_dir)
# 重みを保存
model.save_weights(os.path.join(result_dir, 'model_weight.h5'))

files.download( '/content/results/model_weight.h5' )
h5ファイルにはmodelの重みのみ保存されているのでFlask側にモデルの構成を記述します。
import os
from flask import Flask, request, redirect, render_template, flash
from werkzeug.utils import secure_filename
from tensorflow.keras.models import Model,Sequential, load_model
from tensorflow.keras.preprocessing import image
from tensorflow.keras.utils import to_categorical
from tensorflow.keras.layers import Dense, Dropout, Flatten, Input
from tensorflow.keras.applications.vgg16 import VGG16
from tensorflow.keras import optimizers
import numpy as np

classes = ['Abyssinian','Bengal','Birman','Bombay','British_Shorthair','Egyptian_Mau','Maine_Coon','Persian','Ragdoll','Russian_Blue','Siamese','Sphynx']
image_size = 224

UPLOAD_FOLDER = "uploads"
ALLOWED_EXTENSIONS = set(['png', 'jpg', 'jpeg', 'gif'])

app = Flask(__name__)

def allowed_file(filename):
    return '.' in filename and filename.rsplit('.', 1)[1].lower() in ALLOWED_EXTENSIONS

input_tensor = Input(shape=(image_size,image_size, 3))
base_model = VGG16(include_top=False, weights='imagenet', input_tensor=input_tensor)

top_model = Sequential()
top_model.add(Flatten(input_shape=base_model.output_shape[1:]))
top_model.add(Dense(256,activation='sigmoid'))
top_model.add(Dense(len(classes), activation='softmax'))
model = Model(base_model.inputs, top_model(base_model.output))

model.compile(loss='categorical_crossentropy',
              optimizer=optimizers.SGD(lr=1e-4, momentum=0.9),
              metrics=['accuracy'])
model.load_weights('./model_weight.h5')

@app.route('/', methods=['GET', 'POST'])
def upload_file():
    if request.method == 'POST':
        if 'file' not in request.files:
            flash('ファイルがありません')
            return redirect(request.url)
        file = request.files['file']
        if file.filename == '':
            flash('ファイルがありません')
            return redirect(request.url)
        if file and allowed_file(file.filename):
            filename = secure_filename(file.filename)
            file.save(os.path.join(UPLOAD_FOLDER, filename))
            filepath = os.path.join(UPLOAD_FOLDER, filename)

            #受け取った画像を読み込み、np形式に変換
            img = image.load_img(filepath, grayscale=False, target_size=(image_size,image_size))
            img = image.img_to_array(img)
            data = np.array([img])
            data = data/image_size
            #変換したデータをモデルに渡して予測する
            result = model.predict(data)[0]
            predicted = result.argmax()
            per = int(result[predicted]*100)
            pred_answer = "この猫は " + classes[predicted] + "です(確率: {}%)".format(per)

            return render_template("index.html",answer=pred_answer)

    return render_template("index.html",answer="")

if __name__ == "__main__":
    port = int(os.environ.get('PORT',8080))
    app.run(host = '0.0.0.0',port = port)
上記対策を講じることでh5ファイルの容量を100MB以下に抑えられ、無事にGitHubにリモートリポジトリを作成することに成功しました。
Step5 デプロイ・動作確認
GitHubアカウントとRenderアカウントを連携し、GitHubのリモートリポジトリに接続することでアプリをデプロイしました。
最後に動作確認を行います。
以下の画像を使い結果を確認します。
無事に動作することが確認できました。
分類もうまくいっているようです。
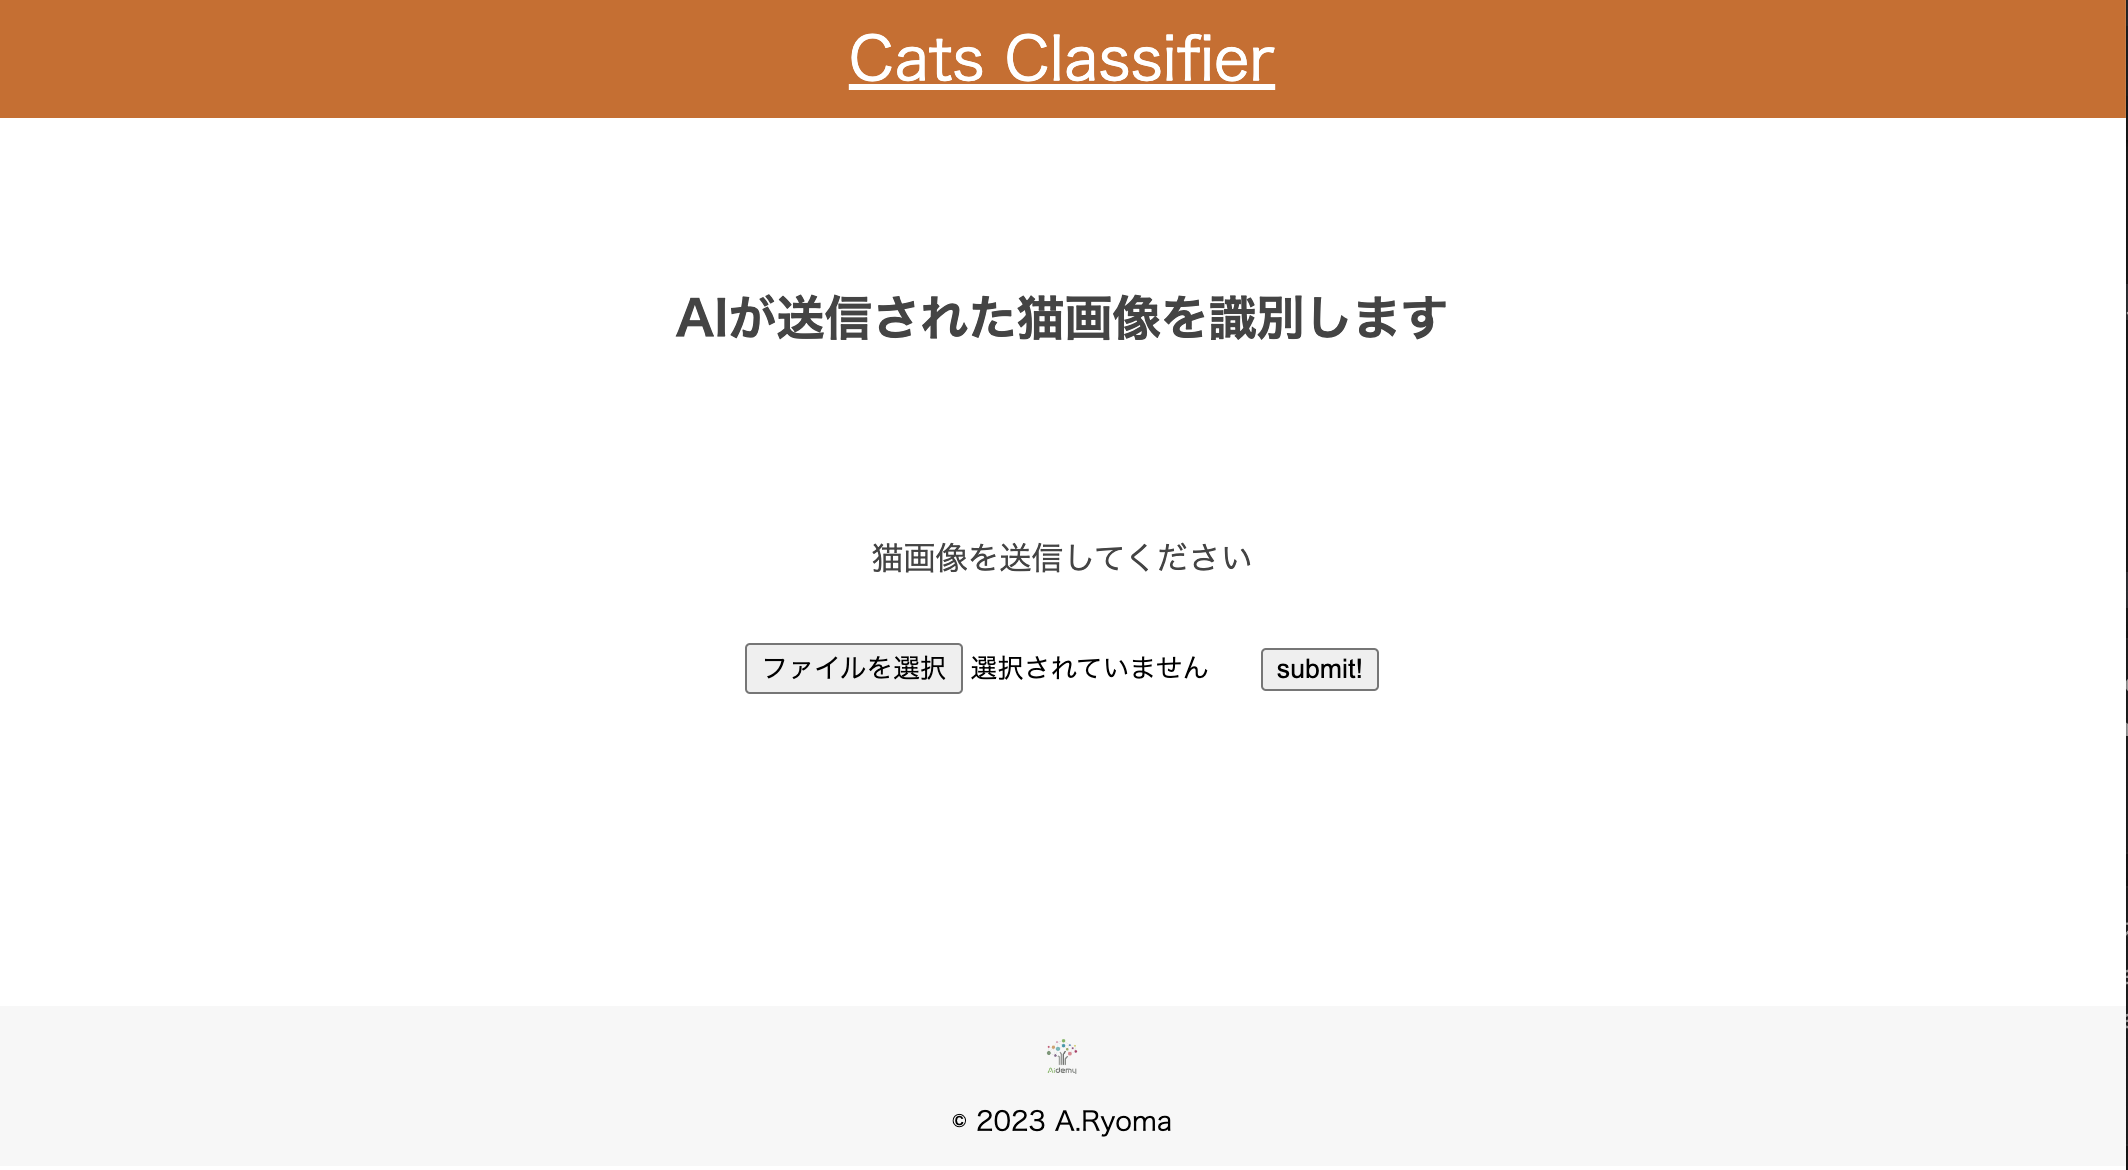
作成したアプリ
Step6 考察・まとめ
やはり学習に用いたデータ数が少なかったせいか中々精度を上げることができませんでした。試しに実家で飼っているAbssyinianの画像を判別させたところ、Russian Blueと判定されてしまいました。
両者はフォルムは比較的似ているのですが、毛色は全く異なるので判別するのに色味という要素がうまく用いられていないようです。
また今回はGitHubへpushする際にデータ容量がオーバーしていまい、h5ファイル自体の容量を削減することで対応しましたが、Git lfsを使用することで100MB以上のファイルもpush可能なようです。
次回以降は活用していきたいと思います。
改善点は多くありますが、独力である程度の機能を持ったアプリを作成することができ、良い練習になりました。
これからも学習を続けていきたいと思います。


