ffmpeg-python
ffmpeg-pythonはffmpegをpythonから使えるようにするパッケージです
github
https://github.com/kkroening/ffmpeg-python
API-reference
https://kkroening.github.io/ffmpeg-python/
使用例
https://github.com/kkroening/ffmpeg-python/tree/master/examples
1. インストール
ffmpeg-pythonはsubprocessでCLIからffmpegを実行するwrapperのみのパッケージなので、別途本体をダウンロードしてきてPATHを通しておく必要があります。
1-1. ffmpegをインストールする
公式サイトからインストーラーをダウンロードしてきて入れます
https://ffmpeg.org/download.html

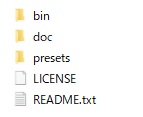
落としてきた圧縮ファイルを適当なフォルダに展開して、binフォルダにPATHを通せばインストール完了です

PATHが通ってれば以下のようにterminalから呼べるようになっている筈です
> ffmpeg

ffmpeg version 2021-03-07-git-a7f841718f-full_build-www.gyan.dev Copyright (c) 2000-2021 the FFmpeg developers
  built with gcc 10.2.0 (Rev6, Built by MSYS2 project)
1-2. ffmpeg-pythonをインストールする
pipで入ります
pip install ffmpeg-python
2. 動画ファイルの情報を取得する
ffmpeg.probe()に動画ファイルのpathを渡すとdictで取得した情報を返してくれます
>>> import ffmpeg
>>> path = './movie.mp4'
>>> video_info = ffmpeg.probe(path)
>>> video_info

{'streams': [{'index': 0,
   'codec_name': 'h264',
   'codec_long_name': 'H.264 / AVC / MPEG-4 AVC / MPEG-4 part 10',
   'profile': 'High',
   'codec_type': 'video',
   'codec_tag_string': 'avc1',
   'codec_tag': '0x31637661',
   'width': 1920,
   'height': 1080,
   'coded_width': 1920,
   'coded_height': 1080,
   ...
3. 使い方
処理する内容をパイプライン的に積み上げておいて、最後にffmpeg.run()することで実行されます。以下ではinput()で読み込んで、hflip()で左右反転して、output()で書き出すという処理になります
stream = ffmpeg.input('movie.mp4')
stream = ffmpeg.hflip(stream)
stream = ffmpeg.output(stream, 'output.mp4')
ffmpeg.run(stream)
同じことを次のように書くことも出来ます
stream = ffmpeg.input('movie.mp4').hflip().output('output.mp4')
ffmpeg.run(stream)
4. 動画を加工する
4-1. 読み込み/書き出し範囲を指定する
開始時間ssと動画時間tを指定することで動画の一部だけ読み書き出来ます
stream = ffmpeg.input('./movie.mp4', ss=2, t=2)
stream = ffmpeg.output(stream, 'output.mp4', ss=2, t=2)
4-2. 画像を反転する
stream = ffmpeg.hflip(stream)
stream = ffmpeg.vflip(stream)
4-3. 音声トラックを分離して処理する場合
画像フィルタによっては音声トラックが消えてしまうものがありますので、その場合はフィルタをかける前に音声を分けておいて、後で結合してやる必要があります
stream = ffmpeg.input('movie.mp4')

audio_stream = stream.audio
stream = ffmpeg.hflip(stream)

stream = ffmpeg.output(stream, audio_stream, 'output.mp4')
ffmpeg.run(stream)
5. 静止画像や音声を保存する
5-1. 静止画像を保存する
時間で指定する
filter()で縦横比を維持して横幅を800ピクセルにリサイズしてoutput()によりimage.jpg名で保存します
time = 10
width = 800
(
    ffmpeg
    .input('movie.mp4', ss=time)
    .filter('scale', width, -1)
    .output('image.jpg', vframes=1)
    .run()
)
フレームを指定する
filter()でフレームを選択して書き出しています
frame_num = 10
(
    ffmpeg
    .input(path)
    .filter('select', 'gte(n,{})'.format(frame_num))
    .output('image.jpg', vframes=1, format='image2', vcodec='mjpeg')
    .overwrite_output()
    .run()
)
5-2. 音声を保存する
wavで保存する
stream = ffmpeg.input('movie.mp4')
stream = ffmpeg.output(stream, 'audio.wav', format='wav')
ffmpeg.run(stream)
mp3で保存する
stream = ffmpeg.input('movie.mp4')
stream = ffmpeg.output(stream, 'audio.mp3', format='mp3')
ffmpeg.run(stream)
6. 動画をnumpy arrayにする
rawvideoの出力をoutに格納してnumpy.frombuffer()に渡すとnumpy arrayにしてくれます。特に条件を指定しない場合はすべてのフレームを書き出しますので、例えば30fpsの2K動画10秒分を出力すると [300, 1080, 1920, 3] サイズのnumpy arrayが得られます。
import numpy as np
import matplotlib.pyplot as plt

height = 1080
width = 1920

out, _ = (
    ffmpeg
    .input(path, ss=0, t=10)
    .output('pipe:', format='rawvideo', pix_fmt='rgb24')
    .run(capture_stdout=True)
)

arr = (
    np
    .frombuffer(out, np.uint8)
    .reshape([-1, height, width, 3])
)

def show_picture(im):
    plt.imshow(im)
    plt.xticks([])
    plt.yticks([])
    plt.show()

print(arr.shape)
show_picture(arr[0])
show_picture(arr[100])
show_picture(arr[200])
7. まとめ
ffmpegのすべての機能が使えるわけではないようですが、手軽に動画の情報を取得したり、動画をnumpy arrayに変換できるのは便利だと思います。
レッツトライ