前回のつづきです。
前回は自動ブレーキをやりましたが、今回はいよいよ障害物回避をつくります。
障害物を避けて走る
ステアリングを操作するので、映像に回転運動が加わり少し難しくなります。
まずはこの回転運動のキャンセリングについて考えます。
カメラキャリブレーション
回転運動のキャンセリングの準備として、カメラキャリブレーションを行います。
OpenCVのキャリブレーションモジュールを使えば比較的簡単にできます。魚眼レンズとしてキャリブレーションすることに注意します。
下記コードは印刷したキャリブレーションパターンを写した複数のキャプチャ画像から、カメラ内部行列Kと歪パラメータDを計算し、npyファイルとして保存するものです。
## ref: http://opencv-python-tutroals.readthedocs.io/en/latest/py_tutorials/py_calib3d/py_calibration/py_calibration.html
import numpy as np
import cv2
import glob

width = 800
height = 600

# termination criteria
criteria = (cv2.TERM_CRITERIA_EPS + cv2.TERM_CRITERIA_MAX_ITER, 30, 0.001)

# prepare object points, like (0,0,0), (1,0,0), (2,0,0) ....,(6,5,0)
## ref: https://stackoverflow.com/questions/39272510/camera-calibration-with-circular-pattern
objp=np.array([[0,0,0],[1,0,0],[2,0,0],[3,0,0],[0.5,0.5,0],[1.5,0.5,0],[2.5,0.5,0],[3.5,0.5,0]])
for y in range(2,11):
        for x in range(4):
                objp=np.append(objp,[np.array([objp[4*(y-2)+x][0],objp[4*(y-2)+x][1]+1,0])],axis=0)

# Arrays to store object points and image points from all the images.
objpoints = [] # 3d point in real world space
imgpoints = [] # 2d points in image plane.

images = glob.glob('c*.jpg')
print(images)
for fname in images:
    img = cv2.imread(fname)
    img = cv2.resize(img,(width,height))
    gray = cv2.cvtColor(img,cv2.COLOR_BGR2GRAY)

    # Find the chess board corners
    ret, corners = cv2.findCirclesGrid(gray, (4,11),flags=cv2.CALIB_CB_ASYMMETRIC_GRID+cv2.CALIB_CB_CLUSTERING)
    print(ret)
    # If found, add object points, image points (after refining them)
    if ret == True:
        corners2 = cv2.cornerSubPix(gray,corners,(4,11),(-1,-1),criteria)
        imgpoints.append(corners2.reshape((1,-1,2)))

        # Draw and display the corners
        img = cv2.drawChessboardCorners(img, (4,11), corners2,ret)

        cv2.imshow('img',img)
        cv2.waitKey(100)


objpoints = [objp.astype(np.float32).reshape((1,-1,3))]*len(imgpoints)

## projection
# ret, mtx, dist, rvecs, tvecs = cv2.calibrateCamera(objpoints, imgpoints, gray.shape[::-1],None,None)

## fisheye
## ref: https://bitbucket.org/amitibo/pyfisheye/src
K = np.zeros((3,3),dtype=np.float32)
D = np.zeros((4, 1),dtype= np.float32)
rvecs = [np.zeros((1, 1, 3), dtype=np.float32)]*len(imgpoints)
tvecs = [np.zeros((1, 1, 3), dtype=np.float32)]*len(imgpoints)
rms, _, _, _, _ = cv2.fisheye.calibrate(
    objpoints,imgpoints,(width,height),
    K,D,rvecs,tvecs,
    cv2.fisheye.CALIB_RECOMPUTE_EXTRINSIC+cv2.fisheye.CALIB_FIX_SKEW)

print(rms)
print(K)
print(D)

np.save("K.npy",K)
np.save("D.npy",D)

## display
for fname in images:
    img = cv2.imread(fname)
    img = cv2.resize(img,(width,height))

    ##projection
    # newcameramtx, roi=cv2.getOptimalNewCameraMatrix(mtx,dist,(width,height),1,(width,height))
    # dst = cv2.undistort(img, mtx, dist, None, newcameramtx)

    ##fisheye
    newcameramtx = cv2.fisheye.estimateNewCameraMatrixForUndistortRectify(K,D,(width//2,height//2),np.eye(3))
    dst = cv2.fisheye.undistortImage(img, K, D, Knew=newcameramtx)

    cv2.imshow("dst",dst)
    cv2.waitKey()

cv2.destroyAllWindows()
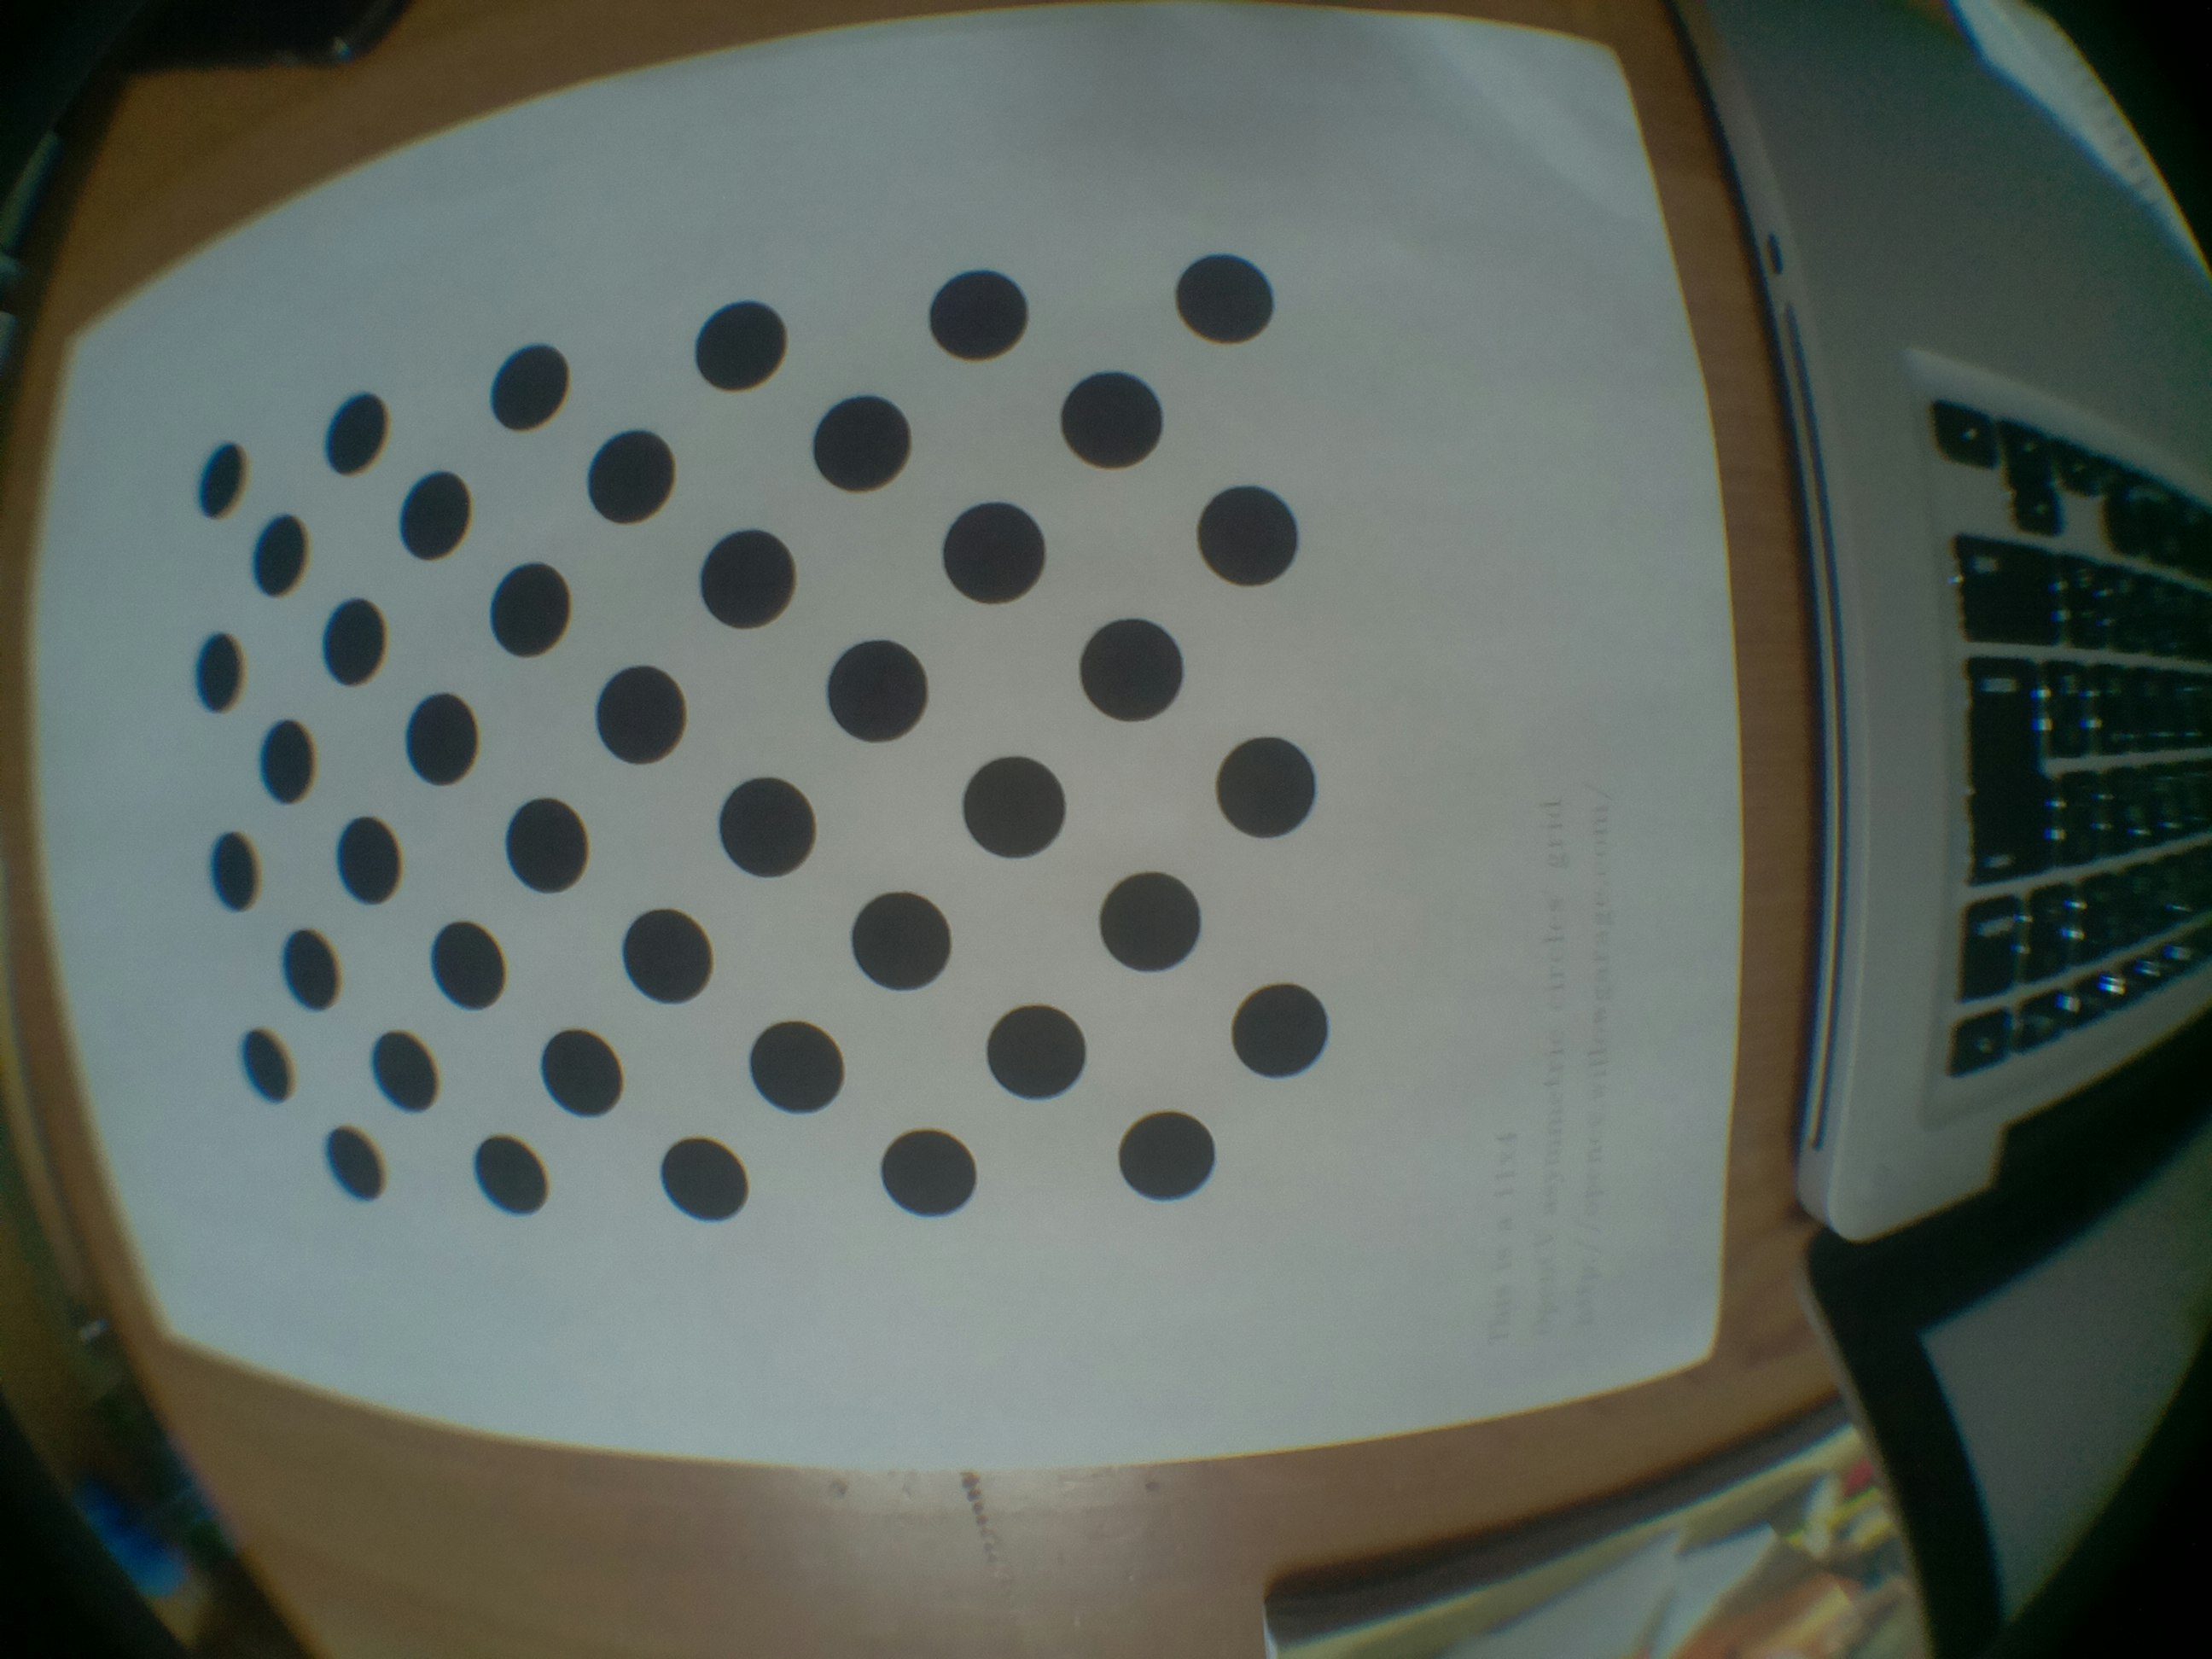
ちなみにキャリブレーション用の画像はこんな感じです(複数用意します):

オプティカルフローのテーブル化
主な車体の回転運動はヨー回転(カメラでいうところのパン)となりますので、予め微小パン回転のオプティカルフローを計算してテーブル化しておきます。微小前進時のテーブル化も同時にしておきます。前項のキャリブレーション結果を利用していますので、魚眼レンズの効果を考慮した結果が得られます。
"""
パン回転・前進のオプティカルフローテンプレートをつくる
画面端で補正がずれているがいまのところ問題ない
"""

import numpy as np
import cv2

K = np.load("K.npy")
D = np.load("D.npy")

width, height = 800, 600 # カメラキャリブレーション時の画像サイズ
shrink = 40 # 表示するサイズ/キャプチャサイズ
delta = 0.001 # オプティカルフロー計算時の移動量
magnify = 40

# center of shrinked pixel
ref_points = np.dstack(np.meshgrid(np.arange(0.5*shrink,width,shrink),np.arange(0.5*shrink,height,shrink)))
print(ref_points.shape)

# image coord -> world coord
# undistortPointsのPを指定しない場合、単位行列が使われるので、世界座標はz=1とすればOK
ud_points = cv2.fisheye.undistortPoints(ref_points,K,D)
wd_points = np.dstack((ud_points,np.ones((int(height//shrink),int(width//shrink),1))))

# world coord -> image coord
rvec = np.zeros((1,3),dtype=np.float32)
tvec = np.zeros((1,3),dtype=np.float32)
points0 = cv2.fisheye.projectPoints(wd_points,rvec,tvec,K,D)[0]

## forward motion
tvec1 = np.copy(tvec)
tvec1[:,2] -= delta
points1 = cv2.fisheye.projectPoints(wd_points,rvec,tvec1,K,D)[0]

## pan rotation
rvec1 = np.copy(rvec)
rvec1[:,1] += delta
points2 = cv2.fisheye.projectPoints(wd_points,rvec1,tvec,K,D)[0]

## invalid area
invalid = np.mean((ref_points-points0)**2,axis=2)**0.5 > 1.0
points0[invalid] = ref_points[invalid]
points1[invalid] = ref_points[invalid]
points2[invalid] = ref_points[invalid]

## calc flow map
forward_flow = (points1-points0)/delta/shrink
pan_flow = (points2-points0)/delta/shrink

## save
np.save("forward_flow.npy",forward_flow)
np.save("pan_flow.npy",pan_flow)

## display
disp = np.zeros((height,width,3))
for p0,p1,p2 in zip(list(points0.reshape(-1,2)),list(points1.reshape(-1,2)),list(points2.reshape(-1,2))):
    # 表示のためにフローベクトルを拡大
    p1 = (p1-p0)*magnify + p0
    p2 = (p2-p0)*magnify + p0

    x0,y0 = (p0+0.5).astype(np.int32)
    x1,y1 = (p1+0.5).astype(np.int32)
    x2,y2 = (p2+0.5).astype(np.int32)

    cv2.line(disp,(x0,y0),(x1,y1),(0,1,0)) # green: forward
    cv2.line(disp,(x0,y0),(x2,y2),(0,0,1)) # red: pan
    cv2.circle(disp,(x0,y0),1,(0,1,1)) # yellow: refpoint

cv2.imshow("",disp)
cv2.waitKey()

# cv2.imwrite("flow.png",(disp*255).astype(np.uint8))
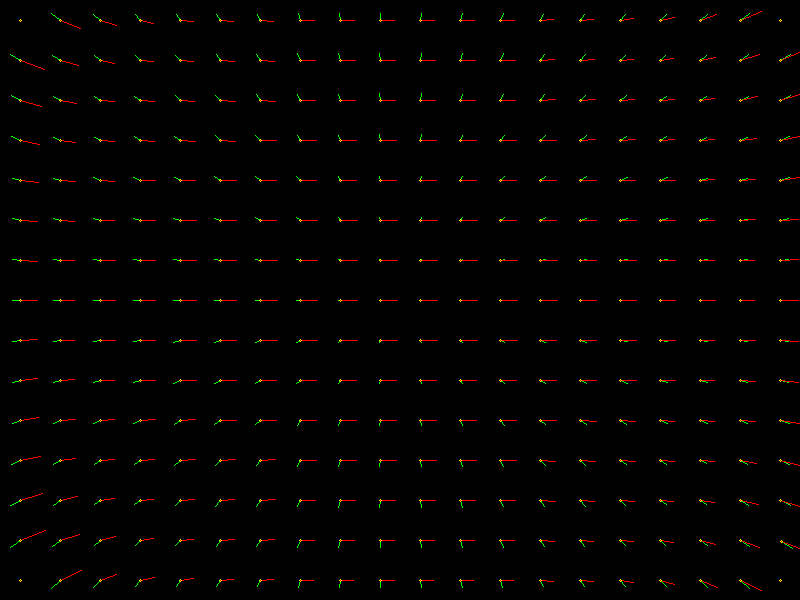
計算したオプティカルフローはこんな感じです。黄色がパン回転時の、緑が前進時のフローです。

回転運動のキャンセリング
各時刻にジャイロセンサーで取得した値でパン回転のテンプレートをスケールすれば、各ピクセルのフレーム間の移動ベクトルを求めることができます。このベクトルを使って画像を変形させることでパン回転をキャンセルした画像ペアをつくることができます。
まずセンサーの値を取得するクラスは下記のとおりです:
import smbus
import time
import numpy as np

class CarSensor(object):
    def __init__(self):
        self.address = 0x68
        self.bus     = smbus.SMBus(1)

        # レジスタをリセットする
        self.bus.write_i2c_block_data(self.address, 0x6B, [0x80])
        time.sleep(0.01)
        # PWR_MGMT_1をクリア
        self.bus.write_i2c_block_data(self.address, 0x6B, [0x00])
        time.sleep(0.01)

        # 加速度の計測レンジ <- 2G
        self.bus.write_i2c_block_data(self.address, 0x1C, [0x00])
        self.accCoefficient = 2 / float(0x8000)
        # 角速度の計測レンジ <- 500dps
        self.bus.write_i2c_block_data(self.address, 0x1B, [0x08])
        self.gyroCoefficient = 500 / float(0x8000)

        # データ読み込み形式の指定
        self.dtype = np.dtype(np.int16).newbyteorder('B')

        self.offsetRawAcc = np.zeros(3)
        self.offsetRawGyro = np.zeros(3)

    def calibrate(self,n=1000):
        """オフセットを計測しておく"""
        sg = np.zeros(3)
        sa = np.zeros(3)
        for i in range(n):
            data = self.bus.read_i2c_block_data(self.address, 0x43 ,6)
            raw = np.frombuffer(bytes(data),self.dtype,3)
            sg += raw
            data = self.bus.read_i2c_block_data(self.address, 0x3B ,6)
            raw = np.frombuffer(bytes(data),self.dtype,3)
            sa += raw
        self.offsetRawGyro = -sg/n
        self.offsetRawAcc = -sa/n

    def readGyro(self):
        ## ジャイロ
        data    = self.bus.read_i2c_block_data(self.address, 0x43 ,6)
        rawGyro = np.frombuffer(bytes(data),self.dtype,3)
        return self.gyroCoefficient*(rawGyro+self.offsetRawGyro)

    def readAcc(self):
        ## 加速度
        data    = self.bus.read_i2c_block_data(self.address, 0x3B ,6)
        rawAcc = np.frombuffer(bytes(data),self.dtype,3)
        return self.accCoefficient*(rawAcc+self.offsetRawAcc)
衝突時間の推定
上記の補正を加えたうえで、前回同様のアルゴリズムを実装します。
なお今回は衝突時間の 逆数 をピクセルごとに出力するクラスとしています。
import cv2
import numpy as np
import math
from collections import deque

from car_sensor import CarSensor

class InverseTTCMap(object):
    """
    ジャイロセンサによる回転補正を行ったうえで
    歪キャリブレーションを入れてTimeToContactの逆数を推定
    """
    def __init__(self,width,height,framerate,threshold=0,m0=5,y0=0):
        self.m0 = m0
        self.width,self.height = width,height
        y1 = y0+self.height

        forward_flow = np.load("forward_flow.npy").astype(np.float32)*0.5/framerate # dx,dy,dtの補正係数を先にかけておく
        self.ex, self.ey = -forward_flow[y0:y1,:,0],-forward_flow[y0:y1,:,1]

        pan_flow = np.load("pan_flow.npy").astype(np.float32)/framerate/180*3.14
        self.px, self.py = pan_flow[y0:y1,:,0],pan_flow[y0:y1,:,1]

        self.sens = CarSensor()
        self.dyaw = deque([0,0,0]) # TODO length = 2? 3?

        self.mx0,self.my0 = np.meshgrid(np.arange(self.width),np.arange(self.height))
        self.mx0 = self.mx0.astype(np.float32)
        self.my0 = self.my0.astype(np.float32)

        self.threshold = threshold

    def initialize_bg(self,bg):
        self.bg = bg

    def update(self,img):
        self.dyaw.popleft()
        self.dyaw.append(self.sens.readGyro()[2])

        img = cv2.GaussianBlur(img,(5,5),2.5)

        w = -0.5*self.dyaw[0]
        mx = self.mx0+w*self.px
        my = self.my0+w*self.py
        bg1 = cv2.remap(self.bg,mx,my,cv2.INTER_LINEAR)

        w = +0.5*self.dyaw[1]
        mx = self.mx0+w*self.px
        my = self.my0+w*self.py
        img1 = cv2.remap(img,mx,my,cv2.INTER_LINEAR)

        dt = cv2.subtract(img1,bg1)
        dx = cv2.Sobel(img1,cv2.CV_32F,1,0,ksize=1)
        dy = cv2.Sobel(img1,cv2.CV_32F,0,1,ksize=1)

        # next background
        self.bg = img

        # remove no-motion area
        dt[np.abs(dt)<self.m0] = 0

        ## calc time-to-contact
        ittc = cv2.divide(dt,dx*self.ex+dy*self.ey)
        ittc[ittc<self.threshold] = 0
        return ittc
制御
衝突時間が小さい方向を離れるようにステアリングすることで、障害物を避ける動きになります。
衝突時間の推定は誤差が大きいので、ノイズ抑制処理も必要です。
シンプルな実装にすることを考えて下記のように実装しました。
後処理や制御方法についてはちゃんと考えて作っていないので、もっといい方法があるとおもいます。
import cv2
import numpy as np
import math

from image_processing import InverseTTCMap
from car_controller import CarController

if __name__=="__main__":
    import time

    WIDTH = 64
    HEIGHT = 48
    Y0 = 24
    Y1 = HEIGHT-2
    FRAMERATE = 30

    M0 = 6 # これより小さい時間差分を0につぶす
    ITTC0 = 0.0 #これより小さいITTCを0につぶす

    LOSS_BINS = 16 # 損失関数の分割数
    LOSS_SIGMA = LOSS_BINS*0.4 # 損失関数の
    LOSS_CAP = 10

    STEER_R = 0.6 # ステアリングの更新係数
    STEER_K = 3.0

    BRAKE_W = 6 # ブレーキ判定の参照幅
    BRAKE_R = 0.5 # ブレーキ判定の更新係数
    BRAKE_THRESH = 4.0

    ctrl = CarController()
    cap = cv2.VideoCapture("rpicamsrc rotation=180 ! video/x-raw,format=I420,width={},height={},framerate={}/1 ! appsink".format(WIDTH,HEIGHT,FRAMERATE))

    ## 推定器の初期化
    estimator = InverseTTCMap(WIDTH,HEIGHT-Y0,FRAMERATE,threshold=ITTC0,m0=M0,y0=Y0)

    ## 移動開始
    ctrl.steer(0.0)
    ctrl.slottle(0.5)

    # 輝度安定化/加速ショック緩和/バッファクリアなどのため0.5秒間はなにもしない
    for i in range(FRAMERATE//2):
        cap.grab()

    ## メインループ
    mean_steer = 0
    mean_loss = 0
    for i in range(FRAMERATE*10):
        ## キャプチャ
        ret,raw = cap.read()
        img = raw[Y0:Y1].astype(np.float32) # I420->Y

        ## 衝突時間の逆数を推定
        if i==0:
            estimator.initialize_bg(img)
            continue
        ittcmap = estimator.update(img)

        ## 後処理
        # 推定値の穴埋め
        ittcmap = cv2.dilate(ittcmap,np.ones((3,3)))
        # 値がITTC0より大きいところだけで平均をとる
        loss = cv2.resize(ittcmap,(LOSS_BINS,1),cv2.INTER_AREA)
        area = cv2.resize(1.0*(ittcmap>ITTC0),(LOSS_BINS,1),cv2.INTER_AREA)
        loss = loss/(area+1e-3)
        # 大きすぎる値をつぶしてから平滑化
        loss = np.minimum(loss,LOSS_CAP)
        loss = cv2.GaussianBlur(loss,(LOSS_BINS+1,1),LOSS_SIGMA) # TODO カーネル形状の見直し
        loss = loss.flatten()[2:-2] # 画面端はうまくスムージングできないので使わない

        imin = np.argmin(loss)

        ## ステアリング
        if loss[imin]<=0:
            steer = 0.0
        else:
            steer = 2*imin/(len(loss)-1)-1.0 # NOTE: -1 <= steer <= 1
            steer *= math.pow(abs(steer),0.5) # 急ハンドル回避
        mean_steer = (1-STEER_R)*mean_steer+STEER_R*steer
        ctrl.steer(STEER_K*mean_steer)

        ## スロットル
        ## TODO 障害物の近くではゆっくり走る
        # 最小値周辺のみ見て判定する
        w = BRAKE_W//2
        imin = max(w,min(len(loss-w-1),imin))
        loss = loss[imin-w:imin+w+1]
        # 平均
        positive_loss = loss[loss>0]
        if len(positive_loss)>0: # loss>0 が空でないときのみ更新
            mean_loss = (1-BRAKE_R)*mean_loss+BRAKE_R*np.mean(positive_loss)
        # ブレーキ判定
        if mean_loss>BRAKE_THRESH:
            ctrl.slottle(-0.3)
            time.sleep(0.3)
            ctrl.brake()
            break

    ctrl.steer(0.0)
    ctrl.brake()
ちなみに障害物までの距離がわかるとより望ましいのですが、必要になる自車速度を手軽に得る方法が思いつきませんでした。
結果
Raspberrypiで自動運転実験中..https://t.co/hvWQAqVovQ
— Satoshi Tanaka (@stnk20) 2018年5月13日
Raspberrypiで自動運転実験中..https://t.co/E5V7dSNWAR
— Satoshi Tanaka (@stnk20) 2018年5月13日
いい感じです。
前回よりブレーキの精度も良くなりました。
おわりに
単眼カメラとジャイロセンサーだけで、自動運転の代表的な課題である障害物回避ができるようになりました。
課題はたくさんあるんですが、下記のような点は気がむいたらやろうと思っています:
- 床面模様を障害物として認識してしまう問題を解消する
- もっと速く走るために、高速化やパラメータチューニングを行う
- より賢く動くために、車速やシーンの状態推定を行う
- かっこいい動画を撮る