はじめに
昨今の"DX"ブームにより、自動化検討が進んでいます。レポートの自動化は誰もが思いつくDXの初手ともいうべきものです。その際に、Pythonでレポートを作成しPDFで書き換え不能にして保管する場面があるかもです。
私はさらに、そのPDFに画像を埋め込むという場面に遭遇しました。AtomエディタやVSCodeを使っている人であればMarkdownをPDFに変換するのが簡単だと思うでしょうか。今回PythonでHTMLをPDFに変換する際に、ローカルに保存した画像の扱いに手こずったため備忘録として以下の記事を残します。
環境
とりあえずWindows10の環境で実行します。pdfkitというライブラリが動くようであれば他のOSでもかまいません。
画像の準備
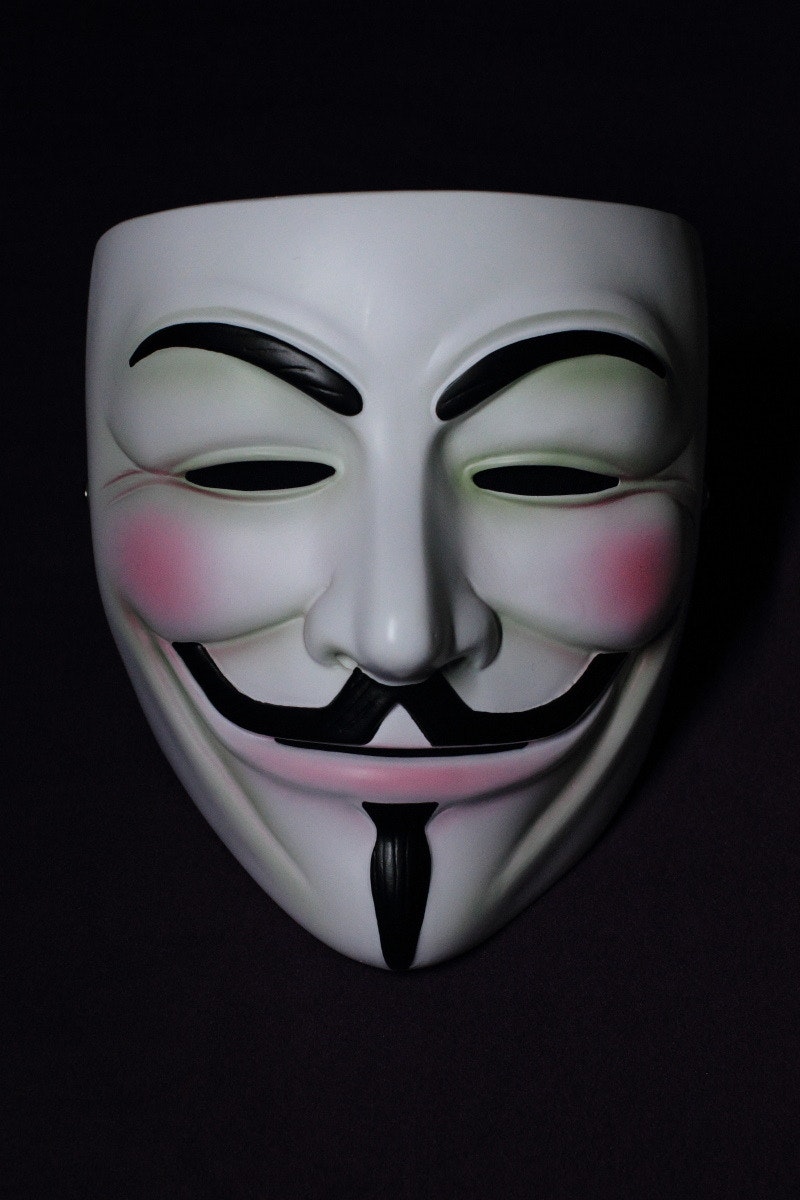
今回は以下のガイ・フォークスマスクをPDFに埋め込みます。権威に対する叛乱の象徴です。'Guy-Fawkes.jpg'という名前で保存します。
ライブラリのインストール:pdfkit
pdfkitというPythonライブラリをインストールします。また、pdfkitのためにmkhtmltopdfというexeソフトウェアを使います。
画像埋め込みの要諦:Base64 URI
HTMLにローカルの画像を埋め込む際、画像をBase64 URIという文字列へ変換し、そのURIをimgタグのsrcで参照させれば画像が表示されます。これはJupyter NotebookでノートブックからHTMLをエクスポートした際にHTMLファイルに画像が埋め込む方法と同じです(Jupyterから出力したHTMLファイルのソース中で、base64で検索するとヒットします)。
Base64 URIを参照するとPNG画像は <img src="data:image/png;base64,..." />のように表記されます。JEPG画像を埋め込むときは"data:image/jpg;base64,..."のように書きます。"..."の部分はハッシュ化されたような人の目で理解できない文字列になっています。非常に長くなるので基本的に割愛します。
実装1:素直に画像を読み出してBase64を使う
HTMLのヘッダーを追加する関数を定義します。これを使うことでHTMLの内容だけに注力して記録できます。
def set_html_meta(body, lang='ja'):
    """
    <!DOCTYPE html> is essential
    """
    assert lang in ('ja', 'en'), "it can take ('ja', 'en'); but %s was fed"%lang
    html = f'<!DOCTYPE html><html lang="{lang}">\n  <meta charset="utf-8">\n'
    html += '<style> body { font-size: 1rem; } </style>\n <body>\n'
    html += body + '\n  </body>\n</html>'
    return html
参考:Open base64 String Image in Jupyter Notebook Without Saving
次に、画像ファイルをopen()で読み出して、Base64を使ってエンコードします。エンコードされた文字はbytes型で、通常のstring型と異なるためPython3で比較/結合する前には.decode()でstring型へ直す必要があります。
import base64
imgname='Guy-Fawkes.jpg'
encoded_str = base64.b64encode(open(imgname,'rb').read())
print(type(encoded_str))
data_uri = 'data:image/jpg;base64,'+encoded_str.decode()

body="<img src='{}' width='200px'/>".format(data_uri)
html=set_html_meta(body)

with open('test.html', 'w') as out:
    """for debug purpose"""
    for row in html.split('\n'):
        out.write(row+'\n')
# <class 'bytes'>
最後に、出来上がったHTMLファイルをPDFへ変換します。ここでpdfkitを使います。pdfkitの設定について、pdfkit.configurationで指定することができます。mkhtmltopdf.exeへのパスを指定しないと動作しないので気を付けてください。
import pdfkit
options = {
        'page-size': 'A4',
        'margin-top': '1in',
        'margin-right': '1in',
        'margin-bottom': '1in',
        'margin-left': '1in',
        'encoding': "UTF-8",
        'no-outline': None,
        'disable-smart-shrinking': '',
    }
conf_ = pdfkit.configuration(wkhtmltopdf='C:/wkhtmltox/bin/wkhtmltopdf.exe')
pdfkit.from_string(html, 'test.pdf', options=options, configuration=conf_)
# Loading pages (1/6)
# Counting pages (2/6)
# Resolving links (4/6)
# Loading headers and footers (5/6)
# Printing pages (6/6)
# Done
# Out[]: True
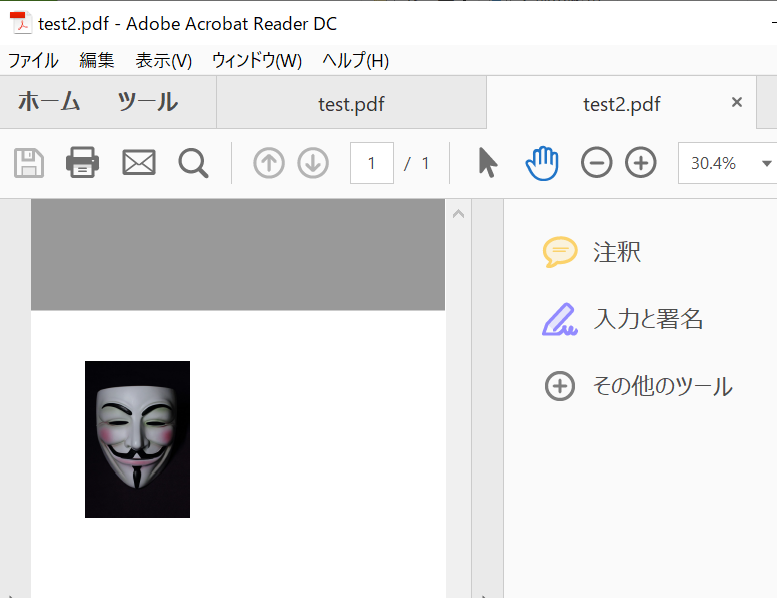
出来上がったtest.pdfを開くと、下図のように画像が埋め込まれていました。

躓いた点
変換したいHTMLファイルに<!DOCTYPE html>が記載されていないと、pdfkitがHTMLファイルを認識できず画像埋め込みに失敗します。正確にHTMLの文法を守るようにしましょう。
実装2:画像をBytesIOに書き出してgetvalue()する
参考:Is it possible to create encoded base64 URL from Image object?
Base64の理解を深めるために少しExerciseします。PillowのImageオブジェクトとして読み出した画像をnumpy arrayに変換して、matplotlibで表示することができます。
import numpy as np
from PIL import Image
import matplotlib.pyplot as plt
from io import BytesIO
imgname='Guy-Fawkes.jpg'

# Take in base64 string and return a numpy image array
def stringToRGB(base64_string):
    imgdata = base64.b64decode(base64_string)
    image = Image.open(BytesIO(imgdata))
    return np.array(image)

byte_string=open(imgname,'rb').read()
encoded_string = base64.b64encode( byte_string )
plt.imshow(stringToRGB(encoded_string))
plt.axis('off')
plt.show()# Guy-Fawkesの画像がでる
上記のコードを踏まえて、BytesIOを利用していきます。以下のコードではPillowオブジェクトをBytesIOに保存し、BytesIOオブジェクトのgetvalue()メソッドを利用したらbytes型が得られました。これは画像データをrawのまま取得した形で、これをbase64.b64encode関数で変換するとBase64 URIが得られます。あとは先ほどと同じですね。
imgname='Guy-Fawkes.jpg'
im = Image.open(imgname)
output = BytesIO()
im.save(output, format='JPEG')
im_data = output.getvalue()
print(type(im_data))
image_data = base64.b64encode(im_data)
if not isinstance(image_data, str):
    # Python 3, decode from bytes to string
    image_data = image_data.decode()
data_uri = 'data:image/jpg;base64,' + image_data
body="<img src='{}' width='200px'/>".format(data_uri)
html2=set_html_meta(body)
# <class 'bytes'>
実行例1と同様にしてPDFを保存します。
options = {
        'page-size': 'A4',
        'margin-top': '1in',
        'margin-right': '1in',
        'margin-bottom': '1in',
        'margin-left': '1in',
        'encoding': "UTF-8",
        'no-outline': None,
        'disable-smart-shrinking': '',
    }
conf_ = pdfkit.configuration(wkhtmltopdf='C:/wkhtmltox/bin/wkhtmltopdf.exe')
pdfkit.from_string(html2, 'test2.pdf', options=options, configuration=conf_)
# Loading pages (1/6)
# Counting pages (2/6)
# Resolving links (4/6)
# Loading headers and footers (5/6)
# Printing pages (6/6)
# Done
# Out[]: True
ファイルを開けば以下のようにtest2.pdfが生成されていることが確認できます。
応用
Markdownを使ってMarkdown→HTMLへの変換をしたり、Jinja2を使ってMarkdownをテンプレートとして扱い動的にコンテンツを埋め込むことにすれば、機械的に様々なレポートを生成するソフトが作成できます。是非実装してみてください。
終わりに
V for Vendetta(映画)は何度見ても名作です。1605年の火薬陰謀事件から400年後にガイ・フォークスをモチーフにした V for Vendettaが公開されたのは非常に上手かったなと思います。
“Beneath this mask there is more than just flesh. Beneath this mask there is an idea... and ideas are bulletproof."
- Alan Moore, V for Vendetta
安直な"DX"ブームへ反抗していきましょう。
関連文献
- Markdownの議事録 → HTML → PDF へ変換出力
- 【Python】WebページやHTMLをPDF出力する - wkhtmltopdfのインストールに言及している。
- PythonでマークダウンをPDFに変換する