環境
- Windows 10 Pro / 20H2 build 19042.804
- virtualbox 6.1.18
- Ubuntu Server 20.04.2 LTS
Virtual Box で共有フォルダーの設定を行う
- Virtual Box上で、仮想マシンを選択し右クリックから
設定を選択 - 左側のメニューから
共有フォルダーを選択 - ウィンドウの右側にある
追加フォルダを選択 -
共有フォルダーの追加ウィンドウが表示されるので以下の項目を入力
-
フォルダーのパス: windows側のフォルダ名 -
フォルダー名: 仮想マシン側で見えるファイルシステム名 -
自動マウント: チェックを入れる -
マウントポイント: 仮想マシン側で見えるフォルダパス
Ubuntuにvirtualbox Guest Additionsをインストールする
Ubuntuを起動したら仮想マシンウィンドウのメニューからデバイス→Guest Additions CD イメージの挿入を選択。

次に、ログインして以下のコマンドを入力してツールをインストールする。
$ sudo apt install virtualbox-guest-utils
インストールが終わったら仮想マシンを起動しなおす。
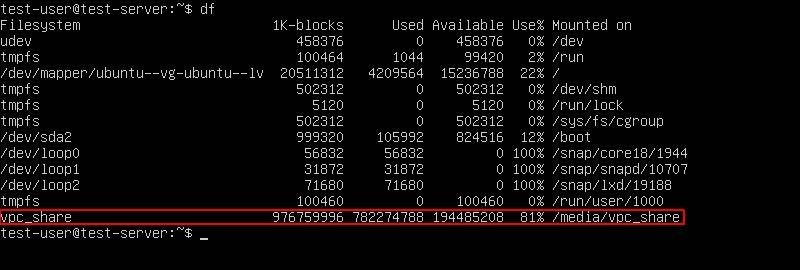
再度ログインしたらdfコマンドで、共有フォルダが追加されているか確認する。

ユーザーをvboxfsグループに追加する
追加された共有フォルダのグループを確認する。
$ cd /media
$ ls -l
ユーザーをvboxfsグループに追加。
以下のコマンドを入力。
$ sudo gpasswd -a ユーザ名 vboxsf
グループに追加後、ログインし直す。
共有フォルダにアクセステスト
共有ファイルにアクセスできるかテストファイルを作成してみる
$ touch /media/vpc_share/test
windouws上で共有フォルダを確認して、作ったテストファイルがあれが成功です。

