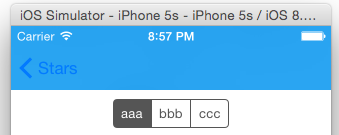
Twitter公式アプリのプロフィール画面やAppStoreアプリの各アプリの画面のように、UITableViewでSectionのヘッダにSegment Controlを置いてテーブルの表示内容を切り替えるUIを実装したい場合があると思います。
UITableViewHeaderFooterViewを使って実装してみます。
実装
2番目のSectionの上部にSegment Controlを配置する例です。
-
UITableViewとTopBarの間にUIViewをD&DしてSegment Controlを配置します。 -
UIViewの@IBOutletを作成します。以下、UIViewの変数名をheaderViewとします。
-
2番目のsectionに
UIViewを配置します。override func tableView(tableView: UITableView, viewForHeaderInSection section: Int) -> UIView?{ switch section { case 1: let sectionHeaderView = UITableViewHeaderFooterView() sectionHeaderView.contentView.addSubview(self.headerView) return sectionHeaderView default: return nil } } -
2番目のsectionの高さを設定します。
override func tableView(tableView: UITableView, heightForHeaderInSection section: Int) -> CGFloat{ switch section { case 1: return self.headerView.frame.height default: return 0 } } -
ビルドして起動します。
背景を変えたい場合はUITableViewHeaderFooterViewのbackgroundViewを設定するなどします。
注意
SectionのヘッダのUITableViewCellに置くと次のような問題が発生します。
- Segment ControlでSegmentボタンをクリックする
- ネットワーク経由でデータを取得する
- reloadSectionやreloadDataでUITableViewCellを更新する
- Segment Controleの表示が初期状態に戻ってしまう←問題
UITableViewHeaderFooterViewを使えばこのような問題は発生しません。


