app.io は、『ブラウザ内でネイティブ iOS アプリを動かせるようにする』サービスです。
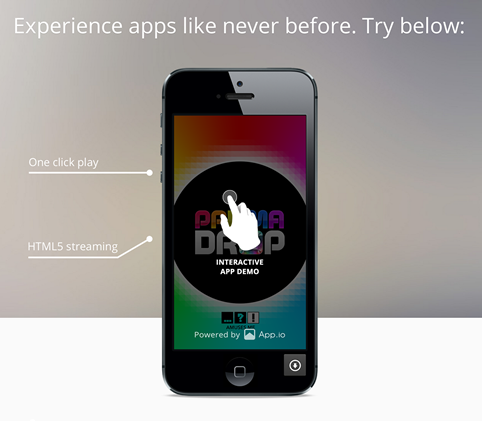
イメージとしては iOSシミュレータをそのままWebコンテンツに埋め込める と考えるとわかりやすいかもしれません。タップ等のインタラクションが効いて、もちろん通信もします。アプリのランディングページや、ブログの紹介記事に埋め込んだりすると良さそうです。
で、「導入にはさぞ複雑な手順が。。」と思いきや、実際にアプリを動作させるまでの手順はめちゃくちゃ簡単です。 ファイルを1つアップするだけ。 以下で具体的に説明します。
使い方
1. アプリをビルド
いつもの普通のビルドです。Xcode でターゲットとして 「シミュレータ」を選択 し、ビルドします。
2. .appファイルをアップロード
"Upload Your App" から、
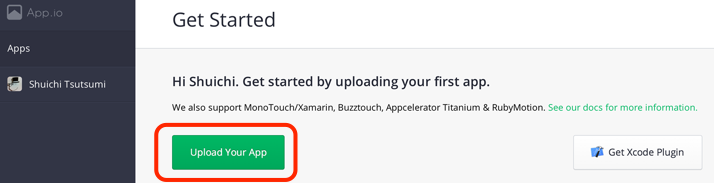
下記パスにある .app ファイルを zip で固めて アップロードします。
~/Library/Developer/Xcode/DerivedData/{アプリ名}/Build/Products/Debug-iphonesimulator/
以上!
Webコンテンツに埋め込む
左側のメニューにある "Embed" を選択すると、iFrame を使った埋め込みコードが生成されます。
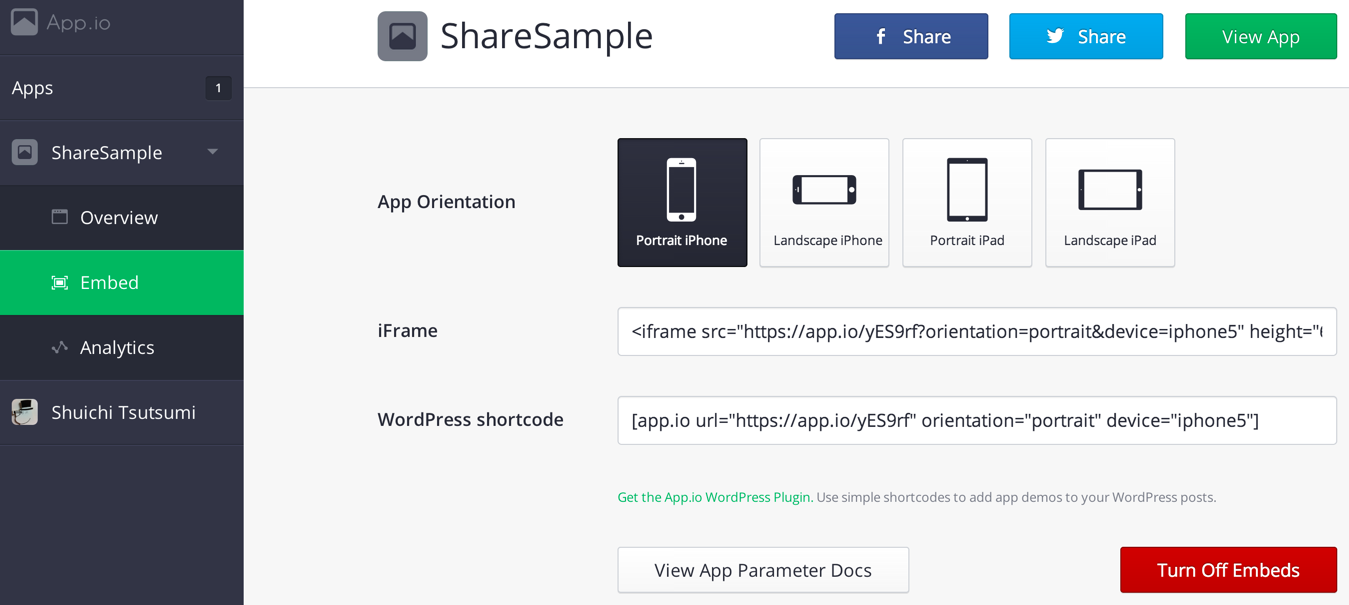
アプリの向きも選択できます。
ちなみにこんなコード。
<iframe src="https://app.io/XXXX?orientation=portrait&device=iphone5" height="607px" width="291px" frameborder="0" allowtransparency="true" scrolling="no"></iframe>
しくみ(憶測)
実際に試してみて、
- アップするファイル(パッケージ)は .app だけ
- ブラウザに表示される初期画面はアプリ固有のものではなく、タップするとロードが始まり、アプリが起動する
- 画質が低い
といった挙動を鑑みるに、 .app を app.io のサーバ側にあるiOSシミュレータ上で動作させ、画面の情報を一定フレームレートでブラウザ側に送る というしくみになっていると思われます。
弱点
使ってみて気付いた中で最大の弱点は、
『設定』アプリにアクセスできない
という点です。ホームボタンを押すとアプリが終了するだけで、ホーム画面等にはアクセスできません。
そんなわけで、Social.framework, Accounts.framework を使用して Facebook や Twitter と連携するアプリ等、『設定』での設定が前提となるアプリには不向きです。
無料でできること
無料ユーザーは、登録アプリは1つだけ、5000Play/月、シェアと埋め込みが可能です。
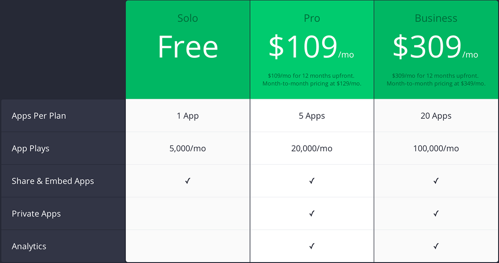
ちゃんと売りたいアプリのデモとして考えると、1ヶ月に5000回しかplayしてもらえないのは少ないような、でもPVじゃなくて動画の再生回数とかの水準で考えると(※)まずはこれぐらいでも良さそうな、微妙なラインですが、とにかく試すだけなら無料で十分かと思います。
(※)埋め込んだページを表示しただけではアプリの起動は開始されないので、PV = play回数ではない
Xcode プラグイン
app.io は Xcode のプラグインも提供しています。
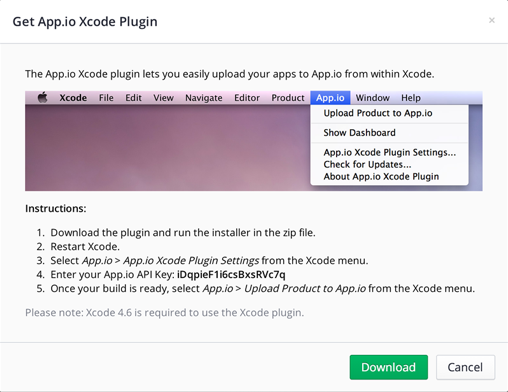
.app をアップするだけ、という使い方があまりにも簡単だったのでプラグインの方は試してないのですが、 上記画像から、Xcode に app.io にアップロードするメニューが加わる、というもののようです。
サービスを使いやすくするための補助ツールとしてオフィシャルに Xcode プラグインを提供する というのはあまり他サービスで見たことがなかったのでおもしろいと思いました。
アプリにパラメータを渡す
生成したアプリのURLにパラメータを渡すことで、 ローカライズ 、 位置情報の指定 、 NSUserDefaults に値を渡す 、といったことも可能です。
ローカライズ
The
languageparameter lets you specify a ISO-639-1 language code for your app, if it has been localized. Defaults toen. For more information on language codes and what they correspond to, please see this Wikipedia entry.
Options:
en,fr,de,ja,nl,it,es,pt,pt-PT,da,fi,nb,sv,ko,zh-Hans,zh-Hant,ru,pl,tr,uk,ar,hr,cs,el,he,ro,sk,th,id,ms,en-GB,ca,hu,vi
Example Usage:
https://app.io/example?language=ja
位置情報の指定
The
locationparameter lets you specify the latitude and longitude provided to the app for geolocation purposes. Specify latitude and longitude in decimal format as a comma-separated string. Defaults to37.7859,-122.406509.
Example Usage:
https://app.io/example?location=37.82,144.9832
NSUserDefaults に値を渡す
The
paramsparameter lets you specify a JSON dictionary of key/value information to be provided to the app in the form of user defaults. These values will be loaded intoNSUserDefaultson app launch and will be available for use by calling[[NSUserDefaults standardUserDefaults] objectForKey:key]in your app. This is particularly useful for tracking App.io sessions with analytics libraries, or automatically logging in users and loading content. For more information onNSUserDefaults, see the documentation.
Important: This parameter must be specified as a URI-encoded JSON string. This is commonly done using the JavaScript
encodeURIComponentfunction. This JSFiddle can help you format your JSON correctly.
Options: A URI-encoded JSON dictionary.
Example Usage:
https://app.io/example?params=%7B"foo"%3A"bar"%7D