MongoDBしか信じない。百歩譲ってJavaScriptは許そう。
そんなあなたにこの記事を。
MongoDB Advent Calendar 2013 第1日目の投稿です。
このテーマにいたる思考プロセス
-
人手不足なMongoDB Advent Calendarを埋めるためにも連載ものっぽくアプリを作っていくか。
-
そういえば、あまり知られてなさそうなMongoDBのREST API機能を使ってみようかな。こんな時くらいしか使い道ないし。
-
旅してる途中だし、MongoDBのGeo Index機能を使ってみる。こちらはけっこう使われている模様。
-
Backbone.jsを使いたかった。
-
TODOアプリはいっぱいあるから位置情報使ってみる。
こんなアプリ作る
-
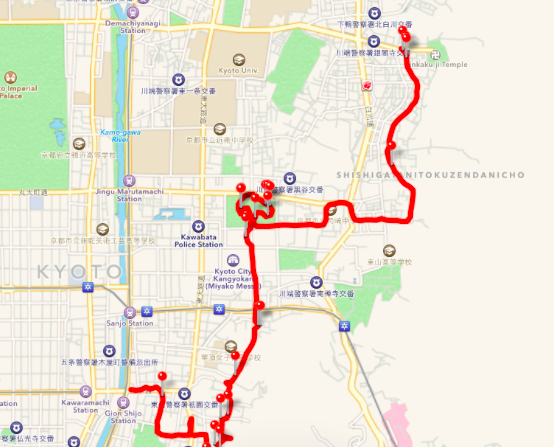
旅を振り返って一人でニヤニヤするのが目的。
-
ブラウザでアクセスしたら位置情報とって記録するやつ。なんかHTML5になってGeolocation APIってのが使えるらしいじゃないですか。
-
Google Mapsにピンとか立つんじゃないかな、たぶん。
-
ピンは線でつなぐと通った道のりがわかってニヤニヤしやすいのでは。(仮説)
-
合計距離を出す。
-
Railsとかnode.jsとかは出てこないよ。だって難しいもん。
-
ブラウザと、MongoDBと、ほんの少しのJavaScriptさえあれば大丈夫。
※イメージです。
ぜんぜんAdvent Calendarっぽくないけど気にしません。
この記事ではMongoDB REST APIを使って、ブラウザからデータをinsert、findすることをお伝えするのがやっとです。あまりお役には立てずに申し訳ない。ただ、一つだけ言えるのは、このアプリはローカルでしか動きません。だって、Webサーバー使ってないし。
環境
-
mongodb 2.4.8
-
Mac OSX 10.9
3分でできるMongoDBのインストール
curl -L -O http://fastdl.mongodb.org/osx/mongodb-osx-x86_64-2.4.8.tgz
tar zxfv mongodb-osx-x86_64-2.4.8.tgz
cd mongodb-osx-x86_64-2.4.8
mkdir data
mkdir log
./bin/mongod --dbpath data --logpath log/mongod.log --rest
3分もいらなかった。
起動時のオプションの解説
--dbpath データベースファイルを作成するディレクトリへのパス。つけなきゃ/data/db/を探して、ディレクトリが無かったらおこられる。
--logpath ログファイルへのパス。つけないと標準出力に出る。
--rest restインターフェース、スイッチオン!ポート28017(デフォルト設定時)でちょっとした管理画面が見れるようになる。
コンフィグオプションについてまとめたスライドです。
http://www.slideshare.net/syokenz/mongodb-config
データベースを作る
mongo
> use adventcalendar
> db.appinfo.insert({"app_name":"MongoDB Advent Calendar 2013"});
> db.appinfo.find().pretty();
{
	"_id" : ObjectId("529a41472f3851f48958c667"),
	"app_name" : "MongoDB Advent Calendar 2013"
}
ブラウザからアクセスしてみよー
http://localhost:28017 にアクセスして、こんな画面が出たら次に進んでください。出なくても次に進んでよいです。

まずは黒い画面でREST APIを試してみる
find
curl 'http://localhost:28017/adventcalendar/appinfo/'
{
  "offset" : 0,
  "rows": [
    { "_id" : { "$oid" : "529a41472f3851f48958c667" }, "app_name" : "MongoDB Advent Calendar 2013" }
  ],

  "total_rows" : 1 ,
  "query" : {} ,
  "millis" : 0
}
insert
// insert は-dオプションでPOSTする
curl -d '{"app_version": 0.1}' 'http://localhost:28017/adventcalendar/appinfo/'
{ "ok" : true }

// find
curl 'http://localhost:28017/adventcalendar/appinfo/'
{
  "offset" : 0,
  "rows": [
    { "_id" : { "$oid" : "529a41472f3851f48958c667" }, "app_name" : "MongoDB Advent Calendar 2013" } ,
    { "_id" : { "$oid" : "529a4453f09d7587cd01b840" }, "app_version" : 0.1 }
  ],

  "total_rows" : 2 ,
  "query" : {} ,
  "millis" : 0
}
RESTでfindとinsertができることを確認できた!
ブラウザからやってみる
こんなコードを書いてみました。
<!DOCTYPE html>
<html lang="ja">
<head>
<meta charset="utf-8">
<title>MongoDB Advent Calendar 2013</title>
<link rel="stylesheet" href="style.css">
<script src="http://ajax.googleapis.com/ajax/libs/jquery/1.8/jquery.min.js"></script>
<script type="text/javascript">
<!--
var find = function(option){
  $.ajax({
    url: 'http://localhost:28017/adventcalendar/appinfo/',
    type:"get",
    dataType: 'json',
    success : function(data) {
      if (option === "last") {
        for (var i=0; i < data.rows.length; i++){
          if ( i == data.rows.length -1 ) {
            $('#document').append('<li><p>' + data.rows[i].destination + '</p></li>');
          }
        }
      } else {
        for (var i=0; i < data.rows.length; i++){
          if ( typeof data.rows[i].destination !== "undefined" ) {
            $('#document').append('<li><p>' + data.rows[i].destination + '</p></li>');
          }
        }
      }
    },
    error : function(){
      alert('error');
    }
  });
};
find("all");

//insert
$(function(){
  $('#post').click(function(){
    $.ajax({
      type:"post",
      url:"http://localhost:28017/adventcalendar/appinfo/",
      data: JSON.stringify({"destination": $("#destination").val()}),
      datatype : 'json',
      success : function(data) {
        console.log('post success');
        console.log(data);
        find("last");
      },
      error : function(){
        console.log('error');
      }
    });
  });
});


// -->
</script>

</head>
<body>
<header>
  <h1>MongoDB Advent Calendar 2013</h1>
</header>

旅行した場所を登録してね : <input type="text" id="destination" >
<button id="post">post</button>

<ul>
  <div id="document"></div>
</ul>
</body>
</html>
MongoDBが--restオプション付きで動いていて、adventcalendarっていうデータベースがあって、上のコードをapp.htmlとかで保存してブラウザで開けば動くよ!
こんな画面
MongoDBとブラウザで旅の記録をつける第一歩
CSSも書いておきます。htmlと同じフォルダに入れましょう。
body {
  margin: 0;
  padding: 0;
}

h1, h2, h3, h4, h5, h6, p, ul, ol, li, dl, dt, dd {
  margin: 0;
  padding: 0;
}

header {
  background: #333;
  color: #FFF;
}

header h1 {
  font-size: 28px;
  padding: 10px;
  text-align: center;
}
まとめ
-
MongoDBのREST APIを使ってみた。
-
MongoDBとブラウザがあれば動くよ!
-
たぶん、この記事の次回はGeo Indexとか使っていくんじゃないでしょうか。
-
2日目は@naru0gaさん、よろしくお願いします!
以上、MongoDB Advent Calendar 第1日目でした。続きます。