概要
Sequel Ace便利ですよね。
今回はSequel AceでMySQLのテーブルにCSVファイルをインポートする手順を備忘録として記録します。
なお、この記事は下記を前提にしているのでご了承ください。
- MySQLとSequel Aceが接続済みであること
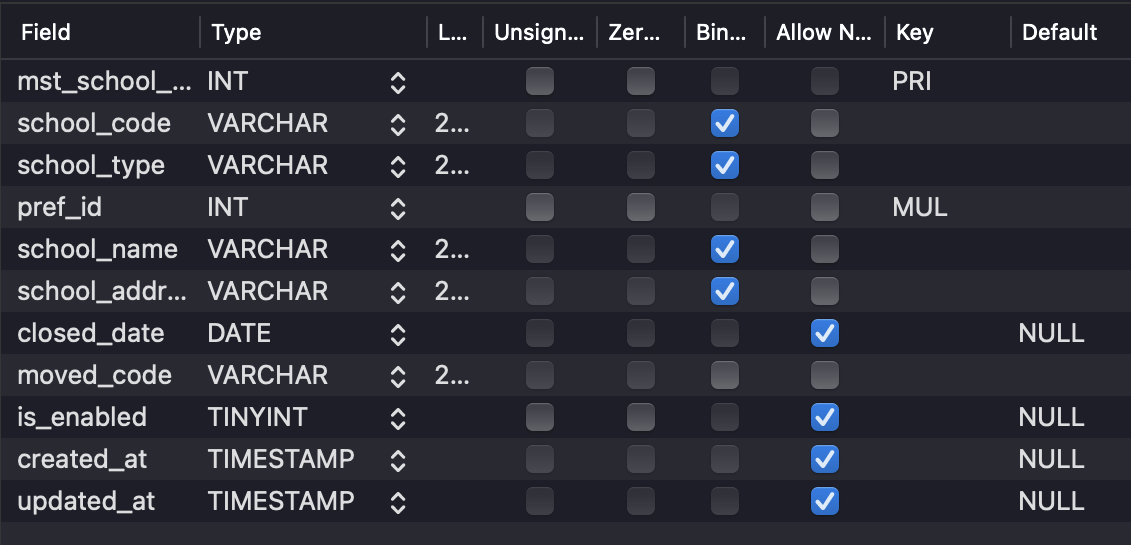
- インポート対象のテーブルが作成済みであること
環境
- MySQL 5.7 (Amazon Aurora)
- Sequel Ace 3.52
- Mac OS Monterey 12.5
手順
1. CSVファイルの準備
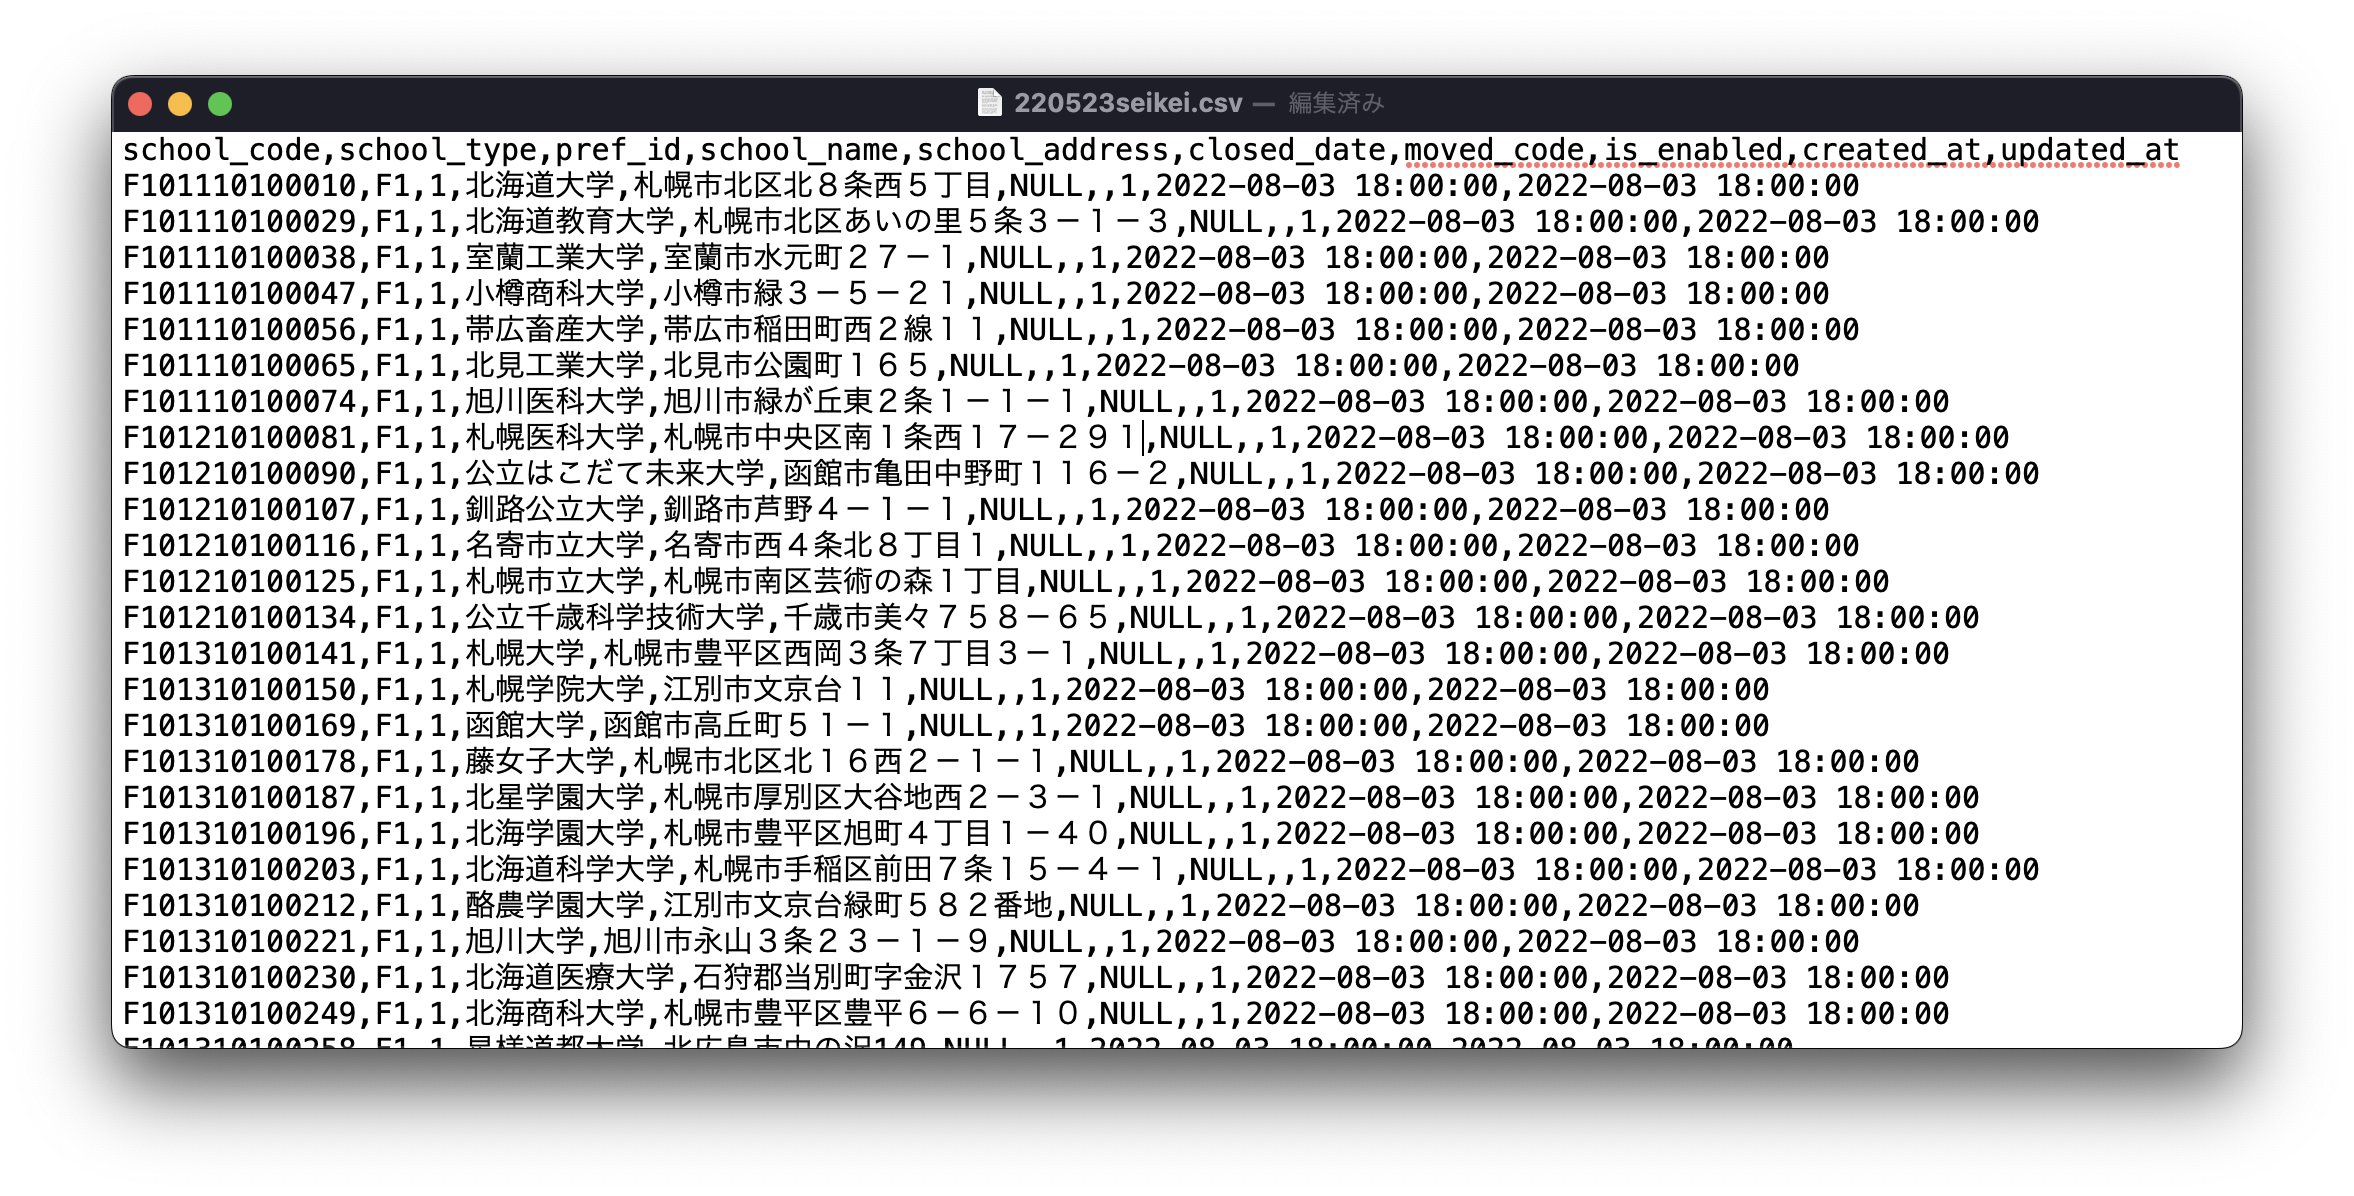
今回は文部科学省の提供する学校名CSVを使用してみます。
先頭の行はカラム名になるので、器となるテーブルのフィールド名(カラム名)と一致させておきます。
また、フィールド名がカンマ刻みであることを確認しておきます。
idはオートインクリメントに設定されているためCSVファイル上では準備不要です。
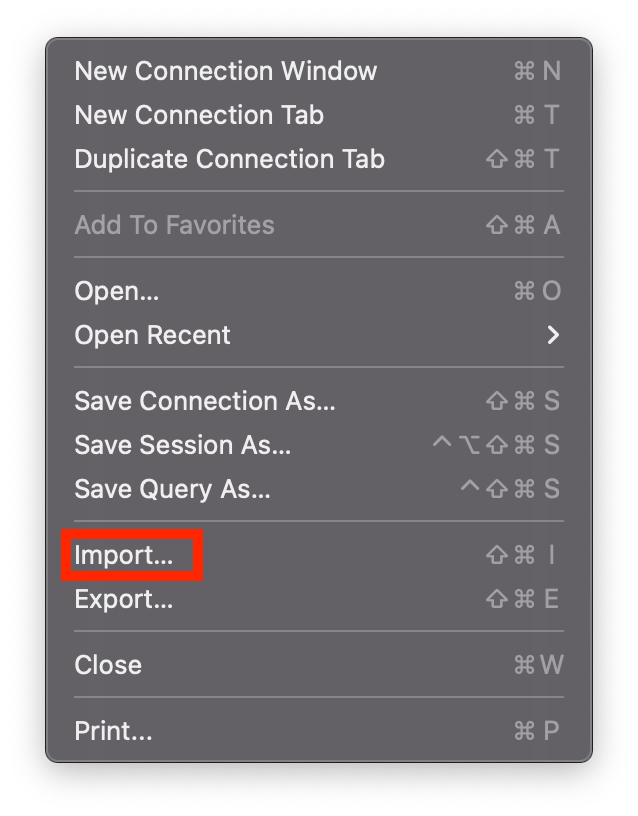
2. Sequel Aceを起動し、Importを選択する
「Sequel Ace」を起動して対象テーブルを選択後、「File」→「Import」の操作でImport画面を呼び出します。

3. ローカル上のCSVファイルを選択する
CSVファイル選択後、「開く」をクリックします。
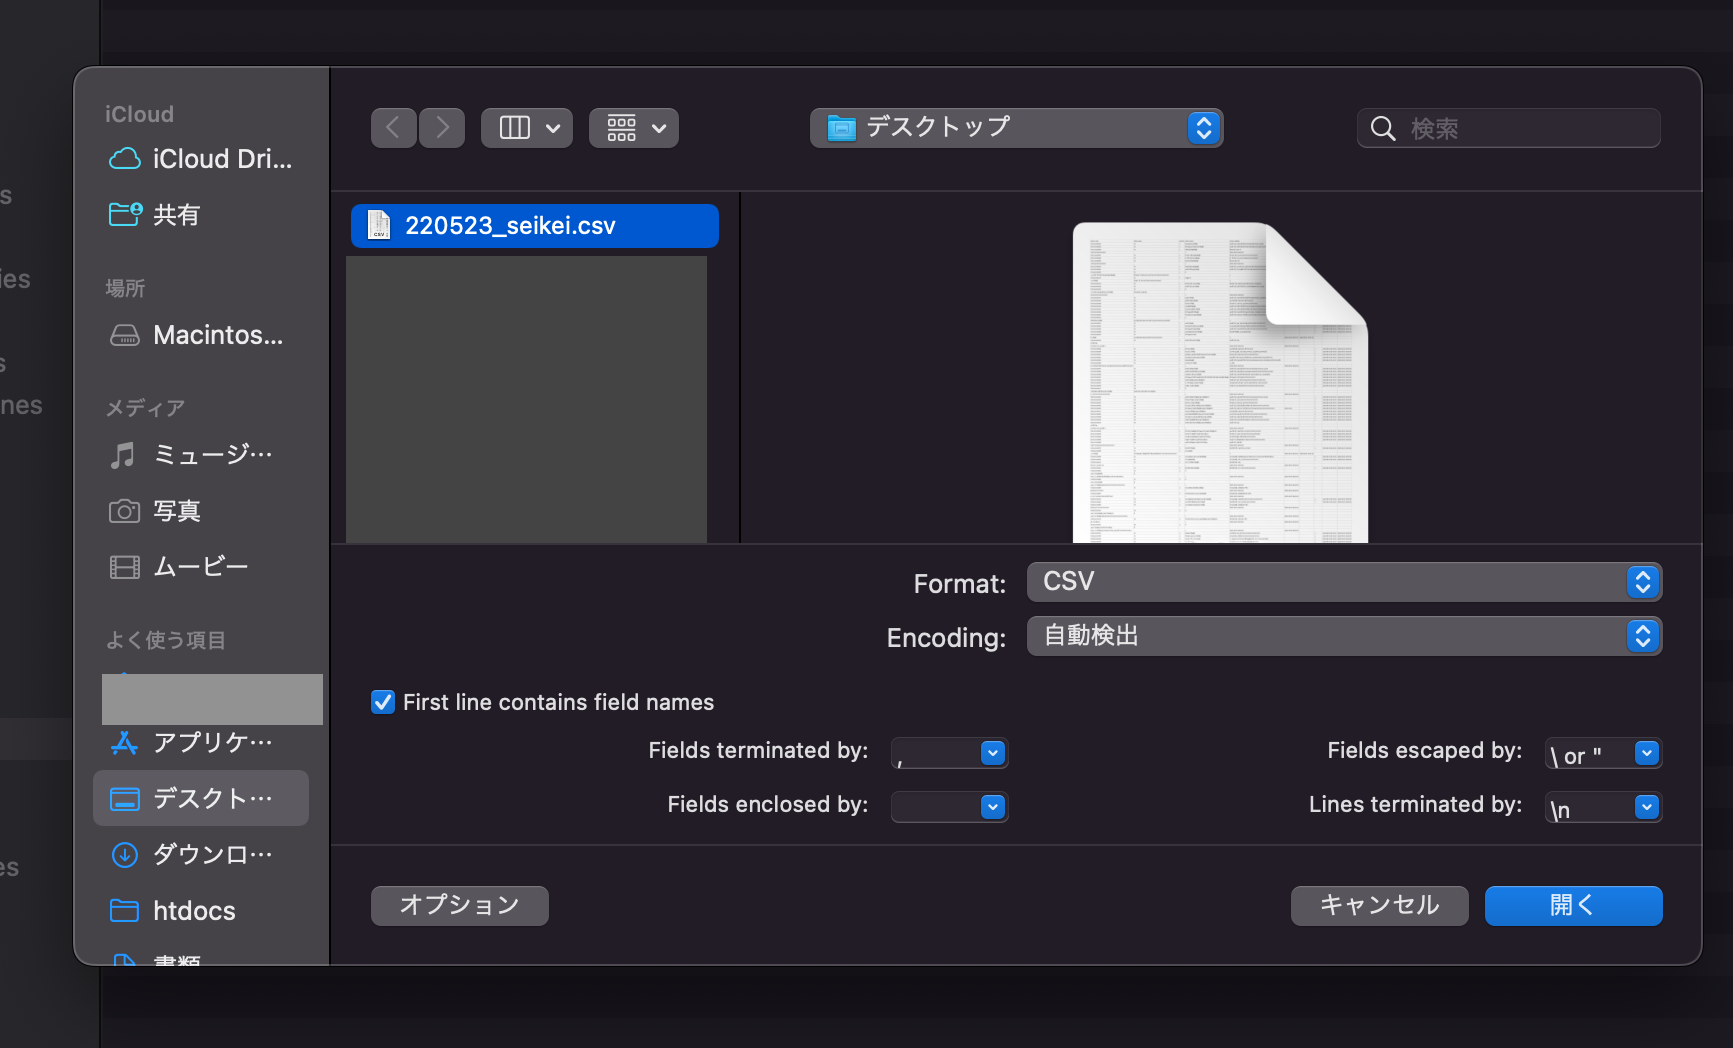
CSV選択時、CSVのフォーマットに併せてオプションで設定が変更できます。
First line contains field names
-> CSVの先頭行がフィールド名(カラム名)の場合はチェック

Fields terminated by:
-> フィールド行の最終文字を指定

Fields enclosed by:
-> フィールド名が「" "」のように囲まれている場合は指定

Lines terminated by:
-> 行末の文字を指定
インポートされる実データとフィールド名の対応を確認し、「Import」をクリック
最後にCSVファイルの実データとテーブルフィールド名のマッピングが表示されます。
問題なければ右下の「Import」をクリックします。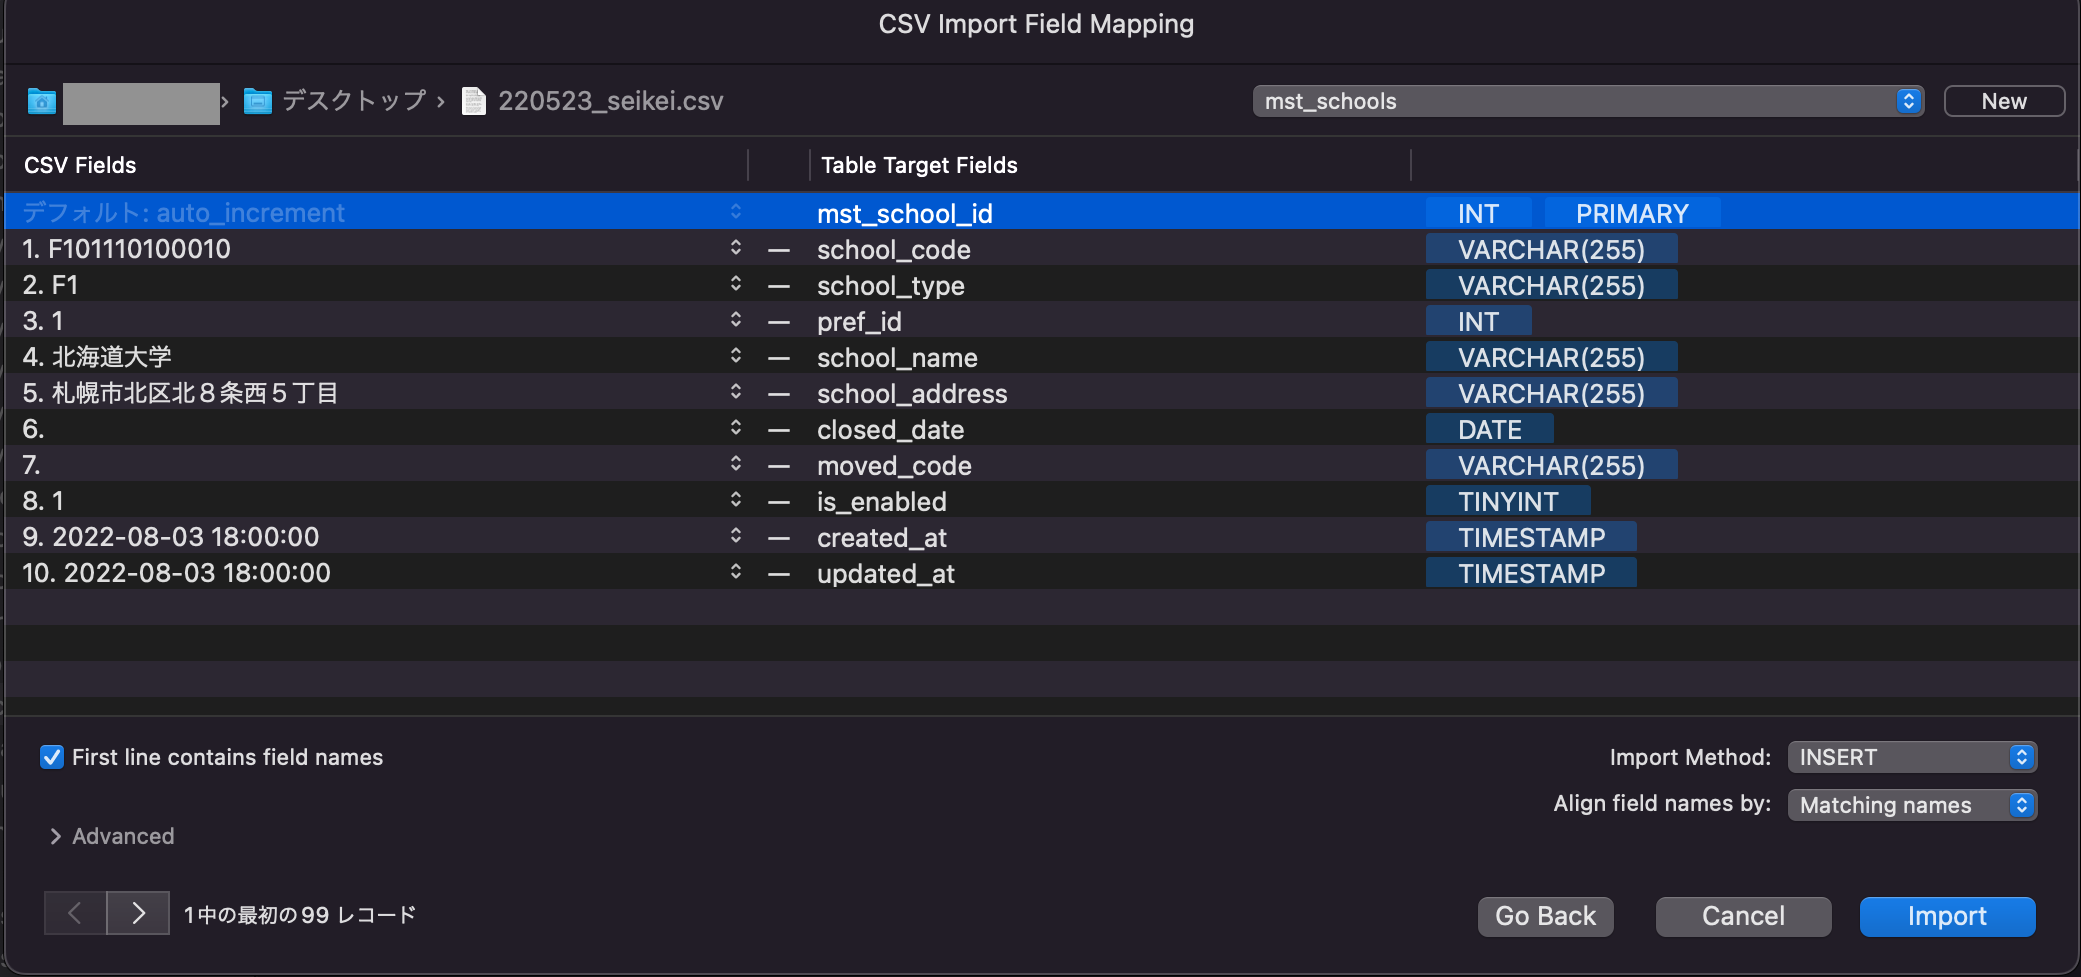
エラーが発生しなければ作業終了です。お疲れさまでした!
