目次
1.はじめに
2.準備
3.検索
4.集計
5.後片付け
6.終わりに
1. はじめに
この記事は 2020 年の RevComm アドベントカレンダー 13 日目の記事です。 12 日目は tomohiro86 さんの「Apollo Clientでwebsocket通信してみよう」でした。
株式会社RevCommは音声解析AI電話MiiTelの開発を行っています。
MiiTel では会話の全文文字起こしを提供しており、文字起こしした文章から単語の検索ができます。
この記事では、Python(elasticsearch_dsl)とElasticsearch(AWS)を使って検索と集計をする方法をご紹介します。
2. 準備
IAM ユーザーの作成
https://console.aws.amazon.com/iam/home#users
ユーザーを追加ボタンからAWS Elasticsearch Serviceを使えるユーザーを作成します。
アクセスキー ID、シークレットアクセスキー、ARNをコピーしておいてください。
Elasticsearch ドメインの作成
https://ap-northeast-1.console.aws.amazon.com/es/home
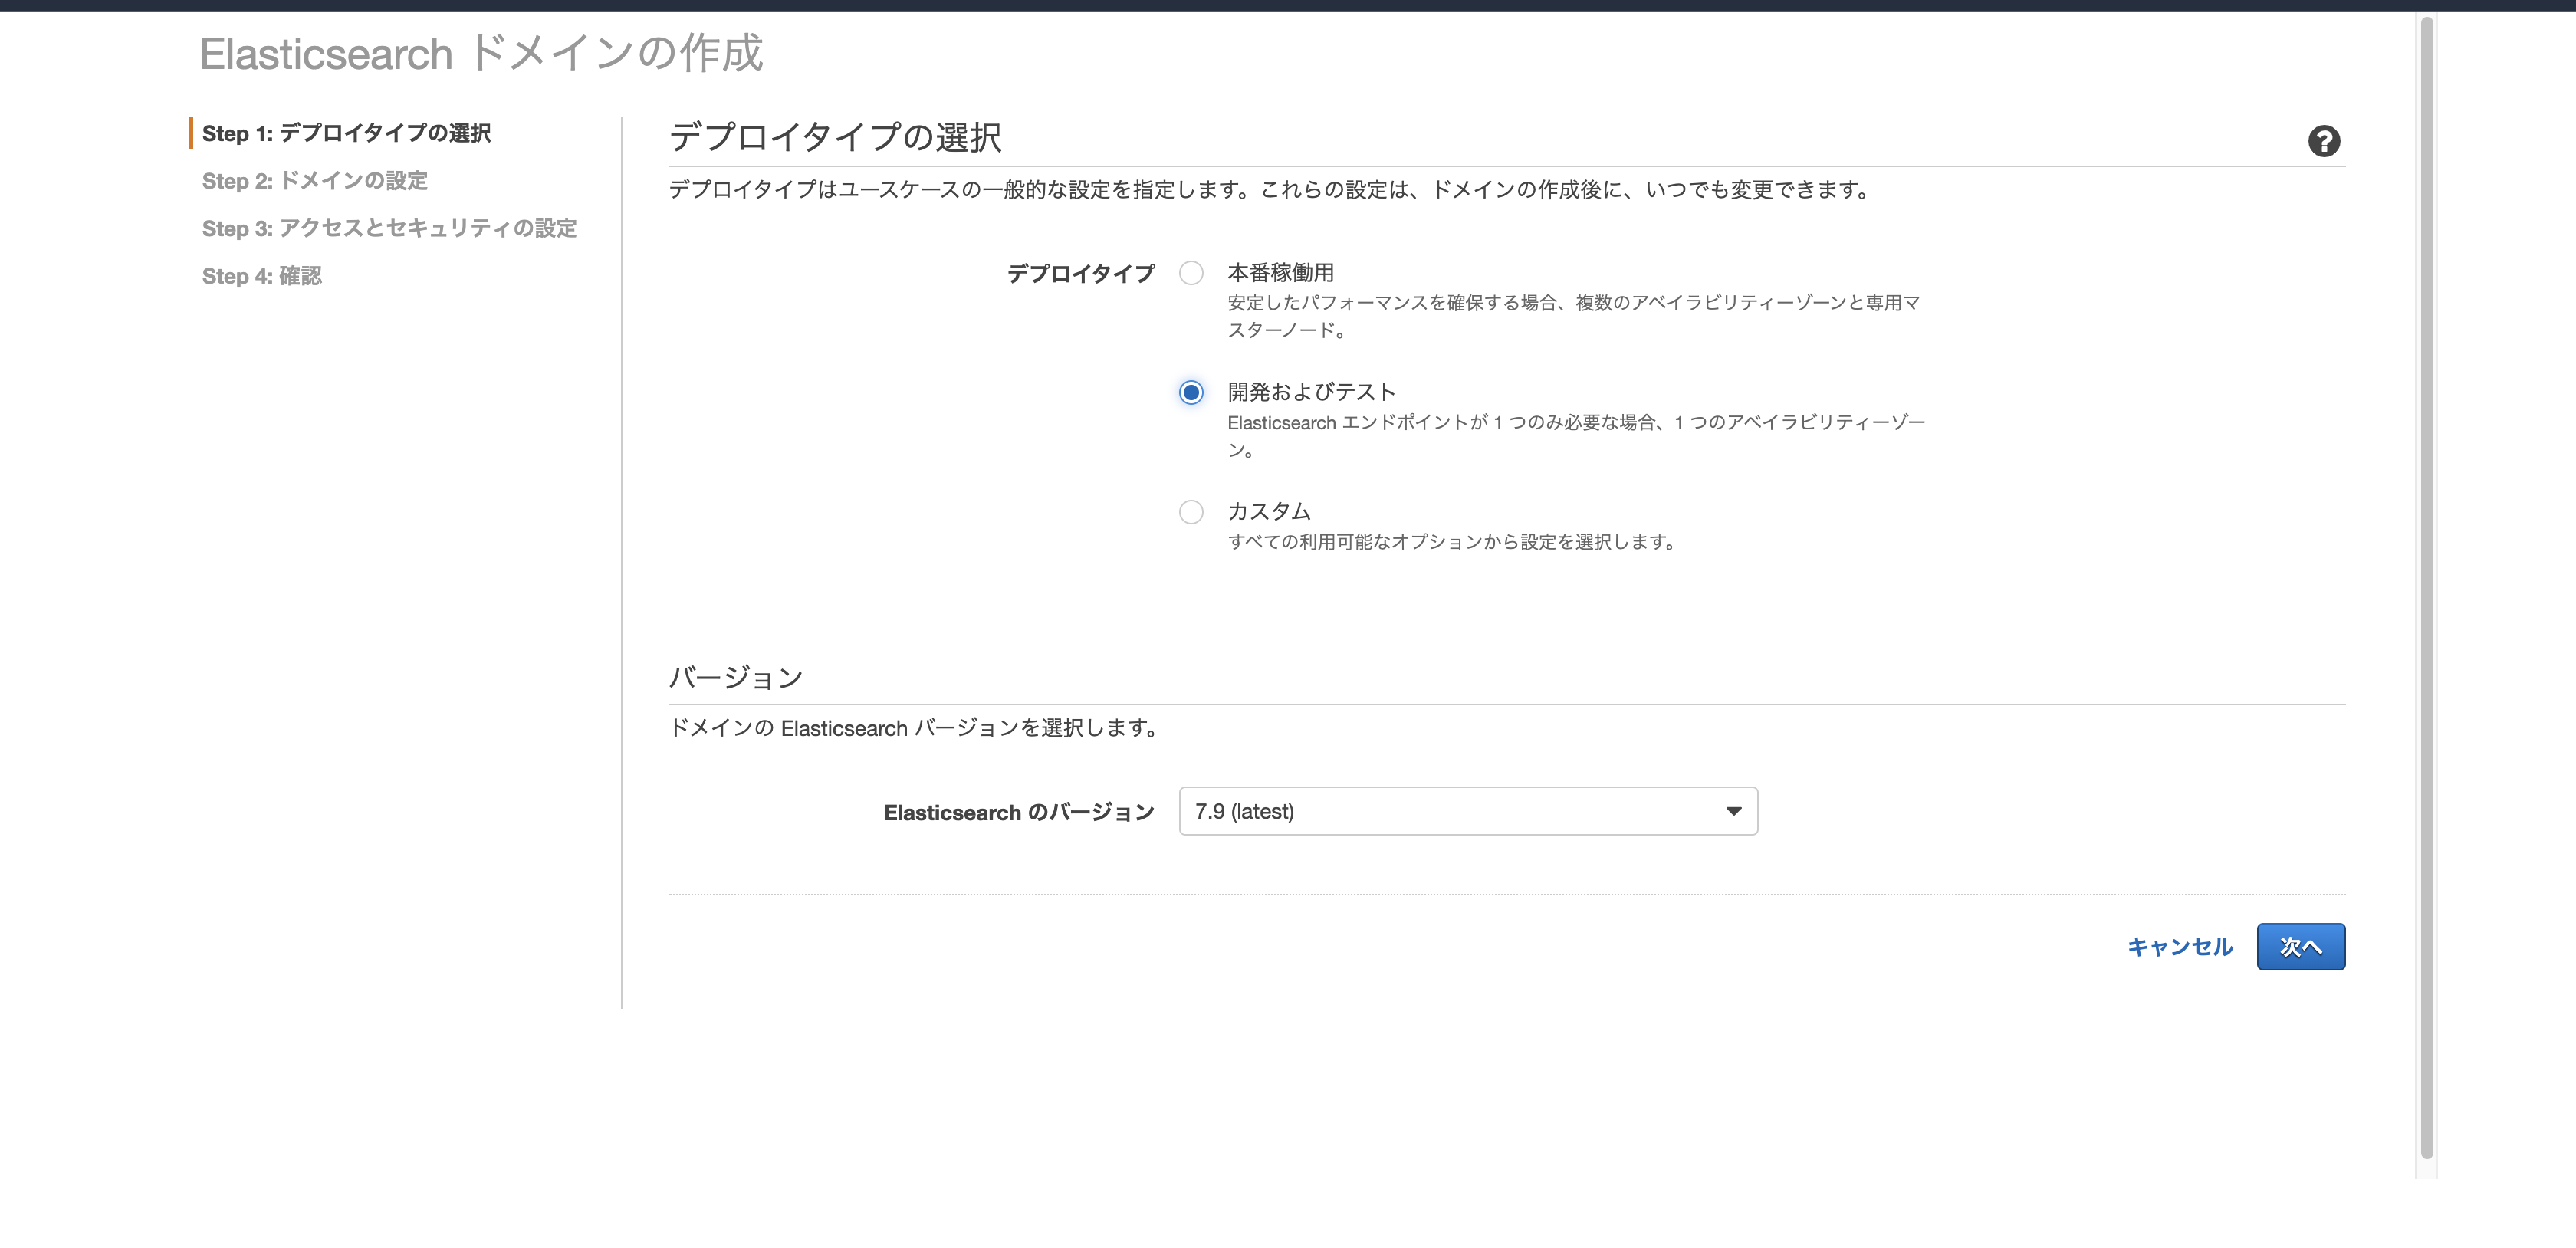
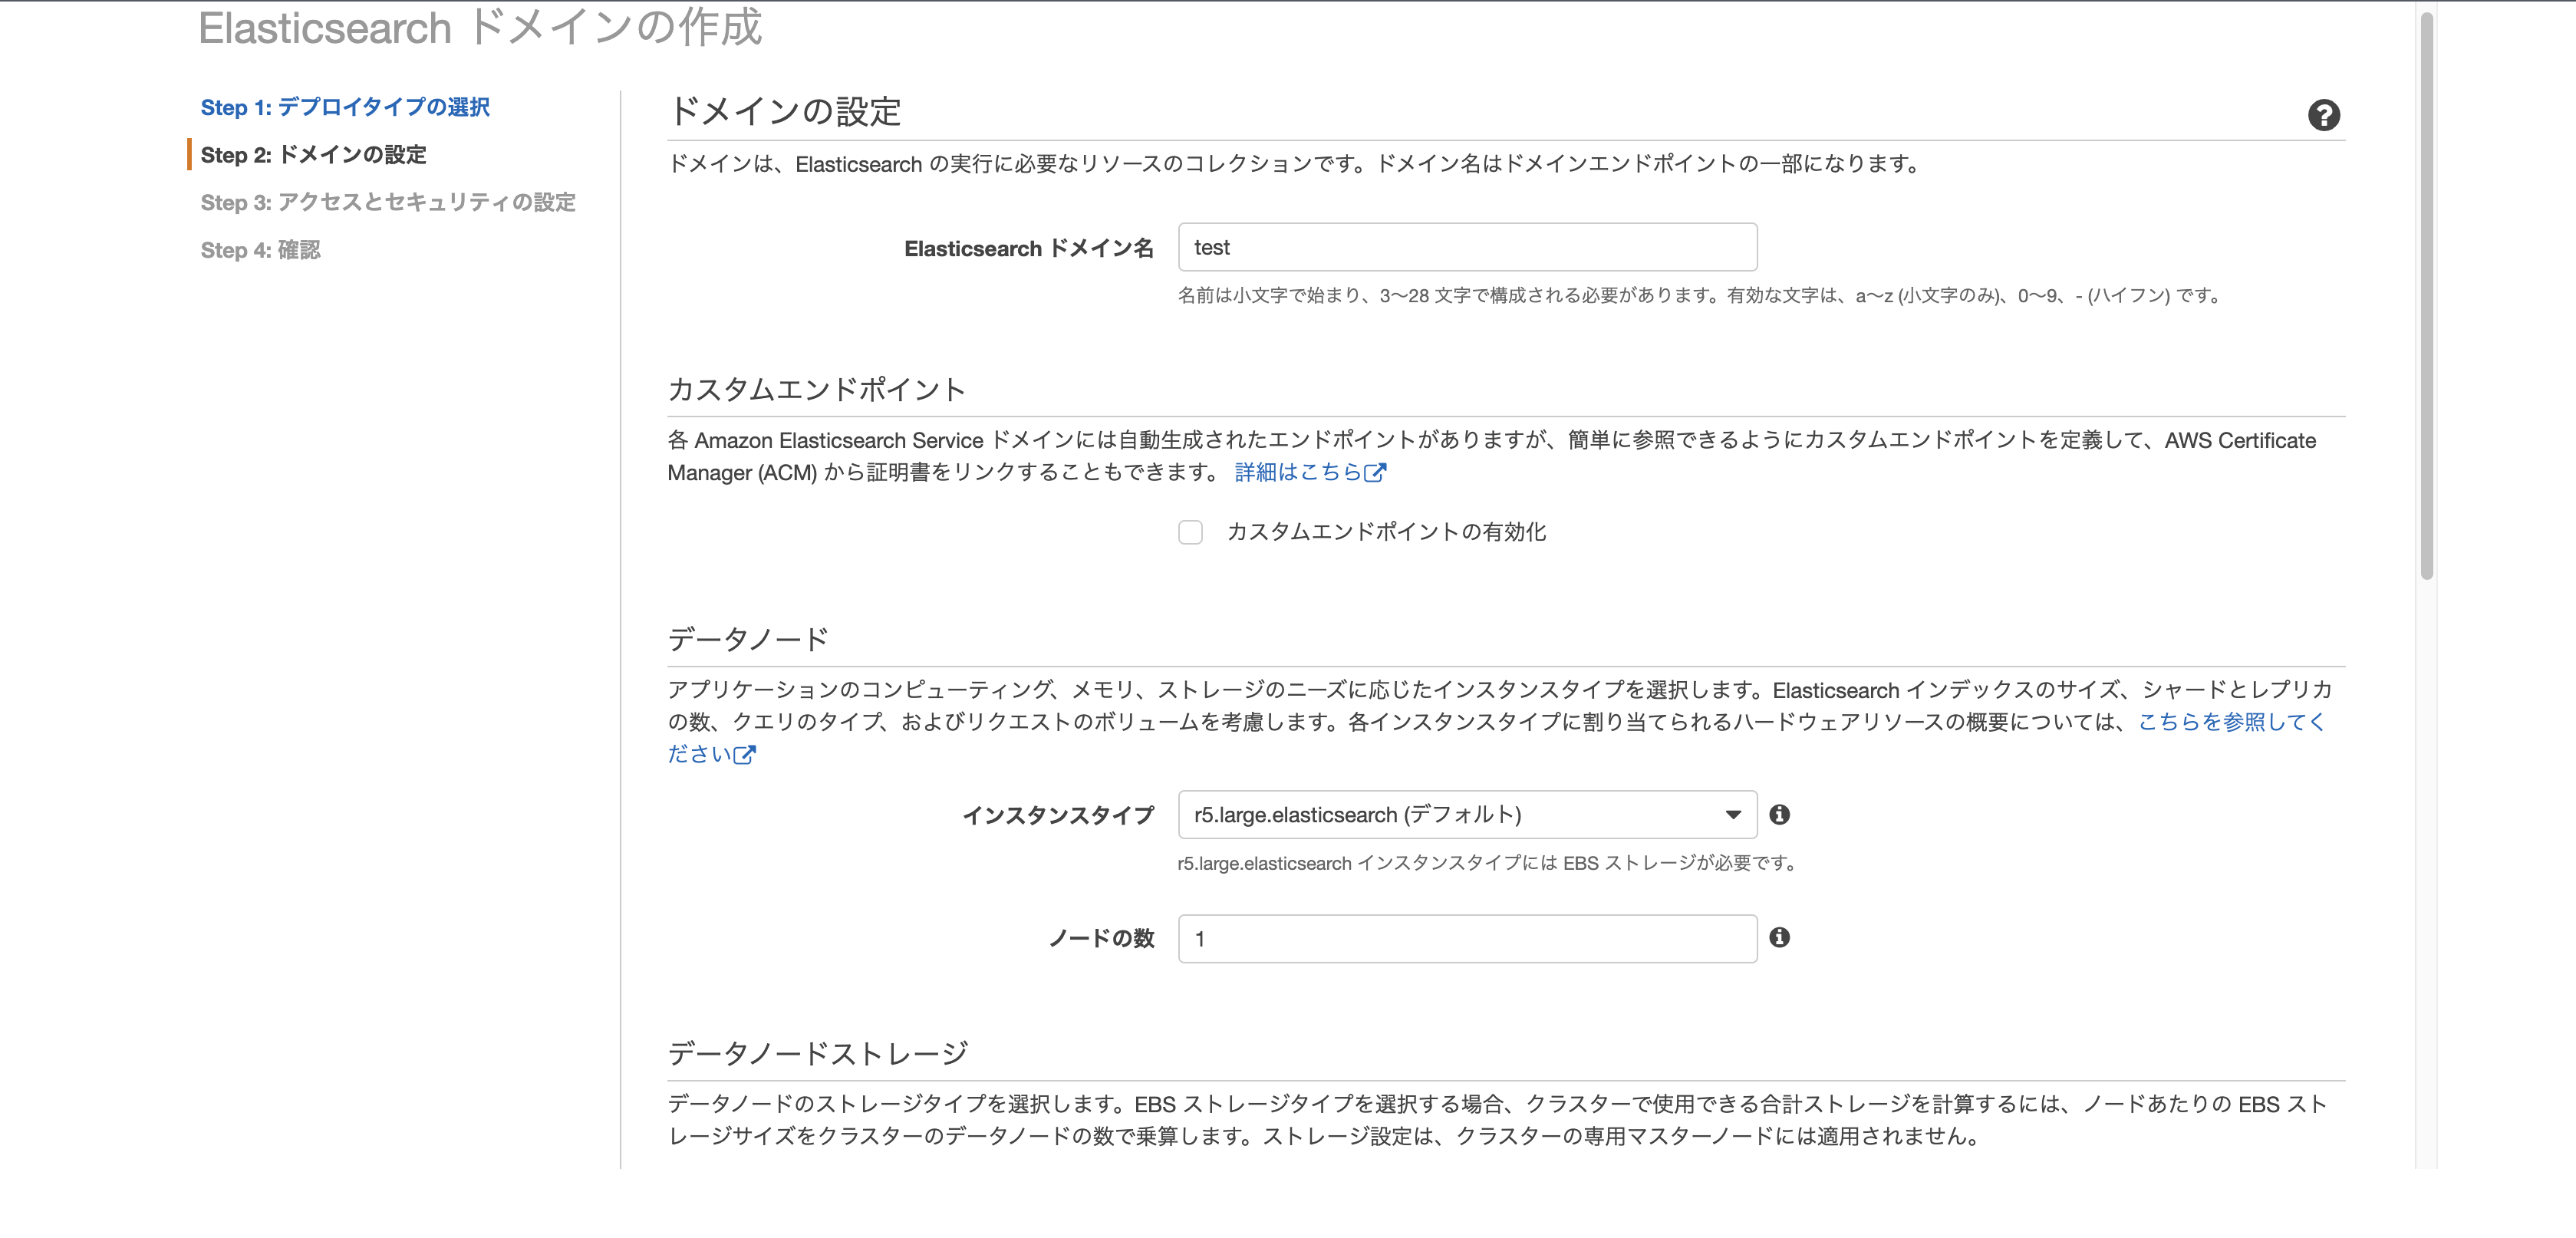
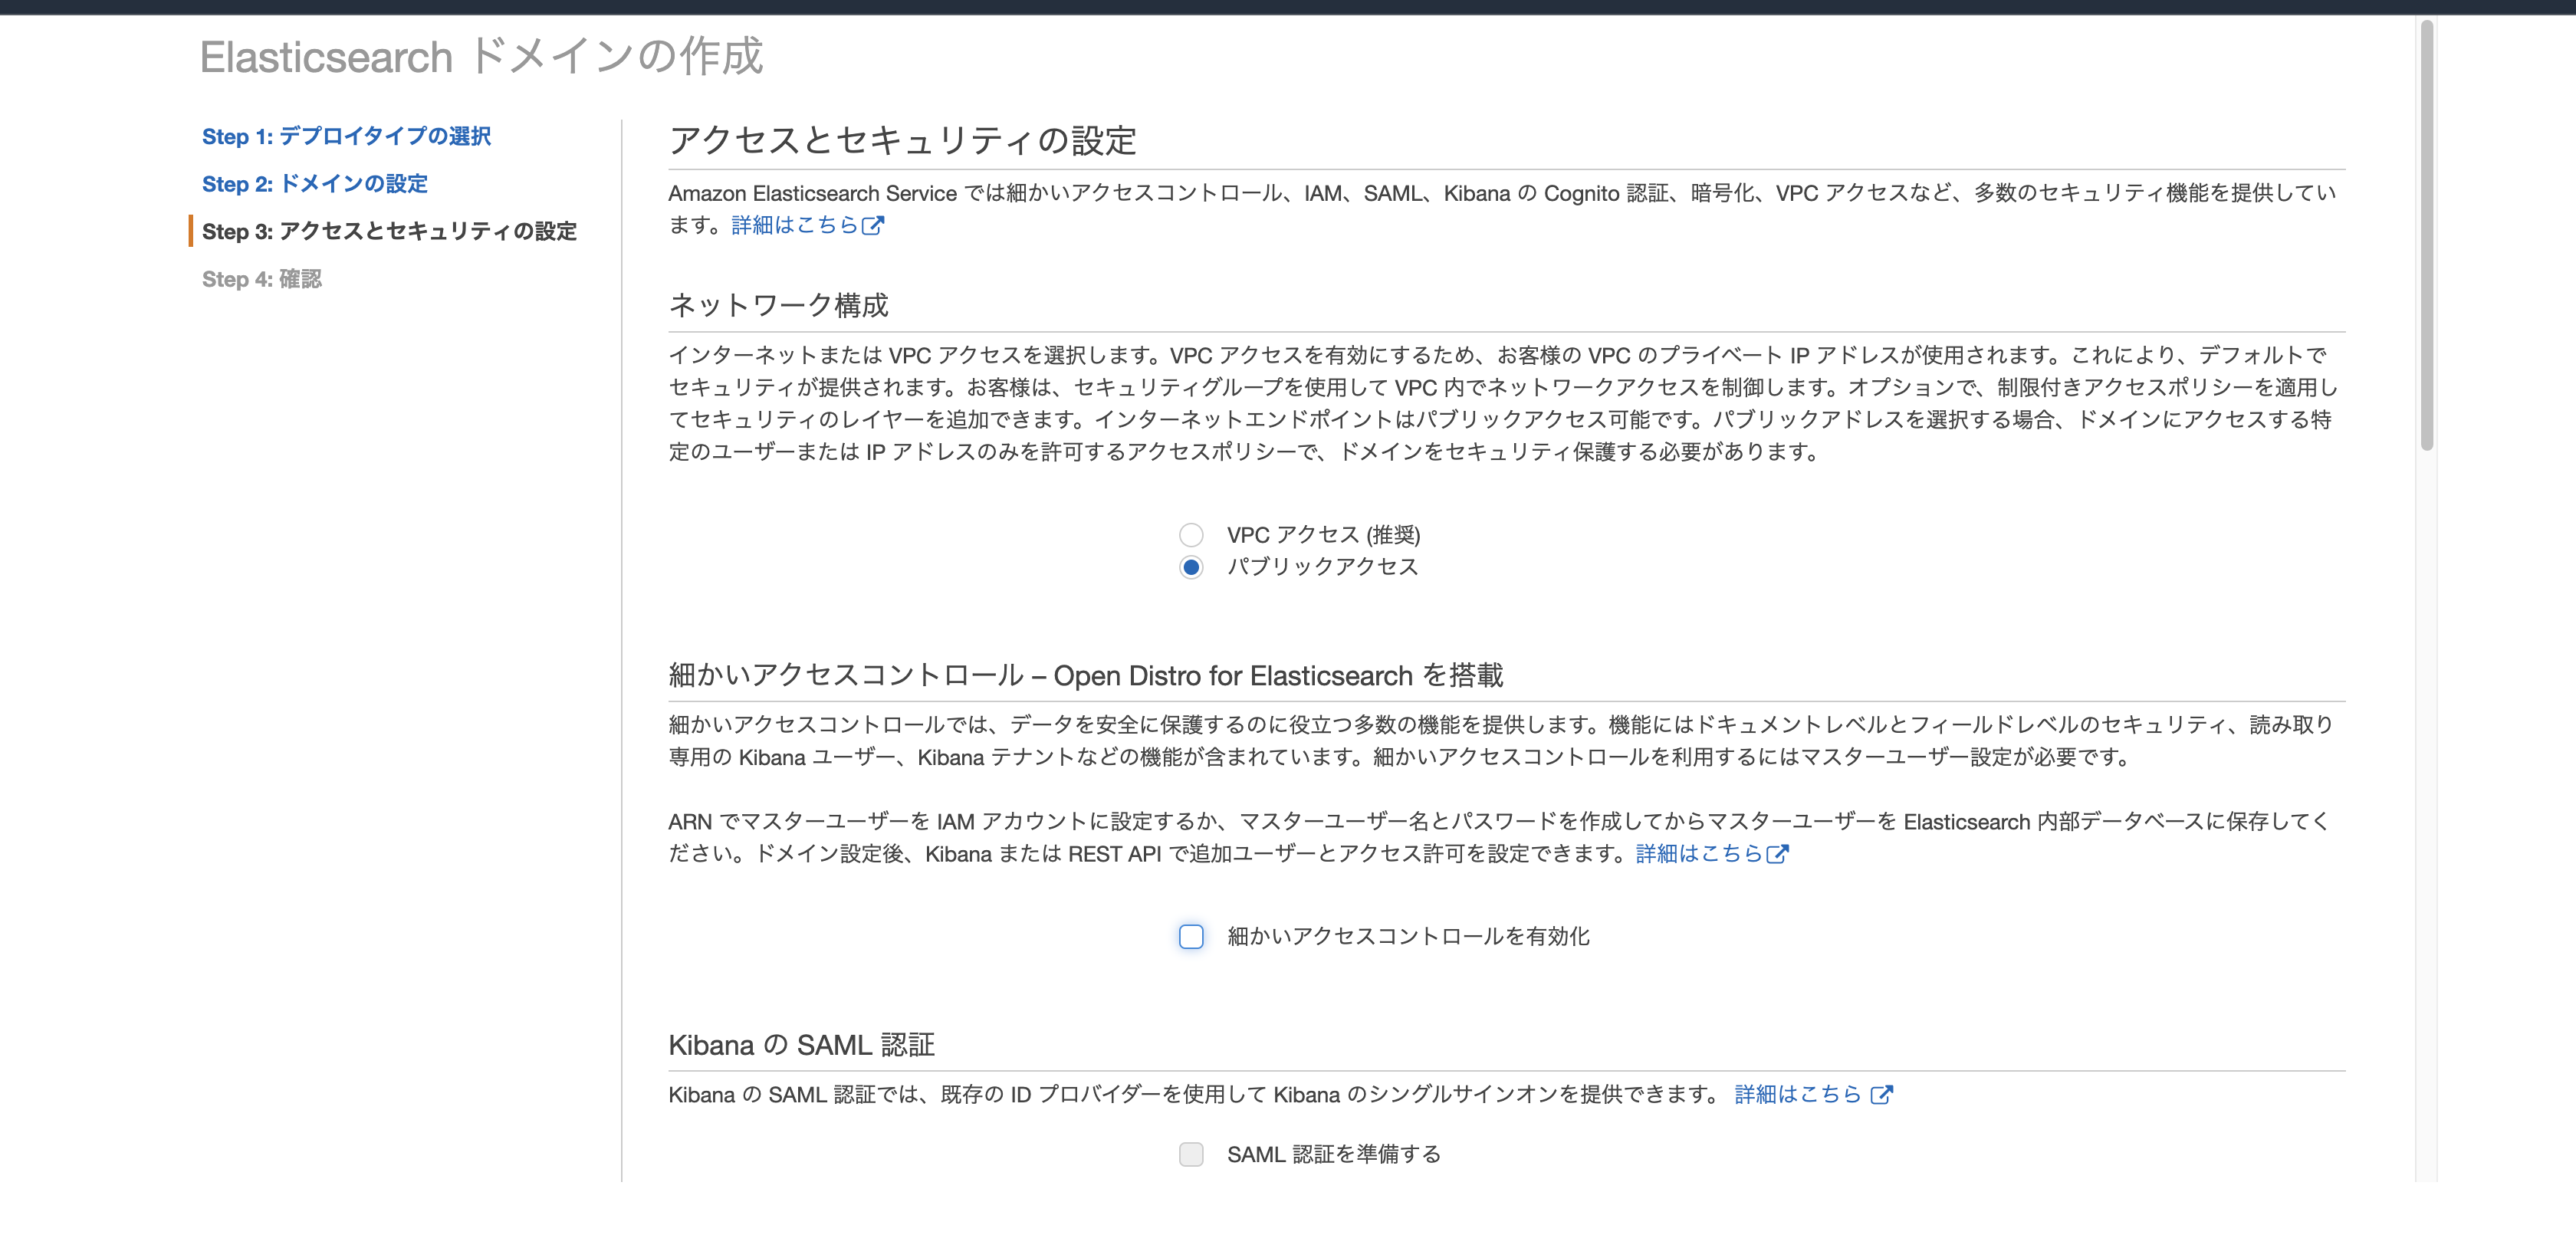
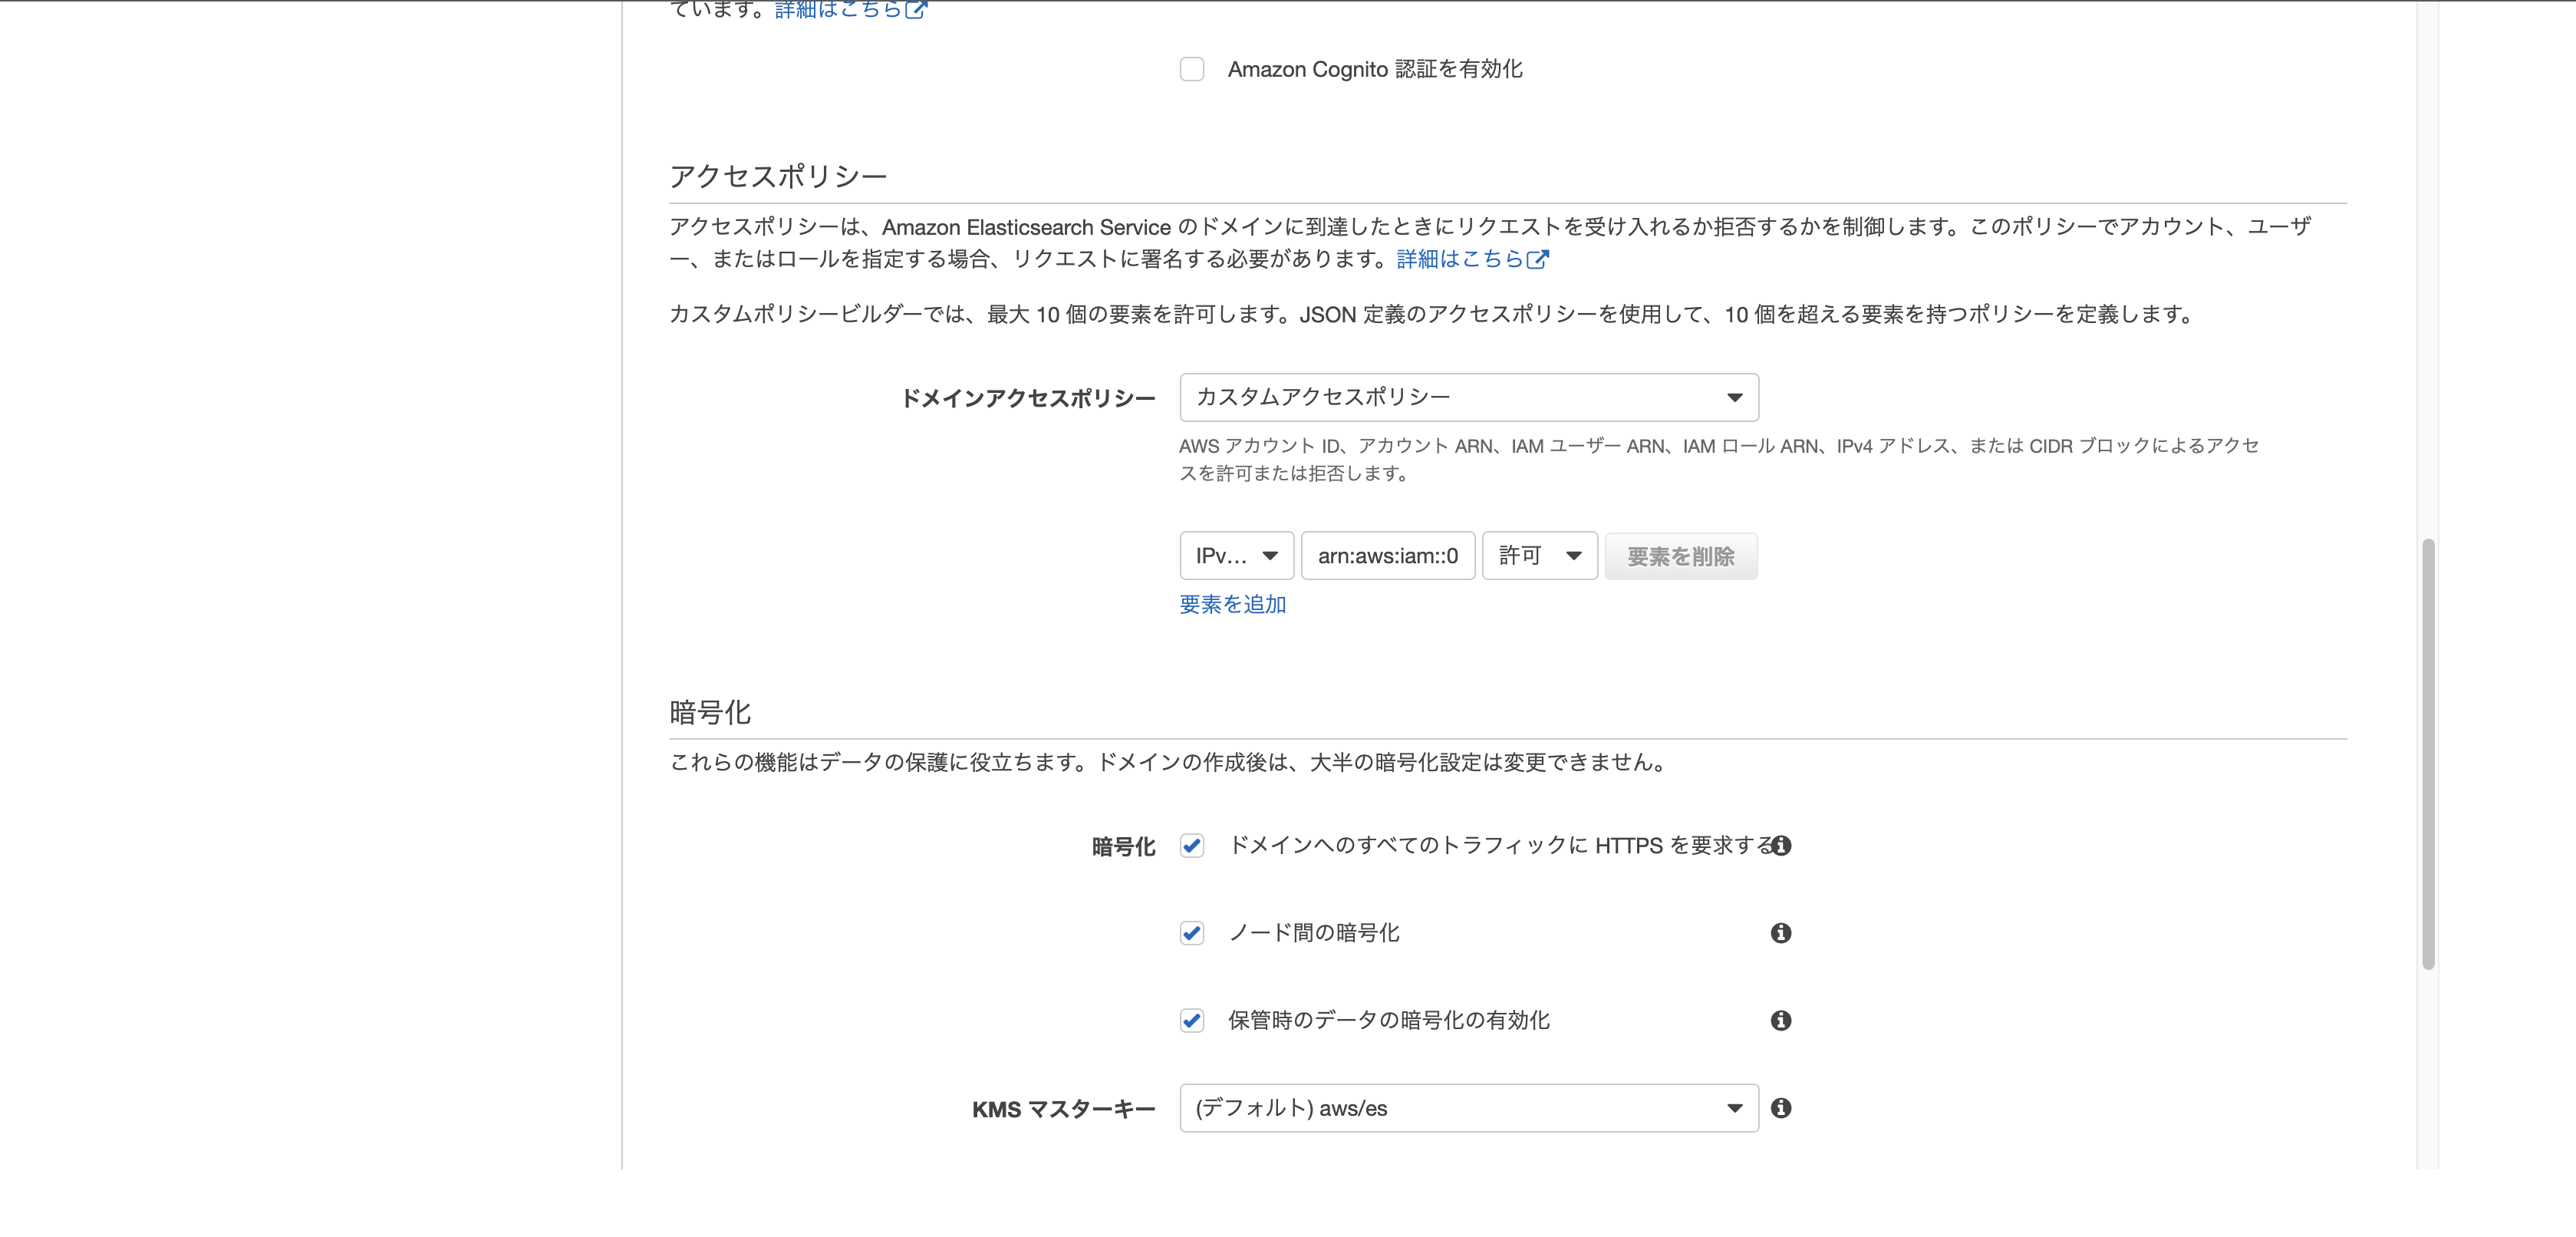
新しいドメインの作成ボタンから作成します。
- デプロイタイプは開発およびテスト

- Elasticsearch ドメイン名を適当につけます。

- ネットワーク構成は今回はパブリックアクセスにします。
そして、「細かいアクセスコントロールを有効化」のチェックを外し、
アクセスポリシーに先ほどコピーしておいたARNを貼り付けます。


- 内容を確認して確認ボタンを押したら作成が開始されます。
ドメインのステータスが「読み込み中...」から「アクティブ」に変わったら作成完了です。
少し時間がかかるのでの次に進みましょう。
データ用意
日本歴代興行収入ランキングのTOP10を用意しました。
2020年11月29日時点のデータです。(鬼滅の刃はどこまで伸びるのだろうか?)
出典: http://www.kogyotsushin.com/archives/alltime/
[
    {
        "title": "千と千尋の神隠し",
        "company": "東宝",
        "type": "animation",
        "year": 2011,
        "rank": 1,
        "income": 308.0
    },
    {
        "title": "劇場版「鬼滅の刃」無限列車編",
        "company": "東宝",
        "type": "animation",
        "year": 2020,
        "rank": 2,
        "income": 275.1
    },
    {
        "title": "タイタニック",
        "company": "FOX",
        "type": "live_action",
        "year": 1997,
        "rank": 3,
        "income": 262.0
    },
    {
        "title": "アナと雪の女王",
        "company": "ディズニー",
        "type": "animation",
        "year": 2014,
        "rank": 4,
        "income": 255.0
    },
    {
        "title": "君の名は。",
        "company": "東宝",
        "type": "animation",
        "year": 2016,
        "rank": 5,
        "income": 250.3
    },
    {
        "title": "ハリー・ポッターと賢者の石",
        "company": "ワーナー",
        "type": "live_action",
        "year": 2001,
        "rank": 6,
        "income": 203.0
    },
    {
        "title": "ハウルの動く城",
        "company": "東宝",
        "type": "animation",
        "year": 2004,
        "rank": 7,
        "income": 196.0
    },
    {
        "title": "もののけ姫",
        "company": "東宝",
        "type": "animation",
        "year": 1997,
        "rank": 8,
        "income": 193.0
    },
    {
        "title": "踊る大捜査線 THE MOVIE2 レインボーブリッジを封鎖せよ!",
        "company": "東宝",
        "type": "live_action",
        "year": 2003,
        "rank": 9,
        "income": 173.5
    },
    {
        "title": "ハリー・ポッターと秘密の部屋",
        "company": "ワーナー",
        "type": "live_action",
        "year": 2002,
        "rank": 10,
        "income": 173.0
    }
]
ライブラリのインストール
pip install elasticsearch elasticsearch_dsl requests_aws4auth
データ追加
準備したElasticsearchにPythonスクリプトでデータを追加していきましょう。
import json
from elasticsearch import Elasticsearch, RequestsHttpConnection, helpers
from requests_aws4auth import AWS4Auth

HOST = 'search-test-foobar.ap-northeast-1.es.amazonaws.com'
awsauth = AWS4Auth(
    'アクセスキー ID',
    'シークレットアクセスキー',
    'ap-northeast-1',
    'es'
)

es = Elasticsearch(
    hosts=[{'host': HOST, 'port': 443}],
    http_auth=awsauth,
    use_ssl=True,
    verify_certs=True,
    connection_class=RequestsHttpConnection
)

def generate():

    with open('movies.json', 'r') as f:
        movies = json.load(f)

    for movie in movies:
        yield {
            "_op_movie_type": "create",
            "_index": "movies",
            "_source": movie
        }

helpers.bulk(es, generate())
print(es.count(index="movies")["count"])
# 結果
# 10 もし10じゃなかったら少し時間を置いて試してみてください。
次にtextデータのfielddataをtrueにします。
これをしないとtextデータを集計の対象にしてくれません。
from pprint import pprint

MAPPING = {
    "properties": {
        "company": {"fields": {"keyword": {"ignore_above": 256, "type": "keyword"}}, "type": "text", "fielddata": True},
        "title": {"fields": {"keyword": {"ignore_above": 256, "type": "keyword"}}, "type": "text", "fielddata": True},
        "type": {"fields": {"keyword": {"ignore_above": 256, "type": "keyword"}}, "type": "text", "fielddata": True},
    }
}

es.indices.put_mapping(index="movies", body=MAPPING)
pprint(es.indices.get_mapping()["movies"])
# 結果
# {'mappings': {'properties': {'company': {'fielddata': True,
#                                         'fields': {'keyword': {'ignore_above': 256,
#                                                                'type': 'keyword'}},
#                                         'type': 'text'},
#                             'income': {'type': 'float'},
#                             'rank': {'type': 'long'},
#                             'title': {'fielddata': True,
#                                       'fields': {'keyword': {'ignore_above': 256,
#                                                              'type': 'keyword'}},
#                                       'type': 'text'},
#                             'type': {'fielddata': True,
#                                      'fields': {'keyword': {'ignore_above': 256,
#                                                             'type': 'keyword'}},
#                                      'type': 'text'},
#                             'year': {'type': 'long'}}}}
これで準備は完了です。
3. 検索
それでは検索をしてみましょう。
Elasticsearchのドキュメント
elasticsearch_dslのドキュメント
from elasticsearch_dsl import Search

s = Search(using=es).sort('rank').query("match", type="animation").query("match", company="東宝")
for hit in s:
    print(hit.title)

# 結果
# 千と千尋の神隠し
# 劇場版「鬼滅の刃」無限列車編
# 君の名は。
# ハウルの動く城
# もののけ姫
- s = Search(using=es).sort('rank').query("match", type="animation").query("match", company="東宝")
+ s = Search(using=es).filter("range", year={"lte": 2000})

# 結果
# タイタニック
# もののけ姫
from elasticsearch_dsl import Search, Q

q = Q("multi_match", query='ハリー アナ', fields=['title'])

s = Search(using=es).sort('rank').query(q)
for hit in s:
    print(hit.title)

# 結果
# アナと雪の女王
# ハリー・ポッターと賢者の石
# ハリー・ポッターと秘密の部屋
- q = Q("multi_match", query='ハリー アナ', fields=['title'])
+ q = Q('bool', must=[Q("match", company="東宝"), ~Q("match", title="の")])

# 結果
# 踊る大捜査線 THE MOVIE2 レインボーブリッジを封鎖せよ!
4. 集計
次に集計をしてみましょう。
Elasticsearchのドキュメント
elasticsearch_dslのドキュメント
まずはtermsを試してみます。
from pprint import pprint
from elasticsearch_dsl import Search, A

s = Search(using=es)

a = A('terms',  field='company')
s.aggs.bucket('results', a)
resp = s.execute()
pprint(resp.aggregations._d_['results']['buckets'])

# 結果
# [{'doc_count': 6, 'key': '宝'},
#  {'doc_count': 6, 'key': '東'},
#  {'doc_count': 2, 'key': 'ワーナー'},
#  {'doc_count': 1, 'key': 'fox'},
#  {'doc_count': 1, 'key': 'ディズニー'}]
東宝が6作品、ワーナー、FOX、ディズニーがそれぞれ1作品ということがわかりました!
- a = A('terms',  field='company')
+ a = A('terms',  field='type')

# 結果
# [{'doc_count': 6, 'key': 'animation'},
#  {'doc_count': 4, 'key': 'live_action'}]
アニメが6作品実写が4作品ということがわかりました!
- a = A('terms',  field='type')
+ a = A('histogram', field='year', interval='5', offset='1901')

# 結果
# [{'doc_count': 2, 'key': 1996.0},
#  {'doc_count': 4, 'key': 2001.0},
#  {'doc_count': 0, 'key': 2006.0},
#  {'doc_count': 2, 'key': 2011.0},
#  {'doc_count': 2, 'key': 2016.0}]
2001年から2005年が4作品と最も多いことがわかりました!
他にもいろいろな集計方法がありますのでドキュメントを見てぜひ遊んでみてください。
5. 後片付け
最後に作成したIAMユーザーとElasticsearchは忘れずに削除しましょう。
IAMユーザーの削除
https://console.aws.amazon.com/iam/home?#/users
対象のユーザーにチェックを入れてユーザーの削除ボタンをクリック
Elasticsearchの削除
https://ap-northeast-1.console.aws.amazon.com/es/home
対象のドメインをクリックし、アクション>ドメインの削除をクリック
6. 終わりに
今まで、ElasticSearchを使ったことはありませんでしたが、弊社ではやりたいと手を挙げればやらせてもらえる環境のため挑戦させてもらいました。
来年もどんどん挑戦し、どんどん成長していきたいと思います!
明日は tatakahashi35 さんの「RevCommの裏側で動くアルゴリズム [二分探索編]」です。
お楽しみにー!