Why not login to Qiita and try out its useful features?

We'll deliver articles that match you.

You can read useful information later.

4
3

Delete article

Deleted articles cannot be recovered.

Draft of this article would be also deleted.

Are you sure you want to delete this article?

More than 3 years have passed since last update.

React Native + Firebase で超簡単なチャットアプリを作ってみた‼️ (Firebaseプロジェクト設定編)

Last updated at Posted at 2020-10-15

はじめに

**前回の記事**で環境構築を終え、プロジェクトを開始するところまでやりました!
今回の記事では、Firebase のプロジェクトの設定をし、実際にコーディングに入る準備を終わらせます!

この記事は4部構成の第2回となっております。

  1. 環境構築編
  2. Firebaseプロジェクト設定編 ← 本記事
  3. データ書き込み編
  4. データ読み取り編

全4回をかけて、簡単なチャットアプリを開発します!
↓↓完成イメージです:bangbang:(再掲)

フォルダの構成を考える

このようなフォルダの構成にしました。
プロジェクト直下にsrcという名前のフォルダを作ります。sourceの略です。
srcの下に components, lib, screens, types という4つのフォルダを作ります。

components:コンポーネントの置き場
lib:firebase関連のファイルの置き場
screens:画面の置き場
types:TypeScriptの型定義関連のファイルの置き場

以下のような構成になるはずです。

スクリーンショット 2020-10-14 14.09.29.png

Prettierの導入

Prettierとは、コードを自動で整形してくれるツールです!
まず、Prettierから、VS Code のプラグインをインストールします。

そして、「.prettierrc」という名前のファイルを作成します。
スクリーンショット 2020-10-14 14.17.26.png

ファイルの中身は以下の通りです。
下記のような設定を記述しています。

  • タブはスペース4個分にする
  • 末尾にセミコロンを付ける
  • 文字列はシングルクオートにする
  • オブジェクトの最後の要素の末尾にコンマをつけない
{
    "tabWidth": 4,
    "semi": true,
    "singleQuote": true,
    "trailingComma": "none"
}

最後に、「⌘ + ,」で VS Code の設定を開き、「format on save」と検索し、これを有効にします。
スクリーンショット 2020-10-14 14.22.01.png

VS Code を再起動すると、ファイルの保存と同時に自動整形が走るようになっているはずです!!

パッケージのインストール

今回のチャットアプリではfirebaseを用いますので、firebaseをプロジェクト内にインストールする必要があります!
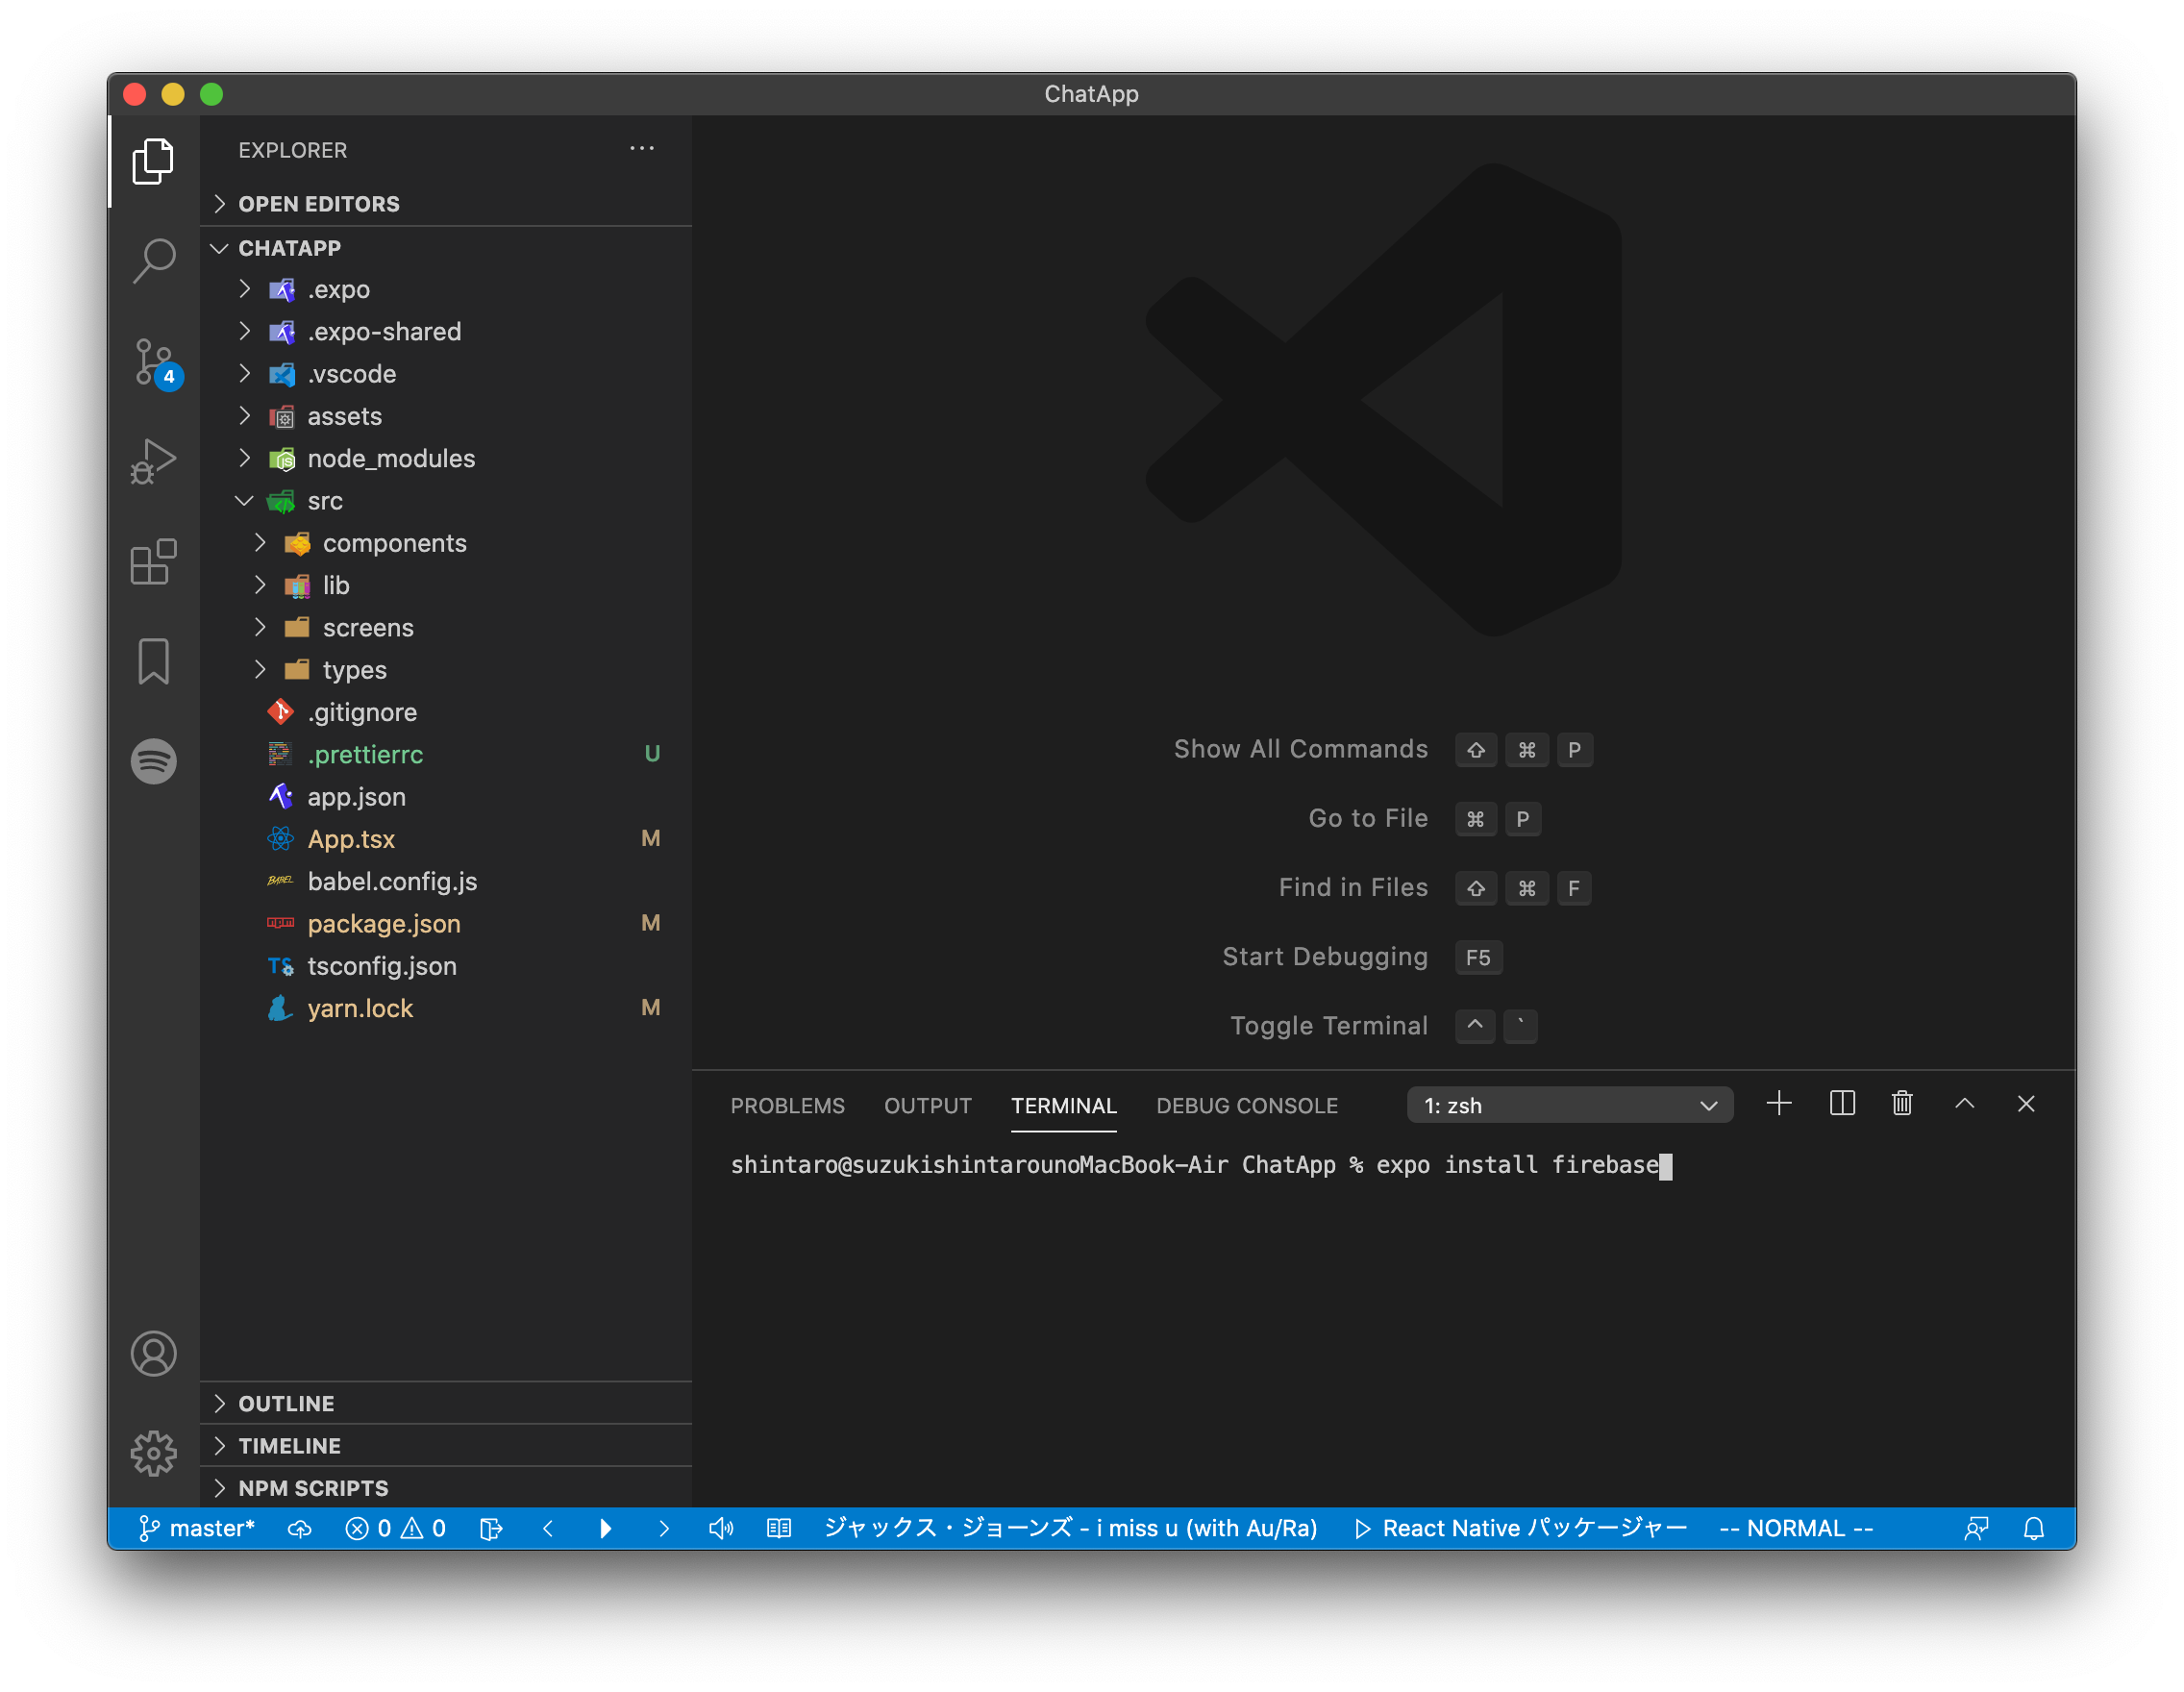
プロジェクト内でexpo install firebaseを実行します。

スクリーンショット 2020-10-14 15.23.51.png

Firebase の準備

Firebase はGoogleアカウントさえ持っていれば誰でも無料で使うことができます。
まず、https://firebase.google.com/にアクセスしてください。

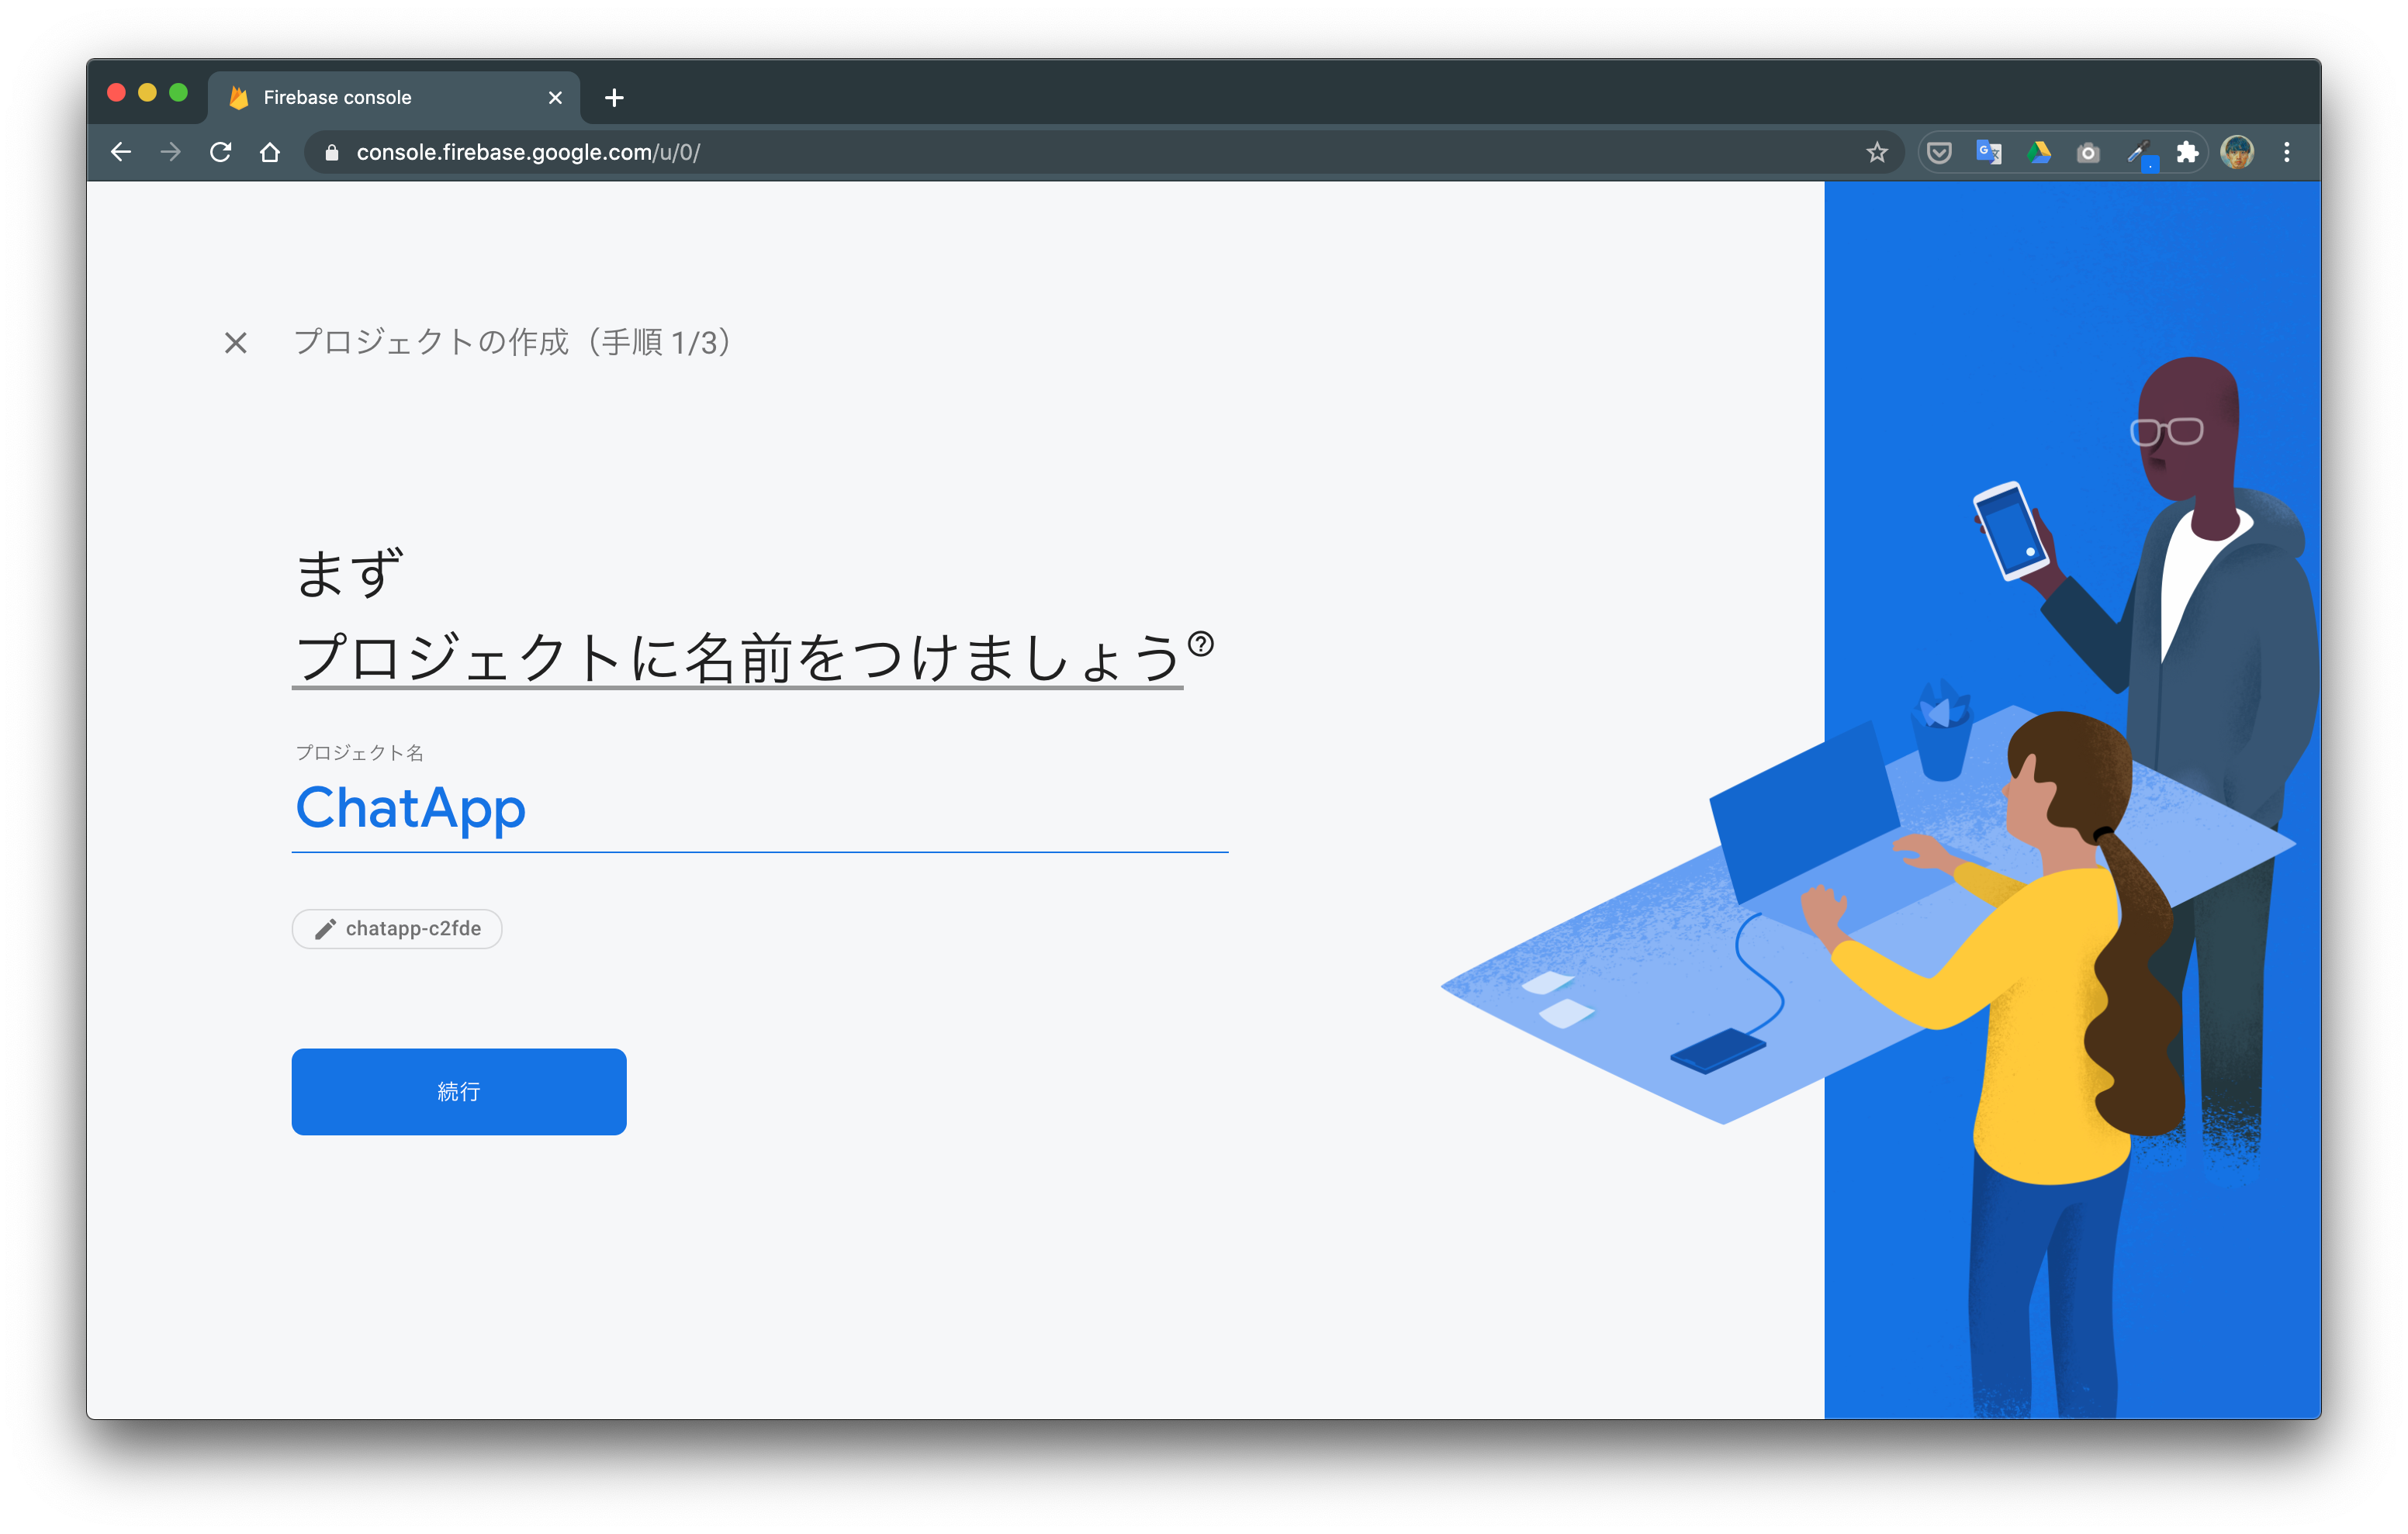
新しいプロジェクトを作成し、任意のプロジェクト名を決めます。
今回は「ChatApp」という名前にしておきました。

スクリーンショット 2020-10-14 15.29.58.png

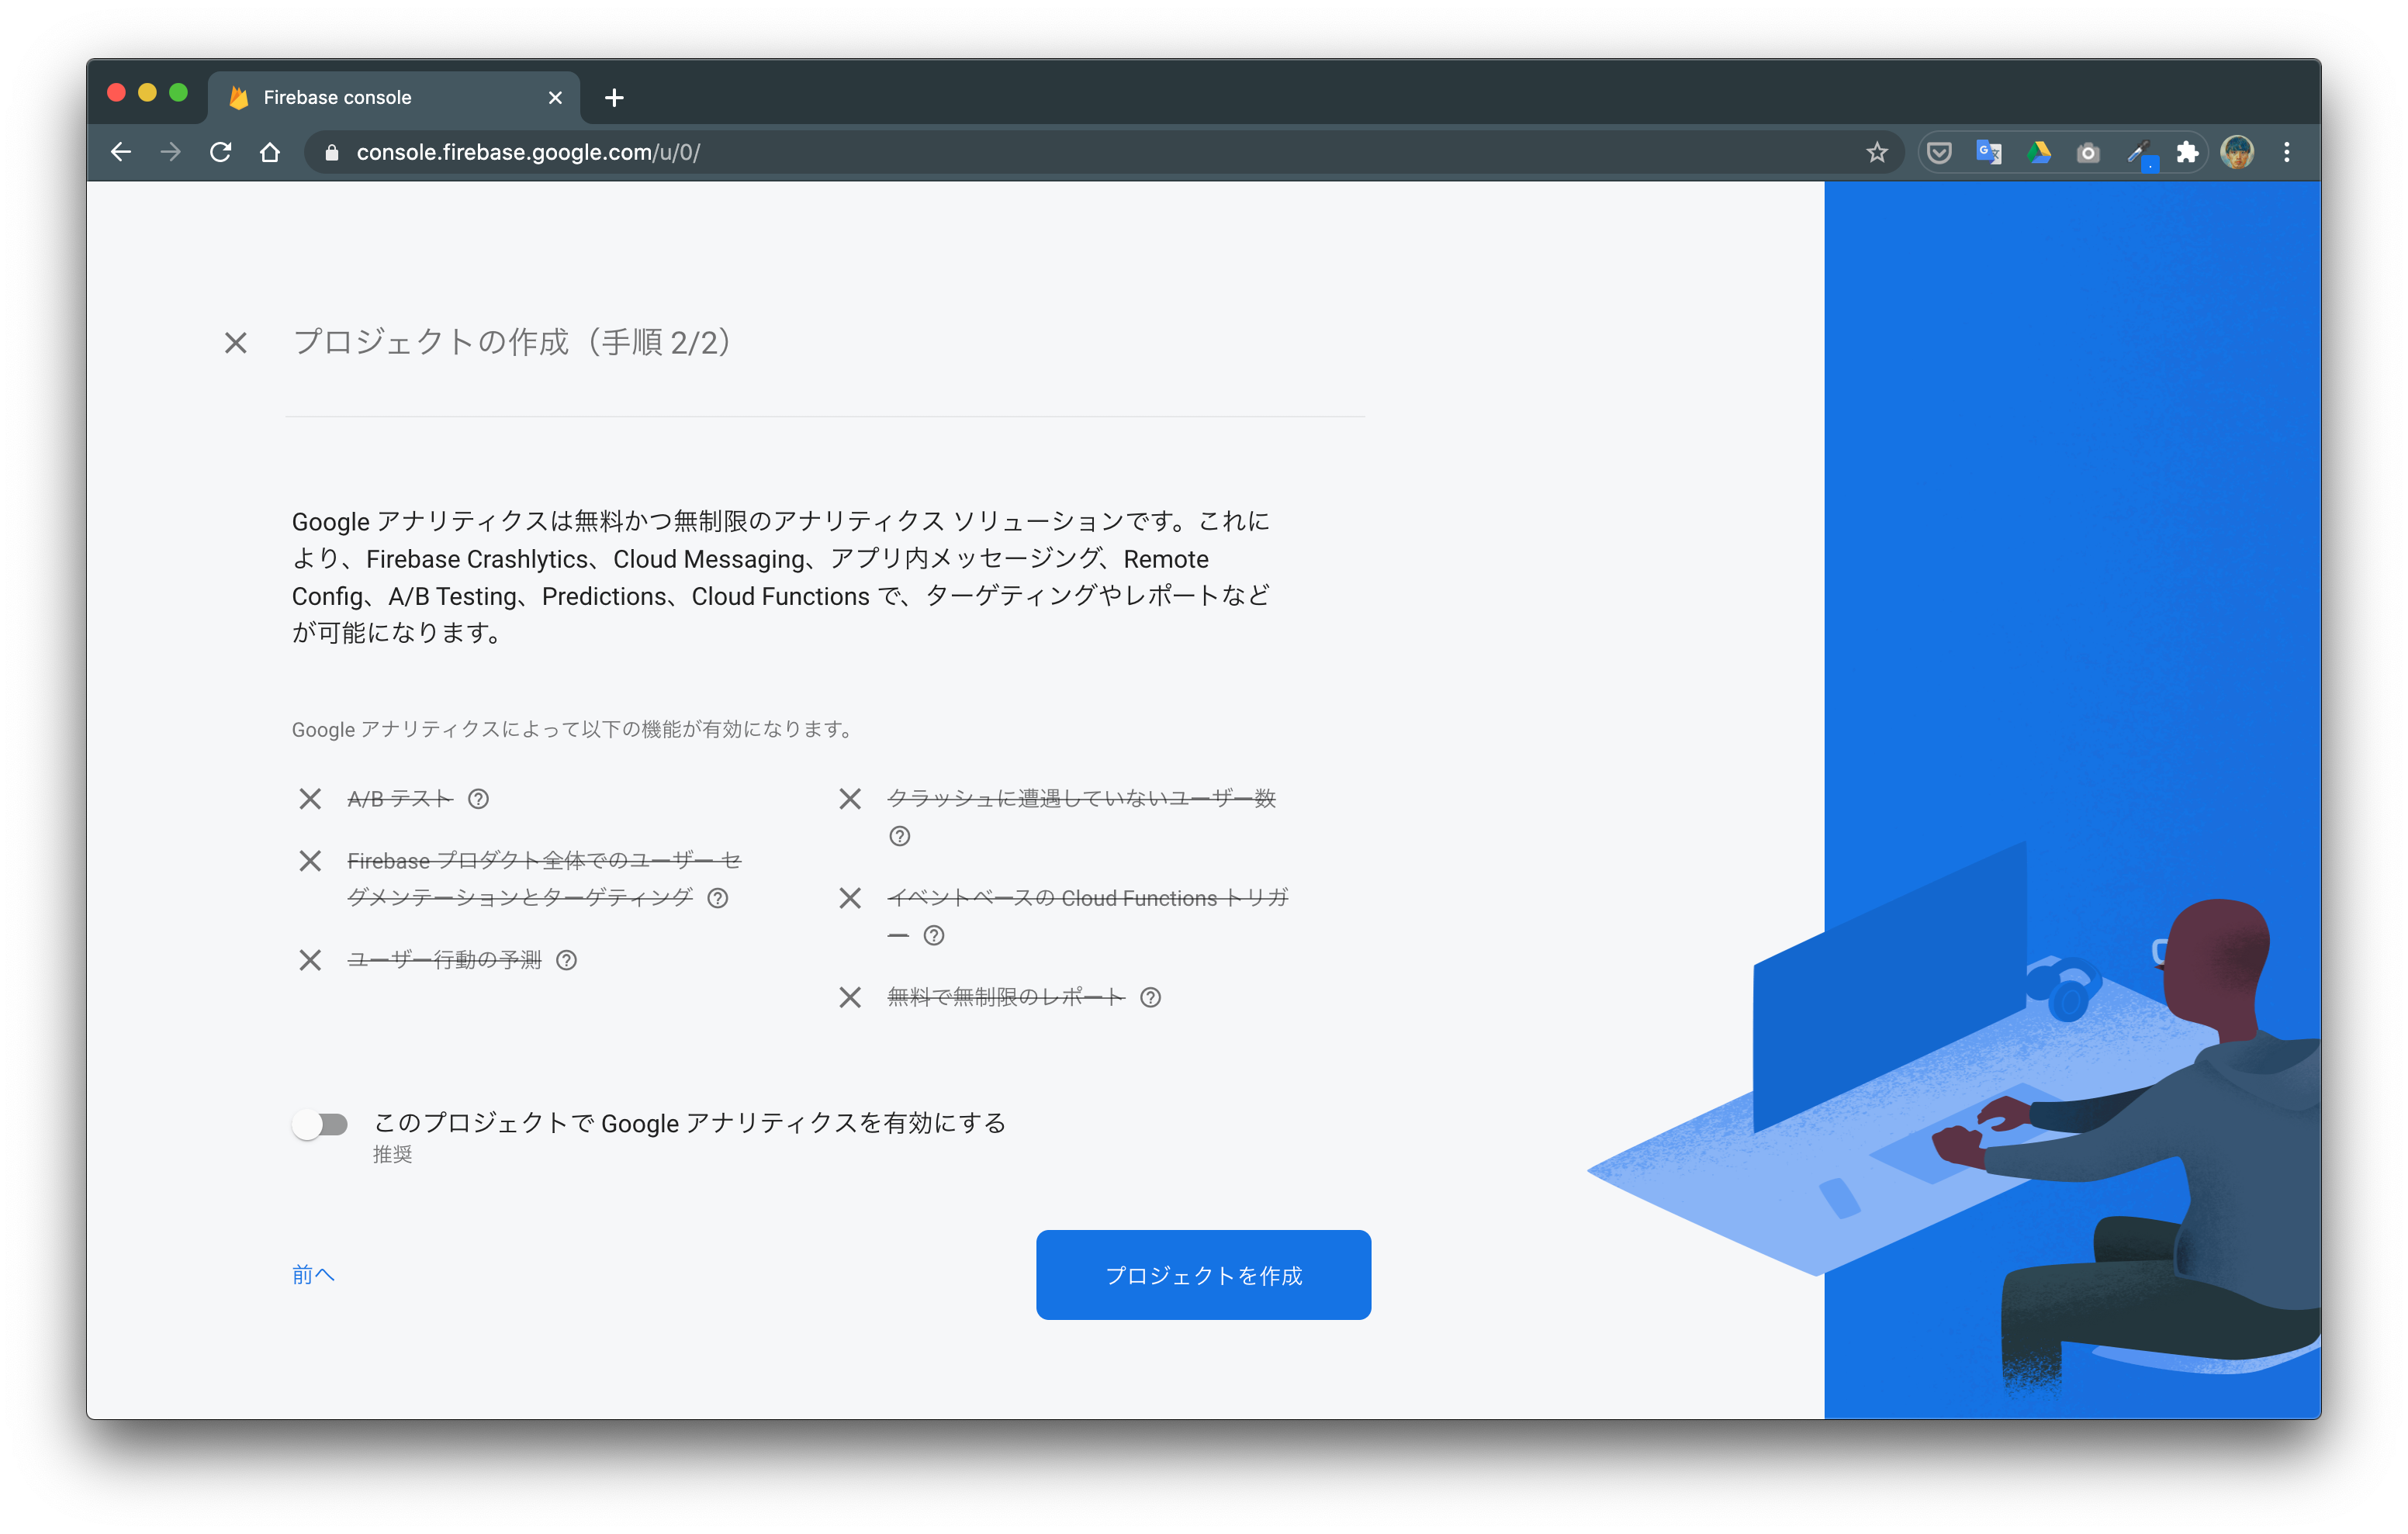
とりあえず今回はGoogleアナリティクスとの連携はしていません。
スクリーンショット 2020-10-14 15.30.12.png

プロジェクトの作成が完了すると、ダッシュボードが表示されます。
スクリーンショット 2020-10-14 15.30.52.png

ウェブアプリの追加を選択してください。
こちらもアプリ名を「ChatApp」にしています。
アプリの登録」を押し、そのまま「コンソールに進む」を選んでもらって大丈夫です。
スクリーンショット 2020-10-14 15.34.37.png

今回はAuthenticationCloud Firestoreを使うので、それらの設定もしていきます。

スクリーンショット 2020-10-14 15.35.42.png

Authentication の設定

Authentication の Sign-in method から、匿名を有効にしてください。
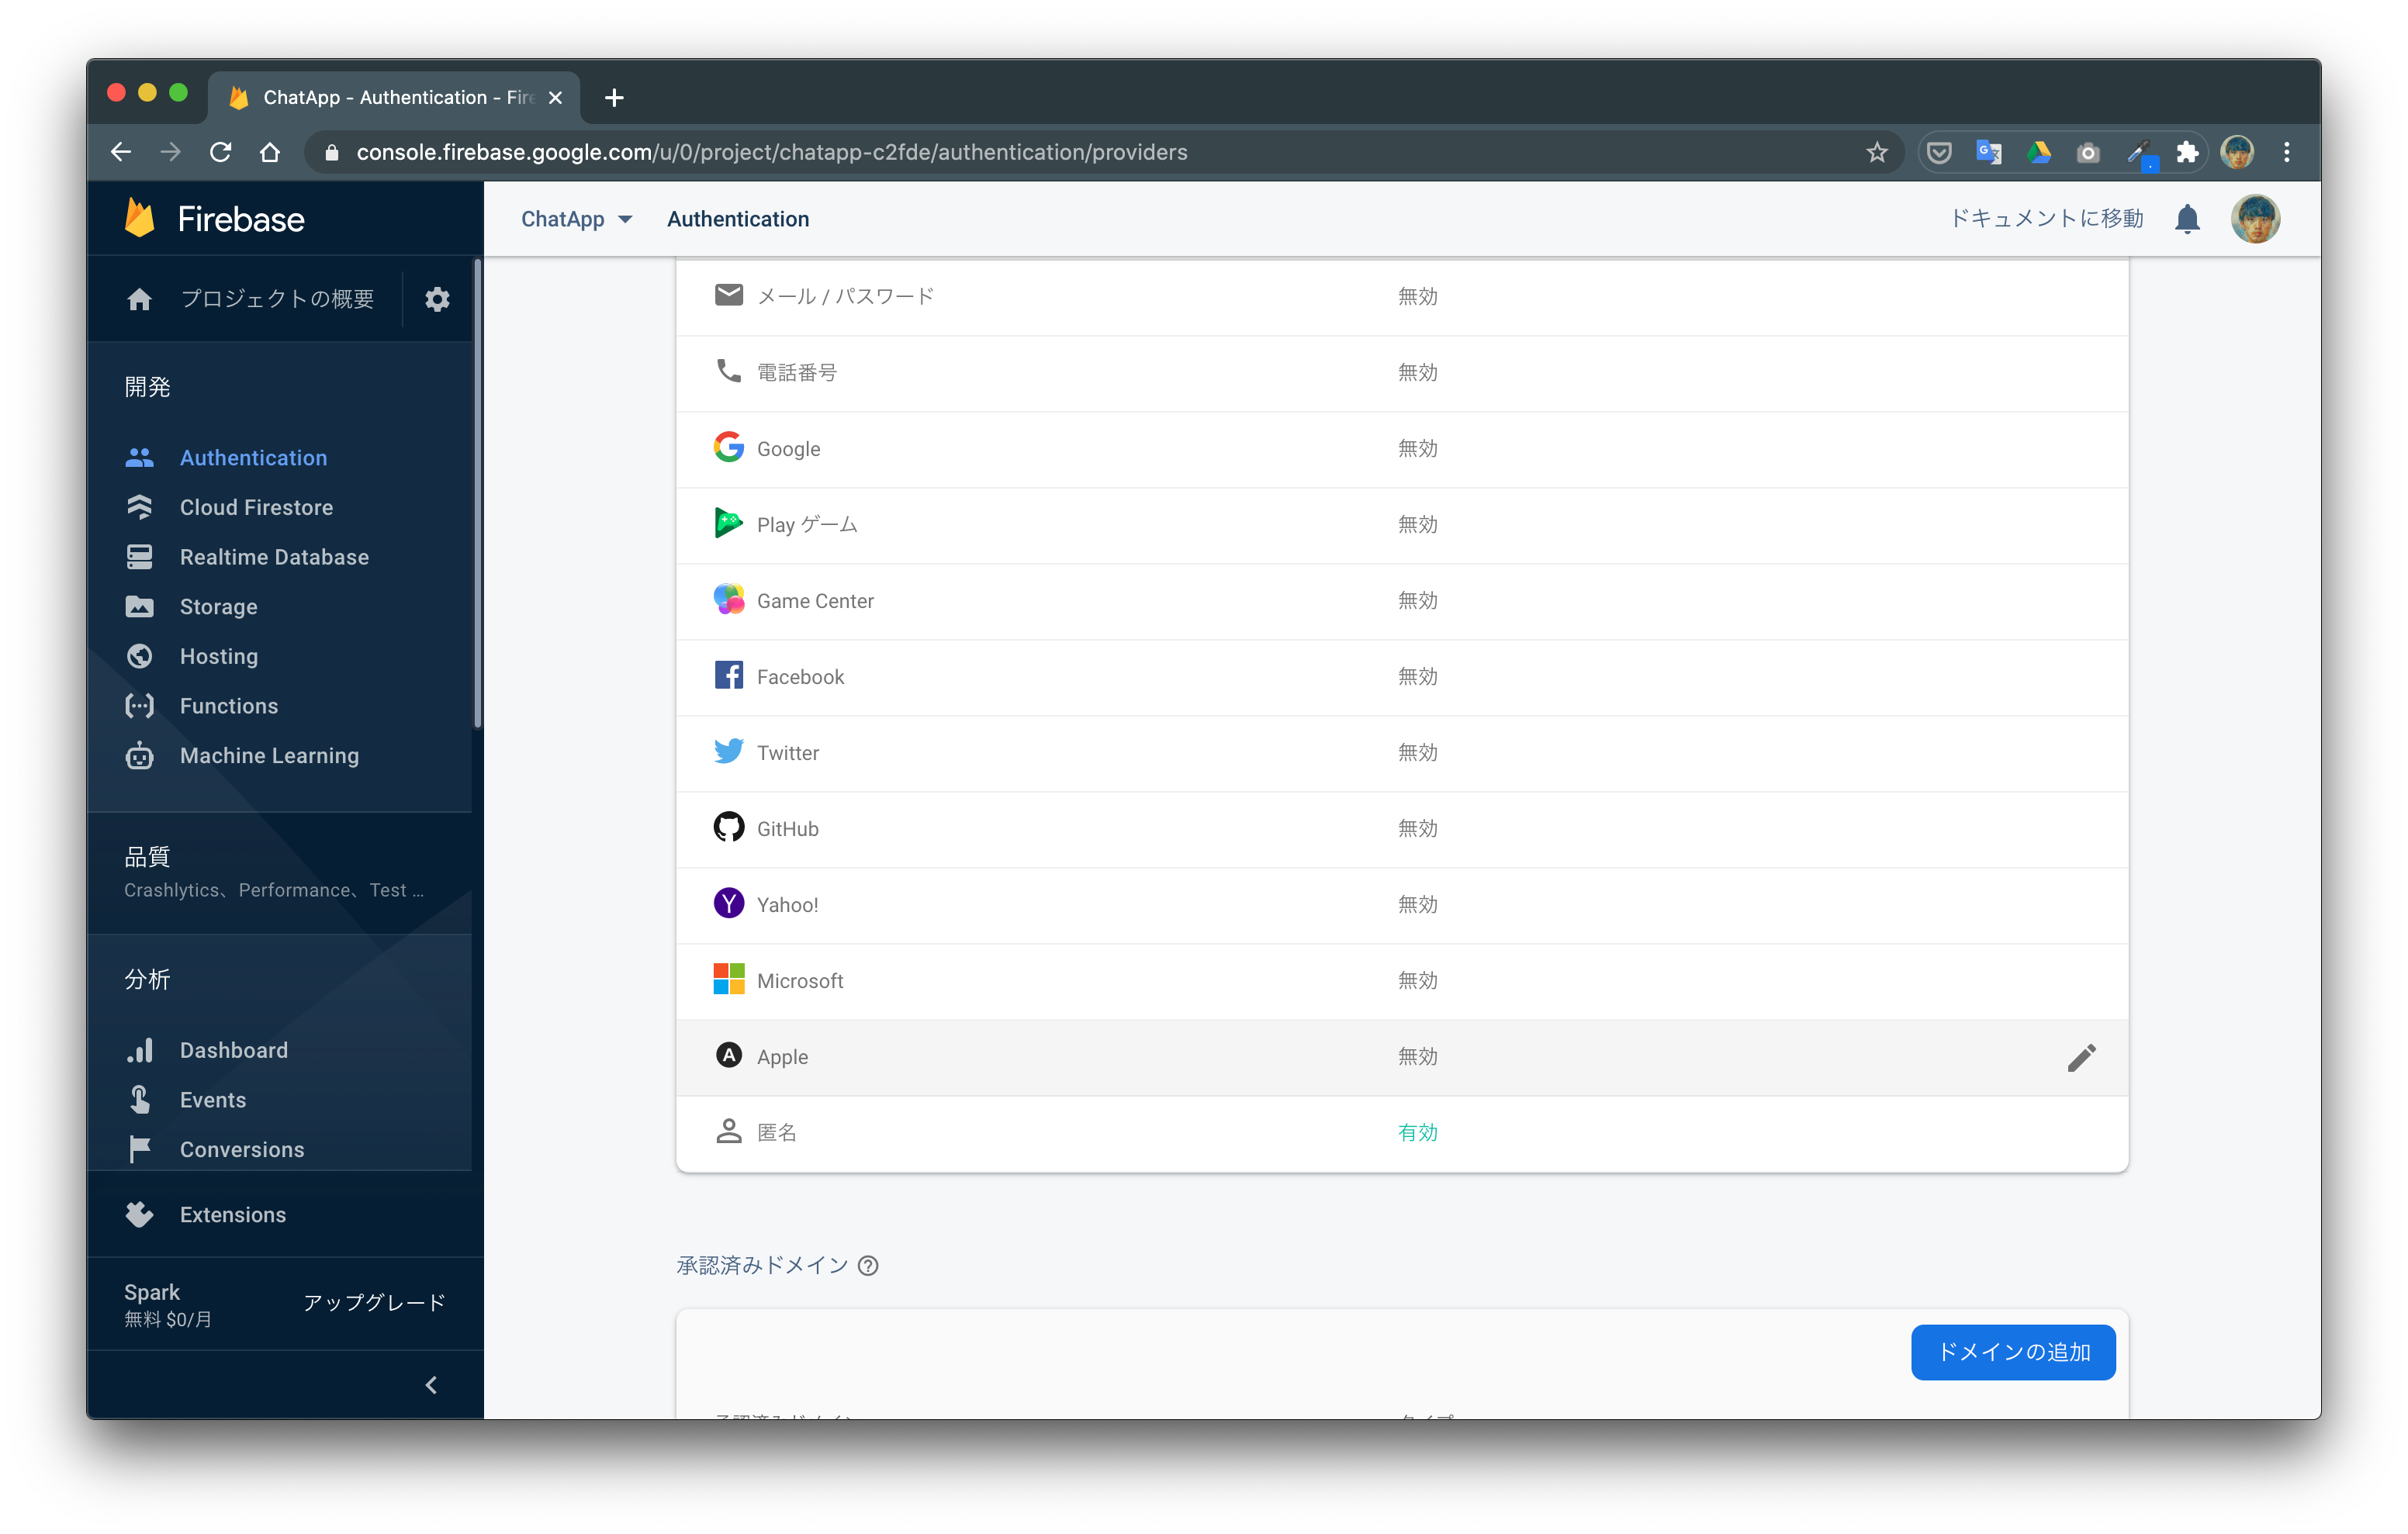
スクリーンショット 2020-10-14 15.39.34.png

Cloud Firestore の設定

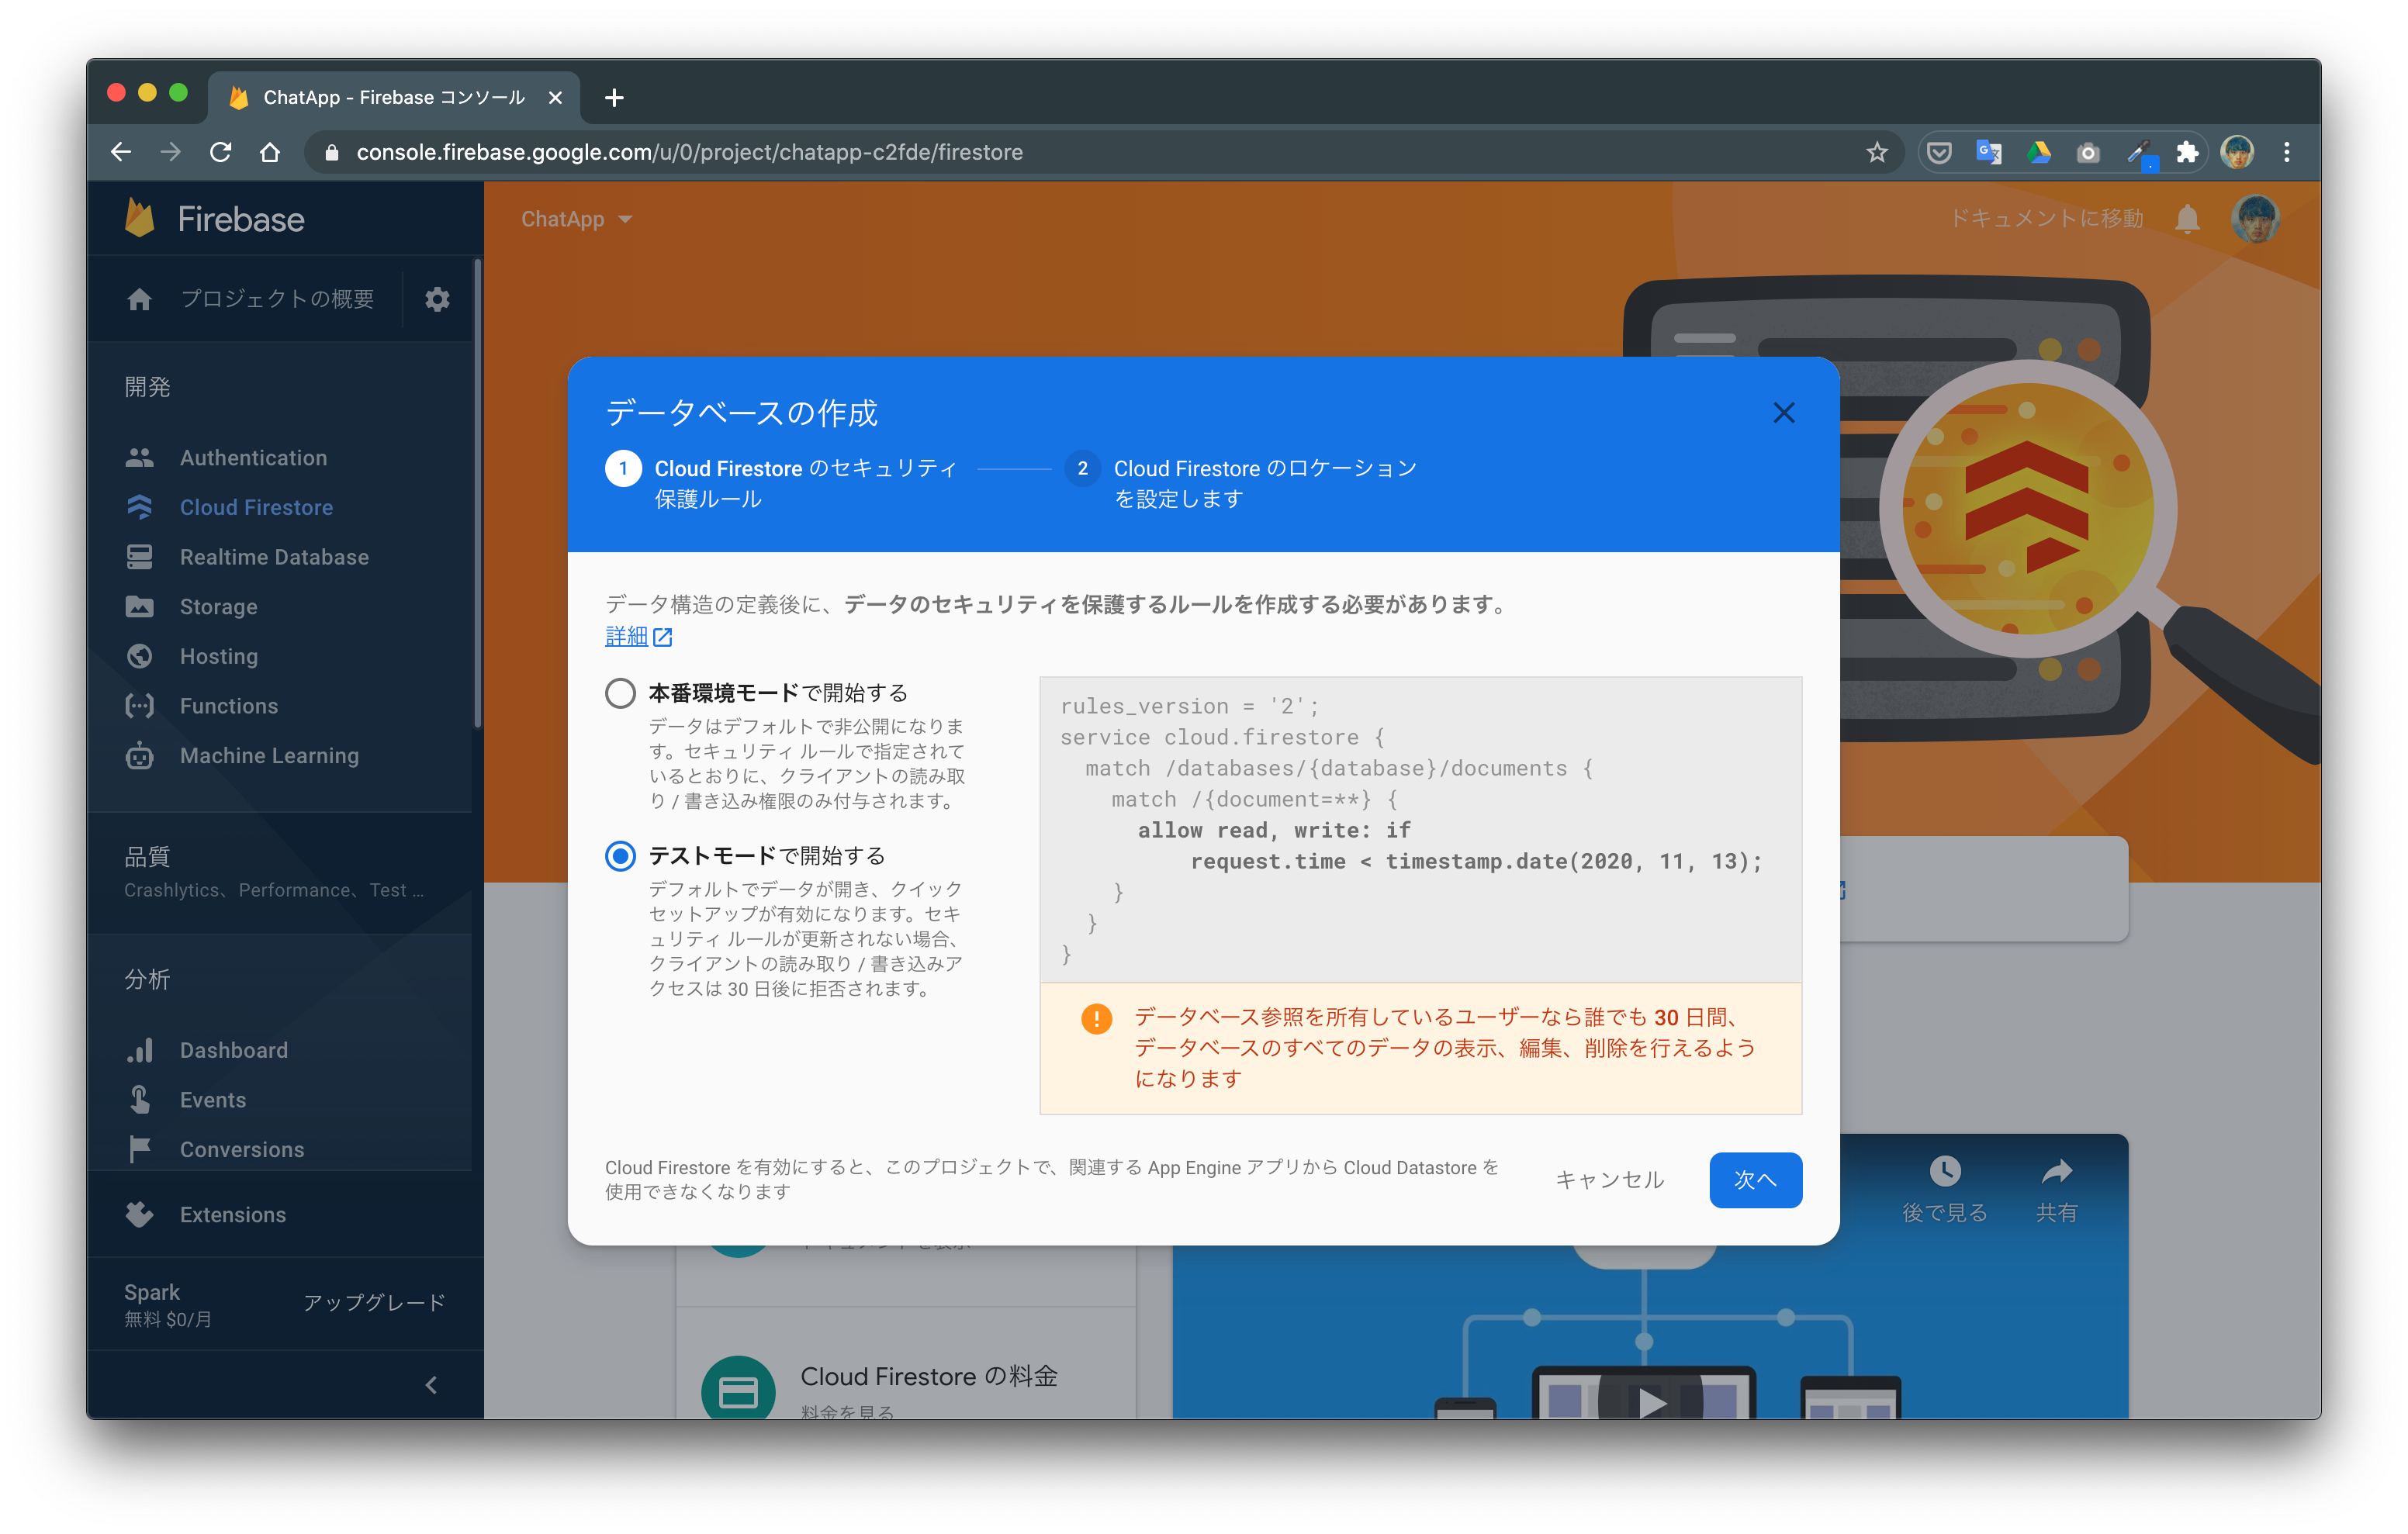
「データベースの作成」を押します。
スクリーンショット 2020-10-14 15.41.29.png

とりあえず、「テストモードで開始する」を選択してください。
スクリーンショット 2020-10-14 15.42.06.png

ロケーションはasia-northeast1を選びましょう。
日本から一番近いサーバーっぽいです。
スクリーンショット 2020-10-14 15.42.20.png

これで Firebaseプロジェクト の設定は完了です!!
次回から実際にコードを書いていきたいと思います!!

次回は今回設定したCloud Firestore 上に、アプリから通じてデータを書き込むという処理を実装します:bangbang:

4
3
0

Register as a new user and use Qiita more conveniently

  1. You get articles that match your needs
  2. You can efficiently read back useful information
  3. You can use dark theme
What you can do with signing up

Comments

No comments

Let's comment your feelings that are more than good

Qiita Advent Calendar is held!

Qiita Advent Calendar is an article posting event where you post articles by filling a calendar 🎅

Some calendars come with gifts and some gifts are drawn from all calendars 👀

Please tie the article to your calendar and let's enjoy Christmas together!

4
3

Delete article

Deleted articles cannot be recovered.

Draft of this article would be also deleted.

Are you sure you want to delete this article?