はじめに
**前回の記事までで環境構築とFirebaseの設定をしたので今回から実際にコードを書いていきたいと思います!!
環境構築については第1回の記事を、フォルダの構成やFirebaseプロジェクトの作成については第2回の記事**を参考にしてください。
- 環境構築編
- Firebaseプロジェクト設定編
- データ書き込み編 ← 本記事
- データ読み取り編
全4回をかけて、簡単なチャットアプリを開発します!
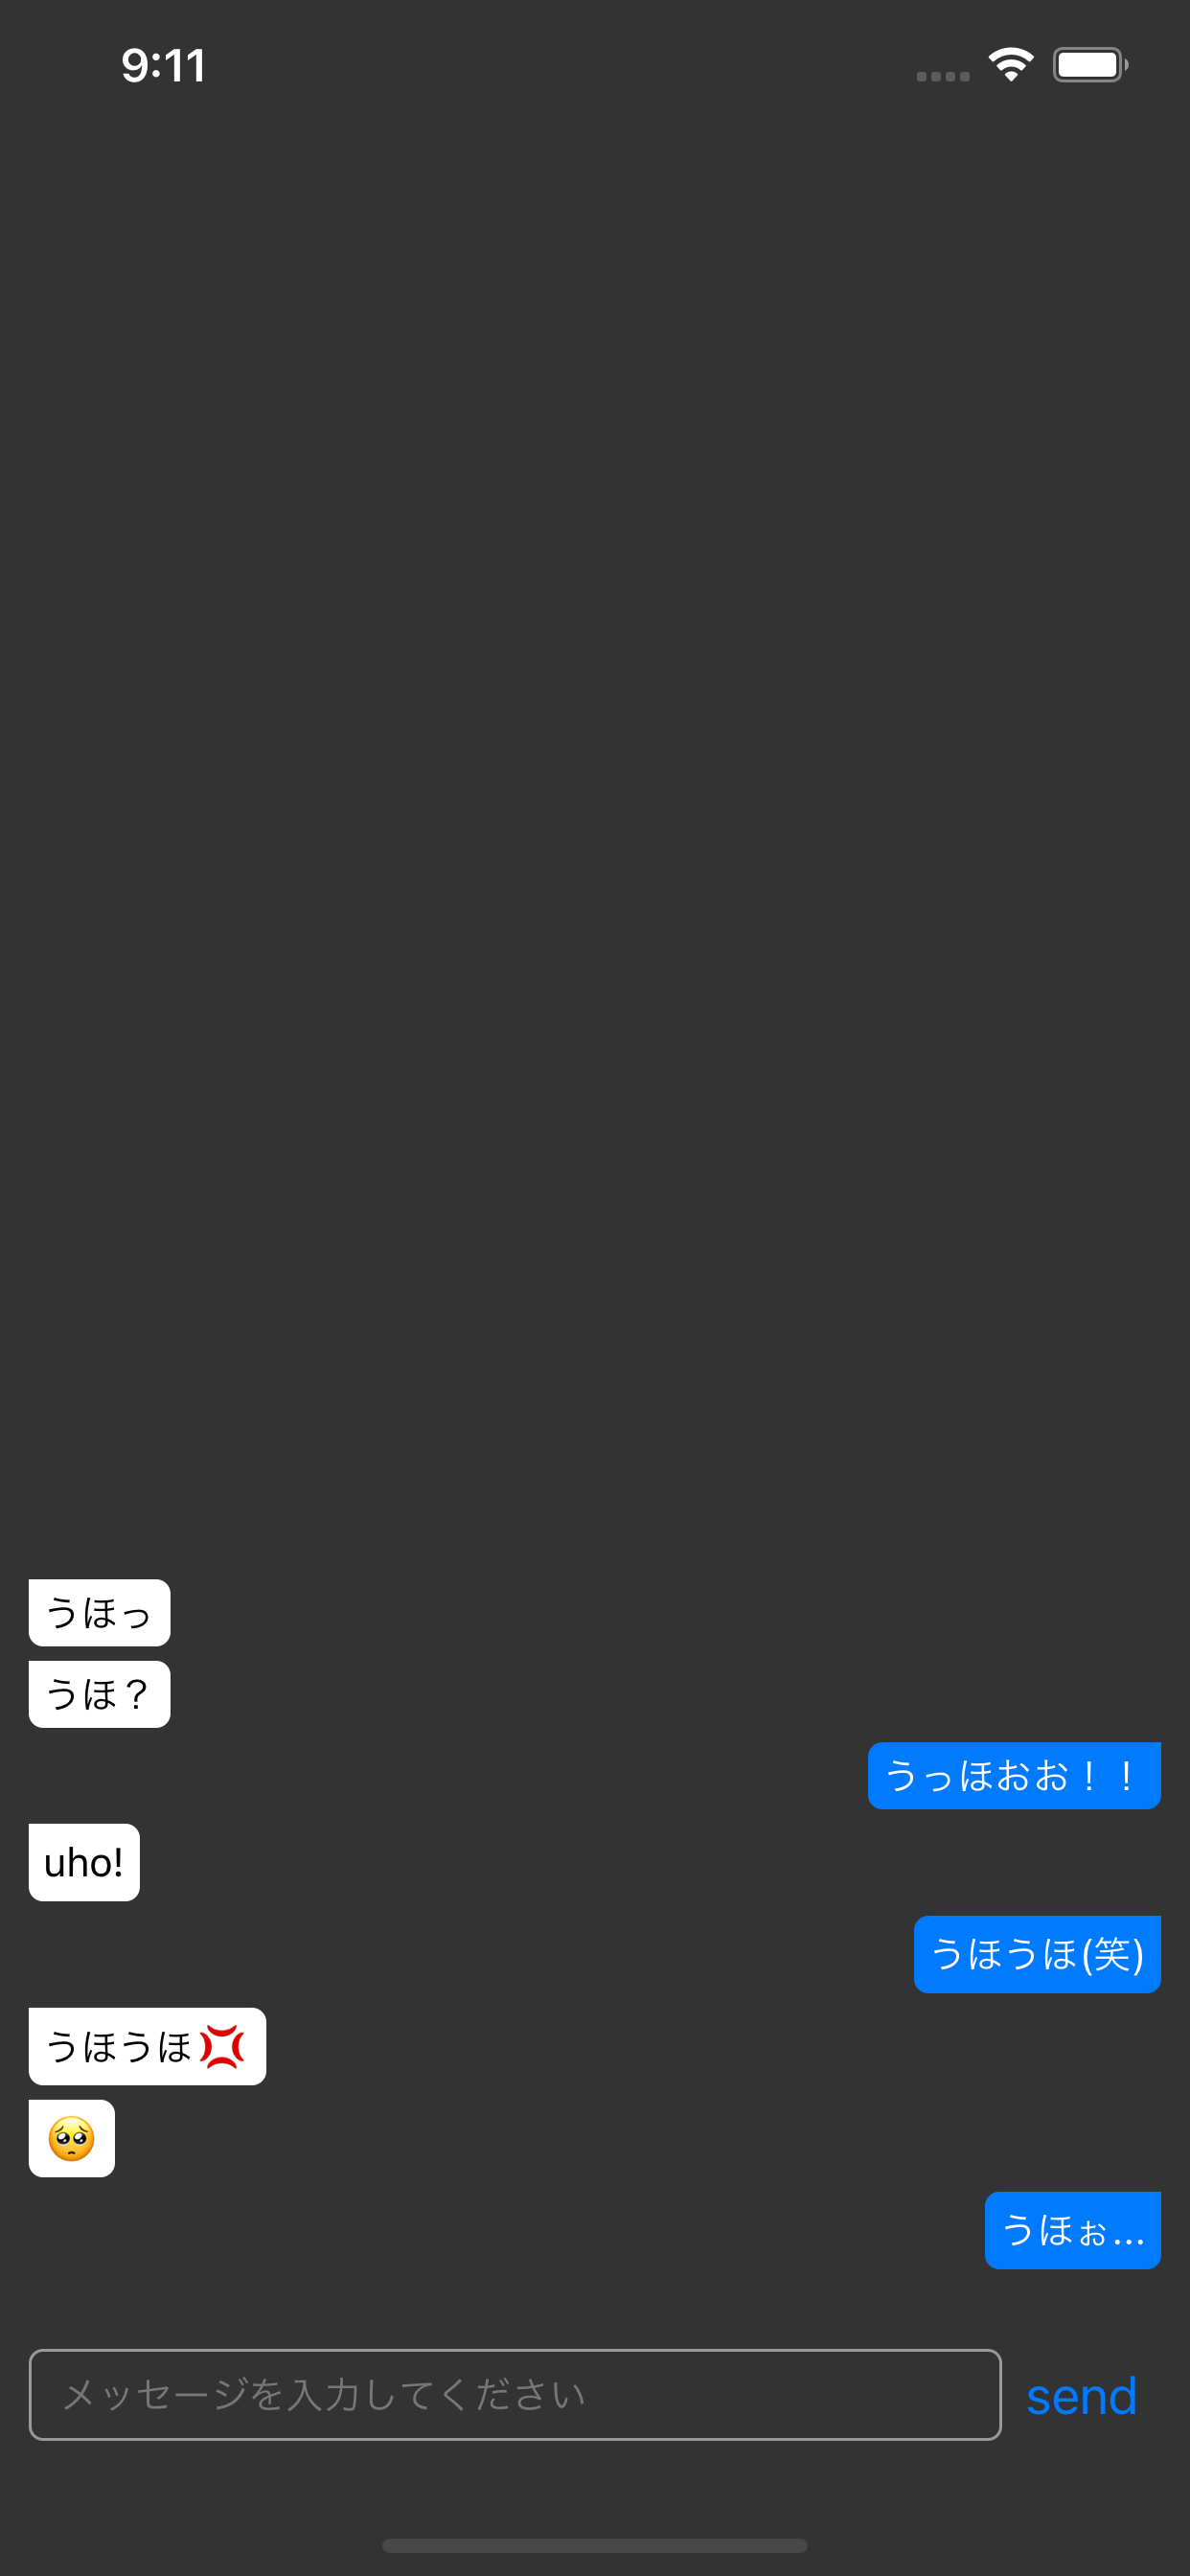
↓↓完成イメージです![]() (再掲)
(再掲)
メインの画面作成
React Nativeのプロジェクトでは、まずApp.tsxを実行するのですが、このApp.tsxに直接長々とコードを書いていくのはスマートじゃないので、メインの画面をscreens/ChatScreen.tsxで記述していきます。
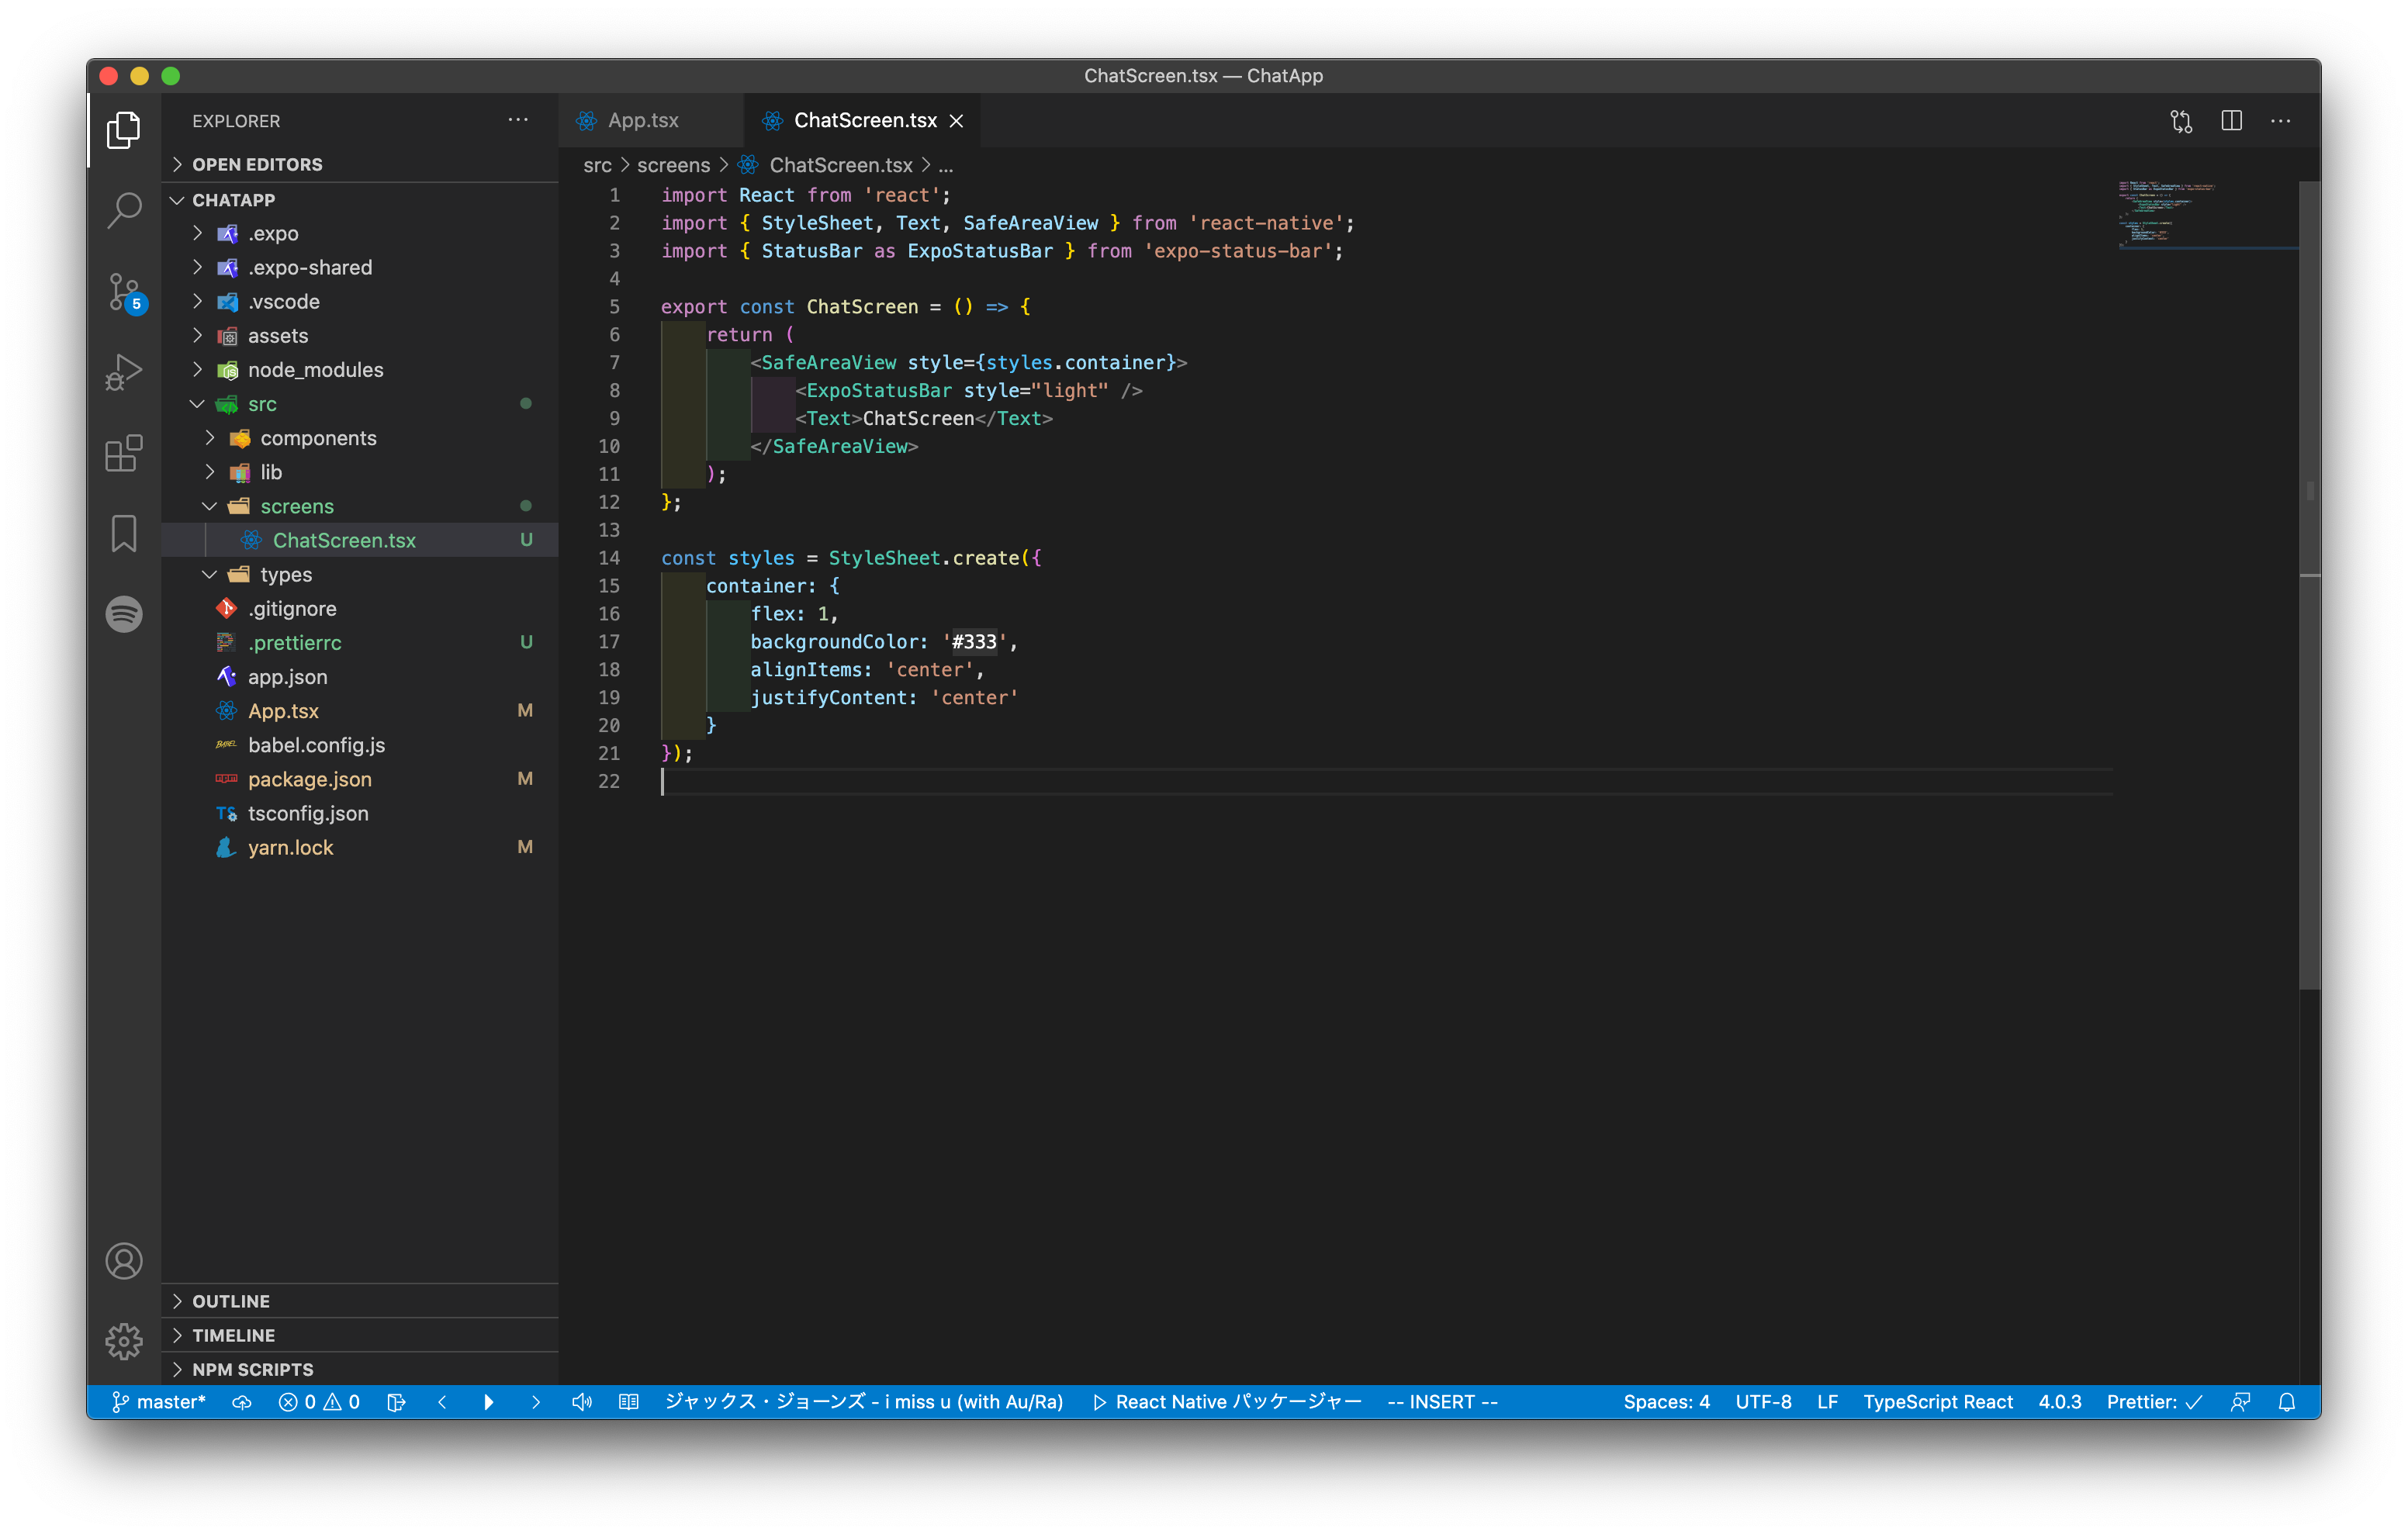
後ほど、react-nativeのStatusBarも使う予定なので、名前が重複しないようにexpo-status-barのStatusBarはExpoStatusBarとしてインポートしています。
//screens/ChatScreen.tsx

import React from 'react';
import { StyleSheet, Text, SafeAreaView } from 'react-native';
import { StatusBar as ExpoStatusBar } from 'expo-status-bar';

export const ChatScreen = () => {
    return (
        <SafeAreaView style={styles.container}>
            <ExpoStatusBar style="light" />
            <Text>ChatScreen</Text>
        </SafeAreaView>
    );
};

const styles = StyleSheet.create({
    container: {
        flex: 1,
        backgroundColor: '#333',
        alignItems: 'center',
        justifyContent: 'center'
    }
});
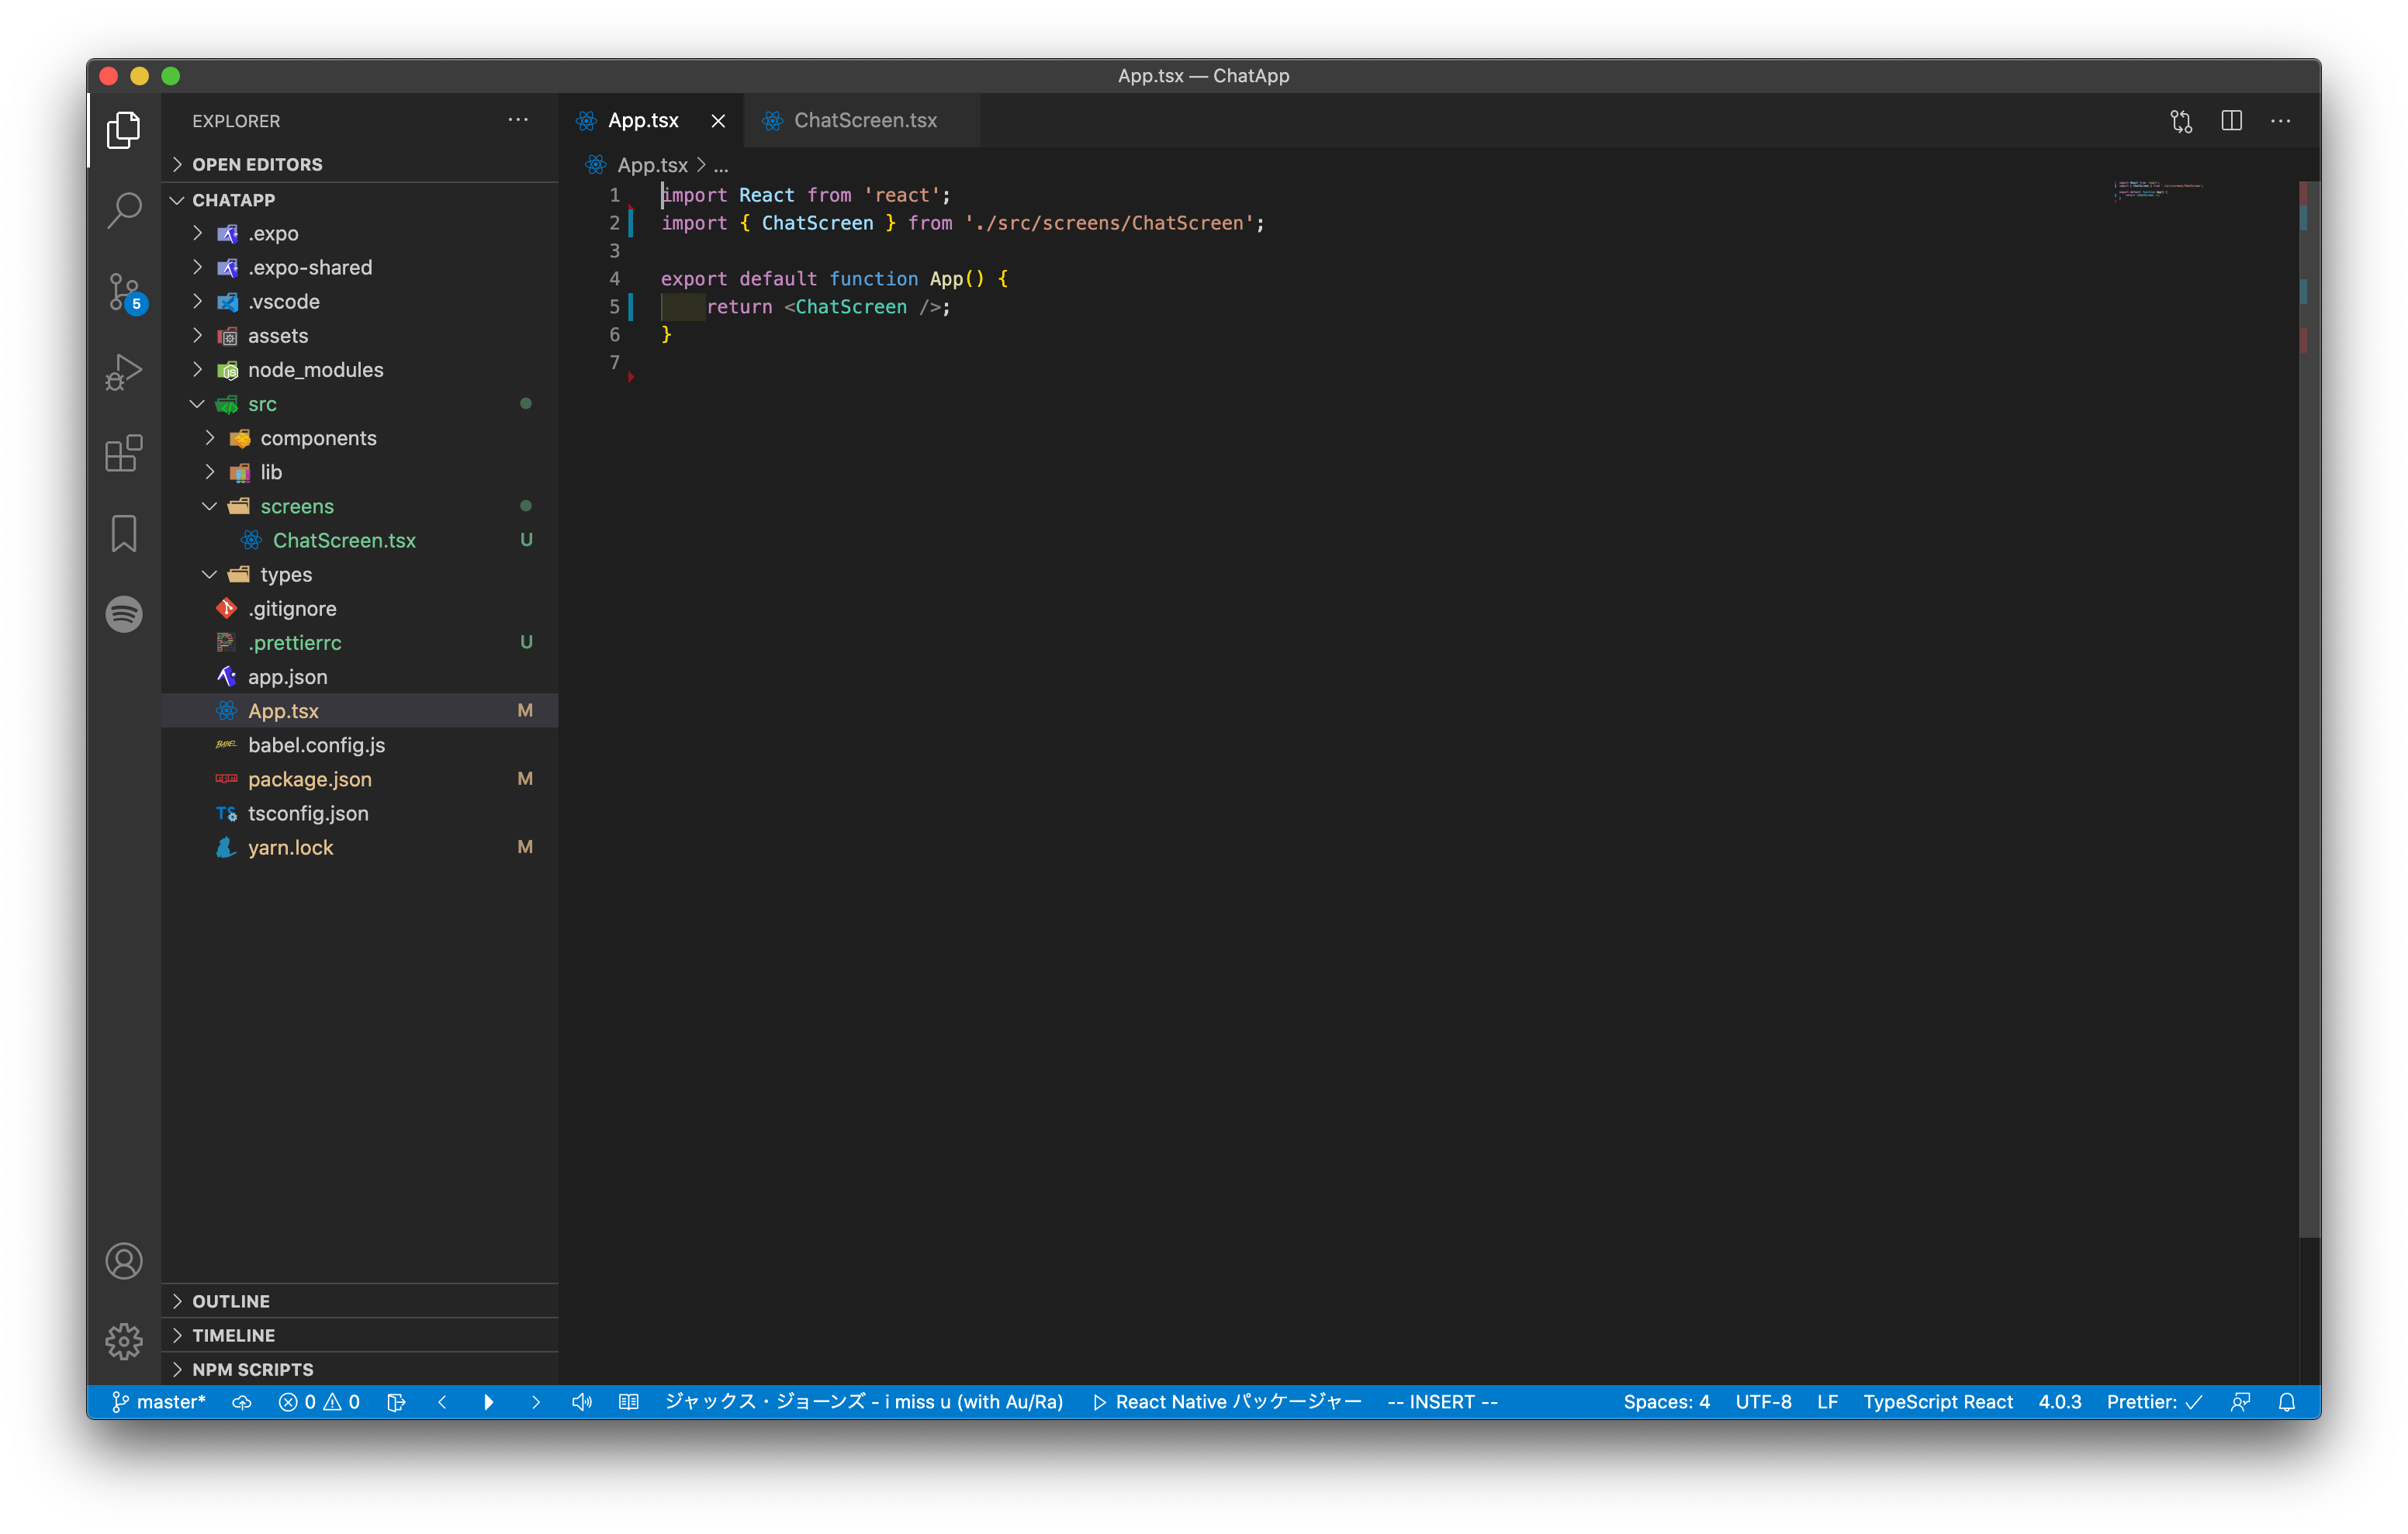
次に、App.tsx側から、上記のChatScreenをインポートする必要があるので、App.tsxも修正を行います。
//App.tsx

import React from 'react';
import { ChatScreen } from './src/screens/ChatScreen';

export default function App() {
    return <ChatScreen />;
}
テキスト入力範囲の作成
screens/ChatScreen.tsxをこのように修正します。
React Nativeにはstateという概念があり、stateを更新すると画面の再レンダリングが走るという仕組みになっています。
useStateを使うと、stateとstateを更新する関数を作成することができます。
const [text, setText] = useState<string>('')を記述することで、textというstateと、setTextというtextを更新する関数が作られました。
InputText のonChangeTextというプロパティで、テキストの変更の際に実行する関数を指定できます。
onChangeTextに先ほど定義したsetTextを渡すことで、テキストの変更と同時にstateを更新し、画面の再レンダリングを行い入力内容が画面に即時反映される仕組みです。
よくわからないという方は、onChangeText={() => {}}と書き換えてみてください。文字の入力をしても画面に文字が表示されないはずです。
import React, { useState } from 'react';
import {
    StyleSheet,
    TextInput,
    SafeAreaView,
    View,
    Button
} from 'react-native';
import { StatusBar as ExpoStatusBar } from 'expo-status-bar';

export const ChatScreen = () => {
    const [text, setText] = useState<string>('');

    return (
        <SafeAreaView style={styles.container}>
            <ExpoStatusBar style="light" />
            <View style={styles.inputTextContainer}>
                <TextInput
                    style={styles.inputText}
                    onChangeText={(value) => {
                        setText(value);
                    }}
                    value={text}
                    placeholder="メッセージを入力してください"
                    placeholderTextColor="#777"
                    autoCapitalize="none"
                    autoCorrect={false}
                    returnKeyType="done"
                />
                <Button title="send" onPress={() => {}} />
            </View>
        </SafeAreaView>
    );
};

const styles = StyleSheet.create({
    container: {
        flex: 1,
        backgroundColor: '#333',
        alignItems: 'center',
        justifyContent: 'center'
    },
    inputTextContainer: {
        width: '100%',
        flexDirection: 'row',
        alignItems: 'center'
    },
    inputText: {
        color: '#fff',
        borderWidth: 1,
        borderColor: '#999',
        height: 32,
        flex: 1,
        borderRadius: 5,
        paddingHorizontal: 10
    }
});
このような画面になっているはずです。
まだsendボタンのアクションを定義していいないので、sendボタンを押してもなんも起こりませんが、文字の入力ができると思います。

Firestore にメッセージを保存する
次にsendボタンを押したときのアクションを作ります。
最終的には、sendボタンを押すとFirestoreにメッセージの内容や、送信者の情報などを保存し、Firestoreが更新されると、他の端末でも再度データ取得を行い画面を更新する形にしようと思っています。
ここではまず、メッセージの内容をFirestoreに保存するようにしたいと思います。
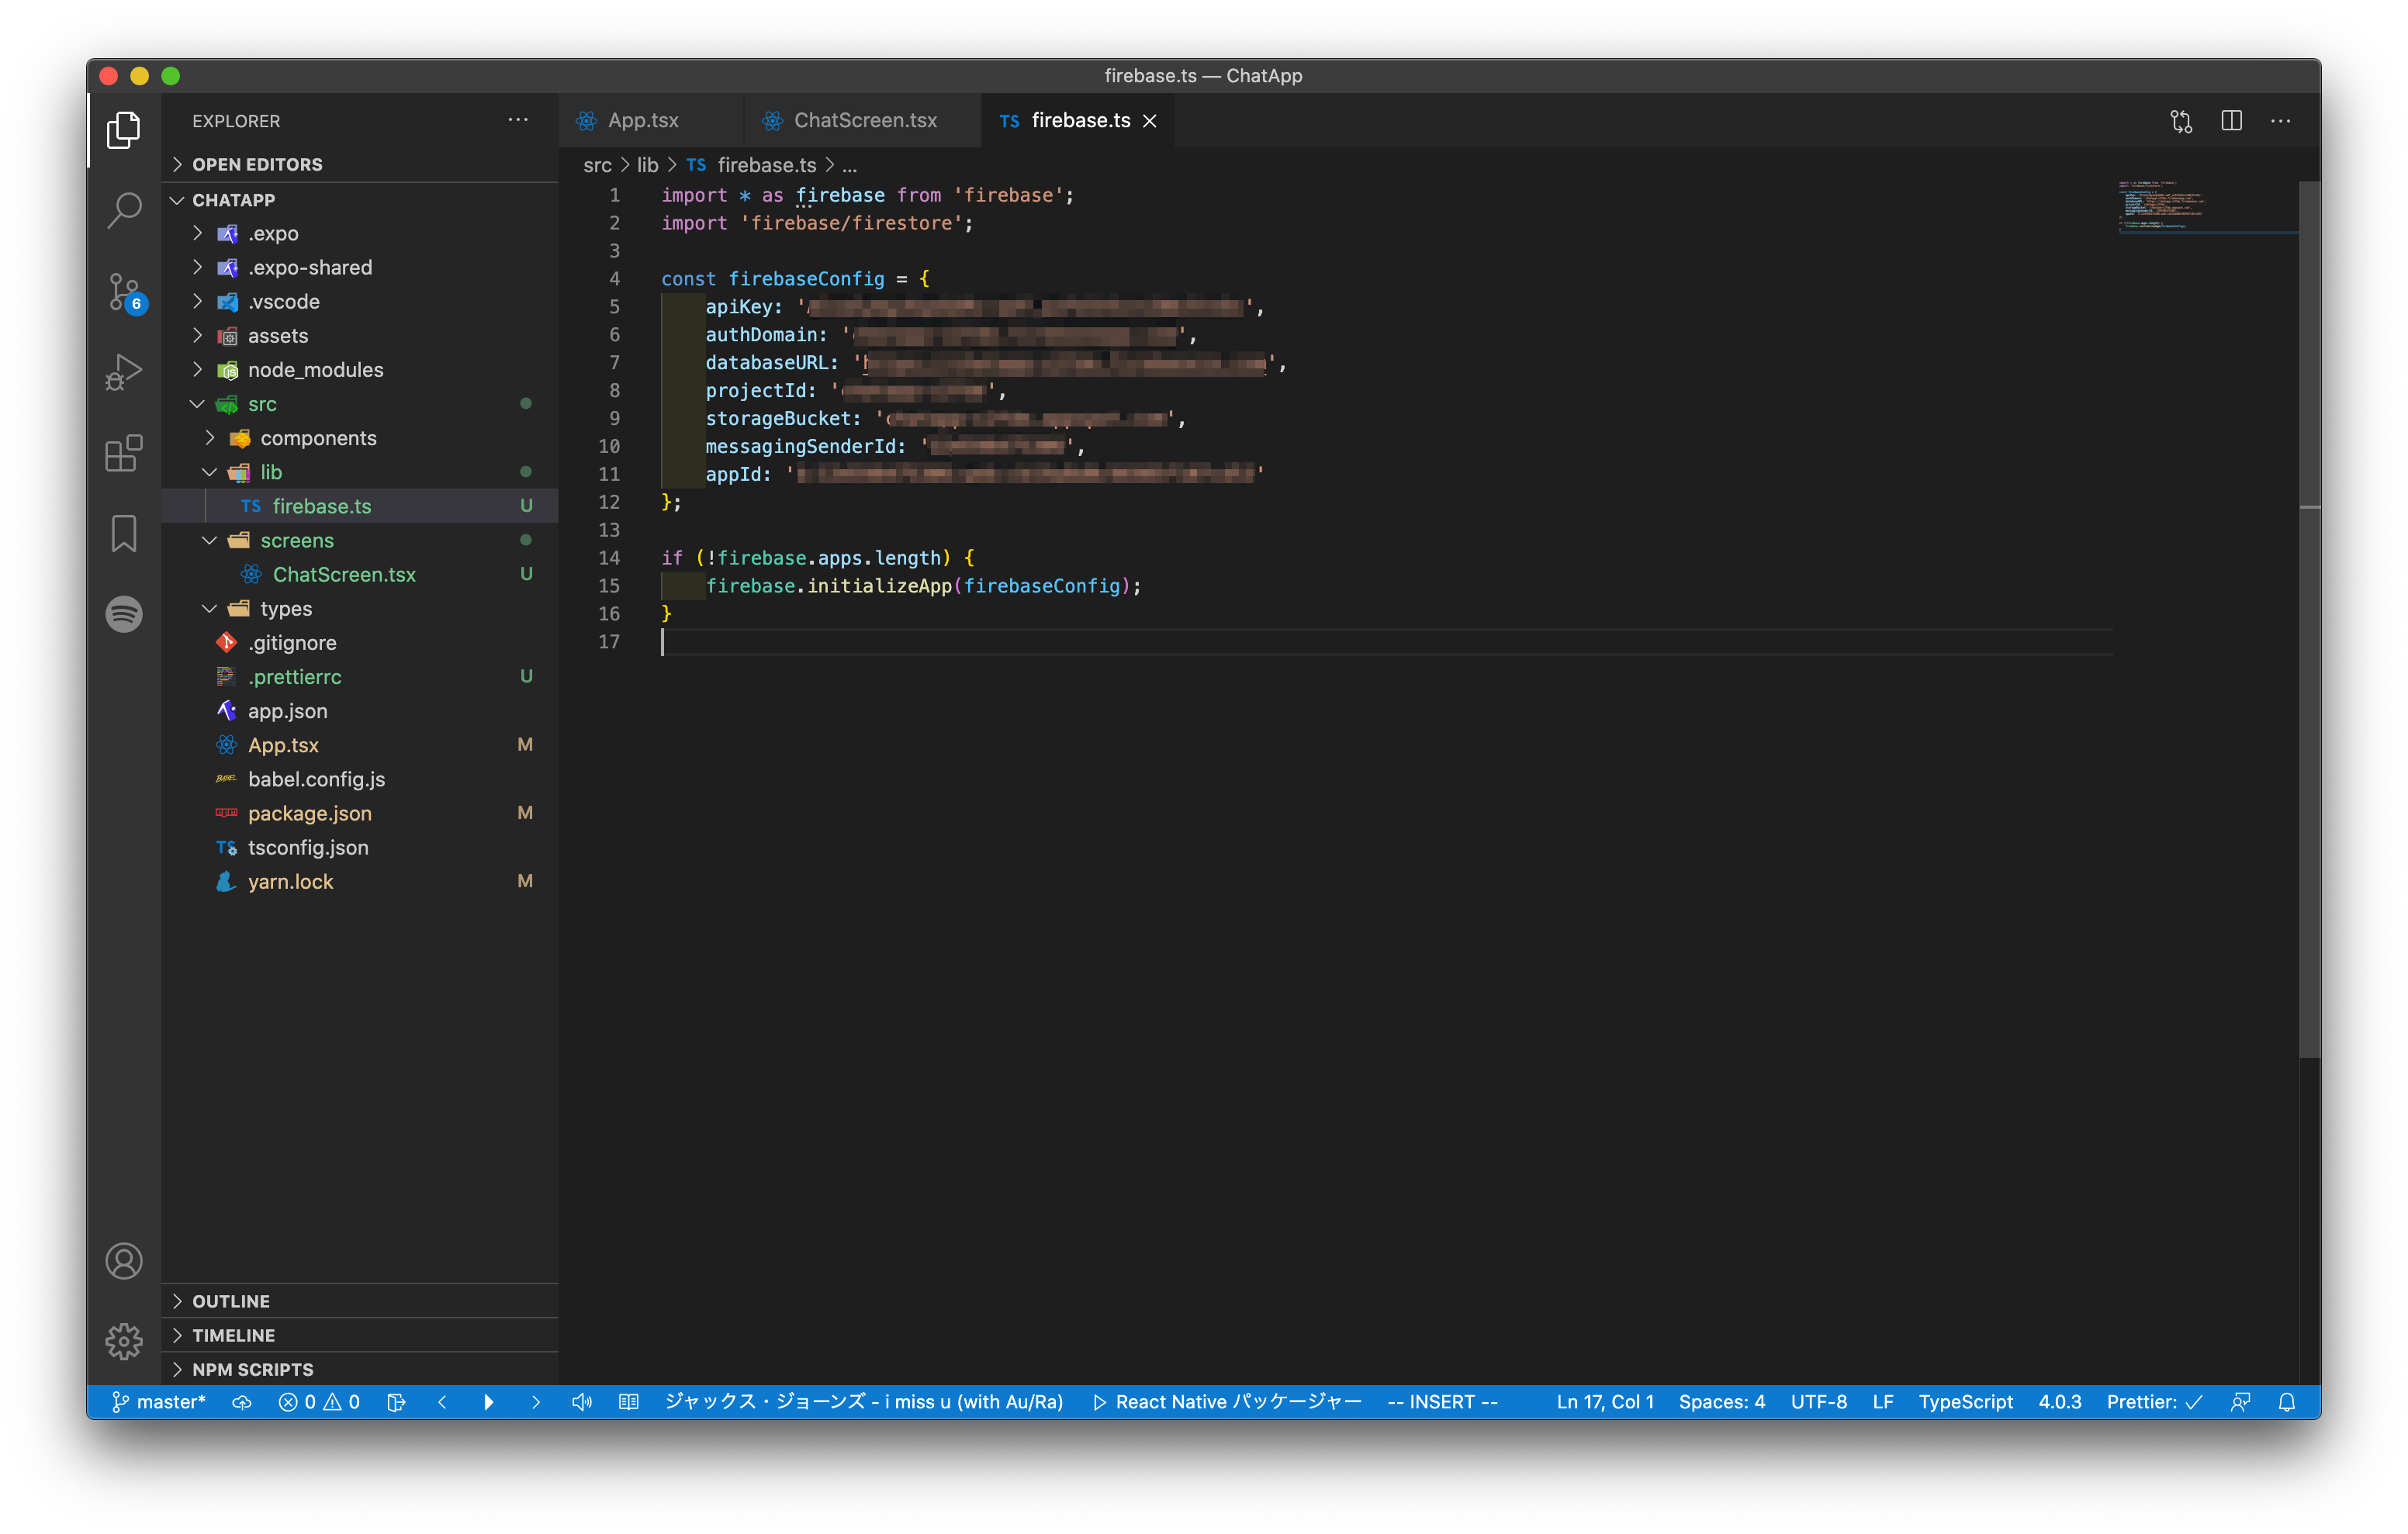
lib/firebase.tsというファイルを作成します。
//lib/firebase.ts

import * as firebase from 'firebase';
import 'firebase/firestore';

const firebaseConfig = {
    apiKey: 'YOUR_API_KEY',
    authDomain: 'YOUR_AUTH_DOMAIN',
    databaseURL: 'YOUR_DATABASE_URL',
    projectId: 'YOUR_PROJECT_ID',
    storageBucket: 'YOUR_STORAGE_BUCKET',
    messagingSenderId: 'YOUR_MESSAGING_SENDER_ID',
    appId: 'YOUR_APP_ID'
};

if (!firebase.apps.length) {
    firebase.initializeApp(firebaseConfig);
}
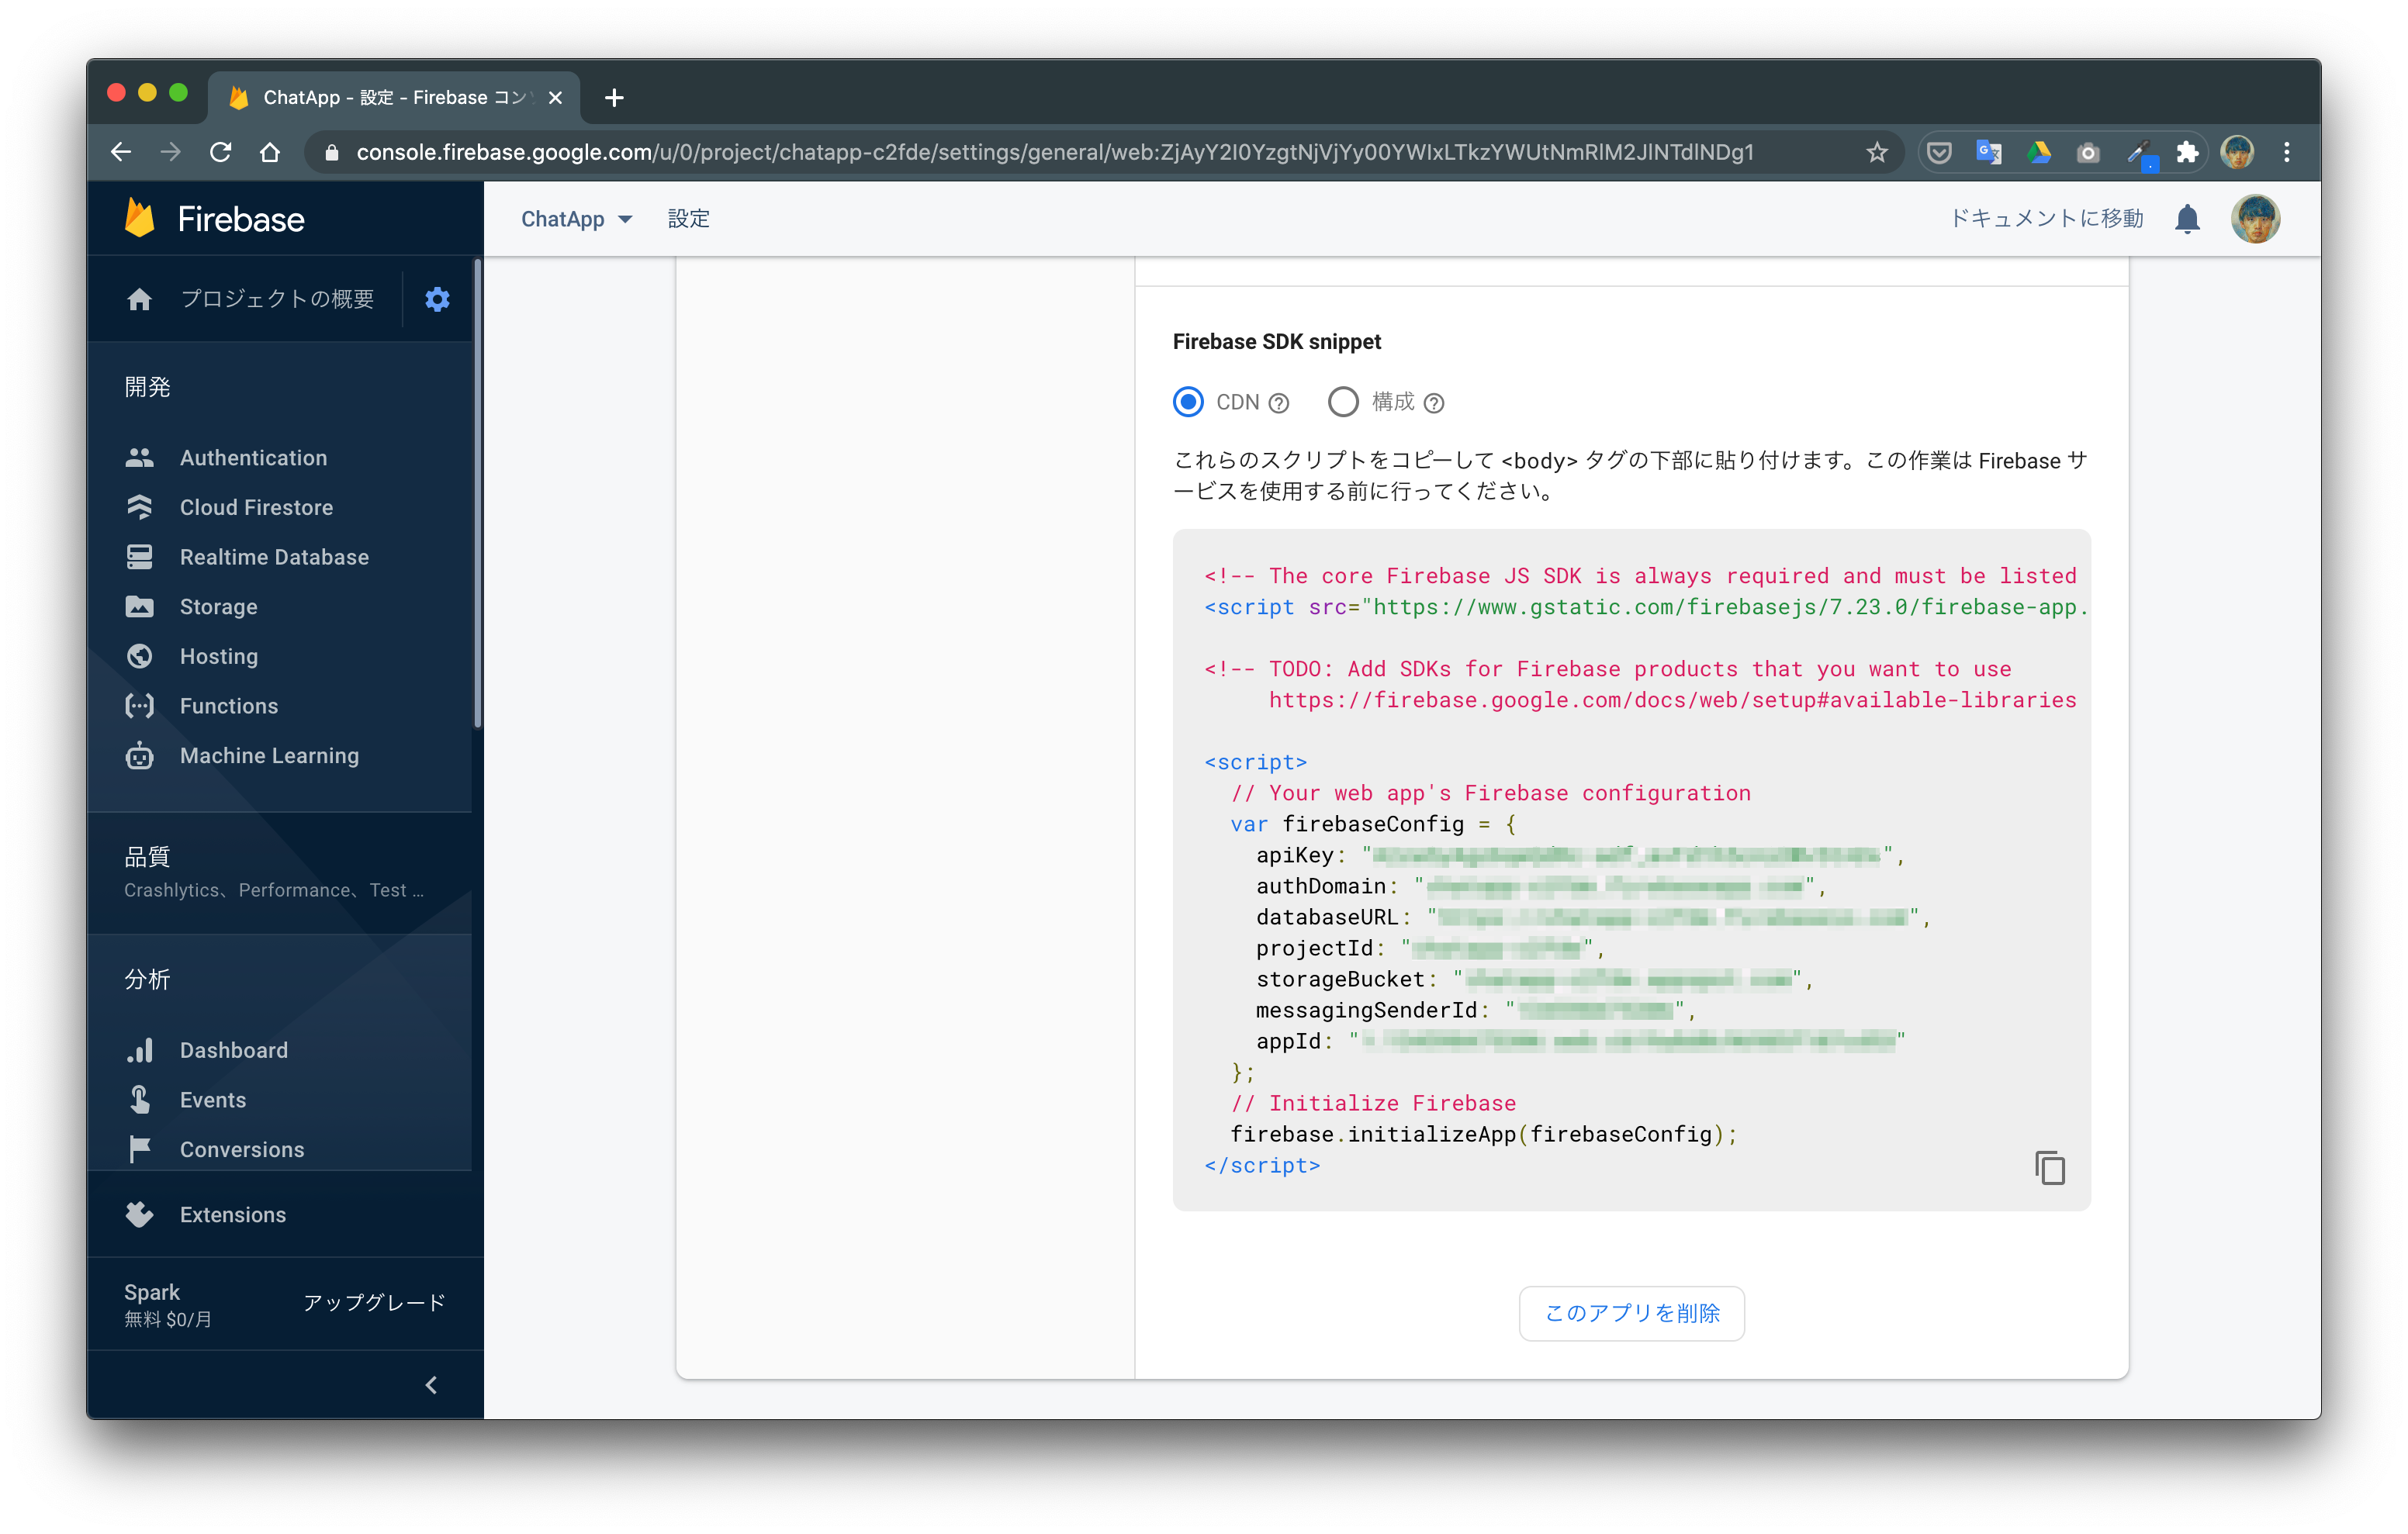
firebaseConfigの調べ方ですが、Firebaseの「プロジェクトの概要」の右側の設定アイコンから、「プロジェクトの設定」に遷移し、ページ下部に記載してあるものをコピペしてください。
これで、アプリ側からFirestoreの操作が行なえます。
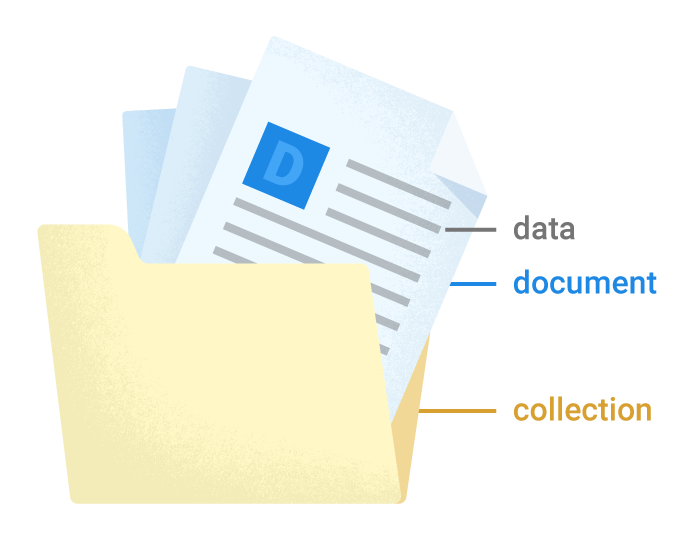
Firestoreは少し特殊なデータ構造をしており、コレクション>ドキュメント>データという構造をしています。
参照:Cloud Firestore データモデル | Firebase
まず、lib/firebase.tsで、messagesというコレクションの新規ドキュメントの参照を得る関数を定義します。
//lib/firebase.ts

import * as firebase from 'firebase';
import 'firebase/firestore';

const firebaseConfig = {
    apiKey: 'YOUR_API_KEY',
    authDomain: 'YOUR_AUTH_DOMAIN',
    databaseURL: 'YOUR_DATABASE_URL',
    projectId: 'YOUR_PROJECT_ID',
    storageBucket: 'YOUR_STORAGE_BUCKET',
    messagingSenderId: 'YOUR_MESSAGING_SENDER_ID',
    appId: 'YOUR_APP_ID'
};

if (!firebase.apps.length) {
    firebase.initializeApp(firebaseConfig);
}

export const getMessageDocRef = async () => {
    return await firebase.firestore().collection('messages').doc();
};
Firestoreにメッセージを保存する前準備として、メッセージの型を作成しておきます。
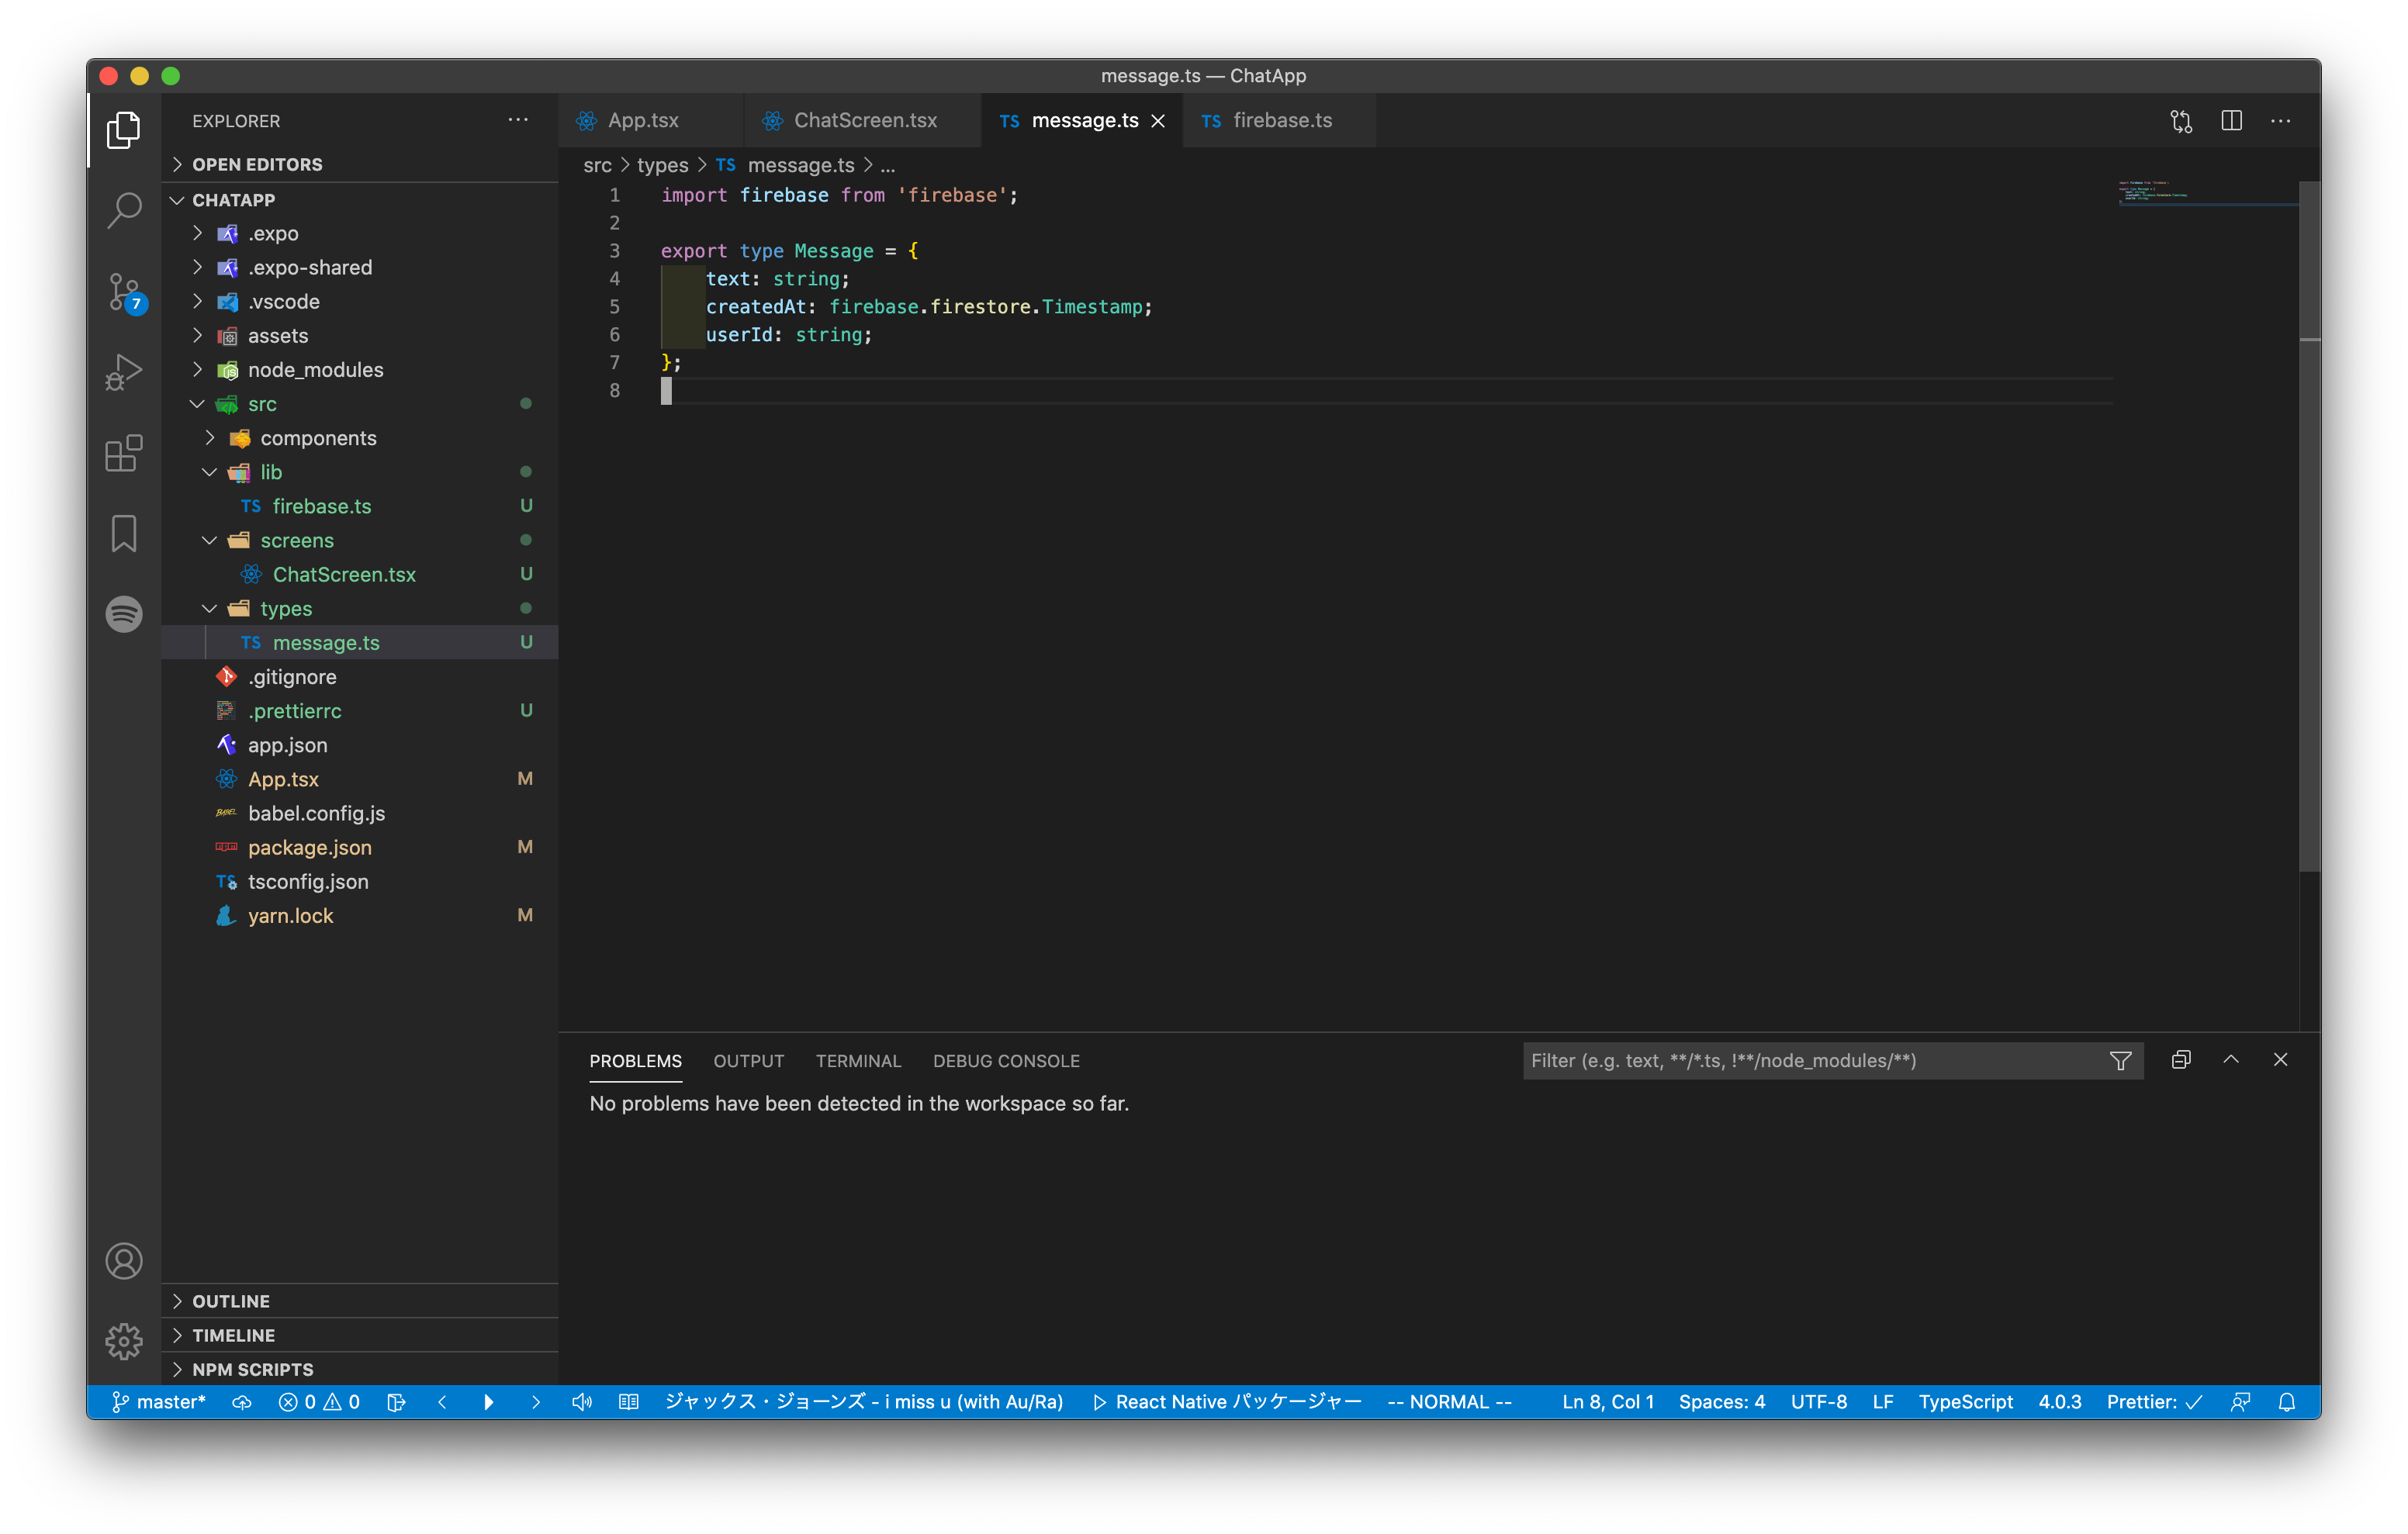
types/message.tsというファイルを作成し、Messageという型を定義します。
メッセージの内容と、送信時間、送信者を管理できるように、このようにMessageの型を定義します。
//types/message.ts

import firebase from 'firebase';

export type Message = {
    text: string;
    createdAt: firebase.firestore.Timestamp;
    userId: string;
};
次に、lib/firebase.tsで定義したgetMessageDocRefを用いて、screens/ChatScreen.tsxから新しいメッセージをFirestoreに保存するようにします。
//screens/ChatScreen.tsx

import React, { useState } from 'react';
import {
    StyleSheet,
    TextInput,
    SafeAreaView,
    View,
    Button,
    Alert
} from 'react-native';
import { StatusBar as ExpoStatusBar } from 'expo-status-bar';
import firebase from 'firebase';
import { getMessageDocRef } from '../lib/firebase';
import { Message } from '../types/message';

export const ChatScreen = () => {
    const [text, setText] = useState<string>('');

    const sendMessage = async (value: string) => {
        if (value != '') {
            const docRef = await getMessageDocRef();
            const newMessage = {
                text: value,
                createdAt: firebase.firestore.Timestamp.now(),
                userId: ''
            } as Message;
            await docRef.set(newMessage);
            setText('');
        } else {
            Alert.alert('エラー', 'メッセージを入力してください!')
        }
    };

    return (
        <SafeAreaView style={styles.container}>
            <ExpoStatusBar style="light" />
            <View style={styles.inputTextContainer}>
                <TextInput
                    style={styles.inputText}
                    onChangeText={(value) => {
                        setText(value);
                    }}
                    value={text}
                    placeholder="メッセージを入力してください"
                    placeholderTextColor="#777"
                    autoCapitalize="none"
                    autoCorrect={false}
                    returnKeyType="done"
                />
                <Button
                    title="send"
                    onPress={() => {
                        sendMessage(text);
                    }}
                />
            </View>
        </SafeAreaView>
    );
};

const styles = StyleSheet.create({
    container: {
        flex: 1,
        backgroundColor: '#333',
        alignItems: 'center',
        justifyContent: 'center'
    },
    inputTextContainer: {
        width: '100%',
        flexDirection: 'row',
        alignItems: 'center'
    },
    inputText: {
        color: '#fff',
        borderWidth: 1,
        borderColor: '#999',
        height: 32,
        flex: 1,
        borderRadius: 5,
        paddingHorizontal: 10
    }
});
一旦userIdは空のままですが、これでsendボタンでFirestoreにメッセージを保存することができます。
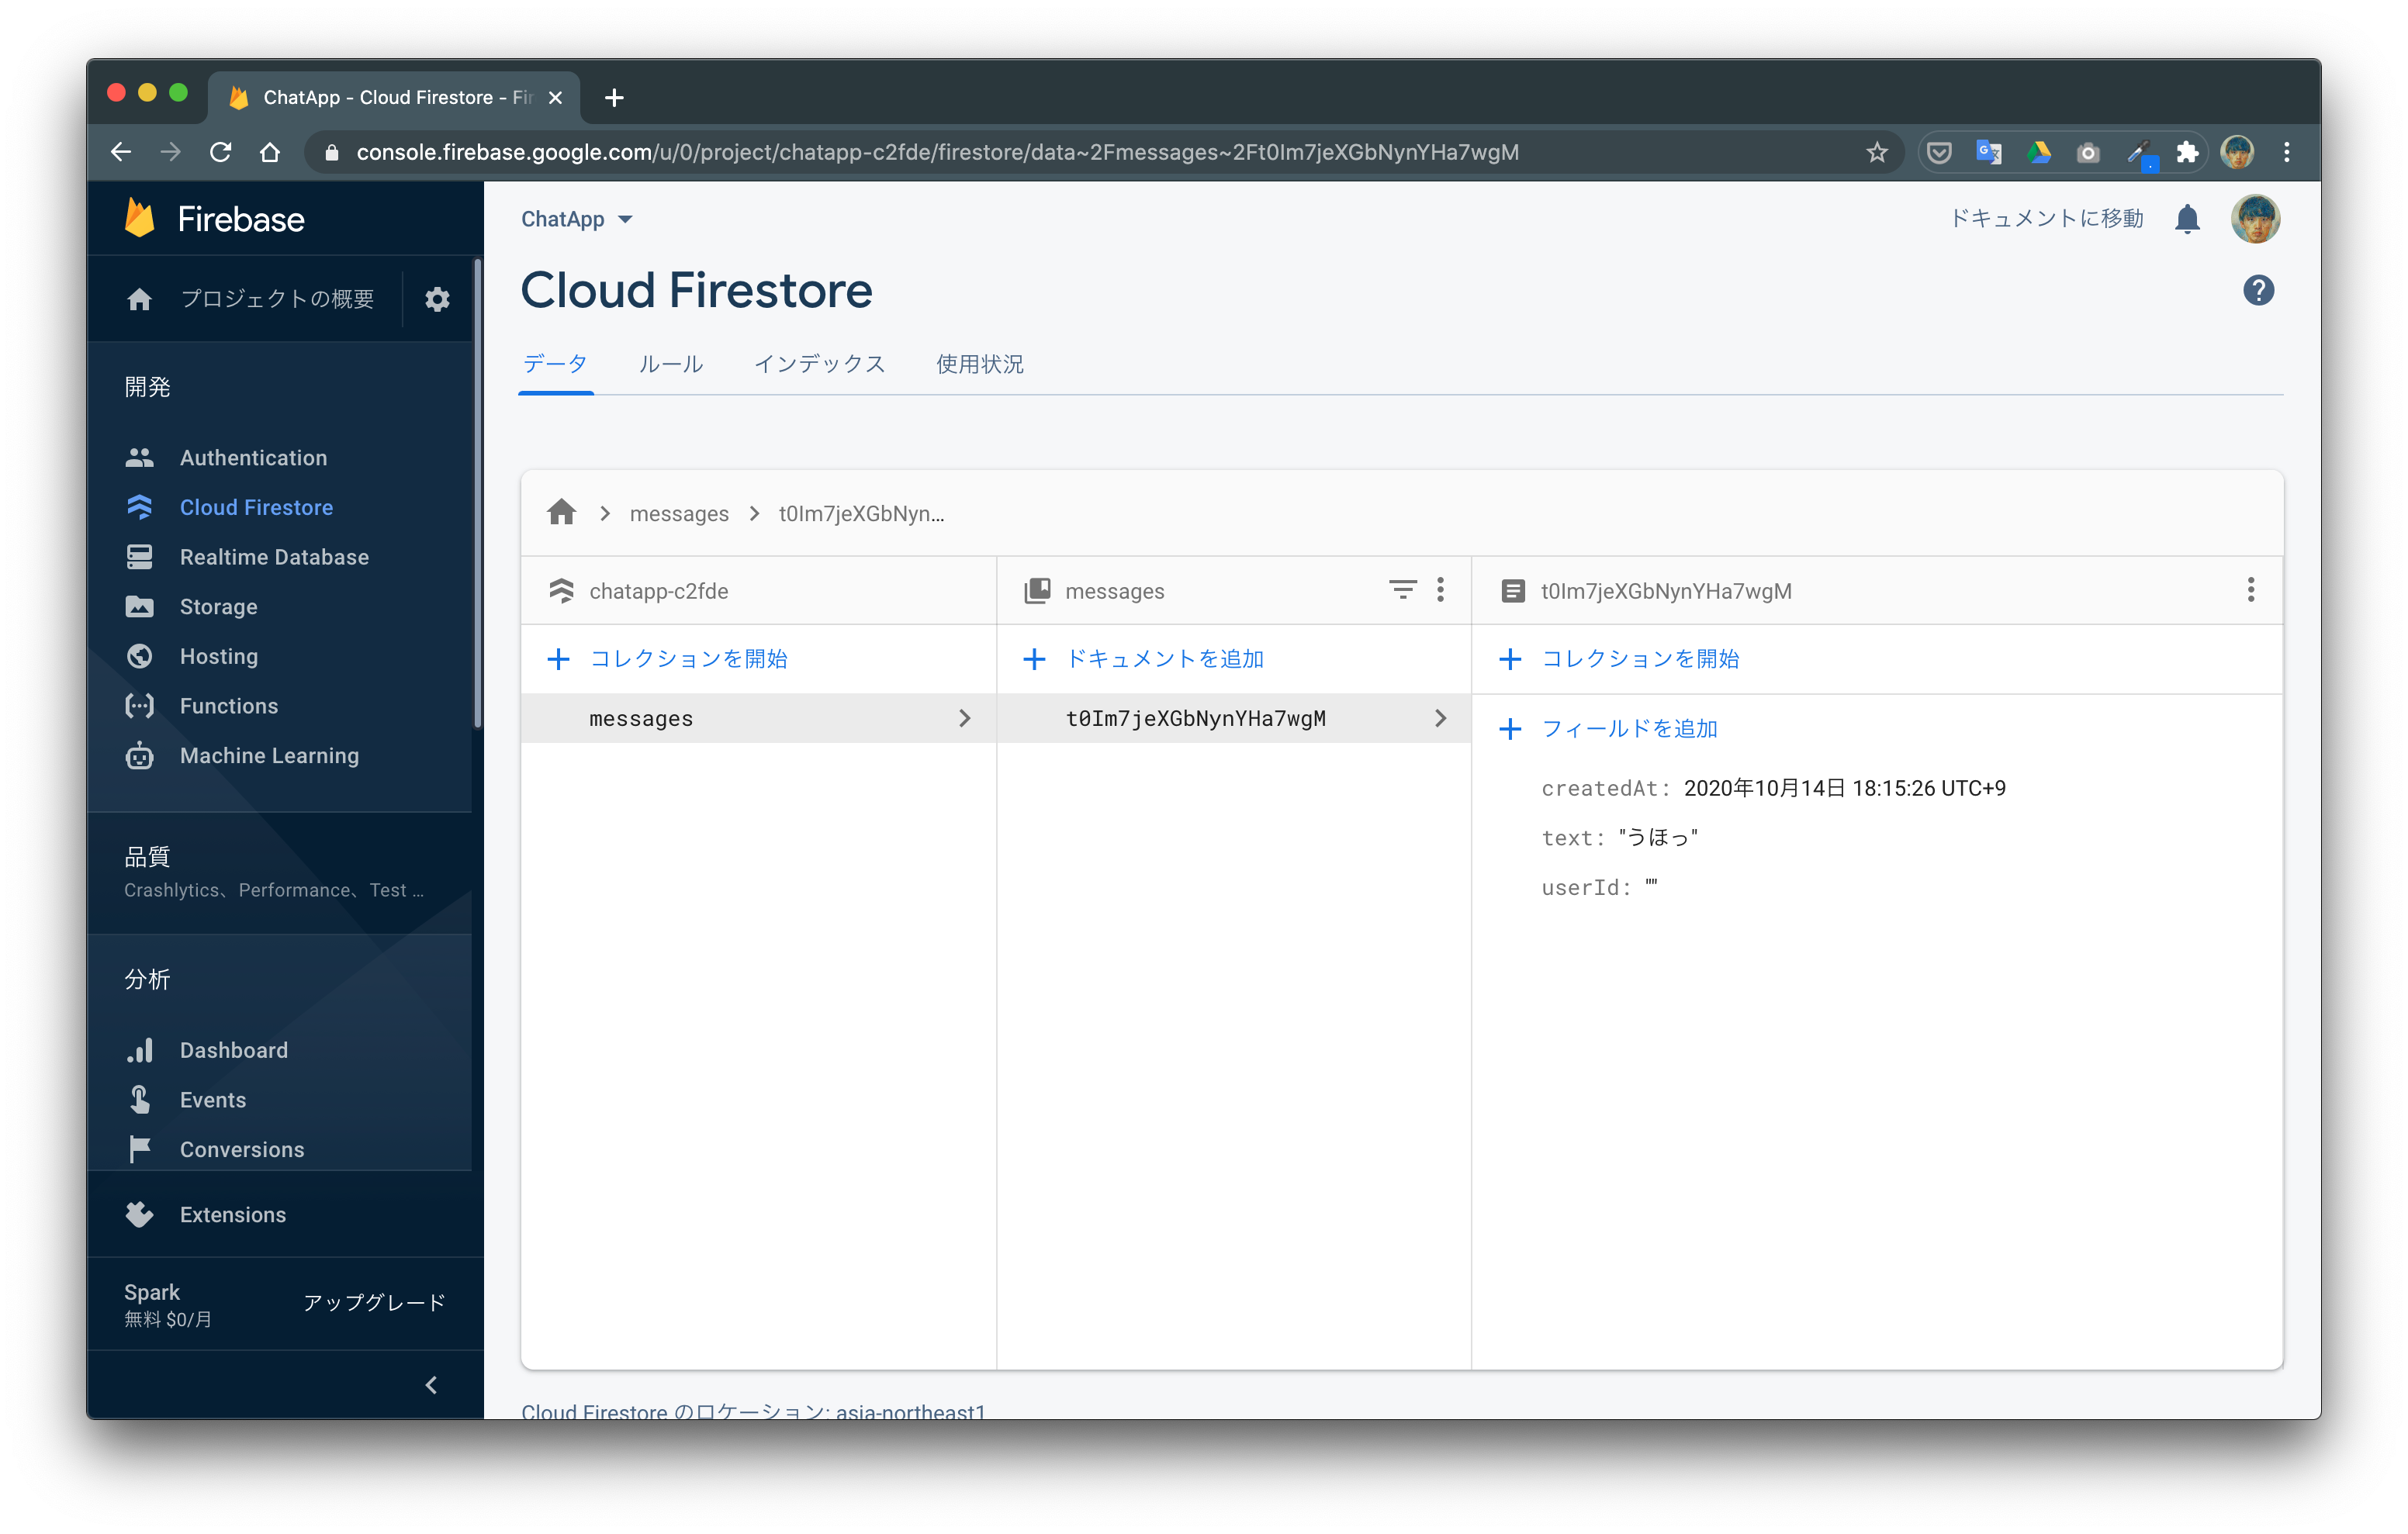
「うほっ」と入力し、sendボタンを押すと、、、

このようにドキュメントが追加されているはずです!!
次回はFirestoreに書き込んだデータを読み込んで、画面に表示できるようにします!!
チャットアプリは次回で完成します!!![]()
![]()

