1
1

Delete article

Deleted articles cannot be recovered.

Draft of this article would be also deleted.

Are you sure you want to delete this article?

More than 1 year has passed since last update.

パブリック / プライベートサブネットを用いて AWS でかんたんな VPC を構築する

Posted at

本記事の目的

  • 以下記事の実質続きとなります。

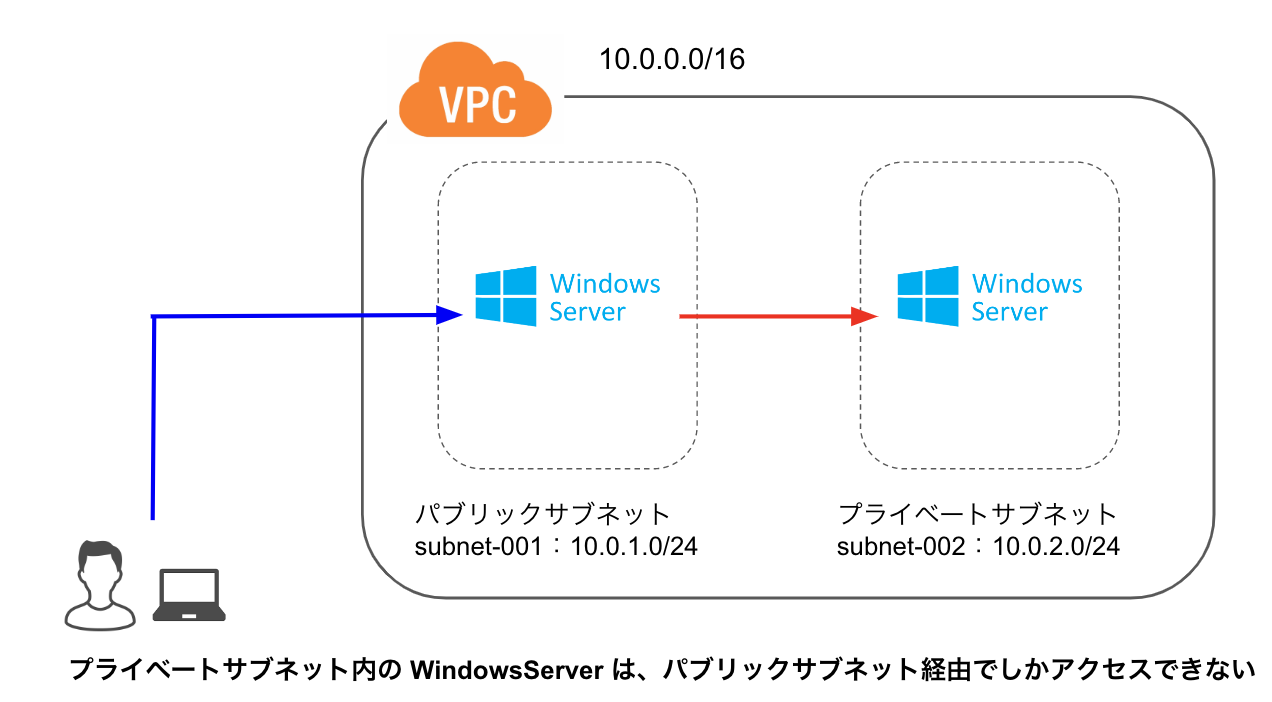
  • 以下のようなネットワークを構築してみる。前回の環境に対し、プライベートサブネットを用意する。

vpc-image-002.png

事前知識

  • AWS のサブネットには「パブリックサブネット」と「プライベートサブネット」という概念があるらしい。

  • 簡潔にまとめると、以下くらいの理解で良さそう。
    • パブリックサブネット:外部インターネットと通信可能
    • プライベートサブネット:外部インターネットと通信不可

手順

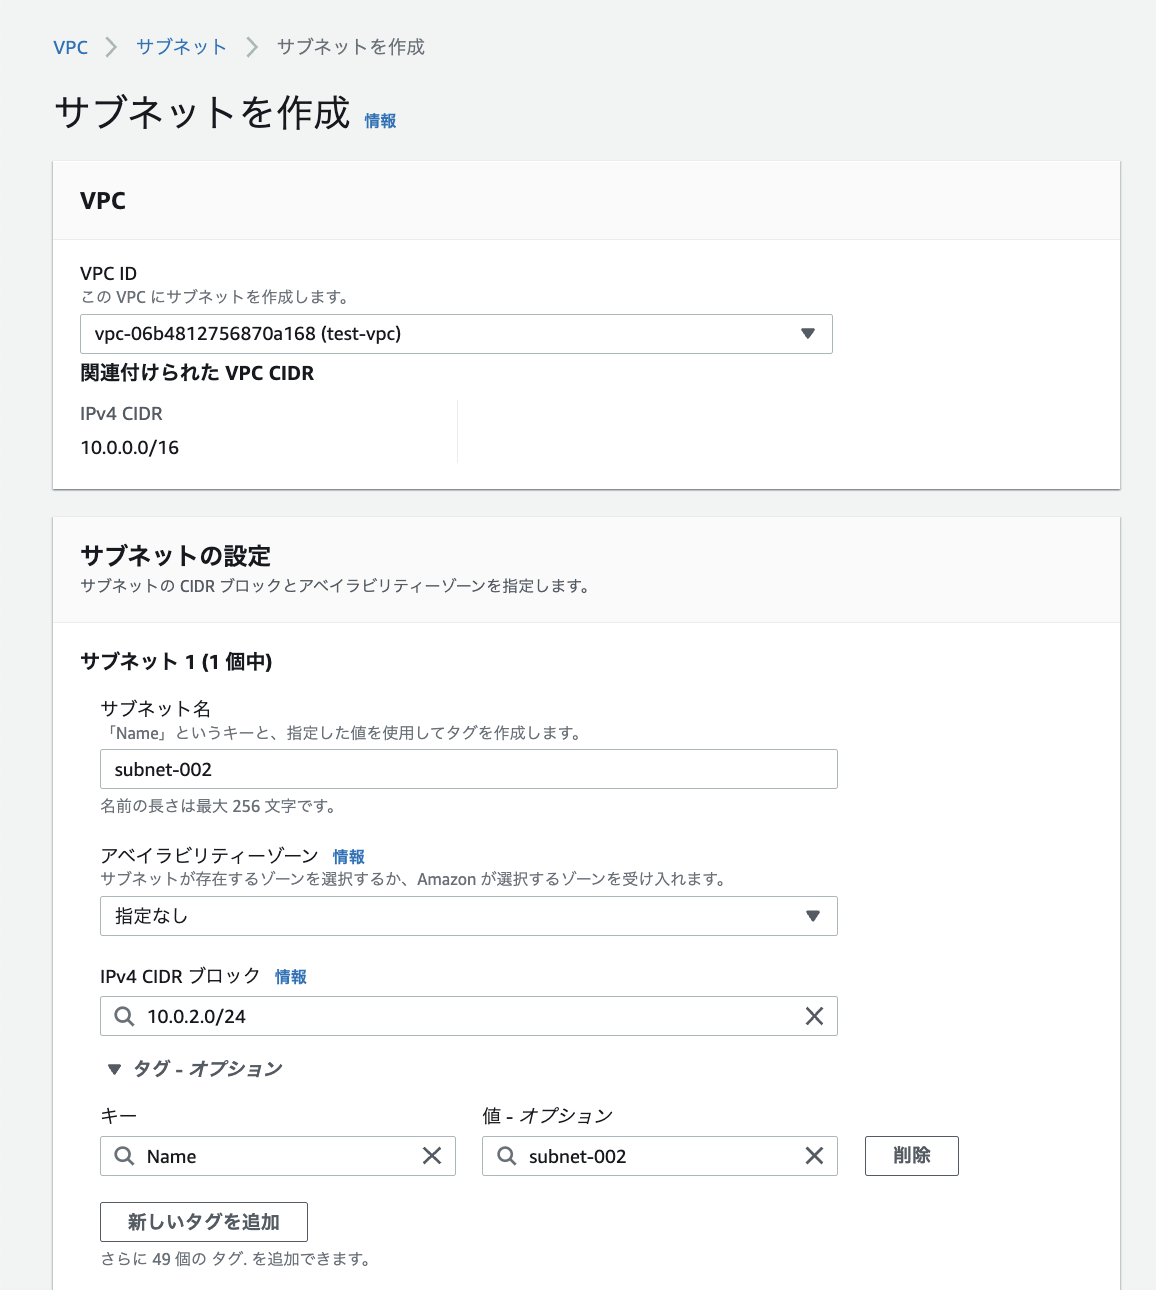
  • まずはプライベートサブネットを作成。名前は subnet-002 で、範囲は 10.0.2.0/24 にしておく。

subnet-002.png

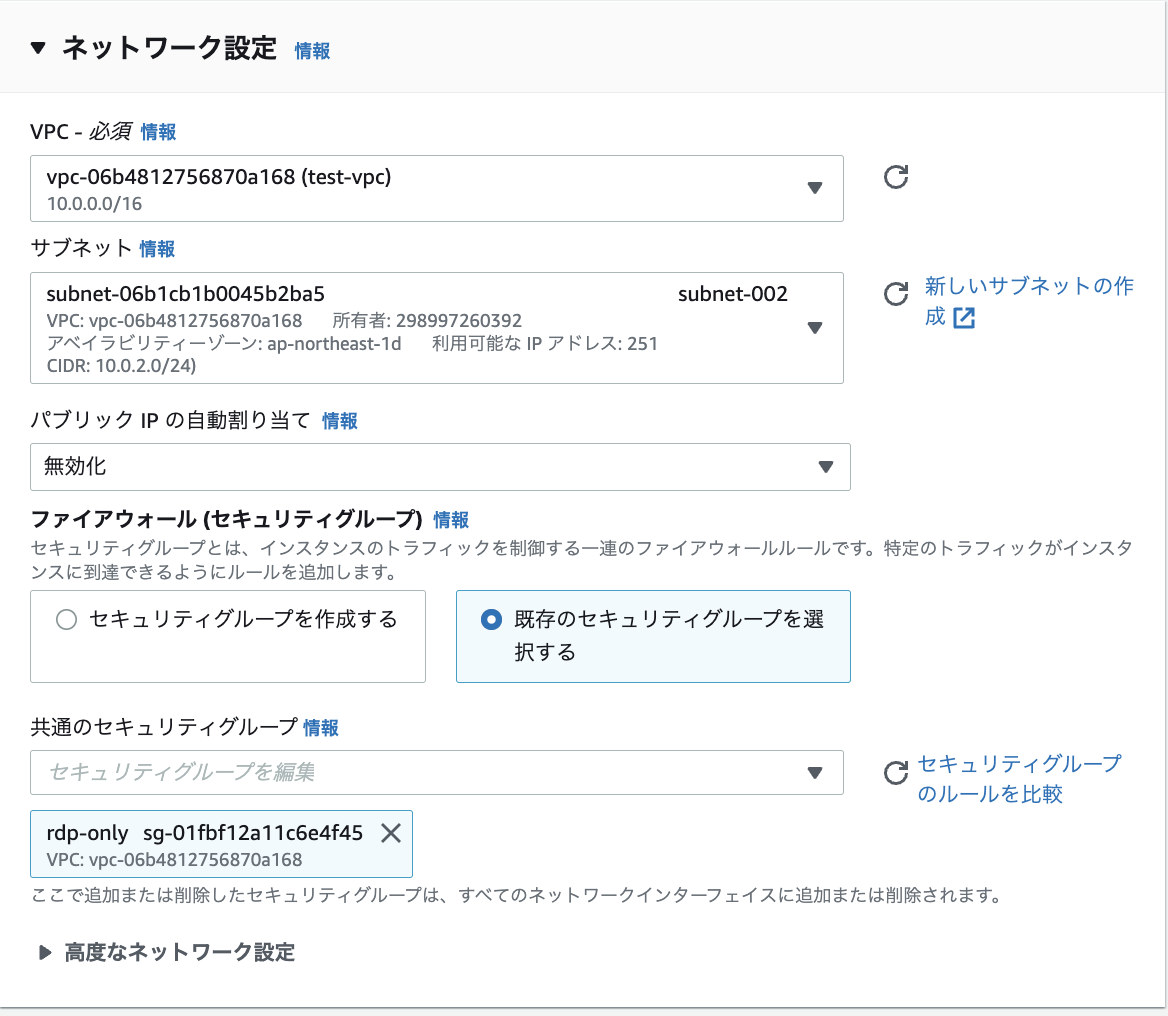
  • プライベートサブネット上にインスタンスを構築する。subnet-002 が割り当てられていることを確認し、「パブリックIPアドレスの割り当て」は無効化のままにしておく。

instance-create.png

  • デプロイした WindowsServer のプライベート IP アドレスを確認。今回は 10.0.2.43 が自動で割り当てられた。
    private-ip.png

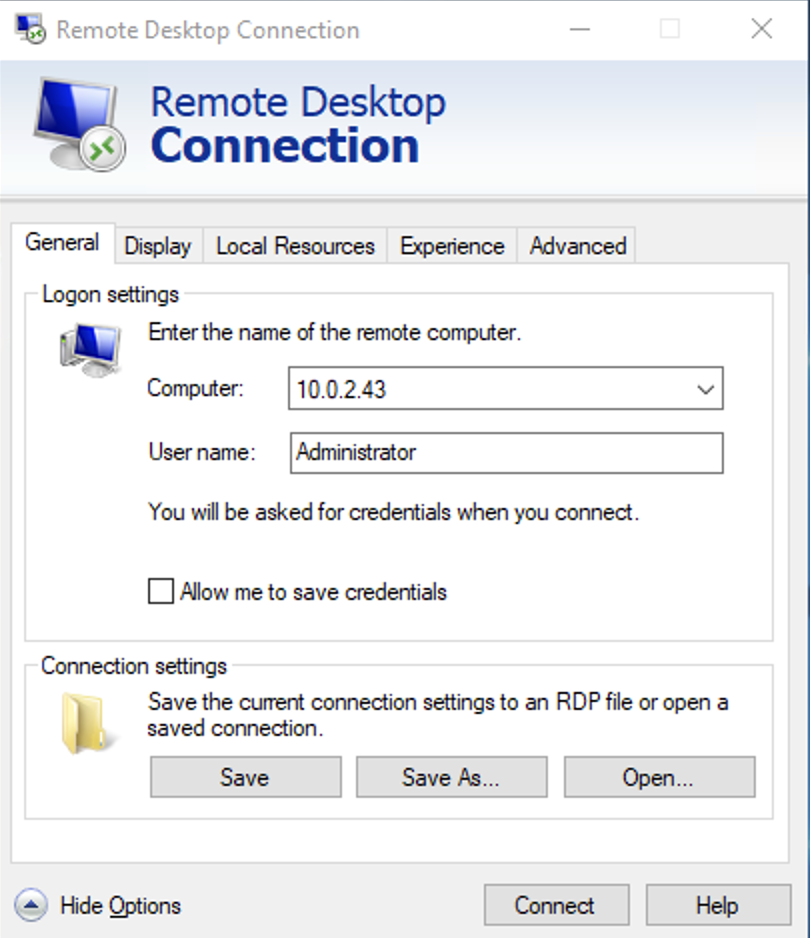
  • パブリックサブネットの WindowsServer にアクセスし、リモートデスクトップのアプリを開く

remote-desktop.png

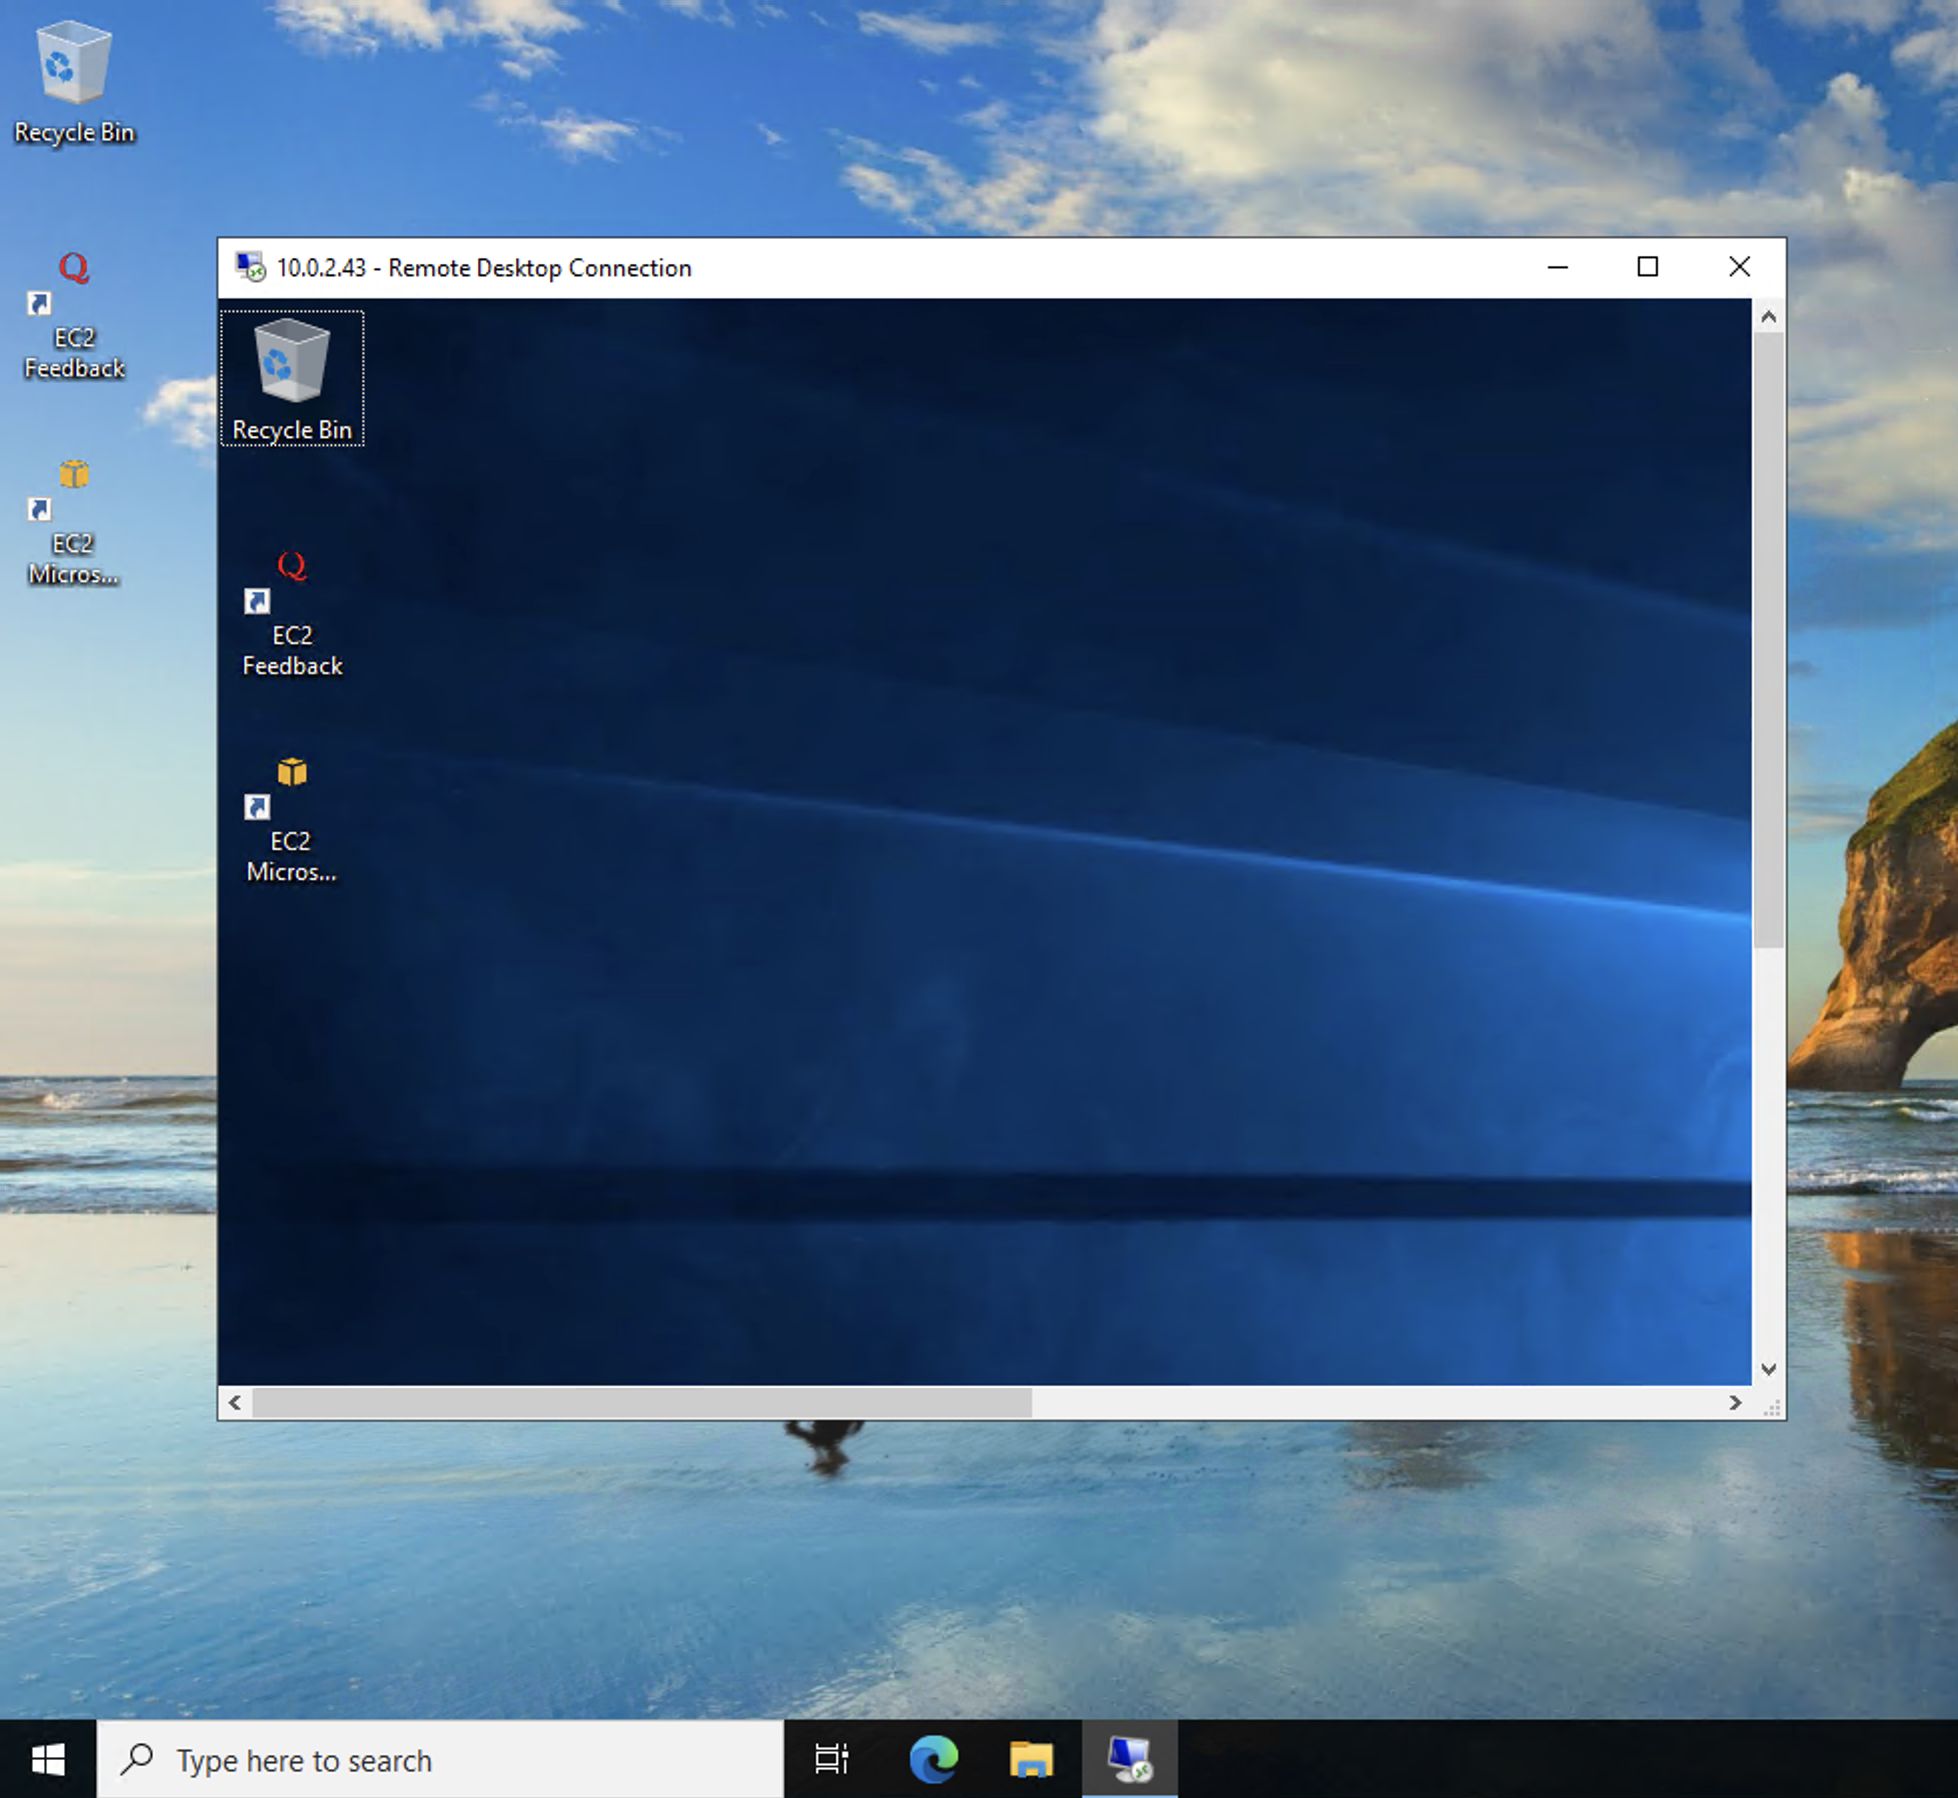
  • 認証情報を正しく入力すると、プライベートサブネットの WindowsServer にアクセスできた。

remote-desktop-002.png

終わりに

  • もうちょっとルートテーブルの設定とか必要なのかな?と思っていたが、案外かんたんに実施できて拍子抜け。。
    • 「特定のインスタンスからだけ、プライベートサブネットへのアクセス許可」みたいな運用を目指すのであれば、ルートテーブルの設定とかは必要そう。
1
1
0

Register as a new user and use Qiita more conveniently

  1. You get articles that match your needs
  2. You can efficiently read back useful information
  3. You can use dark theme
What you can do with signing up
1
1

Delete article

Deleted articles cannot be recovered.

Draft of this article would be also deleted.

Are you sure you want to delete this article?