はじめに
Tkinterは,PythonでGUIを作成する際の最も手軽な選択肢となります。ただし,その内容には若干の不満もあります。Frameのスクロールができないというのもその一つです。以下で,スクロール可能なFrameを作成するためのクラスを紹介します。
なお,下記で紹介するクラスは以下のサイトに掲載されいているクラスの一部を変更したものです。大変助かりました:
・Scrollable Frames in Tkinter | The Teclado Blog, https://blog.tecladocode.com/tkinter-scrollable-frames/
コード全文
TkinterではFrameにScrollbarをつけることができないので,スクロール可能なWidgetであるCanvasをまず生成し,その中にFrameを入れています。そして,Canvasのスクロール可能な範囲にFrameの幅を含めるようにしています。これにより,Canvasがスクロールされた際に内部のFrameも同時にスクロールして見せることができます。
import tkinter as tk
import tkinter.ttk as ttk

class ScrollableFrame(ttk.Frame):
    def __init__(self, container, bar_x = True, bar_y = True):
        super().__init__(container)
        self.canvas = tk.Canvas(self)
        self.scrollable_frame = ttk.Frame(self.canvas)
        self.scrollable_frame.bind(
            "<Configure>",
            lambda e: self.canvas.configure(
                scrollregion=self.canvas.bbox("all")
            )
        )
        self.canvas.create_window((0, 0), window=self.scrollable_frame, anchor="nw")
        if bar_y:
            self.scrollbar_y = ttk.Scrollbar(self, orient="vertical", command=self.canvas.yview)
            self.scrollbar_y.pack(side=tk.RIGHT, fill="y")
            self.canvas.configure(yscrollcommand=self.scrollbar_y.set)
        if bar_x:
            self.scrollbar_x = ttk.Scrollbar(self, orient="horizontal", command=self.canvas.xview)
            self.scrollbar_x.pack(side=tk.BOTTOM, fill="x")
            self.canvas.configure(xscrollcommand=self.scrollbar_x.set)
        self.canvas.pack(side=tk.LEFT, fill="both", expand=True)
実際に使ってみる
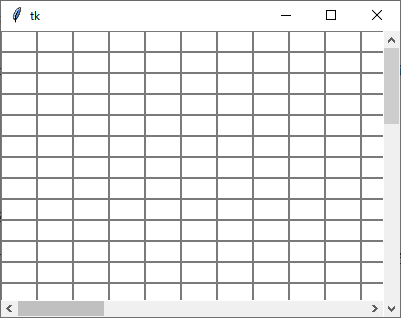
実際に使ってみると下記のようになります。
root = tk.Tk()

frame = ScrollableFrame(root)

for i in range(50):
    for j in range(50):
        ttk.Entry(frame.scrollable_frame, width=5).grid(row=i, column=j)

frame.pack()
root.mainloop()
使い方
ポイントは2つ,インスタンス生成時とScrollableFrame内へのWidgetの配置です。
①インスタンス生成時
スクロール可能なフレームといっても,x軸とy軸の両方が必要な場合は少ないかもしれません。そこで,追加するScrollbarを選べるようにしました。初期値はTrueですので,必要に応じて非表示を選択します。
def __init__(self, container, bar_x = True, bar_y = True):
②ScrollableFrame内へのWidgetの配置
上で説明したように,Canvas内にFrameを作成しています。したがって,Widgetを配置する際もCanvas内のFrame(scrollable_frame)に配置する必要があります。下記のようにします。
frame = ScrollableFrame(root)
ttk.Label(frame.scrollable_frame, text="sample").pack
【補足】
今回のクラスは,下記サイトに掲載のクラスを変更したものです。
・Scrollable Frames in Tkinter | The Teclado Blog, https://blog.tecladocode.com/tkinter-scrollable-frames/
変更点は下記の2点です:
- Scrollbarがy軸しか用意されていませんでしたので,y軸とx軸の両方に対応できるように変更を加えました。
- x軸・y軸の表示・非表示を選べた方が便利な場合が多いので,それも選べるようにしました。
