はじめに
前回の記事では、Templateというリソースを作成してGolden Pathの実行まで完了しました。
今回はtemplate.yamlに追記を行い、より実践的なGolden Pathの作成を行います。
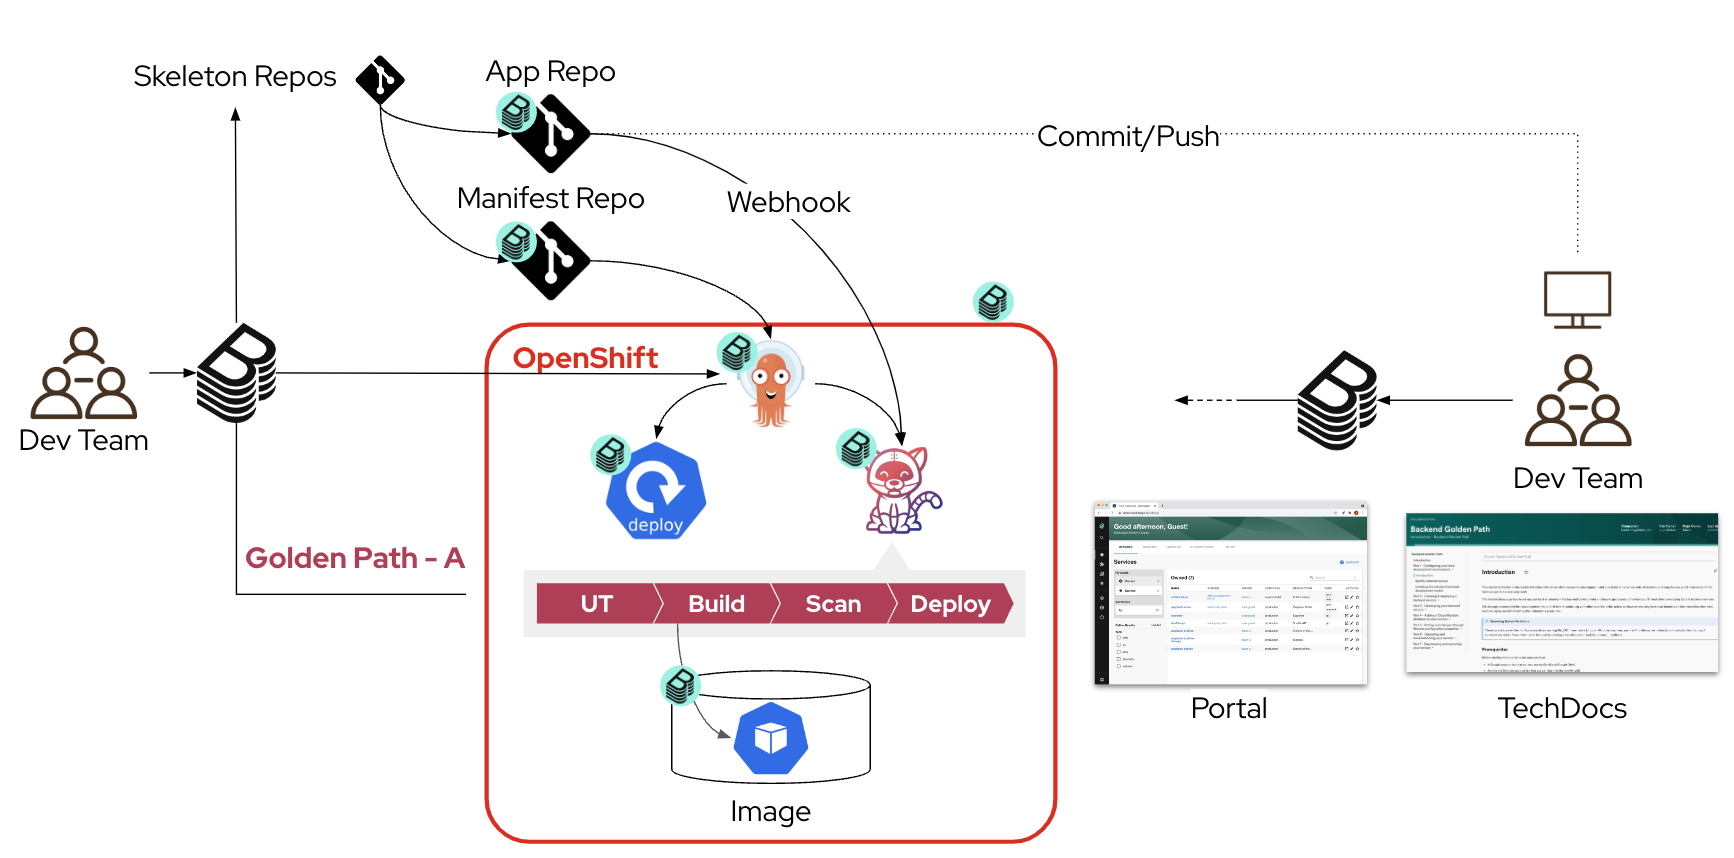
実現する環境
章項目
今回のテーマは6つの記事で構成されています。
- Red Hat Developer Hub (Backstage) でGolden Pathを作ろう〜環境導入編〜
- Red Hat Developer Hub (Backstage) でGolden Pathを作ろう〜認証設定編〜
- Red Hat Developer Hub (Backstage) でGolden Pathを作ろう〜GitHub Integration編〜
- Red Hat Developer Hub (Backstage) でGolden Pathを作ろう〜Golden Path作成編①〜
- Red Hat Developer Hub (Backstage) でGolden Pathを作ろう〜Golden Path作成編②〜 この記事
- Red Hat Developer Hub (Backstage) でGolden Pathを作ろう〜Component UI改善編〜
前提条件
以下の記事の実行が完了していること
- Red Hat Developer Hub (Backstage) でGolden Pathを作ろう〜環境導入編〜
- Red Hat Developer Hub (Backstage) でGolden Pathを作ろう〜認証設定編〜
- Red Hat Developer Hub (Backstage) でGolden Pathを作ろう〜GitHub Integration編〜
- Red Hat Developer Hub (Backstage) でGolden Pathを作ろう〜Golden Path作成編①〜
Sample Skeletonの取得
今回実行するGolden PathでデプロイするためのアプリケーションとK8s ManifestのサンプルコードをGitHubから取得します。
サンプルコードは以下のGitリポジトリにありますので、こちらをcloneしてきましょう。
https://github.com/rhdh-skitamura-org/sample-skeleton-origin
git clone https://github.com/rhdh-skitamura-org/sample-skeleton-origin.git
そしてapp-skeletonディレクトリとmanifest-skeletonを自分のsample-skeletonディレクトリにコピーしてきましょう。
※app-skeletonはすでに存在しますが、上書きしてしまってOKです。
cp -R sample-skeleton-origin/app-skeleton sample-skeleton/
cp -R sample-skeleton-origin/manifest-skeleton sample-skeleton/
少しディレクトリの中身を確認します。
app-skeletonは前回の記事で記載した通り、アプリケーションコードのサンプルを格納してあります。
$ tree -L 1 app-skeleton
app-skeleton
├── Dockerfile
├── LICENSE
├── README.md
├── catalog-info.yaml
├── design
├── images
├── site
└── tests
manifest-skeletonにはその名の通り、様々な用途のK8s Manifestが格納されています。
$ tree -L 3 manifest-skeleton
manifest-skeleton
├── README.md
├── argocd
│   ├── argocd-app-build.yaml
│   └── argocd-app-dev.yaml
└── kustomize
    ├── app
    │   ├── base
    │   └── overlays
    └── build
        ├── base
        └── overlays
-
manifest-skeleton: こちらは主に以下の種類のmanifestを格納するSkeletonになります。-
argocd: RHDHが作成するArgoCDのApplicationリソースを格納するディレクトリです。 -
kustomize/app: アプリケーションのデプロイに必要なK8s Manifestを格納します。 -
kustomize/build: CIの実行に必要なK8s Manifestを格納します。
-
Vault Secretの作成
manifest-skeletonの中を確認すると、いくつかのSecretをExternalSecretとして設定していることがわかります。
$ tree manifest-skeleton/kustomize/build/base
manifest-skeleton/kustomize/build/base
├── el-route.yaml
├── external-secret-basic-auth.yaml
├── external-secret-sonar-settings.yaml
├── external-secret-webhook.yaml
├── external-secret-webhooksecret.yaml
├── git-cli.yaml
├── git-clone.yaml
├── job-create-webhook.yaml
├── kustomization.yaml
├── kustomize.yaml
├── pipeline.yaml
├── sonarqube.yaml
├── tekton-pvc.yaml
├── trigger-sa.yaml
├── triggertemplate.yaml
└── trivy.yaml
$ cat manifest-skeleton/kustomize/build/base/external-secret-basic-auth.yaml
apiVersion: external-secrets.io/v1beta1
kind: ExternalSecret
metadata:
  name: external-${{ values.git }}-basic-auth
spec:
  secretStoreRef:
    name: vault-secretstore
    kind: ClusterSecretStore
  target:
    name: ${{ values.git }}-basic-auth
  data:
  - secretKey: .git-credentials
    remoteRef:
      key: secret/${{ values.git }}-basic-auth
      property: .git-credentials
  - secretKey: .gitconfig
    remoteRef:
      key: secret/${{ values.git }}-gitconfig
      property: .gitconfig
そのため、あらかじめVaultでSecret情報を登録しておきましょう。
今回必要なSecret情報は以下の4つになります。
-
git_token: Golden Pathの実行によって作成されたappリポジトリに対してwebhookを設定するjobを実行します。そのjobにGitHubのPersonal Access Tokenを渡す必要があるため、その値をこの変数に格納します。 -
webhook_secret: webhookには任意のWebhook Secretを設定する必要があるため、こちらもSeretとして管理します。 -
.git-credentials: manifestリポジトリ内のdeployment.yamlはPipeline上でimageの書き換えを行います。そのためGitHubにPushするために必要なクレデンシャル情報を.git-credentialsとして渡す必要があります。 -
sonar-project.properties: 今回のGolden Pathで用意されたPipelineでは、SonarqubeでのScanが含まれます。そのSonarqubeとの連携に必要な情報をSecretとして管理します。
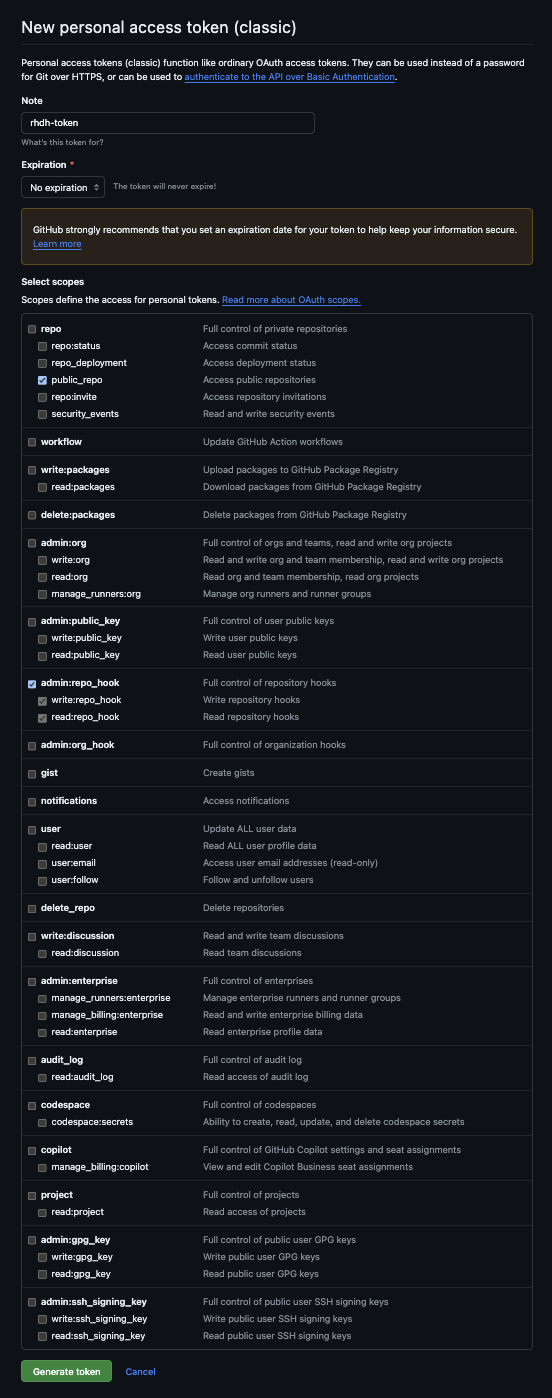
GitHubのAccess Tokenの取得
git_tokenや.git-credentialsに必要なAccess Tokenを取得します。
- GitHubの右上のプロフィールアイコンから
Settingsを選択します。 - 左側のサイドバーから
Developer settingsを選択します。 -
Personal access tokensセクションを選択し、Tokens (classic)を選択します。 -
Generate new token (Classic)を選択します。 - 任意の名前を記述し、
Select scopesで以下のScopeにチェックを入れてGenerate tokenを選択します。public_repoadmin:repo_hook
するとtokenが発行されるので、こちらをメモしておきましょう。

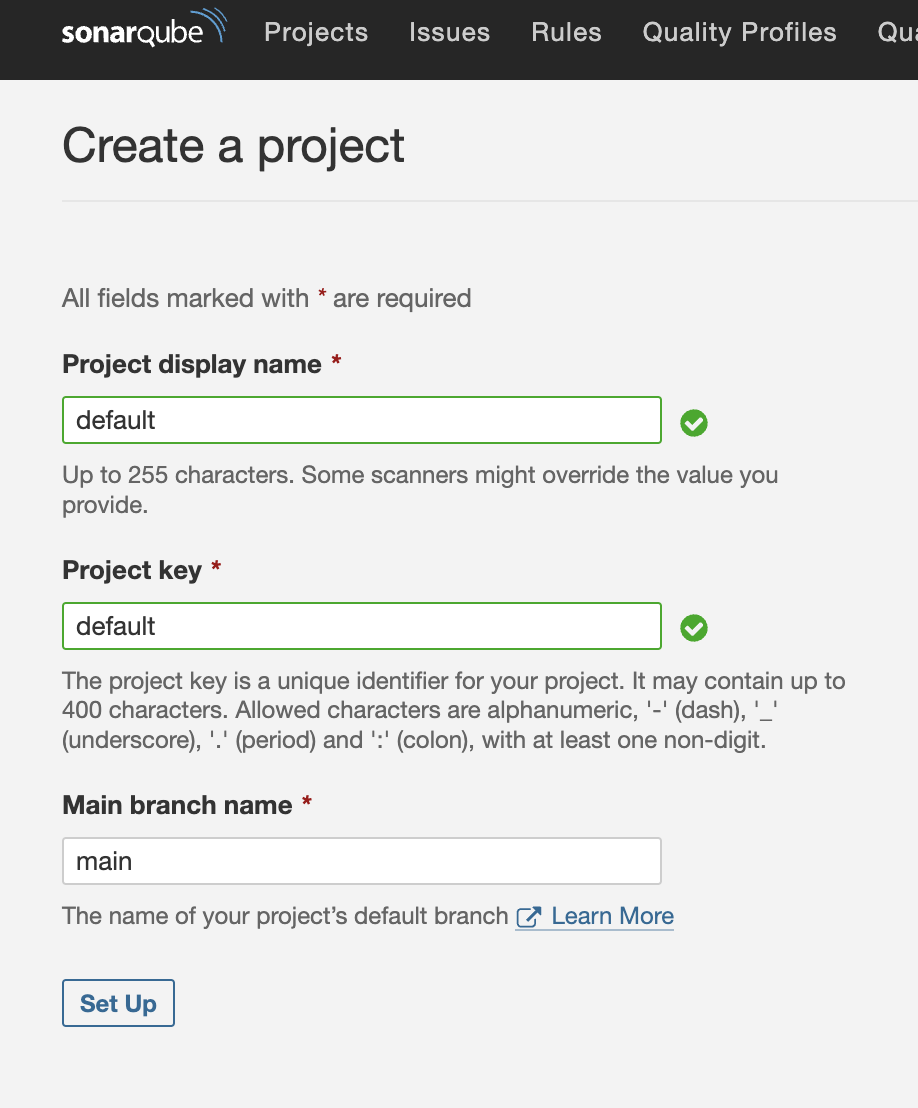
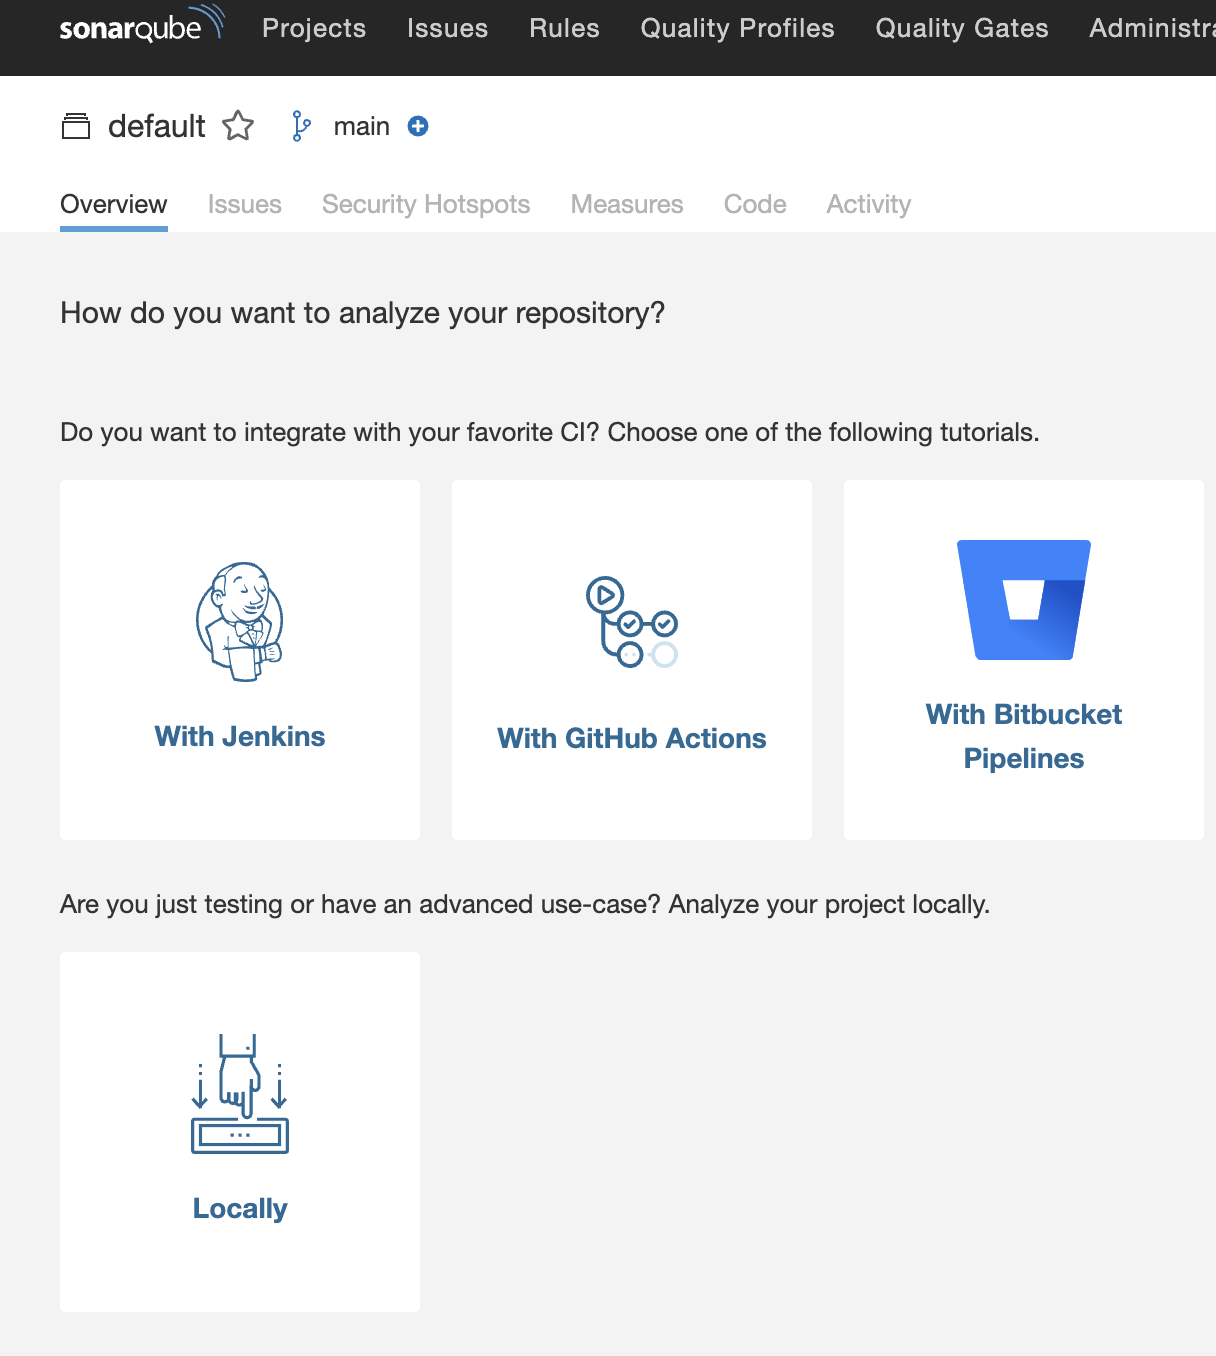
SonarqubeのSecretの取得
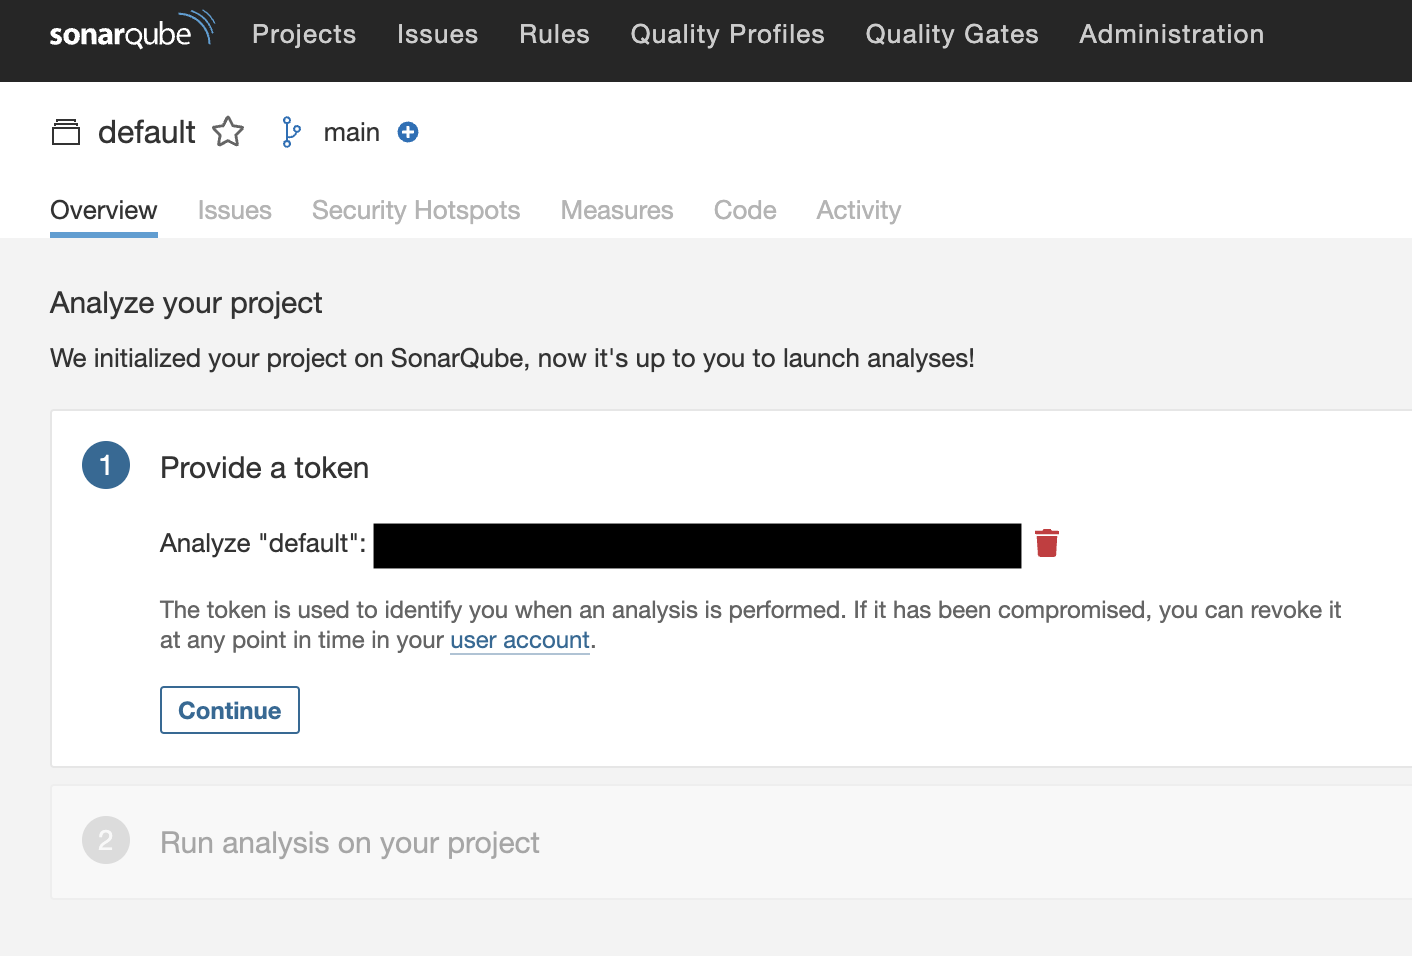
次にSonarqubeの を取得します。
Sonarqubeの画面右上のCreate Project→Manuaryを選択します。

Provide a tokenでGenerateを選択します。
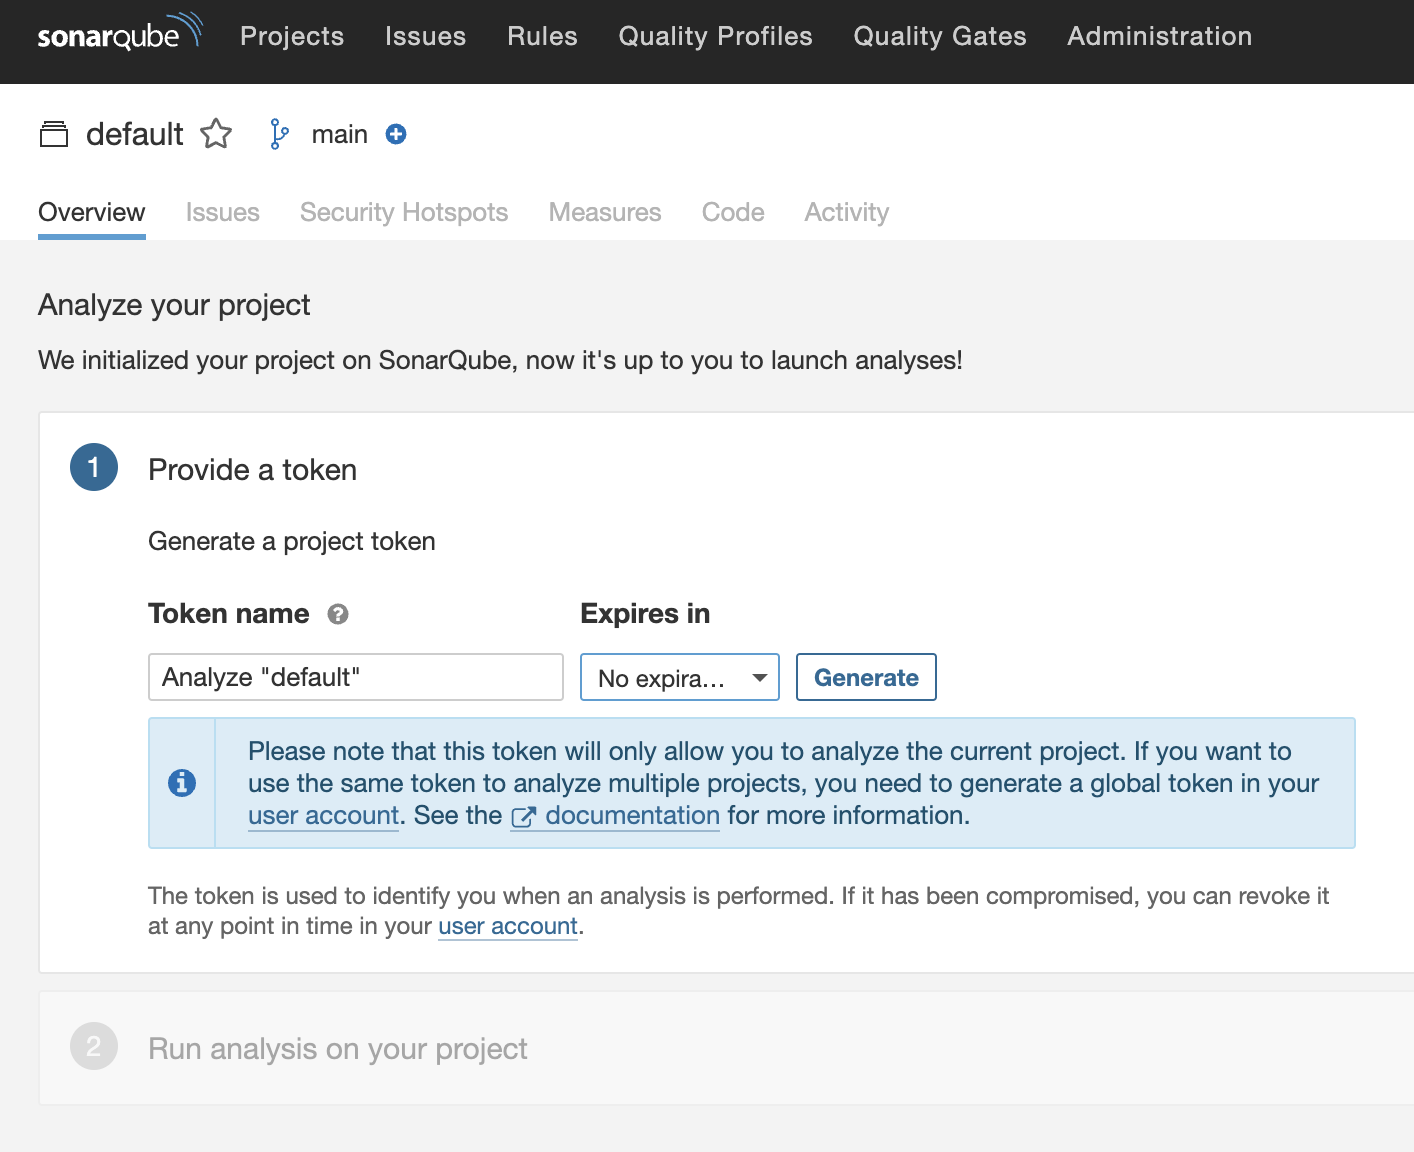
export SONARQUBE_TOKEN="<取得したToken>"
Vaultの操作
では必要なSecretを作成していきます。
まずは環境変数に各値を入れていきます。
export GIT_TOKEN="<取得したPersonal Access Token>"
# ROSAのapp配下のドメインを入力
export CLUSTER_URL="<apps.rosa.<rosa cluste名>.xxx.xx.openshiftapps.com>"
export WEBHOOK_SECRET="<任意の値>"
export GITHUB_USER="<自分のGitHub ID>"
VaultにSecretを作成していきます。
# github-env.yamlの作成
cat <<EOF > github-env.yml
git_token: "$GIT_TOKEN"
cluster_url: "$CLUSTER_URL"
webhook_secret: "$WEBHOOK_SECRET"
EOF

# github-gitconfigの作成
cat <<EOF > github-gitconfig
[credential "https://github.com"]
  helper = store
EOF

# sonar-project.propertiesの作成
cat <<EOF > sonar-project.properties
sonar.projectKey=default
sonar.organization=default
sonar.token=$SONARQUBE_TOKEN
sonar.host.url=sonarqube-sonarqube.sonarqube.svc:9000
EOF

# Secret作成
vault kv put secret/github-webhook env.yml=@github-env.yml
vault kv put secret/github-webhooksecret webhook_secret="$WEBHOOK_SECRET"
vault kv put secret/github-basic-auth .git-credentials="https://$GITHUB_USER:$GIT_TOKEN@github.com"
vault kv put secret/github-gitconfig .gitconfig=@github-gitconfig
vault kv put secret/sonar-settings sonar-project.properties=@sonar-project.properties
Golden Pathによるサンプルアプリのデプロイ方法
RHDH上のGolden Pathからどうやってアプリをデプロイするのかをお伝えします。
基本的にRHDHからGolden Pathを実行してK8s(OpenShift)にリソースをデプロイする際は、ArgoCDによるGitOpsを利用します。
というのも、RHDH(Backstage)でK8sに対してできるactionはArgoCDのApplicationの実行くらいです。もちろん独自のPluginを実装すればK8sへの操作を操ることは可能ですが、RHDHはこれまでの記事で説明した通り、Gitとの連携をかなり重視する思想であるため、K8s Manifestのデプロイも極力GitOpsで実現しましょう、というスタンスは正しいと思います。
RHDHでは、ArgoCDのPluginをインストールすることによって「ArgoCDのApplicationリソースをデプロイする」というActionを使用することができるようになります。
まずはArgoCDのPluginをインストールしましょう。
ArgoCDとの連携設定
RHDHの動的Pluginのインストール機能を使って、helmのupgradeでPluginのインストールを行います。インストールする対象はこちらの中にある@roadiehq/scaffolder-backend-argocdです。
values.yamlに以下のように追記します。
    plugins:
      - package: ./dynamic-plugins/dist/backstage-plugin-catalog-backend-module-github-org-dynamic
        disabled: false
      # ここから
      - package: ./dynamic-plugins/dist/roadiehq-scaffolder-backend-argocd-dynamic
        disabled: false
      # ここまで
次にapp-config-rhdh.yamlを編集します。
    integrations:
    ___omit____
    catalog:
    ___omit____
    # ここから
    argocd:
      appLocatorMethods:
      - instances:
        - name: main
          password: ${ARGOCD_PASSWORD}
          url: ${ARGOCD_INSTANCE_URL}
          username: ${ARGOCD_USERNAME}
        type: config
    # ここまで
次にArgoCDとの連携に必要な変数を取得します。
まずはArgoCDのAdminパスワードを取得します。
export ARGOCD_USERNAME="admin"
export ARGOCD_PASSWORD=$(oc get secret -n openshift-gitops openshift-gitops-cluster  -o jsonpath="{.data.admin\.password}" | base64 -d)
echo $ARGOCD_PASSWORD
ArgoCDのRoute URLを取得します。
export ARGOCD_INSTACE_URL="https://$(oc get route -n openshift-gitops openshift-gitops-server -o jsonpath={.status.ingress[0].host})"
最後にcreate-secret.yamlを編集します。先ほど取得した変数を追記します。
# Secret作成
oc -n rhdh create secret generic rhdh-secrets \
  ___omit____
  --from-literal=ARGOCD_INSTANCE_URL="${ARGOCD_INSTANCE_URL}" \
  --from-literal=ARGOCD_PASSWORD="${ARGOCD_PASSWORD}" \
  --from-literal=ARGOCD_USERNAME="${ARGOCD_USERNAME}" \
ここまで設定が完了したら、create-secret.yamlを実行します。
cat create-secret.sh | envsubst | bash
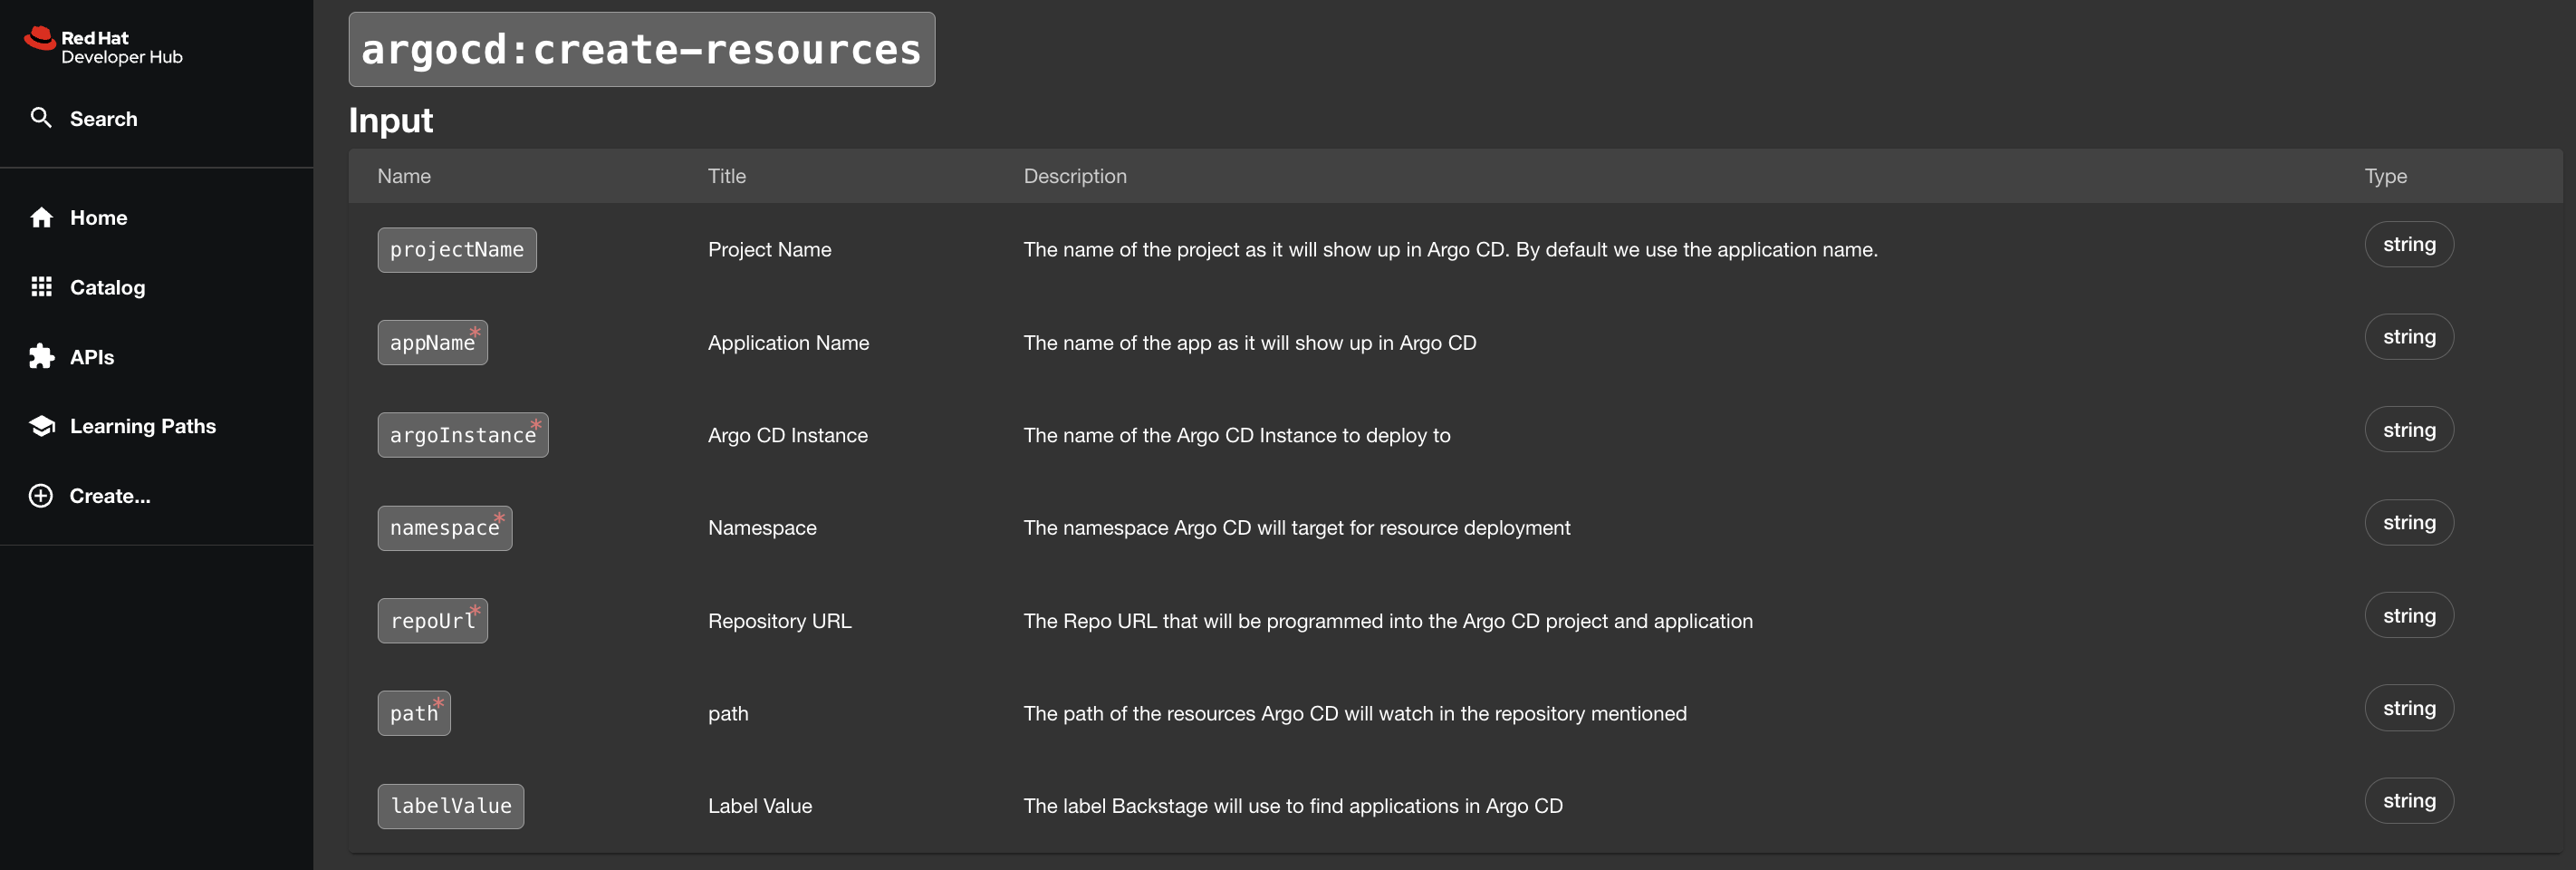
これでTemplateからArgoCDのApplicationを作成するActionを設定することができました。
https://<RHDH URL>/create/actionsにアクセスしてActionが追加されていることを確認しましょう。
Templateの追記
ArgoCDとの連携設定が完了したので、template.yamlにいくつか新しいStepを追加します。
まずはid: publish-app-to-githubの下に以下の2つのactionを追記しましょう。
    - id: publish-app-to-github
      ____omit____
    # ここから
    - id: manifest_template
      name: Generating the K8s Manifest Component
      action: fetch:template
      input:
        url: ./manifest-skeleton
        copyWithoutTemplating:
          - .github/workflows/
        values:
          git: ${{ parameters.git }}
          git_host_url: ${{ parameters.git_host_url }}
          git_owner_name: ${{ parameters.git_owner_name }}
          app_name: ${{ parameters.app_name }}
          owner: ${{ parameters.owner }}
          system: ${{ parameters.system }}
          description: ${{ parameters.description }}
        targetPath: ./tenant-manifest

    - id: publish-manifest-to-github
      if: ${{ parameters.git == "github" }}
      name: Publish Manifest Repository to GitHub
      action: publish:github
      input:
        repoUrl: ${{ parameters.git_host_url }}?owner=${{ parameters.git_owner_name }}&repo=${{ parameters.app_name }}-manifest
        repoVisibility: public
        sourcePath: ./tenant-manifest
        defaultBranch: develop
        protectDefaultBranch: false
    # ここまで
app-skeletonに対して実行していたfatch: templateとpublish:githubを追記した形になります。記述方法はほぼ同様なのでここでは説明を割愛します。
次に、id: register-to-githubの下に以下のactionを追記しましょう。
    - id: register-to-github
      ____omit____
    # ここから
    - id: create-argocd-resources
      name: Create ArgoCD Resources
      action: argocd:create-resources
      input:
        appName: ${{ parameters.app_name }}-bootstrap
        argoInstance: main
        namespace: openshift-gitops
        repoUrl: https://${{ parameters.git_host_url }}/${{ parameters.git_owner_name }}/${{ parameters.app_name }}-manifest.git
        path: 'argocd/'
    # ここまで
-
input.appName: このactionによってデプロイするArgoCDのApplication名です。 -
input.argoInstance: これはapp-configで設定したArgoCD instanceのNameを記述します。今回はmainとなります。 -
input.namespace:Applicationのデプロイ先のNamespaceです。 -
input.repoUrl: GitOpsの参照先となるGitのURLです。 -
input.path: GitのURLにおけるサブディレクトリを指定します。
今回の設定によって、id: register-to-githubでPushしたリポジトリの/argocd配下のK8s Manifest(あるいはkustomization.yaml)をGitOpsでデプロイするApplicationがデプロイされます。
現時点でのtemplate.yamlは以下のようになっています。
template.yaml(クリックして展開)
apiVersion: scaffolder.backstage.io/v1beta3
kind: Template
metadata:
  name: sample-app-template
  title: Create a sample application with a CI pipeline
  description: Provides the sample code and CI pipeline to build and deploy a sample application on OpenShift.
  tags:
    - recommended
spec:
  owner: user:default/<自分のGitHub ID>
  type: service

  parameters:
    - title: Provide information about the new component
      required:
        - app_name
        - owner
        - system
      properties:
        app_name:
          title: Repository Name
          type: string
          default: "sample-app"
        description:
          title: Description
          type: string
          description: Help others understand what this component is for
        owner:
          title: Owner
          type: string
          description: Owner of the component
          ui:field: OwnerPicker
          ui:options:
            catalogFilter:
              kind:
                - Group
        system:
          title: System
          type: string
          ui:field: EntityPicker
          ui:options:
            catalogFilter:
              kind:
                - System
    - title: Provide information about the git to used
      required:
        - git
        - git_host_url
        - git_owner_name
      properties:
        git:
          title: Git of Destination
          type: string
          description: This action will store the application source code on the selected Git server
          enum:
            - github
          enumNames:
            - GitHub
      dependencies:
        git:
          oneOf:
            - properties:
                git:
                  enum:
                    - github
                git_host_url:
                  title: Git Host URL
                  type: string
                  default: github.com
                  description: Specify the GitHub or GitLab host URL(e.g., github.com)
                git_owner_name:
                  title: GitHub Organization Name or User Name
                  type: string
                  description: Specify the GitHub Organization or User to register the repository
  steps:
    - id: app-template
      name: Generating the Application Source Code Component
      action: fetch:template
      input:
        url: ./app-skeleton
        values:
          git: ${{ parameters.git }}
          git_host_url: ${{ parameters.git_host_url }}
          git_owner_name: ${{ parameters.git_owner_name }}
          app_name: ${{ parameters.app_name }}
          owner: ${{ parameters.owner }}
          system: ${{ parameters.system }}
          description: ${{ parameters.description }}
        targetPath: ./tenant-app

    - id: publish-app-to-github
      if: ${{ parameters.git == "github" }}
      name: Publish App Repository to GitHub
      action: publish:github
      input:
        repoUrl: ${{ parameters.git_host_url }}?owner=${{ parameters.git_owner_name }}&repo=${{ parameters.app_name }}-app
        repoVisibility: public
        sourcePath: ./tenant-app
        defaultBranch: develop
        protectDefaultBranch: false

    - id: manifest-template
      name: Generating the K8s Manifest Component
      action: fetch:template
      input:
        url: ./manifest-skeleton
        copyWithoutTemplating:
          - .github/workflows/
        values:
          git: ${{ parameters.git }}
          git_host_url: ${{ parameters.git_host_url }}
          git_owner_name: ${{ parameters.git_owner_name }}
          app_name: ${{ parameters.app_name }}
          owner: ${{ parameters.owner }}
          system: ${{ parameters.system }}
          description: ${{ parameters.description }}
        targetPath: ./tenant-manifest

    - id: publish-manifest-to-github
      if: ${{ parameters.git == "github" }}
      name: Publish Manifest Repository to GitHub
      action: publish:github
      input:
        repoUrl: ${{ parameters.git_host_url }}?owner=${{ parameters.git_owner_name }}&repo=${{ parameters.app_name }}-manifest
        repoVisibility: public
        sourcePath: ./tenant-manifest
        defaultBranch: develop
        protectDefaultBranch: false

    - id: register-to-github
      if: ${{ parameters.git == "github" }}
      name: Registering the Catalog Info Component to GitHub
      action: catalog:register
      input:
        repoContentsUrl: ${{ steps['publish-app-to-github'].output.repoContentsUrl }}
        catalogInfoPath: "/catalog-info.yaml"

    - id: create-argocd-resources
      name: Create ArgoCD Resources
      action: argocd:create-resources
      input:
        appName: ${{ parameters.app_name }}-bootstrap
        argoInstance: main
        namespace: openshift-gitops
        repoUrl: https://${{ parameters.git_host_url }}/${{ parameters.git_owner_name }}/${{ parameters.app_name }}-manifest.git
        path: 'argocd/'

  output:
    links:
      - title: Open the Source Code Repository
        if: ${{ parameters.git == "github" }}
        url: ${{ steps['publish-app-to-github'].output.remoteUrl }}
      - title: Open the Catalog Info Component
        if: ${{ parameters.git == "github" }}
        icon: catalog
        entityRef: ${{ steps['register-to-github'].output.entityRef }}
このtemplate.yamlをGitHubにPushしておきましょう。
Golden Pathの更新
まだRHDHは新しくPushしたtemplate.yamlを認識できていないため、更新をかけます。
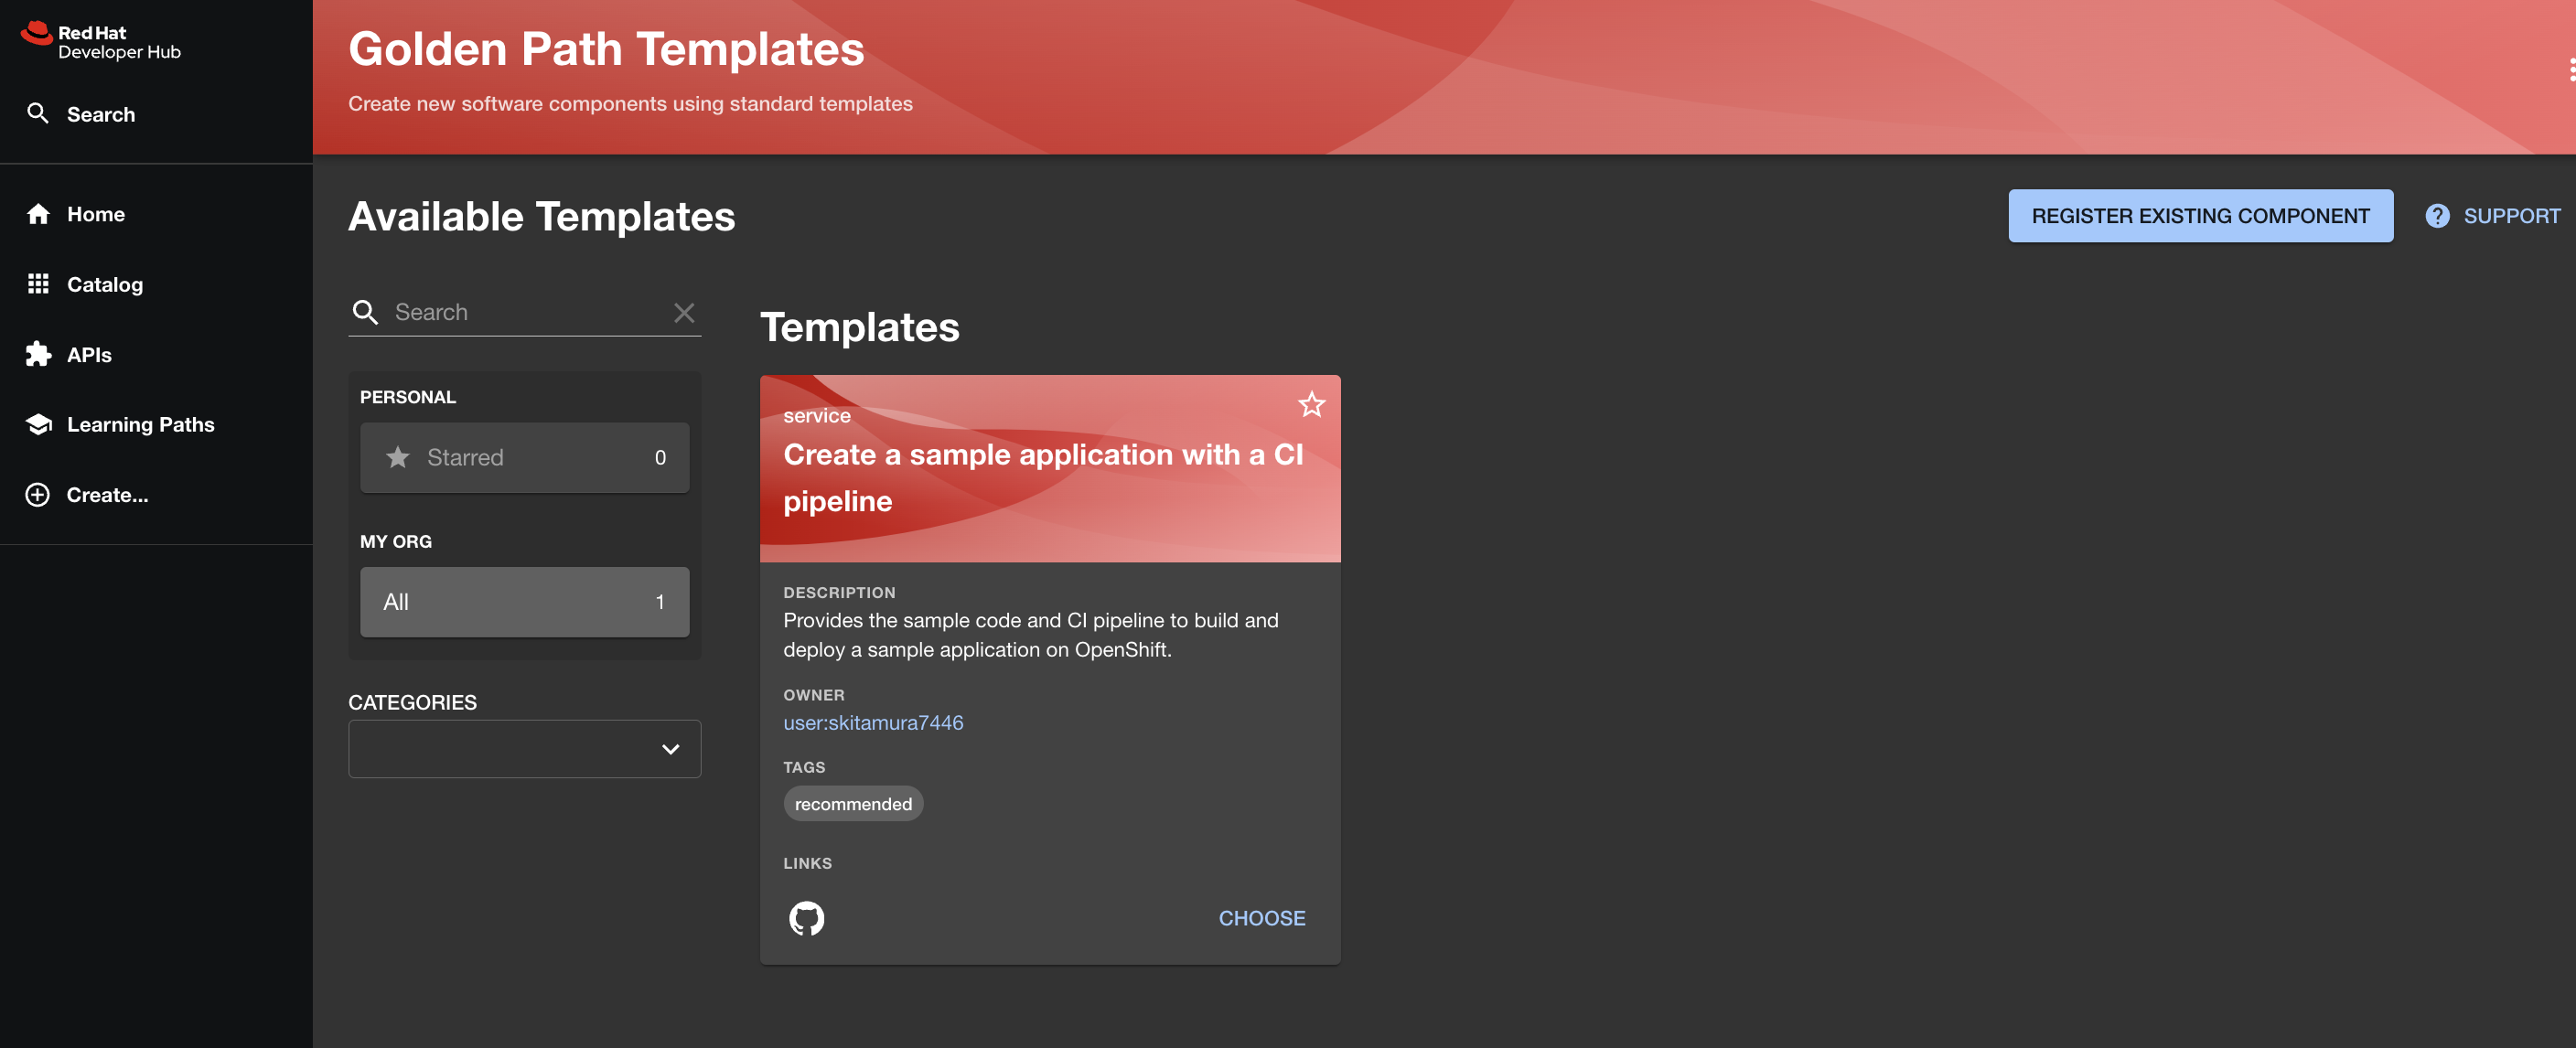
Create...画面から右上のREGISTER EXISTING COMPONENTを選択します。
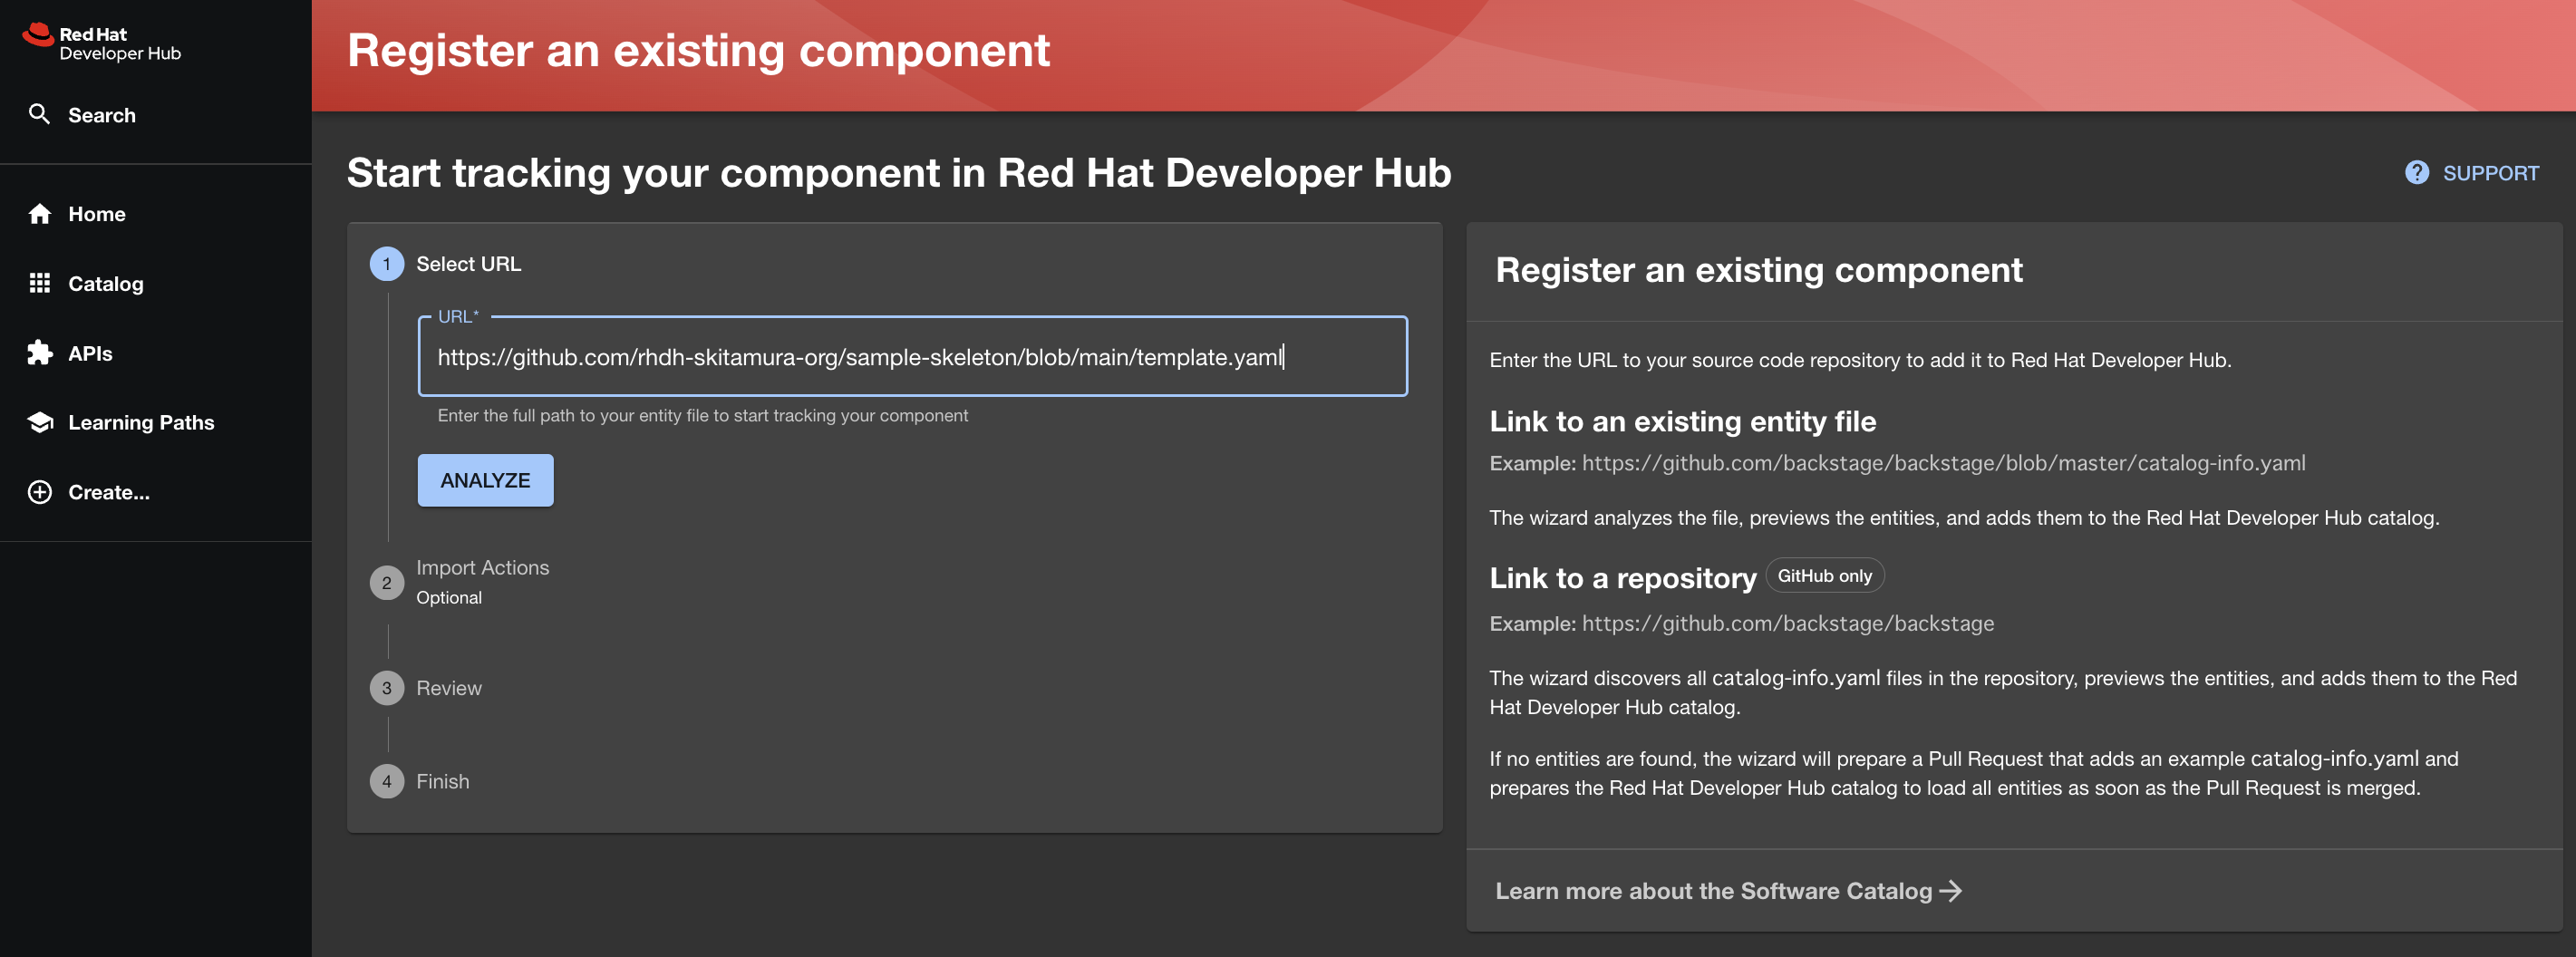
Select URLにtemplate.yamlのURLを入力しANALYZEを選択します。
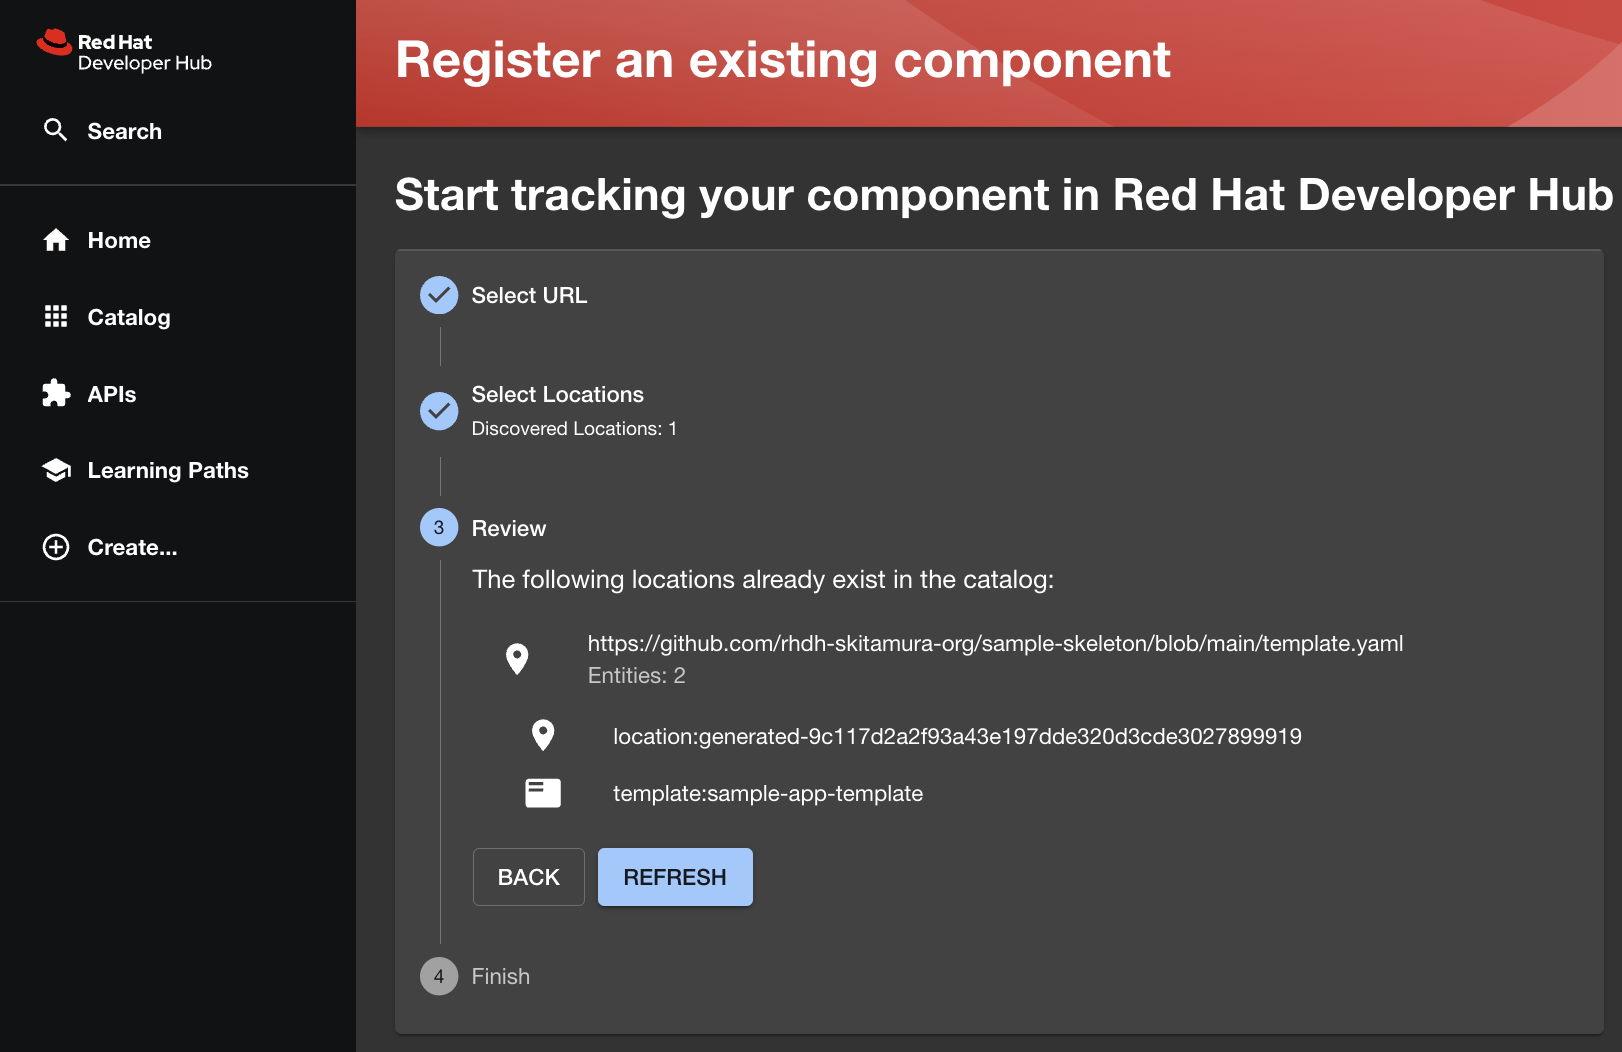
するとCatalogをRefreshするか確認されるので、REFRESHを選択します。
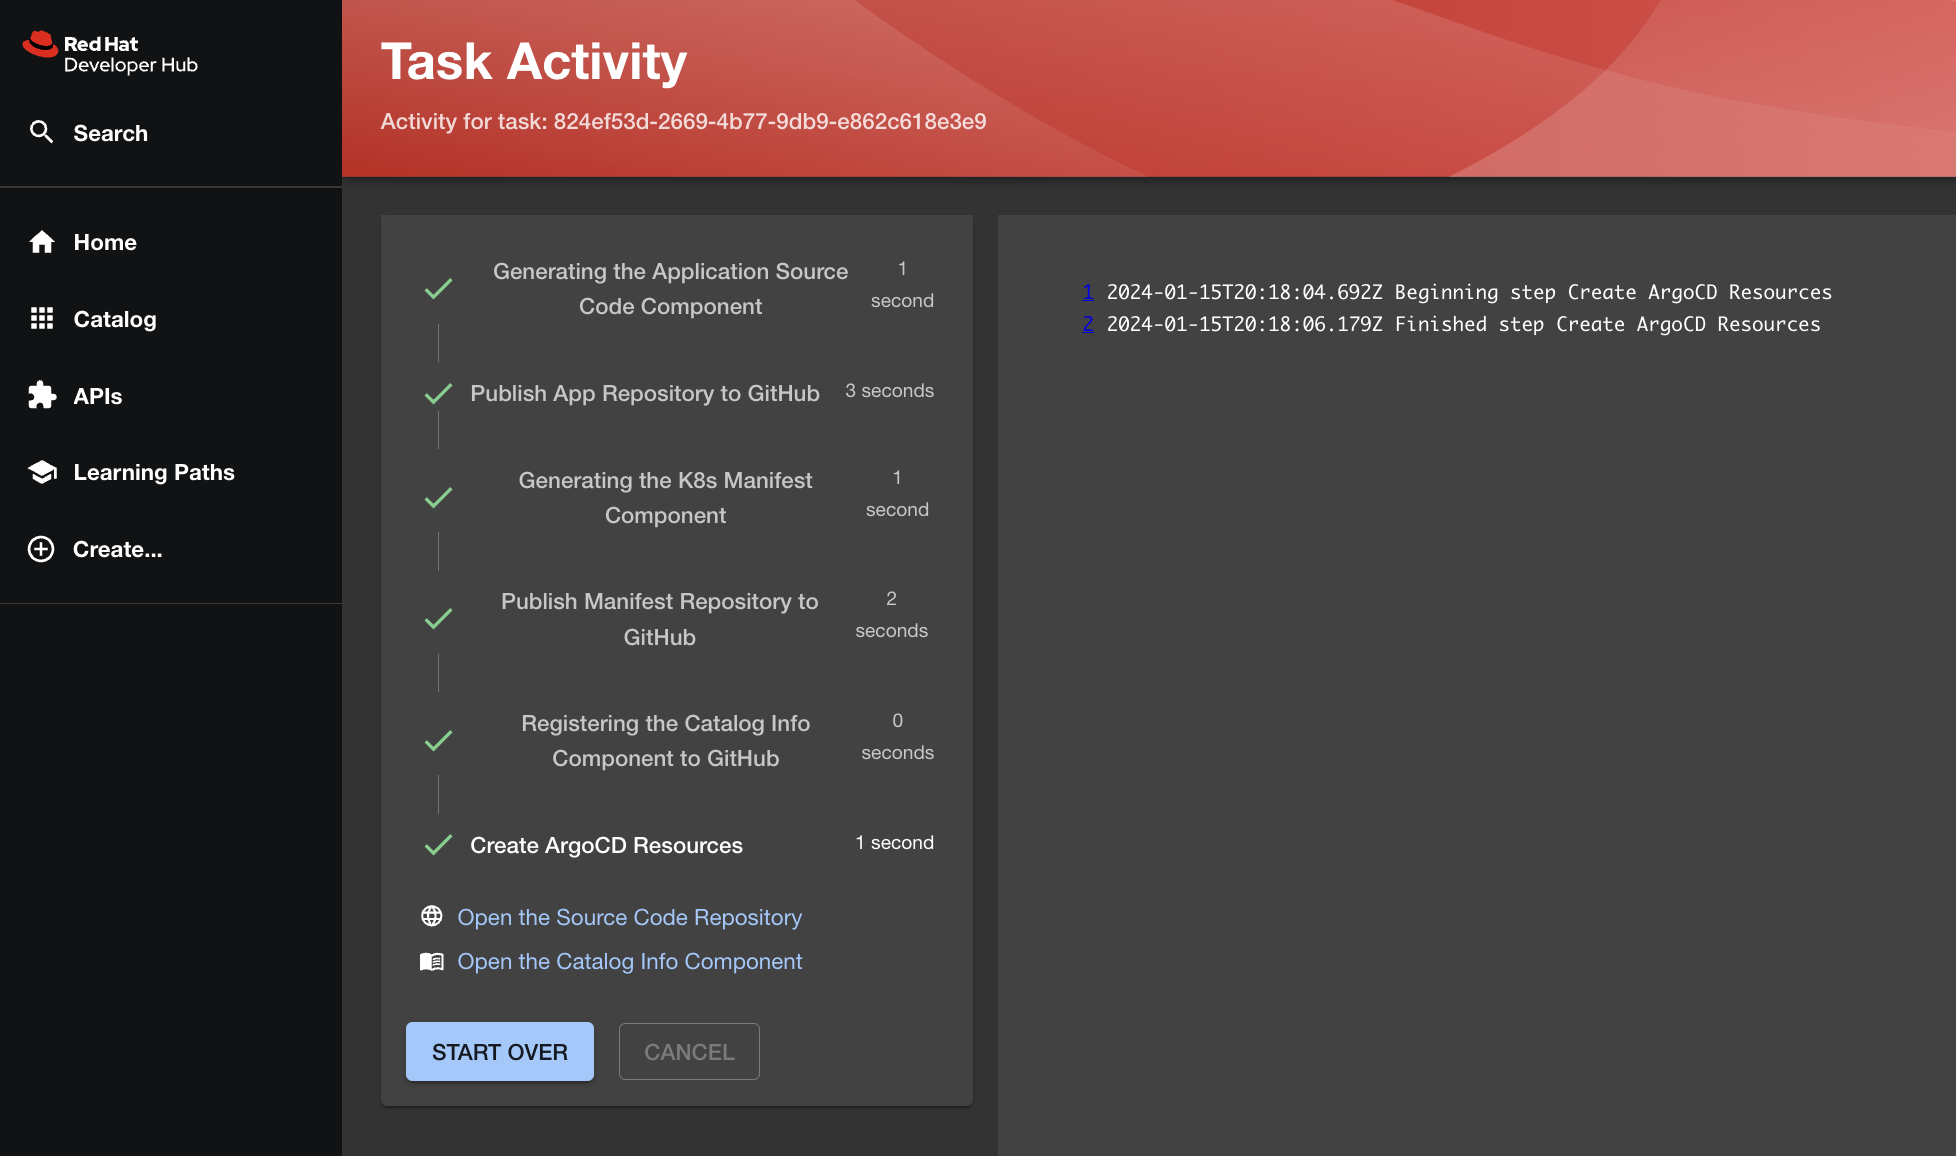
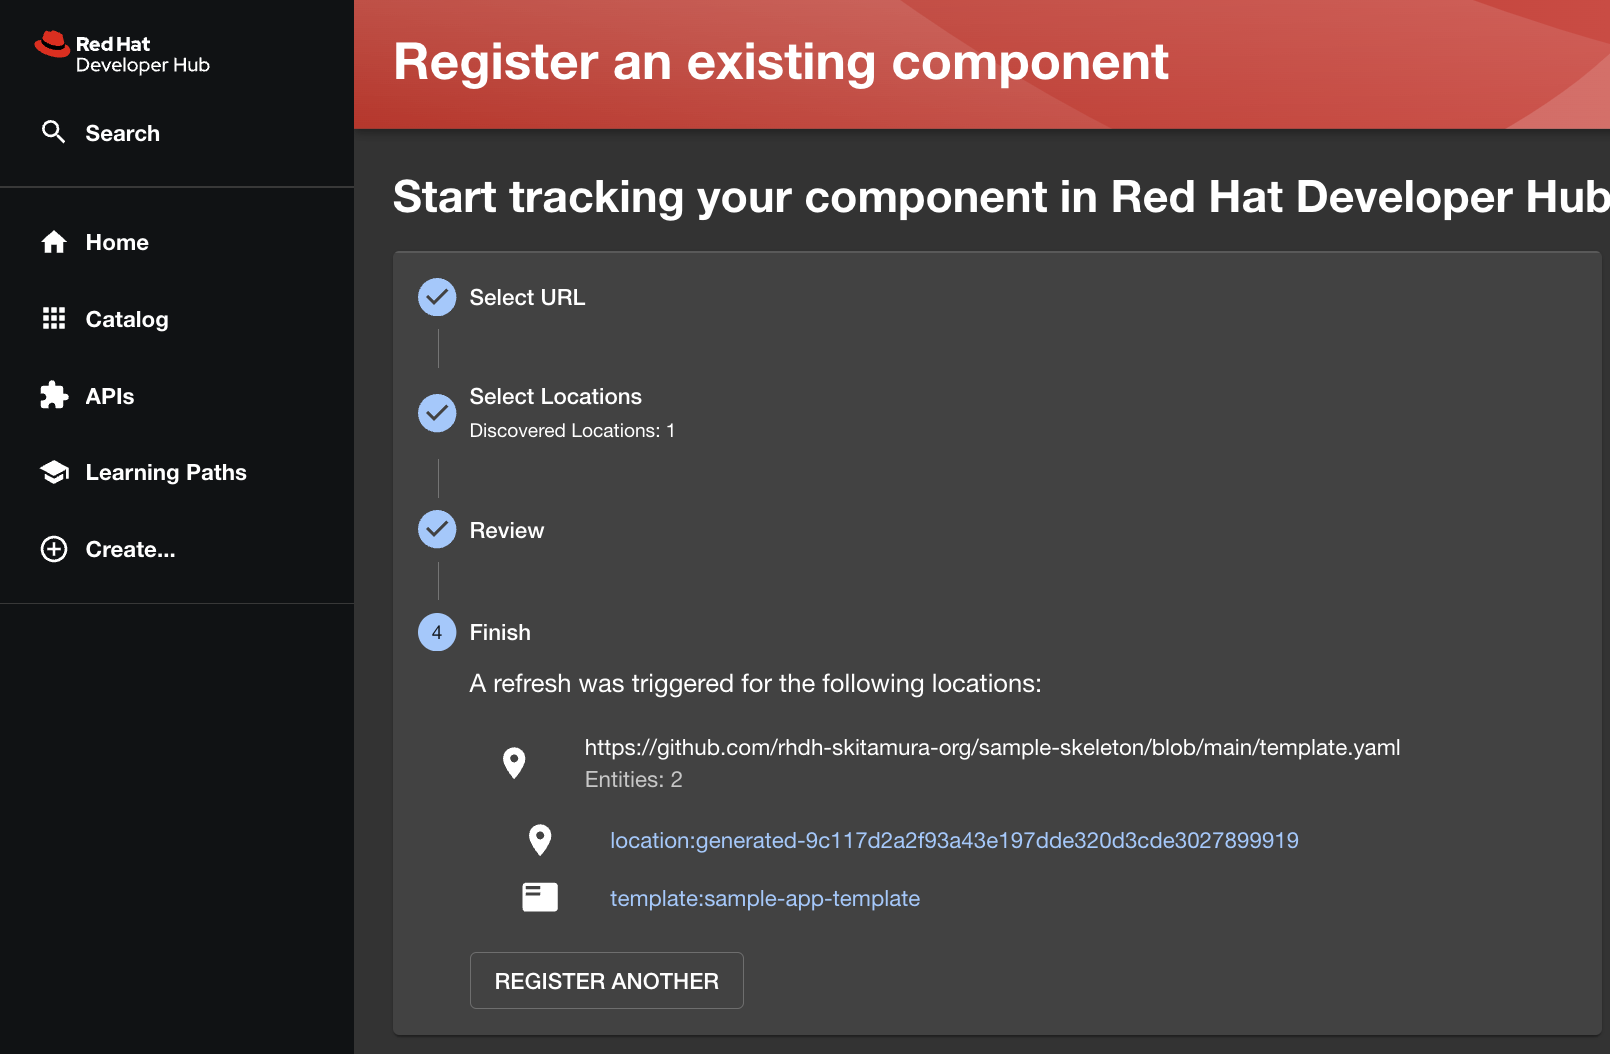
これでGolden Pathの更新が完了したので、実行してみましょう。
Golden Pathの実行
では更新したtemplate.yamlを使ってGolden Pathを実行します。
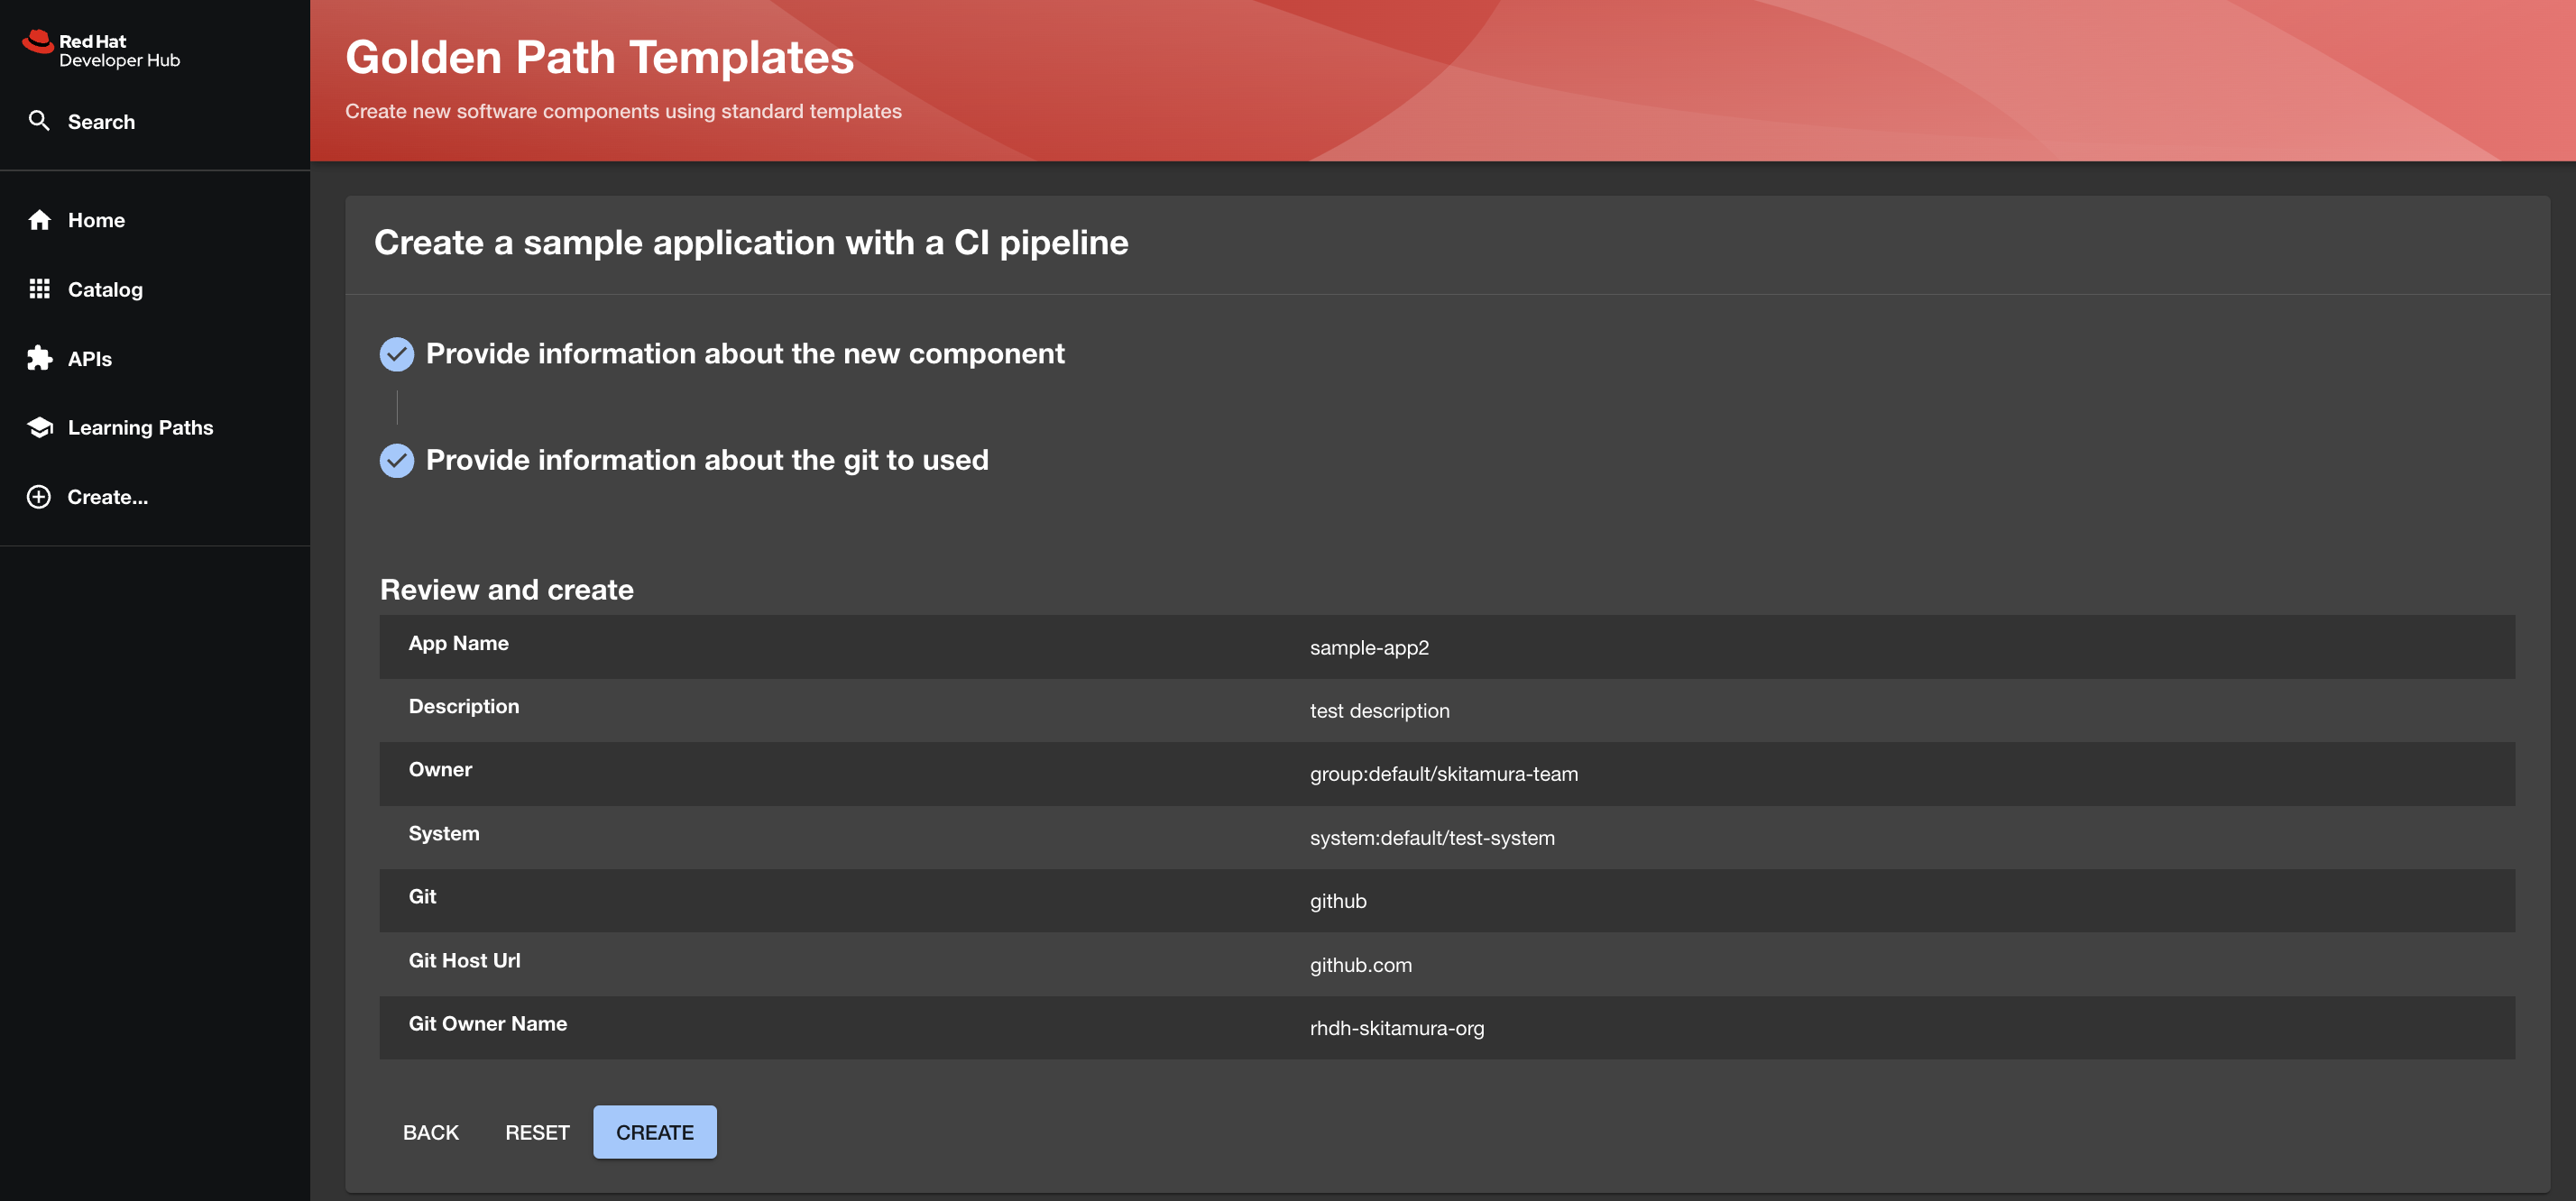
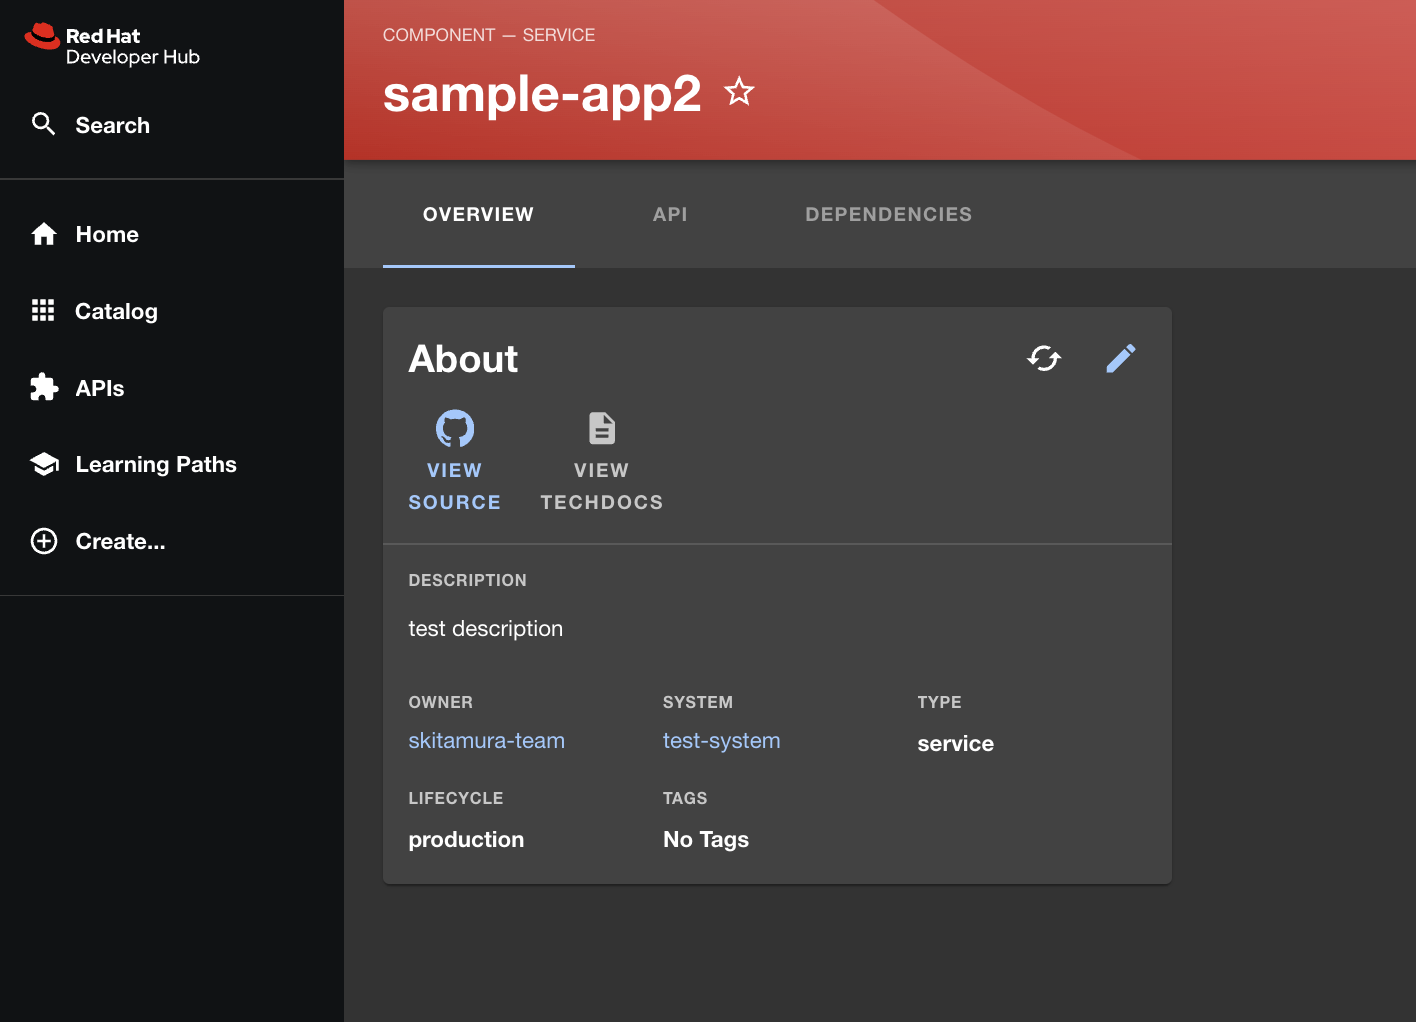
前回と同様に必要事項を入力してCreateしていきます。App NameはGitリポジトリ名に使われれるため、重複するとエラーになります。sample-app2など、前回とは別の値にしましょう。
環境の確認
まずは今回変更を加えたArgoCDをみていきましょう。
ブラウザからArgoCDにアクセスすると、以下のように3つのApplicationがデプロイされています。
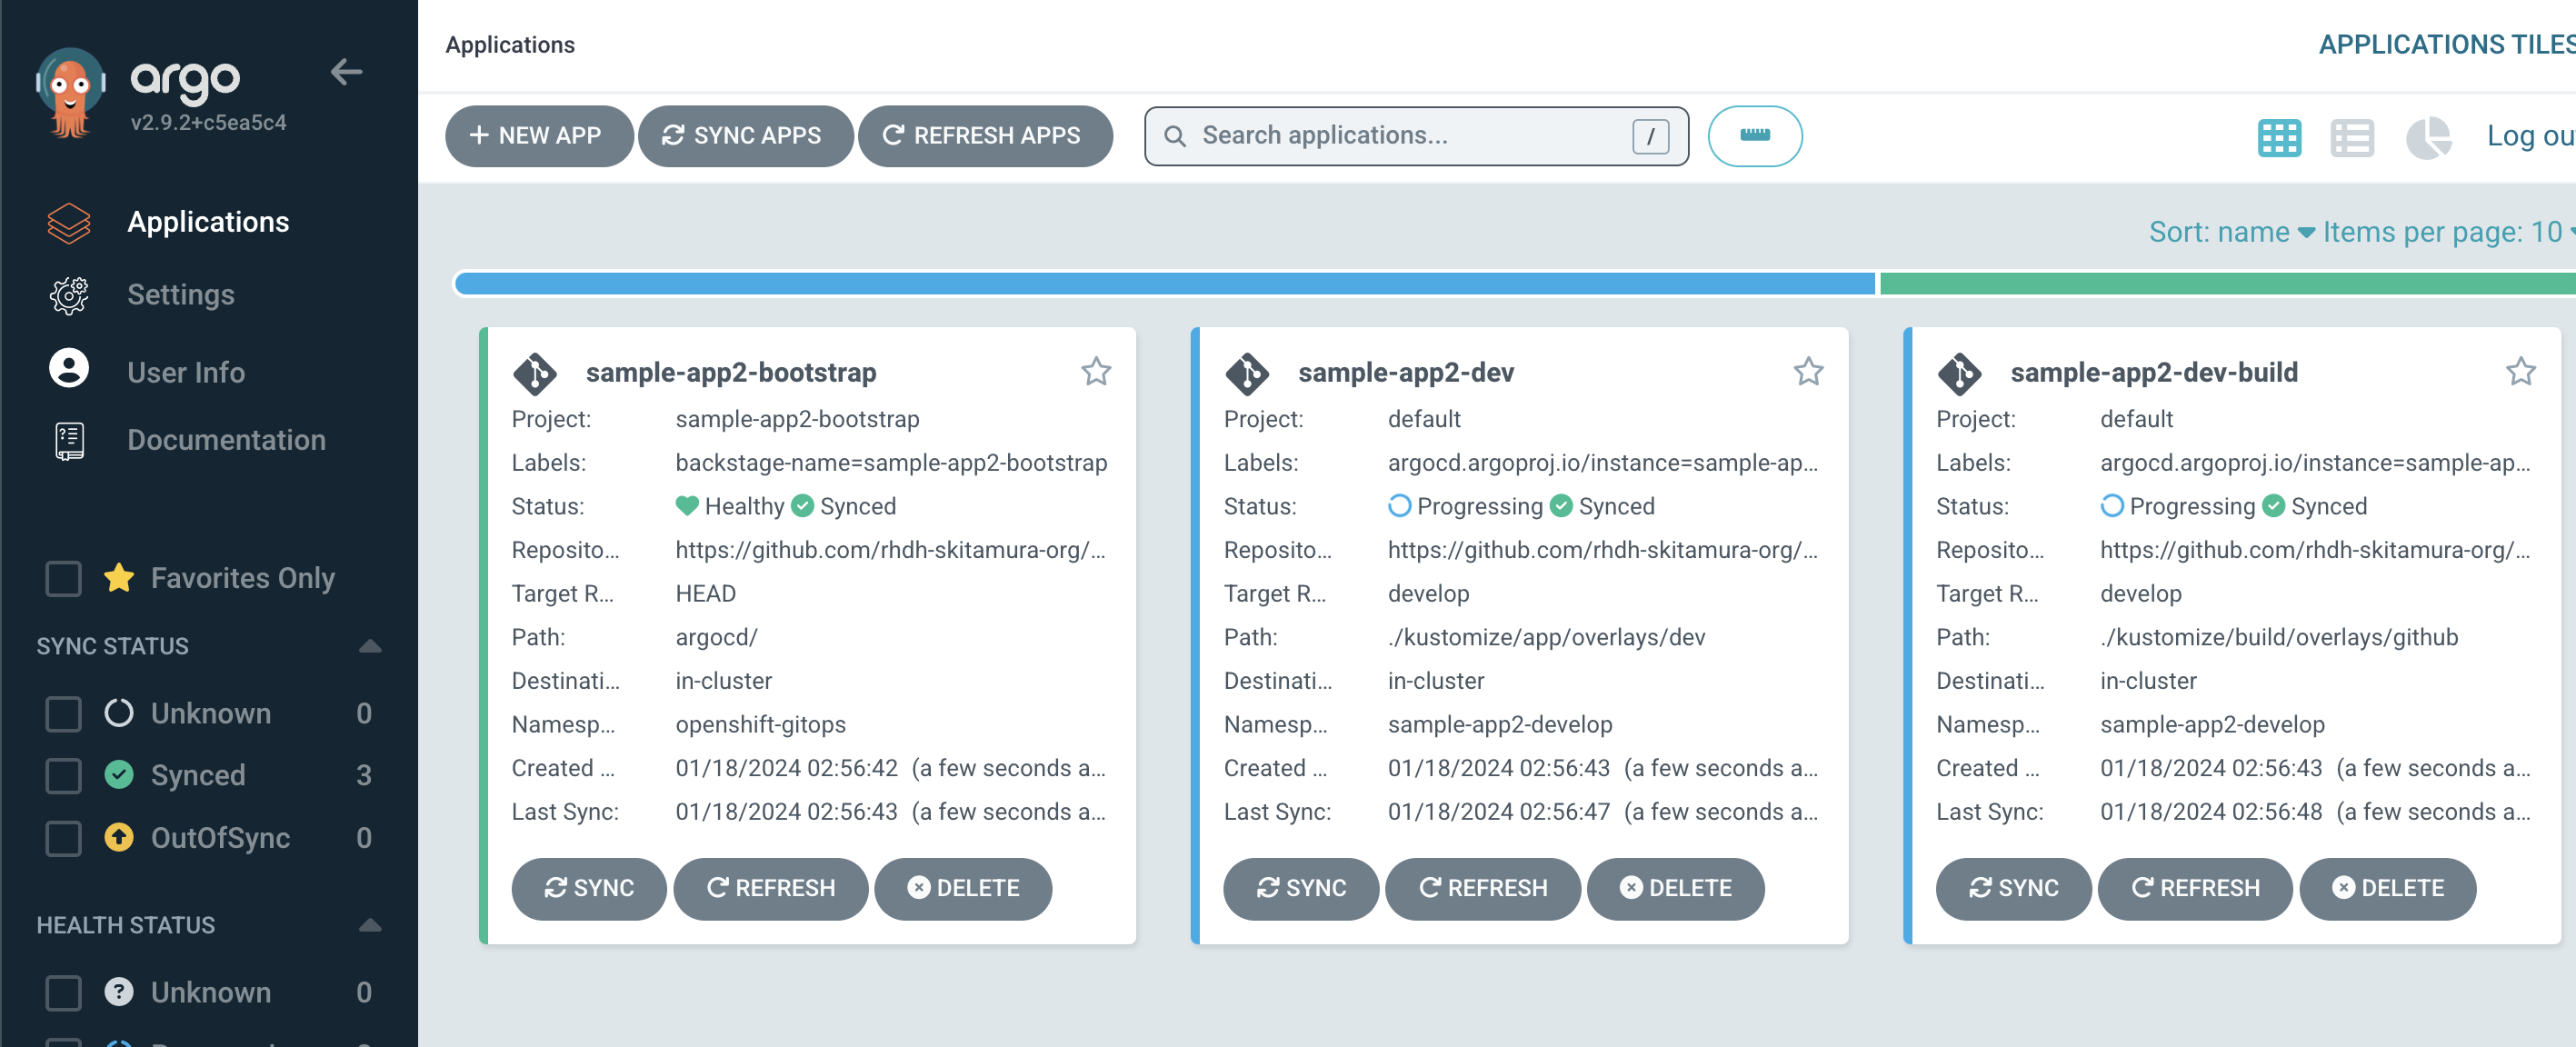
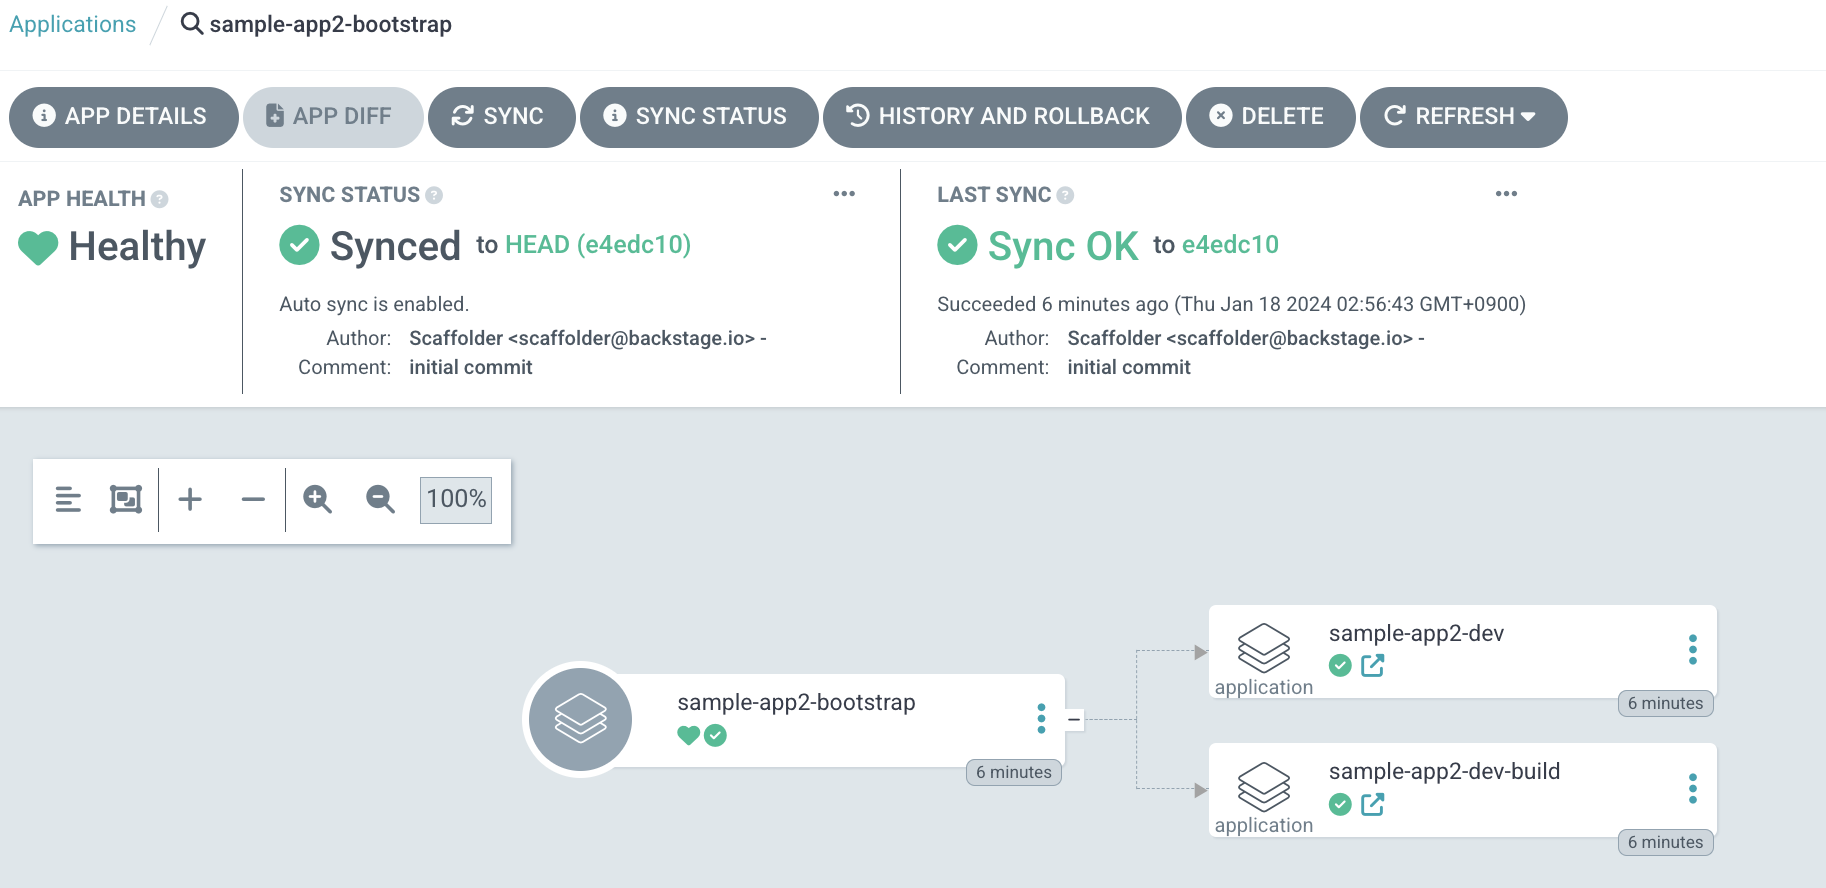
この中でsample-app-2-bootstrapを選択して見てみると、このApplicationは他の2つのsample-app2-devとsample-app2-buildのApplicationをデプロイしていることがわかります。
要はApp of Appsの構成になっているということです。
このApplicationは、Golden Pathの実行で新たに作成されたsample-app2-manifestリポジトリの/argocdディレクトリ配下を参照しています。
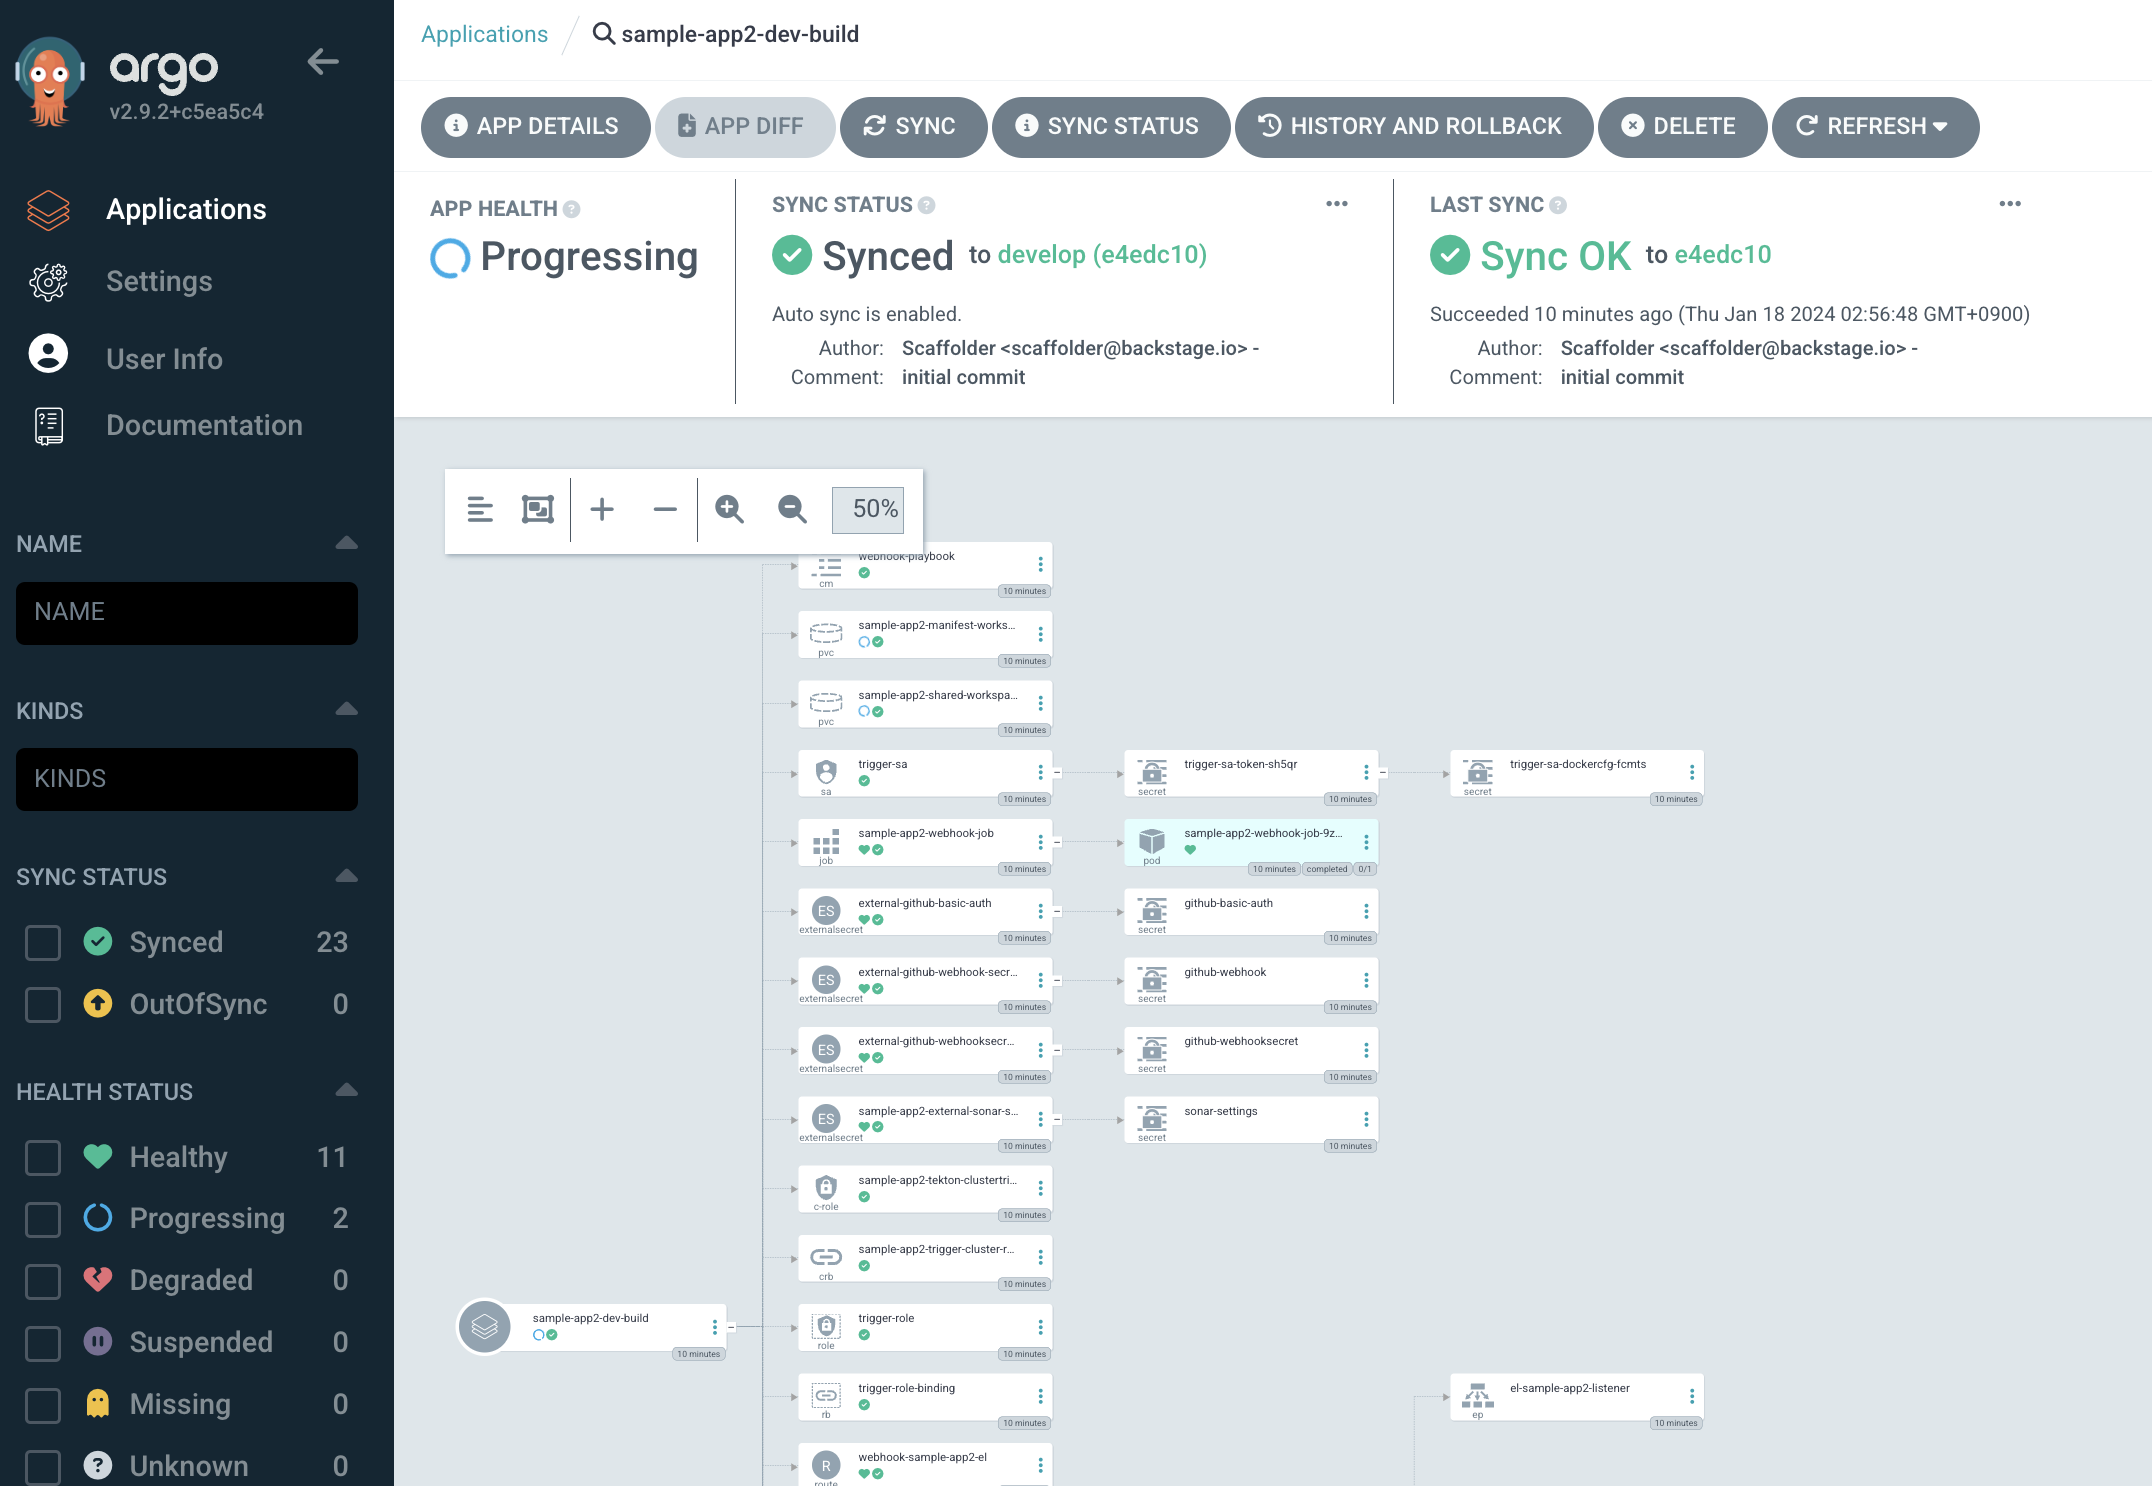
次にsample-app2-buildを確認すると、TektonのTaskやPipeline、EventListenerなど、主にパイプラインの実行に必要なリソースがデプロイされています。
こちらはsample-app2-manifestリポジトリの/kustomize/build配下のリソースを参照しています。
真ん中でJobが実行されていますが、こちらはsample-app2-appリポジトリに対してwebhookの設定を行うコマンドを実行しています。
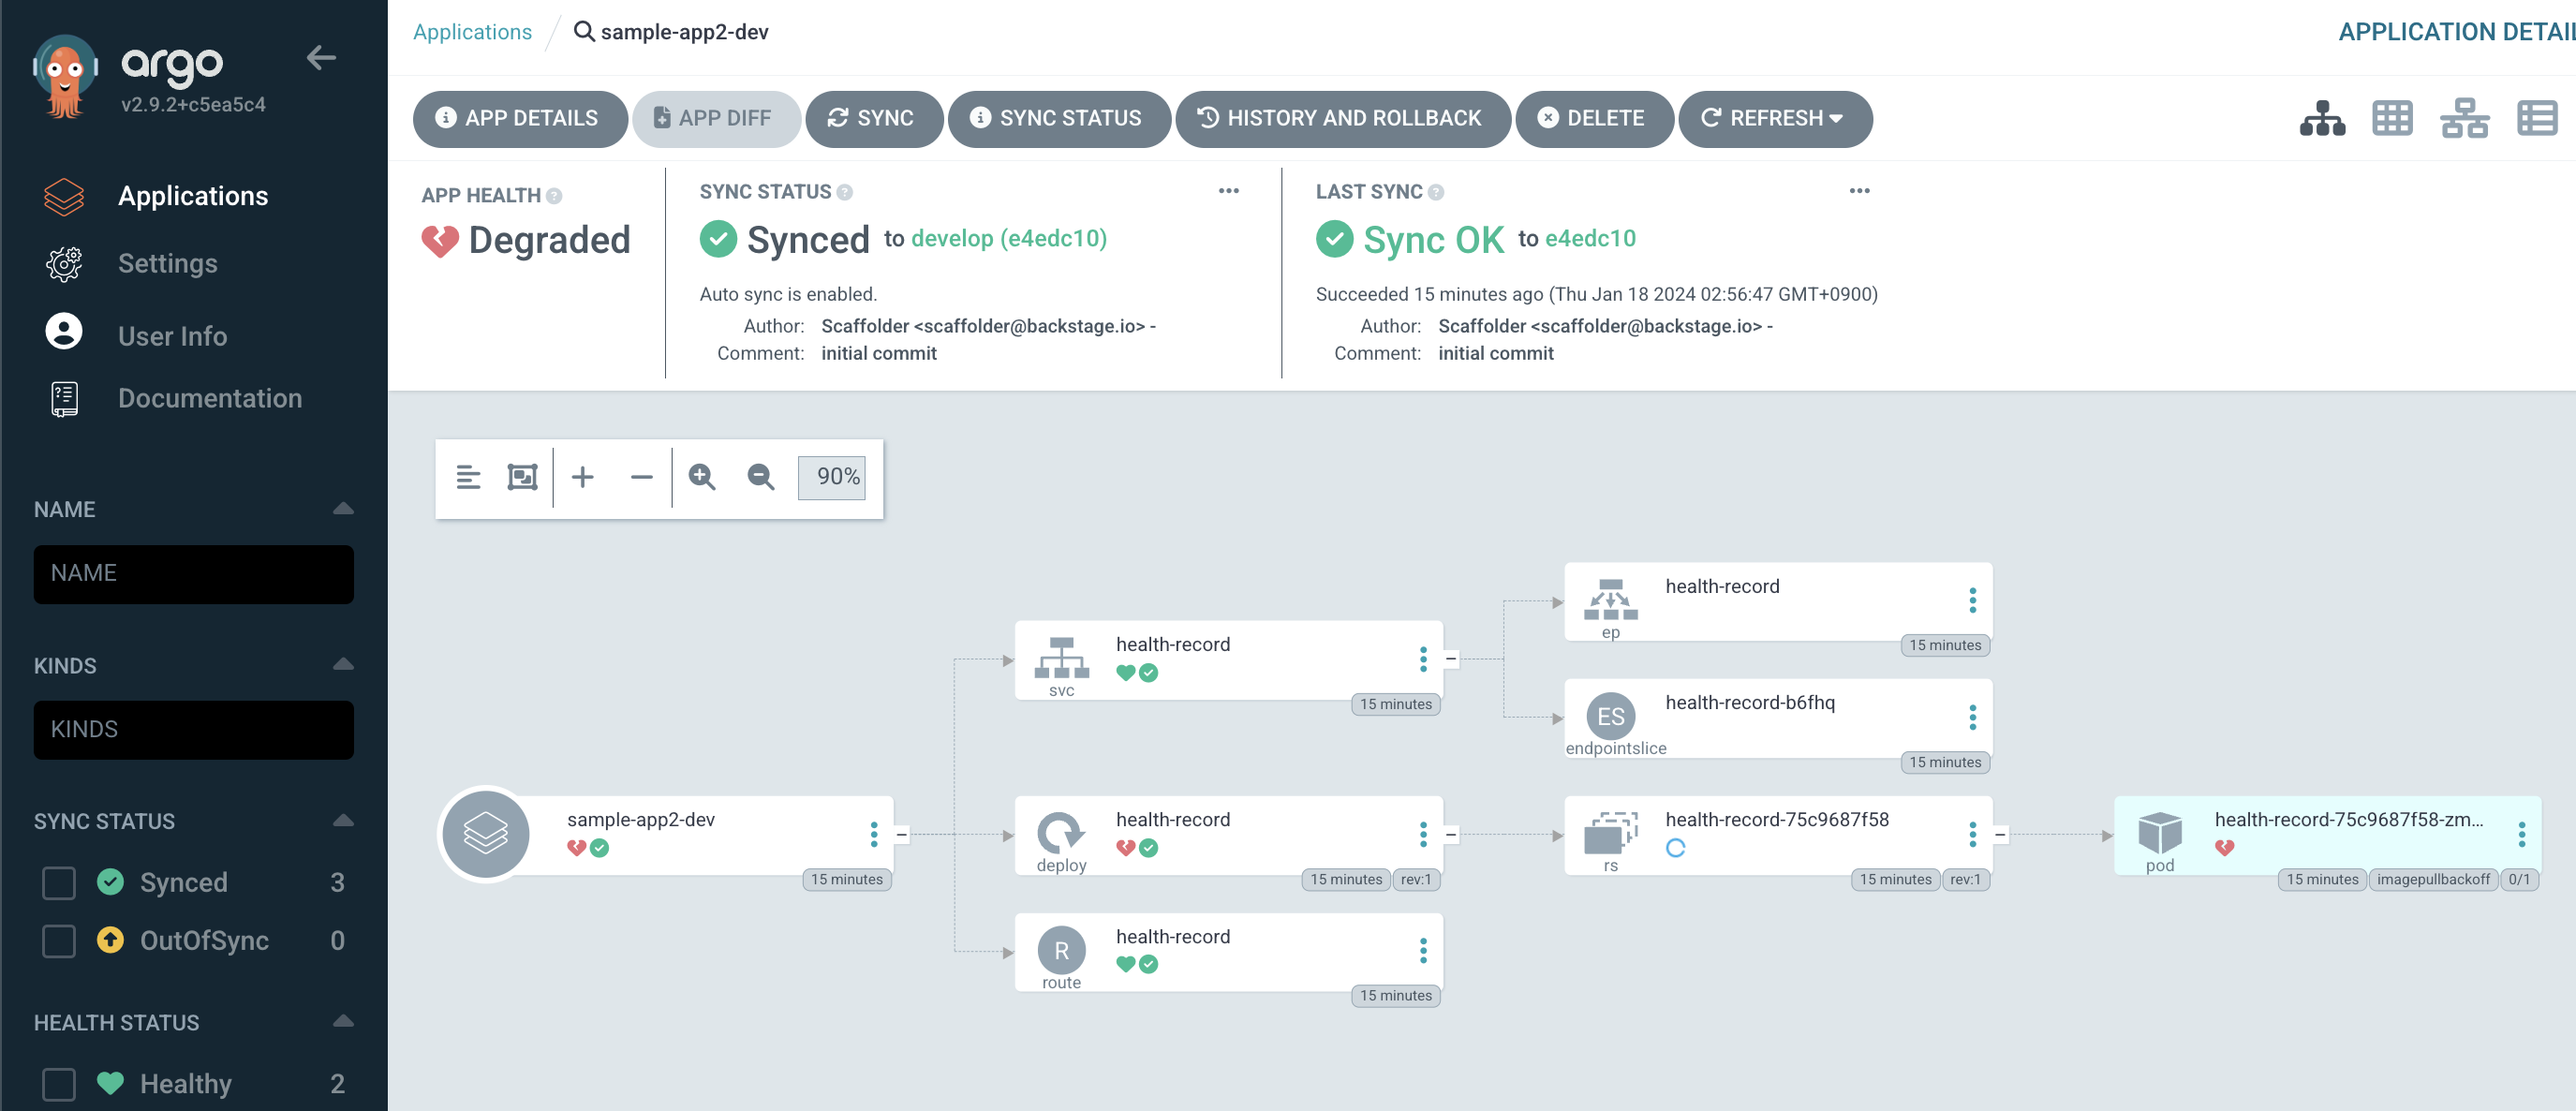
最後にsample-app2-devを確認します。こちらはSync状況がDegradedになっていますが、現時点では問題ありません。まだイメージがビルドされていないため、PodのPullエラーが発生しています。
次にOpenShift側を見てみましょう。
こちらではArgoCDの設定により自動的にsample-app2-developNamespaceが作成されており、TektonのPipelineが準備されていることがわかります。
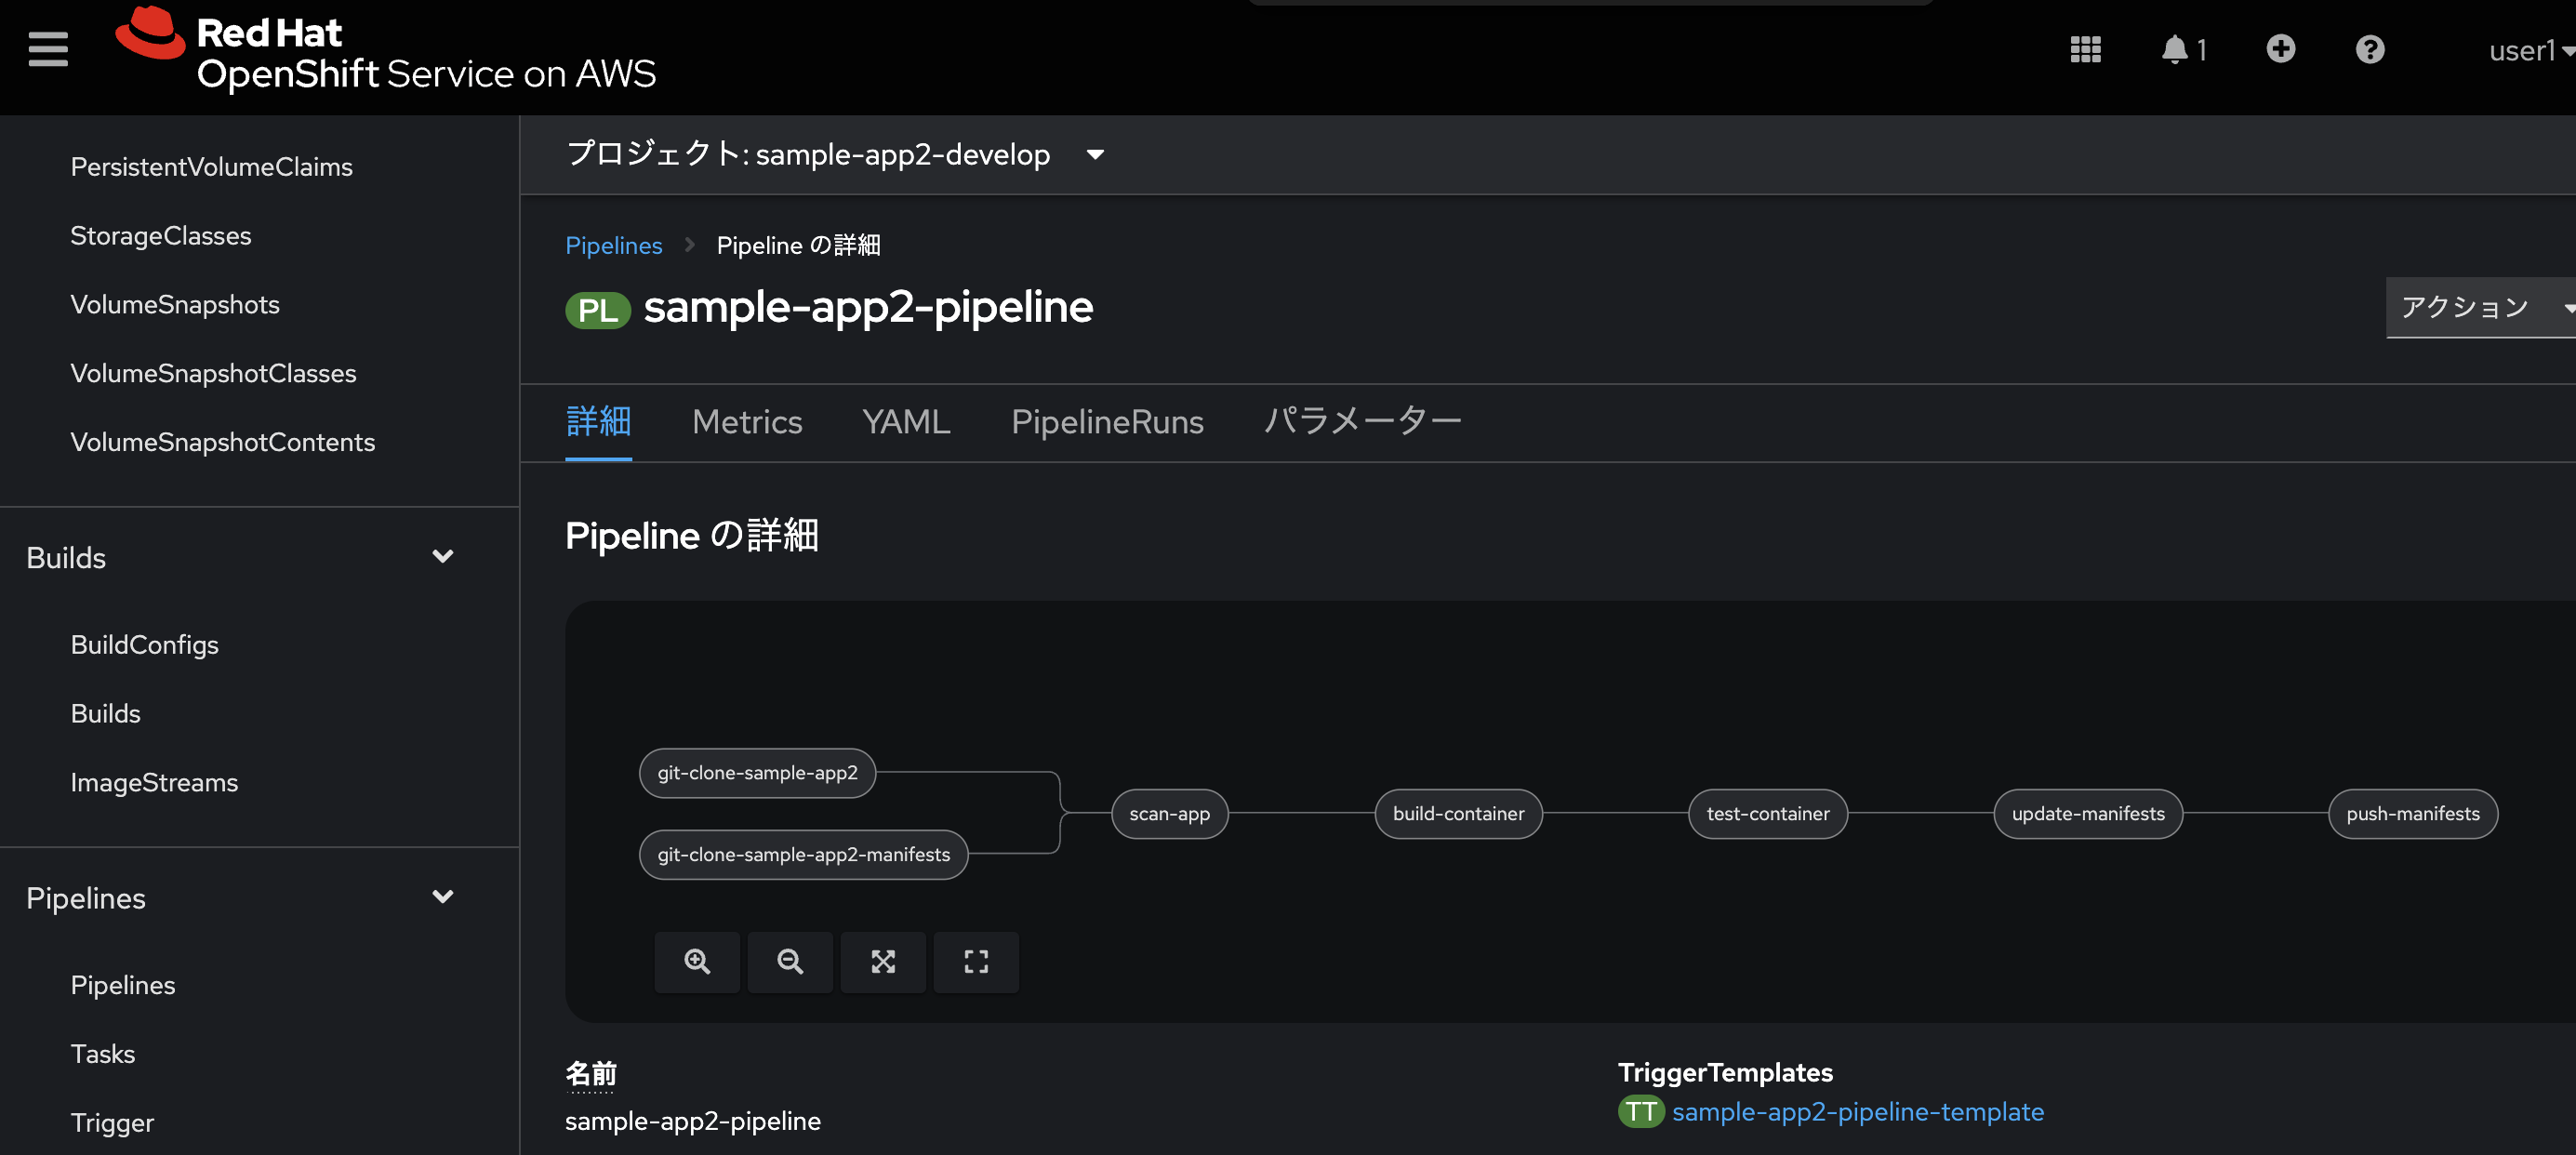
ではこの状態でアプリケーションのコード修正を行ってみましょう。
sample-app2-app/site/public/index.htmlを開き、Edit this fileを選択します。

適当に改行などを入れ、Commit changes...を選択します。

するとソースコードの変更を検知し、WebhookによってOpenShift Pipelinerunが実行されます。

設定がうまくいっていれば、無事にPipelineも成功します。
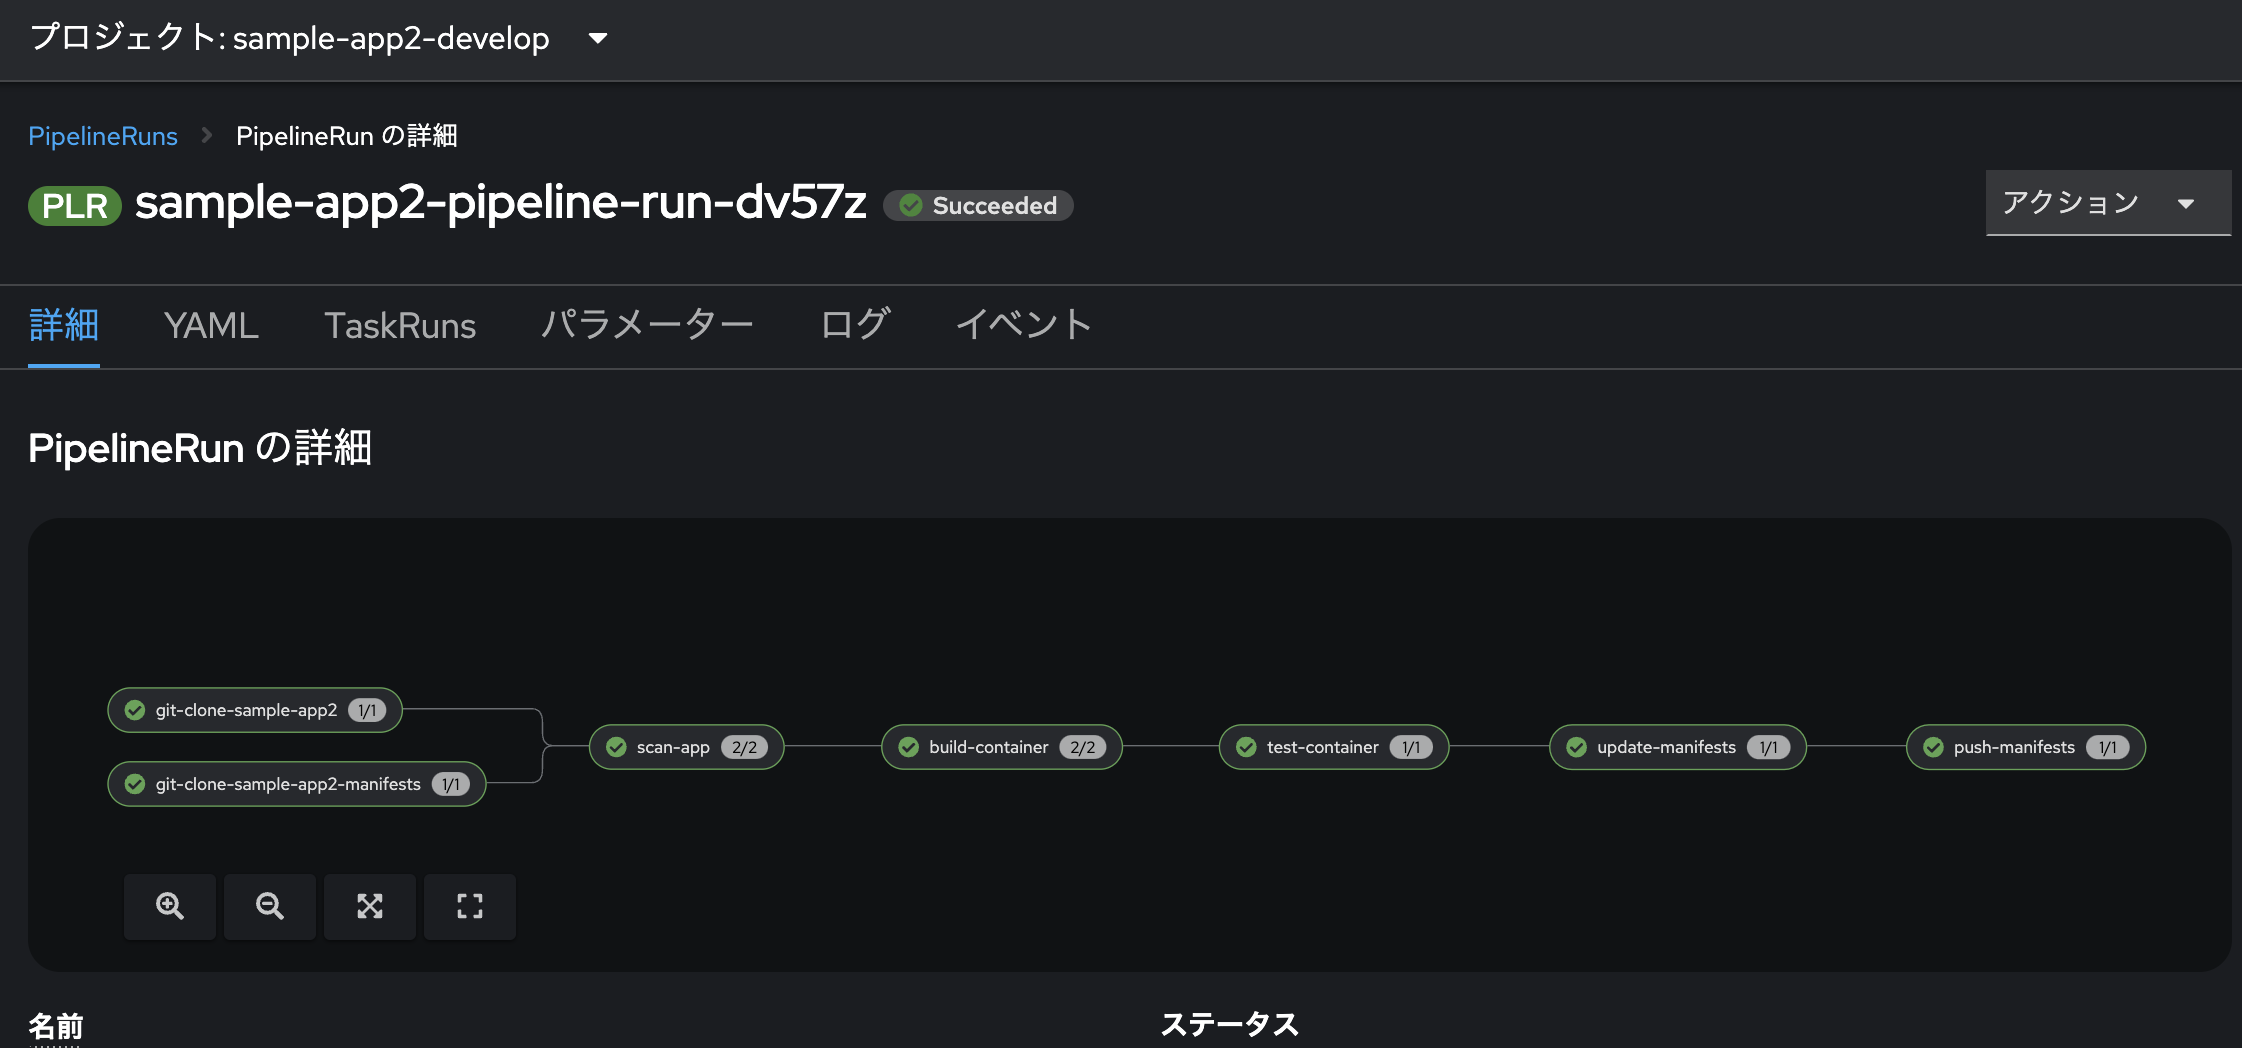
最後にArgoCDで、sample-app2-devのリフレッシュを行うとアプリケーションのデプロイが完了します。
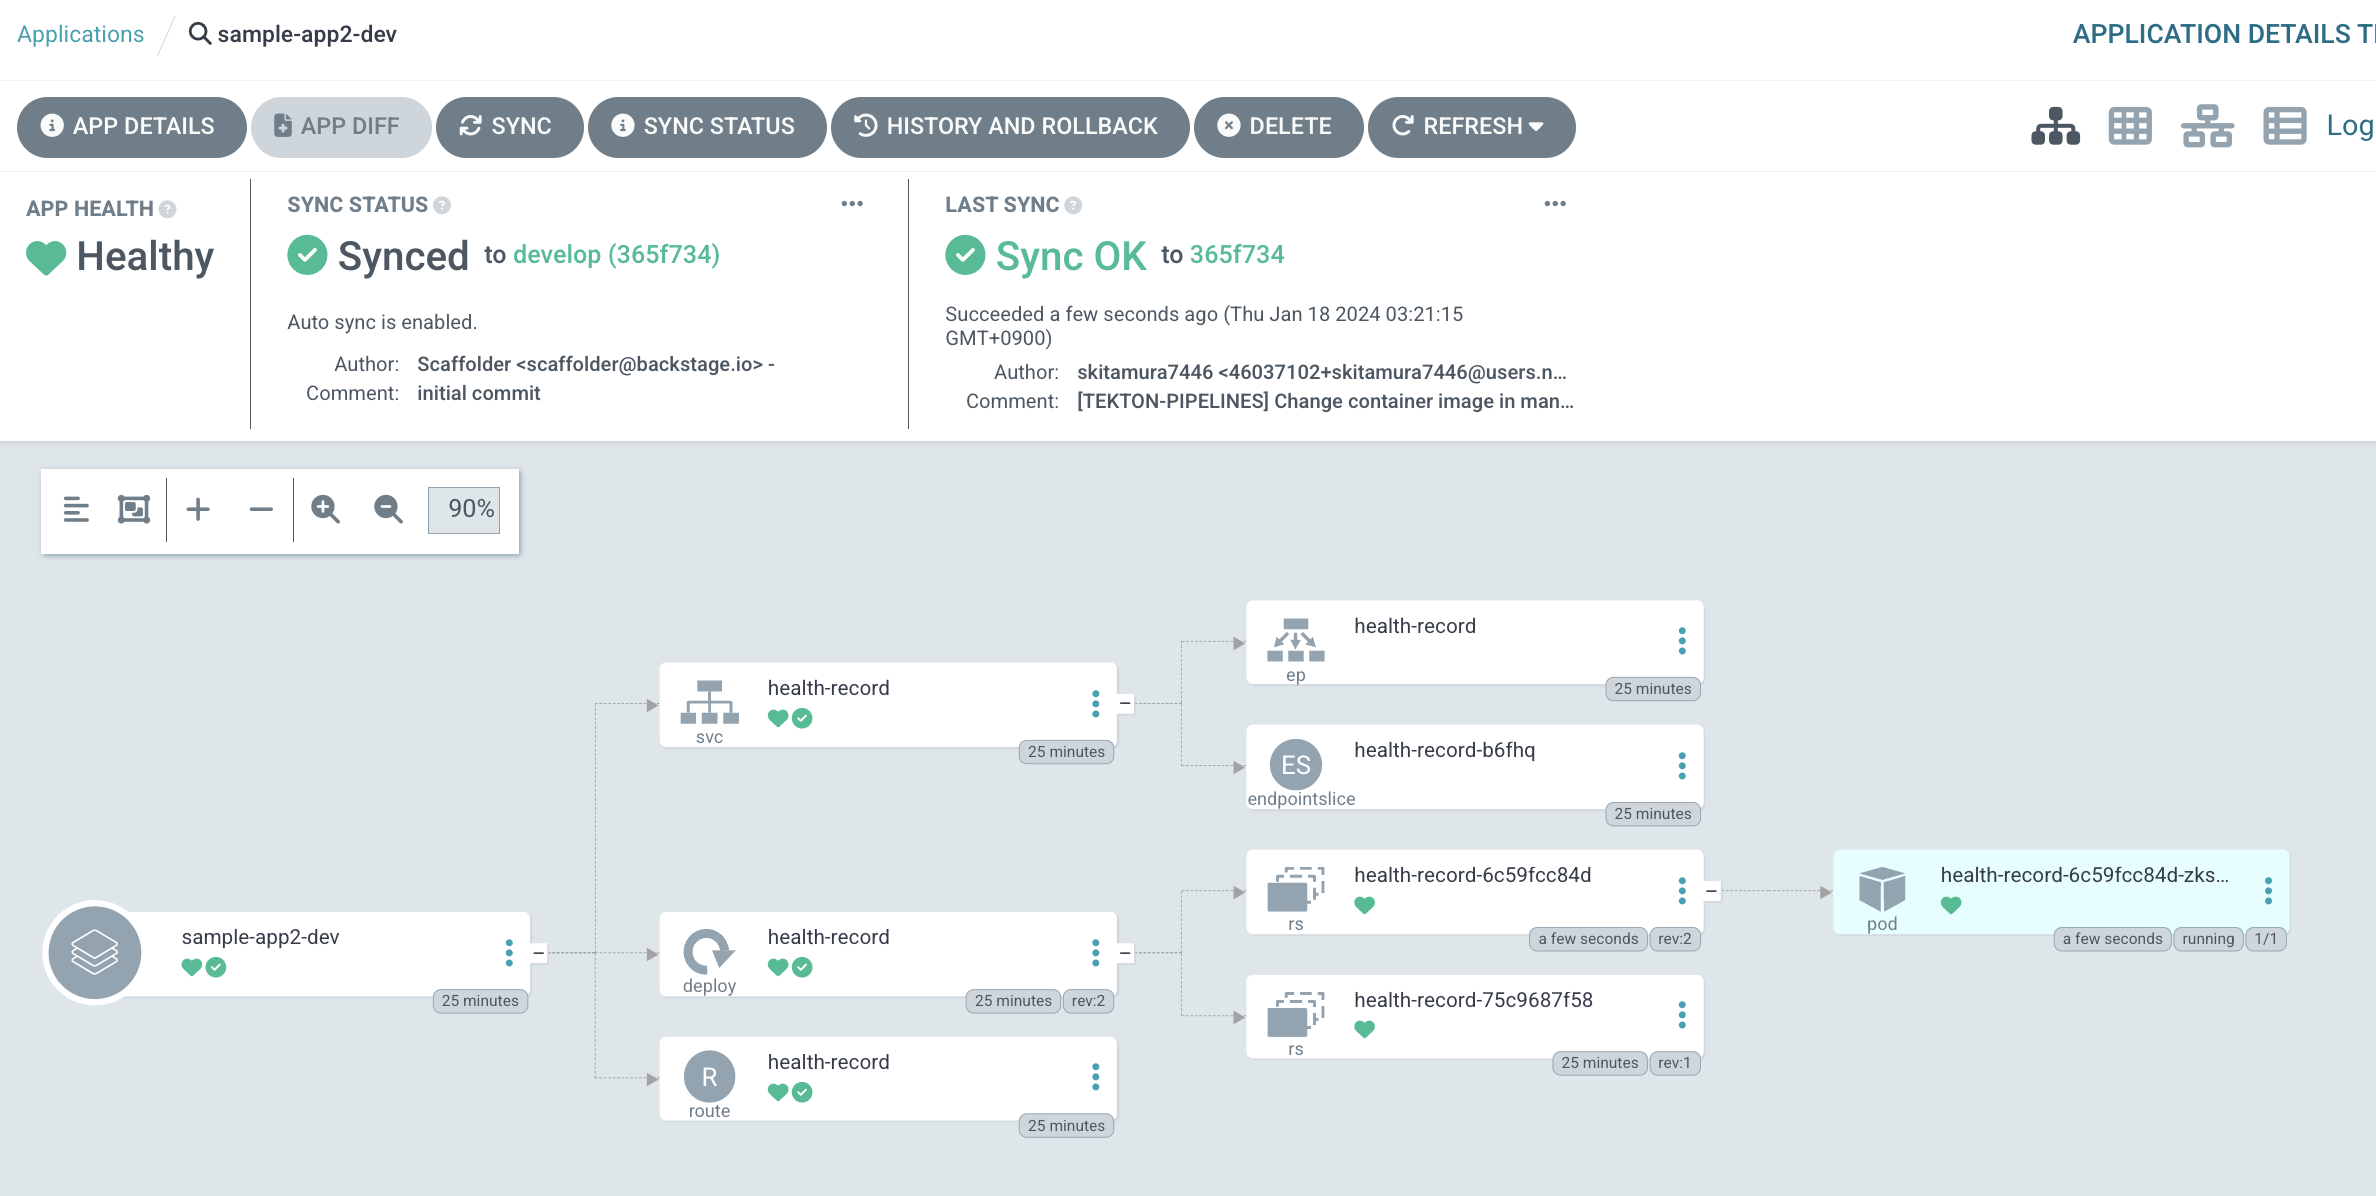
アプリのRoute URLにアクセスしてみます。httpでのアクセスになります。

おわりに
とても長い道のりでしたが、これで一連の流れを実現することができました。
今回は基本的なGolden Pathの実行でしたが、GitHub上のSkeletonテンプレートからリポジトリを作成し、その情報をもとにArgoCDで環境のデプロイまで行い、プリセットのCICDをいきなり使い始めることができるという、まさしく"ゴールデンパス"を開発者に提供することができました。
一方で、今回の取り組みによって、いかにRHDH上でGolden Pathの提供を整備することが難しいかもご理解いただけたかと思います。
- GitOpsだからSecretの管理は別途考えないといけない
- Pipelineに含めるテストやセキュリティスキャンはどうする?
- RHDH上から埋め込む値をK8s Manifestに反映できるようSkeletonリポジトリを構築しないといけない
- 連携設定やプラグインなど、RHDH上だけでも考えることが多い
とはいえこれを構築できれば、開発者は初めての開発でも"強くてニューゲーム"状態でスタートできるので、効果は絶大です。
まだまだBackstageも発展途上で、その成長に伴いRHDHもどんどん新しい機能が追加されていきますので、ぜひ定期的にチェックしてみていただければと思います。
今回テーマの記事はのこり1つです。最後の記事では、RHDH上で管理されているComponent、こちらの画面をブラッシュアップし、より開発者によって有益な情報を表示する"ポータル"として機能させるための手順をお伝えします。
