データベースを使って自学で検証したいけど、使えるようになるまでにどんな手順が必要になるのか分からない方は見てください。これを見れば数時間でサーバ(自PC内に構築した仮想サーバ)にPostgreSQL環境を構築し、PC端末(Windowsなどの作業PC側)からツールでDB操作を始められるようになります。
内容
今回の手順ではPostgreSQLを使って説明。作業内容は以下。
1.PostgreSQLのインストール&設定
2.Postgresqlへ接続し、データベース作成
3.テーブル作成/レコード挿入
4.A5M2のダウンロード/設定/接続
※PC端末からのDB接続にはA5M2を使用します。
事前準備
PCにPostgreSQLをインストールする仮想環境を事前にご用意下さい。
今回の例では、VMwareを使い、CentOS7がインストールされている環境に接続を行っています。
環境のインストール方法が知りたい方はこちら
PostgreSQL環境構築
1.PostgreSQLのインストール
CentOSにrootユーザでログインし、実行する。以下のコマンドにより、postgresql-server、postgresql-libs、postgresqlがインストールされる。
# yum -y install postgresql-server
DBの初期化を行い、設定ファイルを生成する。
# postgresql-setup initdb
設定ファイルの階層に移動しファイルの確認。ファイルが生成されている事が分かる。
# cd /var/lib/pgsql/data
# ls -la
合計 40
drwx------ 15 postgres postgres   305 12月  1 19:42 .
drwx------  4 postgres postgres    72 12月  1 19:42 ..
-rw-------  1 postgres postgres     4 12月  1 19:42 PG_VERSION
drwx------  5 postgres postgres    41 12月  1 19:42 base
drwx------  2 postgres postgres  4096 12月  1 19:42 global
drwx------  2 postgres postgres    18 12月  1 19:42 pg_clog
-rw-------  1 postgres postgres  4232 12月  1 19:42 pg_hba.conf
-rw-------  1 postgres postgres  1636 12月  1 19:42 pg_ident.conf
drwx------  2 postgres postgres     6 12月  1 19:42 pg_log
drwx------  4 postgres postgres    36 12月  1 19:42 pg_multixact
drwx------  2 postgres postgres    18 12月  1 19:42 pg_notify
drwx------  2 postgres postgres     6 12月  1 19:42 pg_serial
drwx------  2 postgres postgres     6 12月  1 19:42 pg_snapshots
drwx------  2 postgres postgres     6 12月  1 19:42 pg_stat_tmp
drwx------  2 postgres postgres    18 12月  1 19:42 pg_subtrans
drwx------  2 postgres postgres     6 12月  1 19:42 pg_tblspc
drwx------  2 postgres postgres     6 12月  1 19:42 pg_twophase
drwx------  3 postgres postgres    60 12月  1 19:42 pg_xlog
-rw-------  1 postgres postgres 19848 12月  1 19:42 postgresql.conf
次にファイルの編集を行う。
■postgresql.conf
外部からアクセス出来るように設定。最下部に以下の内容を追記。
listen_addresses = '*'
※viコマンドの使用方法が不明な場合は、以下のようにコマンドライン上から書き込むことも出来る。
# echo "listen_addresses = '*'" >> postgresql.conf
■pg_hba.conf
ログインの認証方法を設定。以下の内容を追記
local all all     trust
host  all all all trust
※コマンドライン上から書き込む場合はこちら
# echo "local all all     trust" >> ./pg_hba.conf
# echo "host  all all all trust" >> ./pg_hba.conf
■自動起動設定
次回からサーバ起動時にサービスが起動するように設定を行う。
# systemctl enable postgresql
Created symlink from /etc/systemd/system/multi-user.target.wants/postgresql.service to /usr/lib/systemd/system/postgresql.service.
ファイアウォールにPostgreSQLを許可(これをしないと外部から接続出来ない)
# firewall-cmd --add-service=postgresql --zone=public --permanent
# firewall-cmd --reload
postgresqlが追加されたか確認
# firewall-cmd --list-services --zone=public --permanent
ssh dhcpv6-client http https postgresql
サービス起動。(初回なので。次回からは自動で起動している。)
# systemctl start postgresql
systemctl status postgresqlコマンドを使ってサービスの状態を確認することも出来る。状態がactive (running)になっていれば無事起動している。
2.Postgresqlへ接続。
postgresユーザに変更する。
# su - postgres
-bash-4.2$
データベースを確認するとデフォルトの状態で3つのデータベースが存在する。
-bash-4.2$ psql -l
                                         データベース一覧
   名前    |  所有者  | エンコーディング |  照合順序   | Ctype(変換演算子) |      アクセス権
-----------+----------+------------------+-------------+-------------------+-----------------------
 postgres  | postgres | UTF8             | ja_JP.UTF-8 | ja_JP.UTF-8       |
 template0 | postgres | UTF8             | ja_JP.UTF-8 | ja_JP.UTF-8       | =c/postgres          +
           |          |                  |             |                   | postgres=CTc/postgres
 template1 | postgres | UTF8             | ja_JP.UTF-8 | ja_JP.UTF-8       | =c/postgres          +
           |          |                  |             |                   | postgres=CTc/postgres
次にデータベースを作成する。
今回は、postgresユーザでtestdbというデータベースを作成する。(※名前を指定したい場合は、自身の設定したいものに置き換えて作業を行なう。)
スーパーユーザ(postgres)でログイン
-bash-4.2$ psql -U postgres
psql (9.2.24)
"help" でヘルプを表示します.

postgres=#
データペース作成
※sql文を書く際は、実行文の最後に「;」を入れないと実行できないので注意。
postgres=# create database testdb;
CREATE DATABASE
データベースにログイン
postgres-# \c testdb
データベース "testdb" にユーザ"postgres"として接続しました。
testdb-#
3.テーブル作成/レコード挿入
2でデータベースにログインが出来たら今度はそのまま、テーブル作成を行う。
見やすくするために改行しながら入力し、最後に実行しているが、1行にしても問題ない。
testdb-# create table kaiinmst(
testdb(# k_num int primary key,
testdb(# k_name text not null,
testdb(# k_age int not null,
testdb(# k_sex char not null
testdb(# );
NOTICE:  CREATE TABLE / PRIMARY KEYはテーブル"kaiinmst"に暗黙的なインデックス"kaiinmst_pkey"を作成します
CREATE TABLE
テーブル定義を確認すると、カラム名と入力する型とnot nullで空では登録できないことが分かる。
testdb=# \d kaiinmst
    テーブル "public.kaiinmst"
   列   |      型      |  修飾語
--------+--------------+----------
 k_num  | integer      | not null
 k_name | text         | not null
 k_age  | integer      | not null
 k_sex  | character(1) | not null
インデックス:
    "kaiinmst_pkey" PRIMARY KEY, btree (k_num)
次にレコードを挿入してみる。
testdb=# insert into kaiinmst values(1,'Qiita',30,'M');
INSERT 0 1
testdb=# insert into kaiinmst values(2,'Postgre',24,'F');
INSERT 0 1
挿入されたか確認
testdb=# select * from kaiinmst;
 k_num | k_name  | k_age | k_sex
-------+---------+-------+-------
     1 | Qiita   |    30 | M
     2 | Postgre |    24 | F
(2 行)
DB接続ツール
4.A5M2のダウンロード/設定/接続
DBツールは、A5M2(A5:SQL Mk-2)を使用する。
PC端末に以下のサイトより無料版をダウンロード。
ソフトを探す・ゲームで遊ぶ Vector(ベクター)
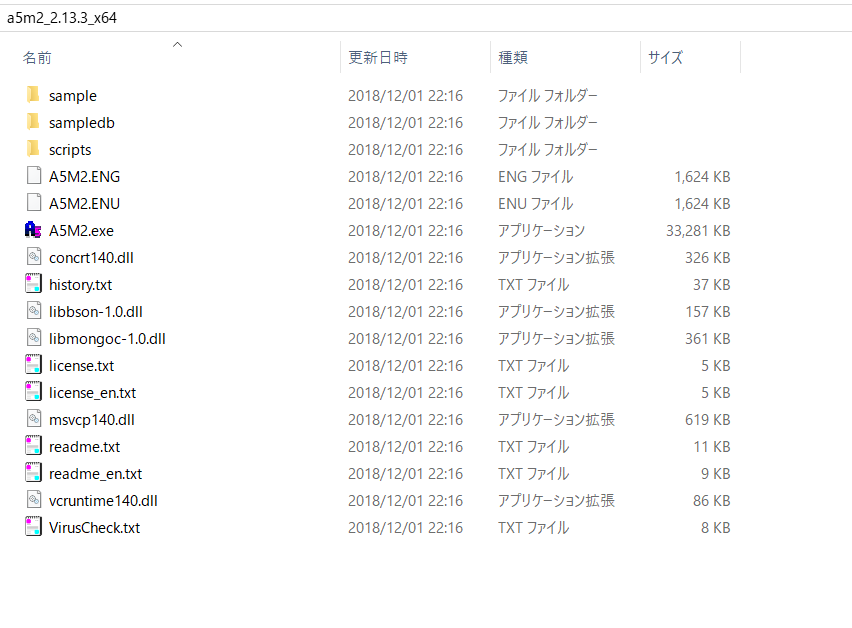
ダウンロードしたzipを展開すると以下のような中身になっている。
A5M2.exeを使用するので、デスクトップなどにショートカットを作成しておくと良い。
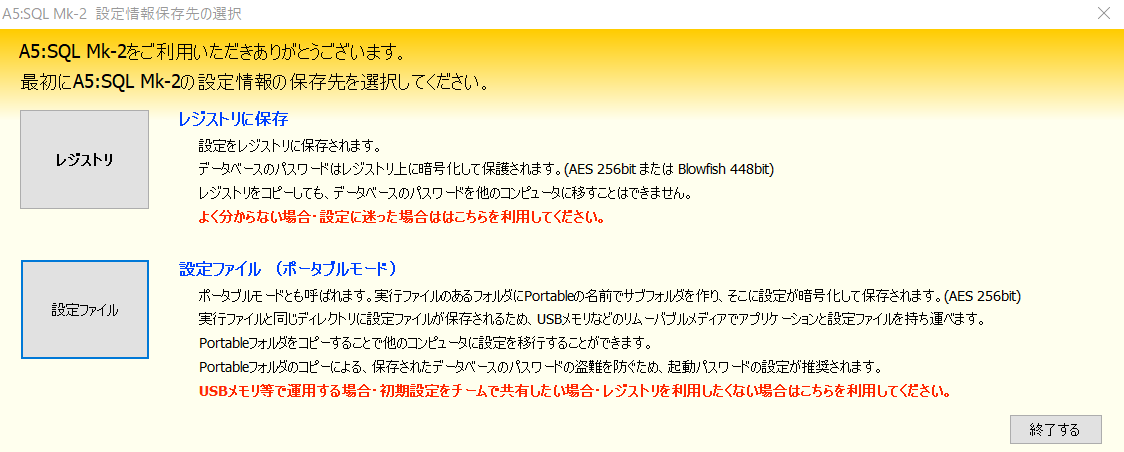
A5M2.exeを実行すると、初回のみ以下のように設定の保存方法の確認がある。好みによるが私は「設定ファイルに保存」で行う。そうすることでレジストリを汚さず、フォルダを消せば設定もすべて消える。
次にデータベースの追加を行う。
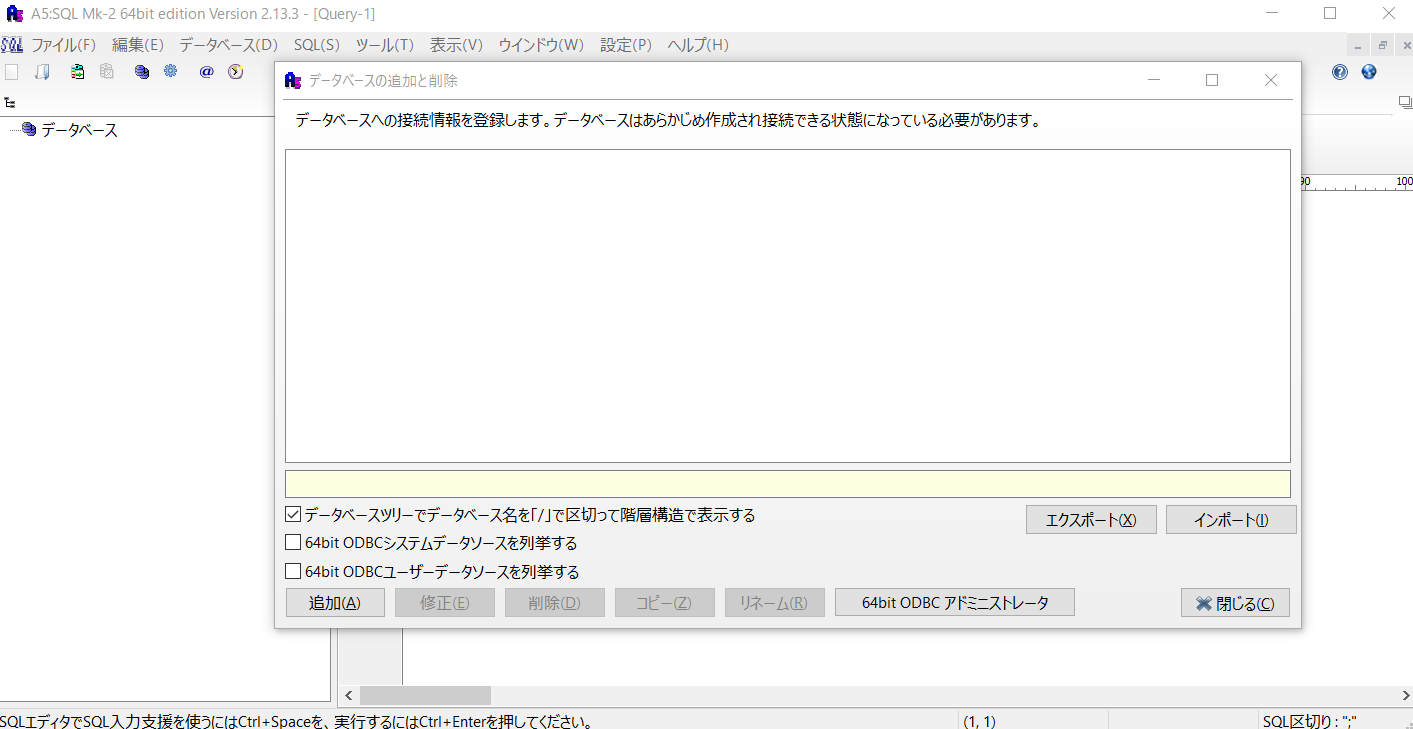
初回起動時は、以下のようにダイアログが出てくるので、追加を押下。
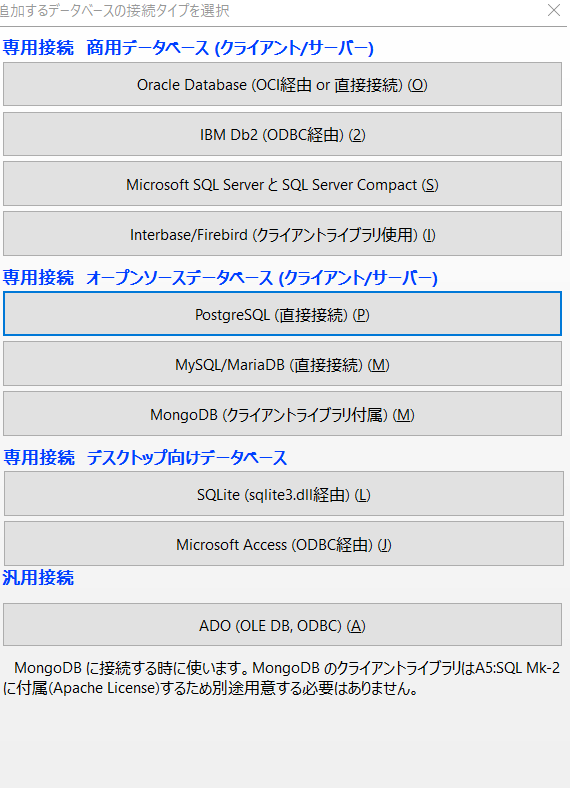
次にデータベースの種類の選択だが、今回は「PostgreSQL(直接接続)」を押下。
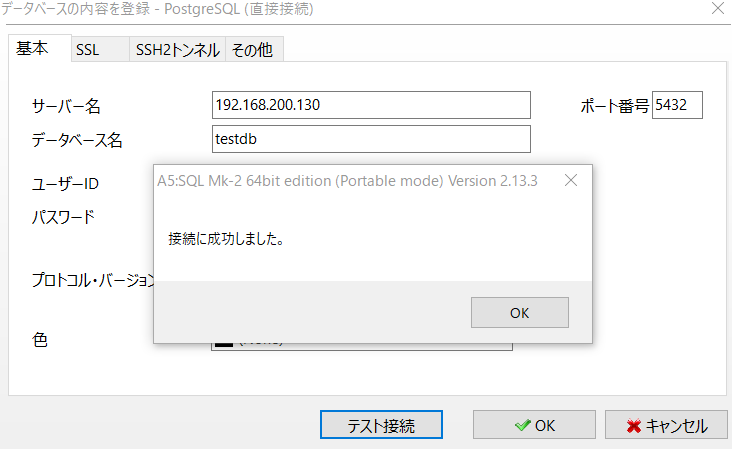
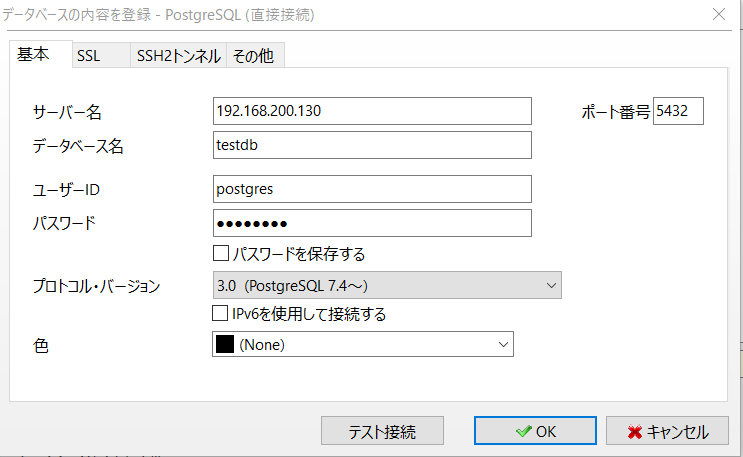
以下のように自身の仮想環境構築した環境に合わせて設定を入力し、テスト接続で繋がれば使用可。
※サーバ名に設定するCentOSへアクセスするipアドレスが分からない場合は、ip addrコマンドで確認。デフォルトでは、 ens33のinetにアドレスが載っている。
入力内容は
サーバ名:IPアドレス
データベース名:データベース作成時につけたDB名
ユーザID:postgres(※データベースの所有者)
パスワード:postgres(※ユーザに設定しているパスワード)
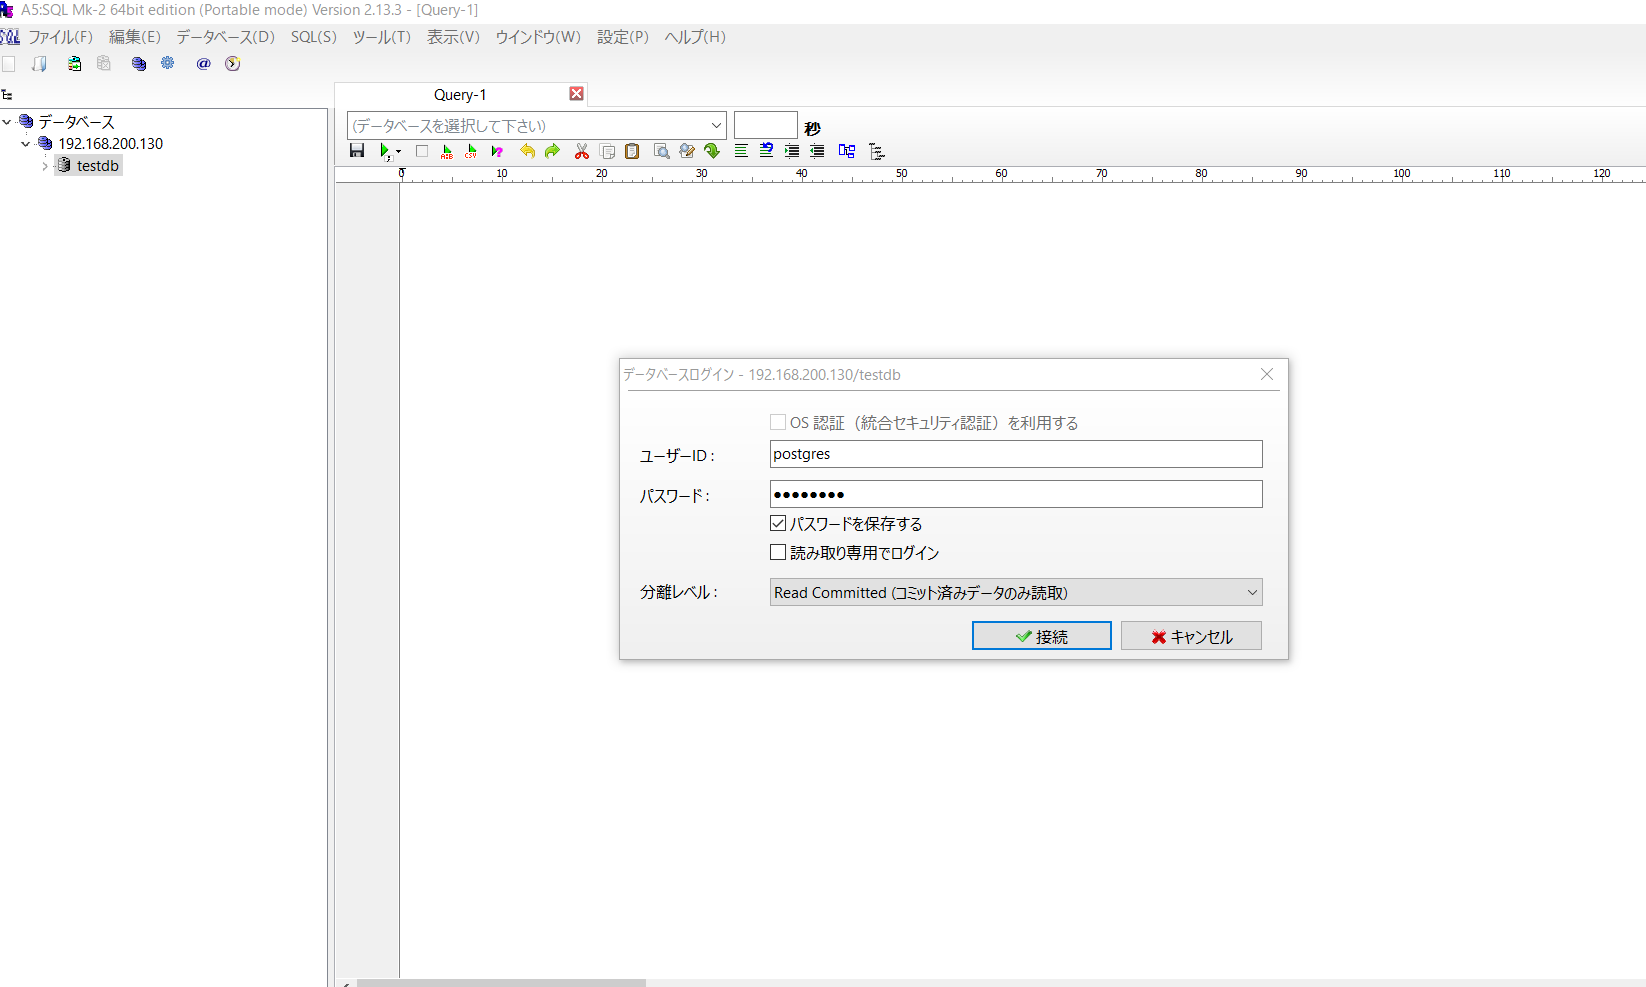
左側の枠にデータベース名が表示されるので、そちらをクリックし、接続する。
SQLコマンドを実行するには、「新しいドキュメント」→「SQL」の手順で押下。

データベースを指定し、SQL文を選択し、Ctrlキー+Enterキーで実行できる。
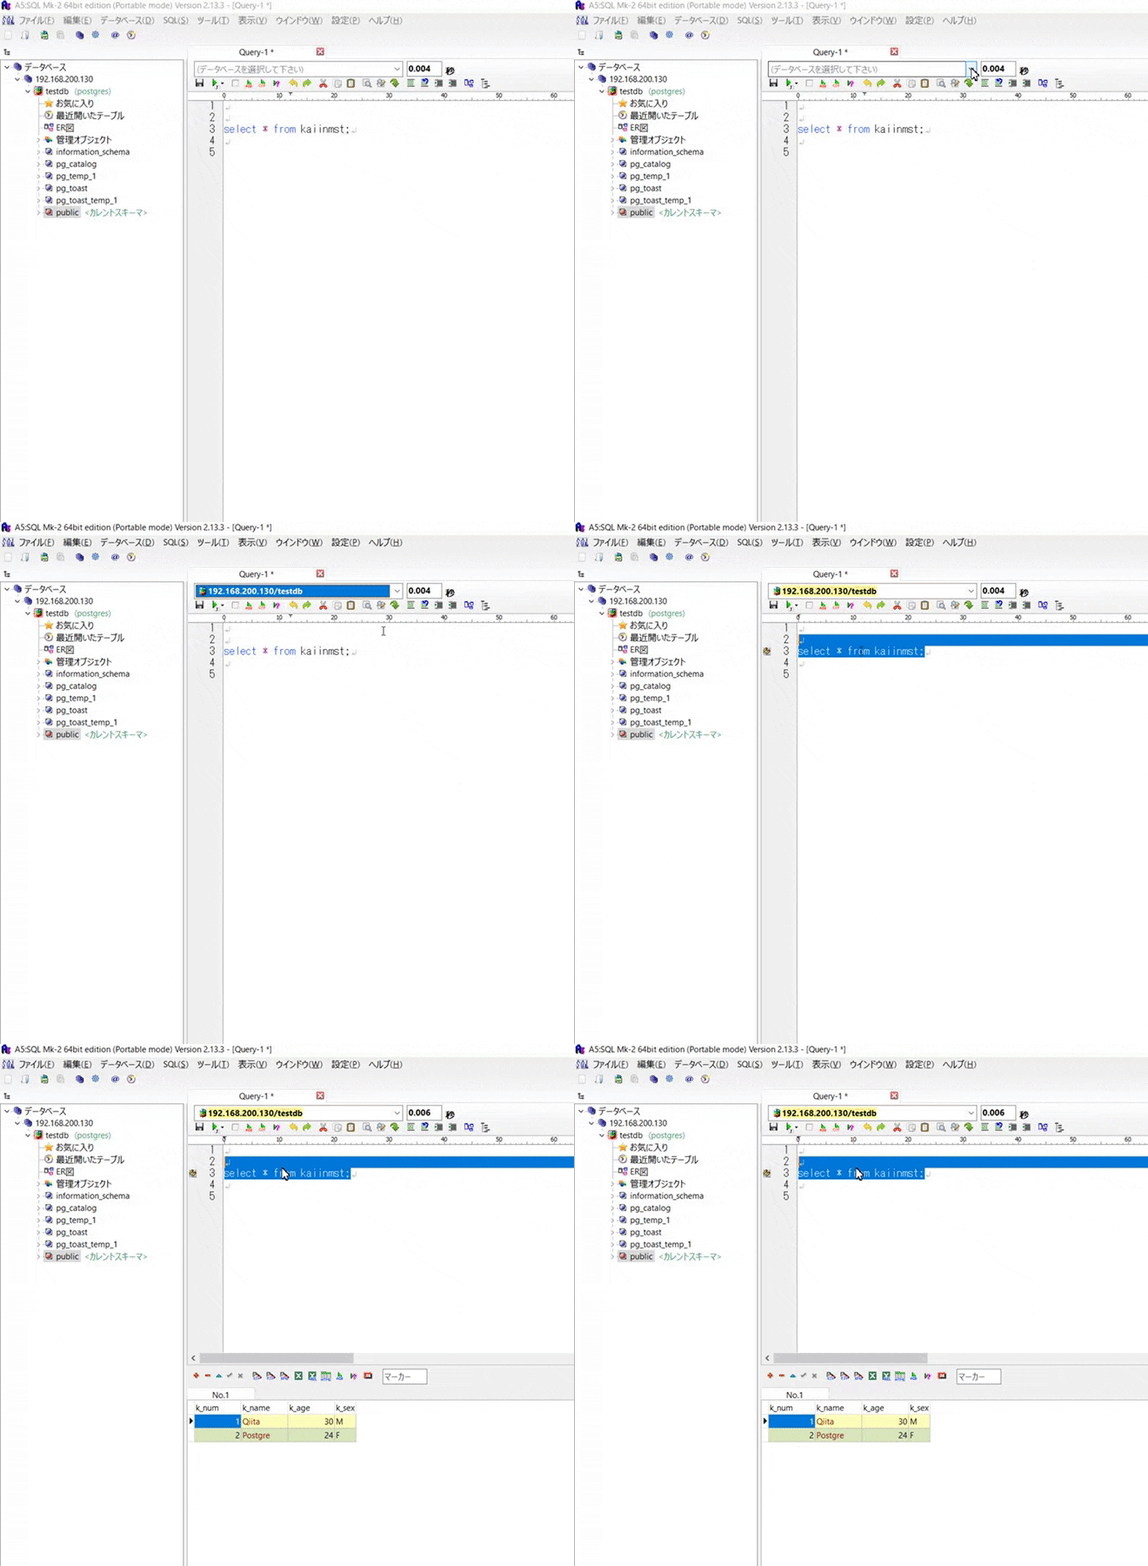
これでDBツールからSQLを実行できるようになった。
ちなみに直接テーブル内を確認、編集したい場合は、以下のように左の枠より対象をクリック。
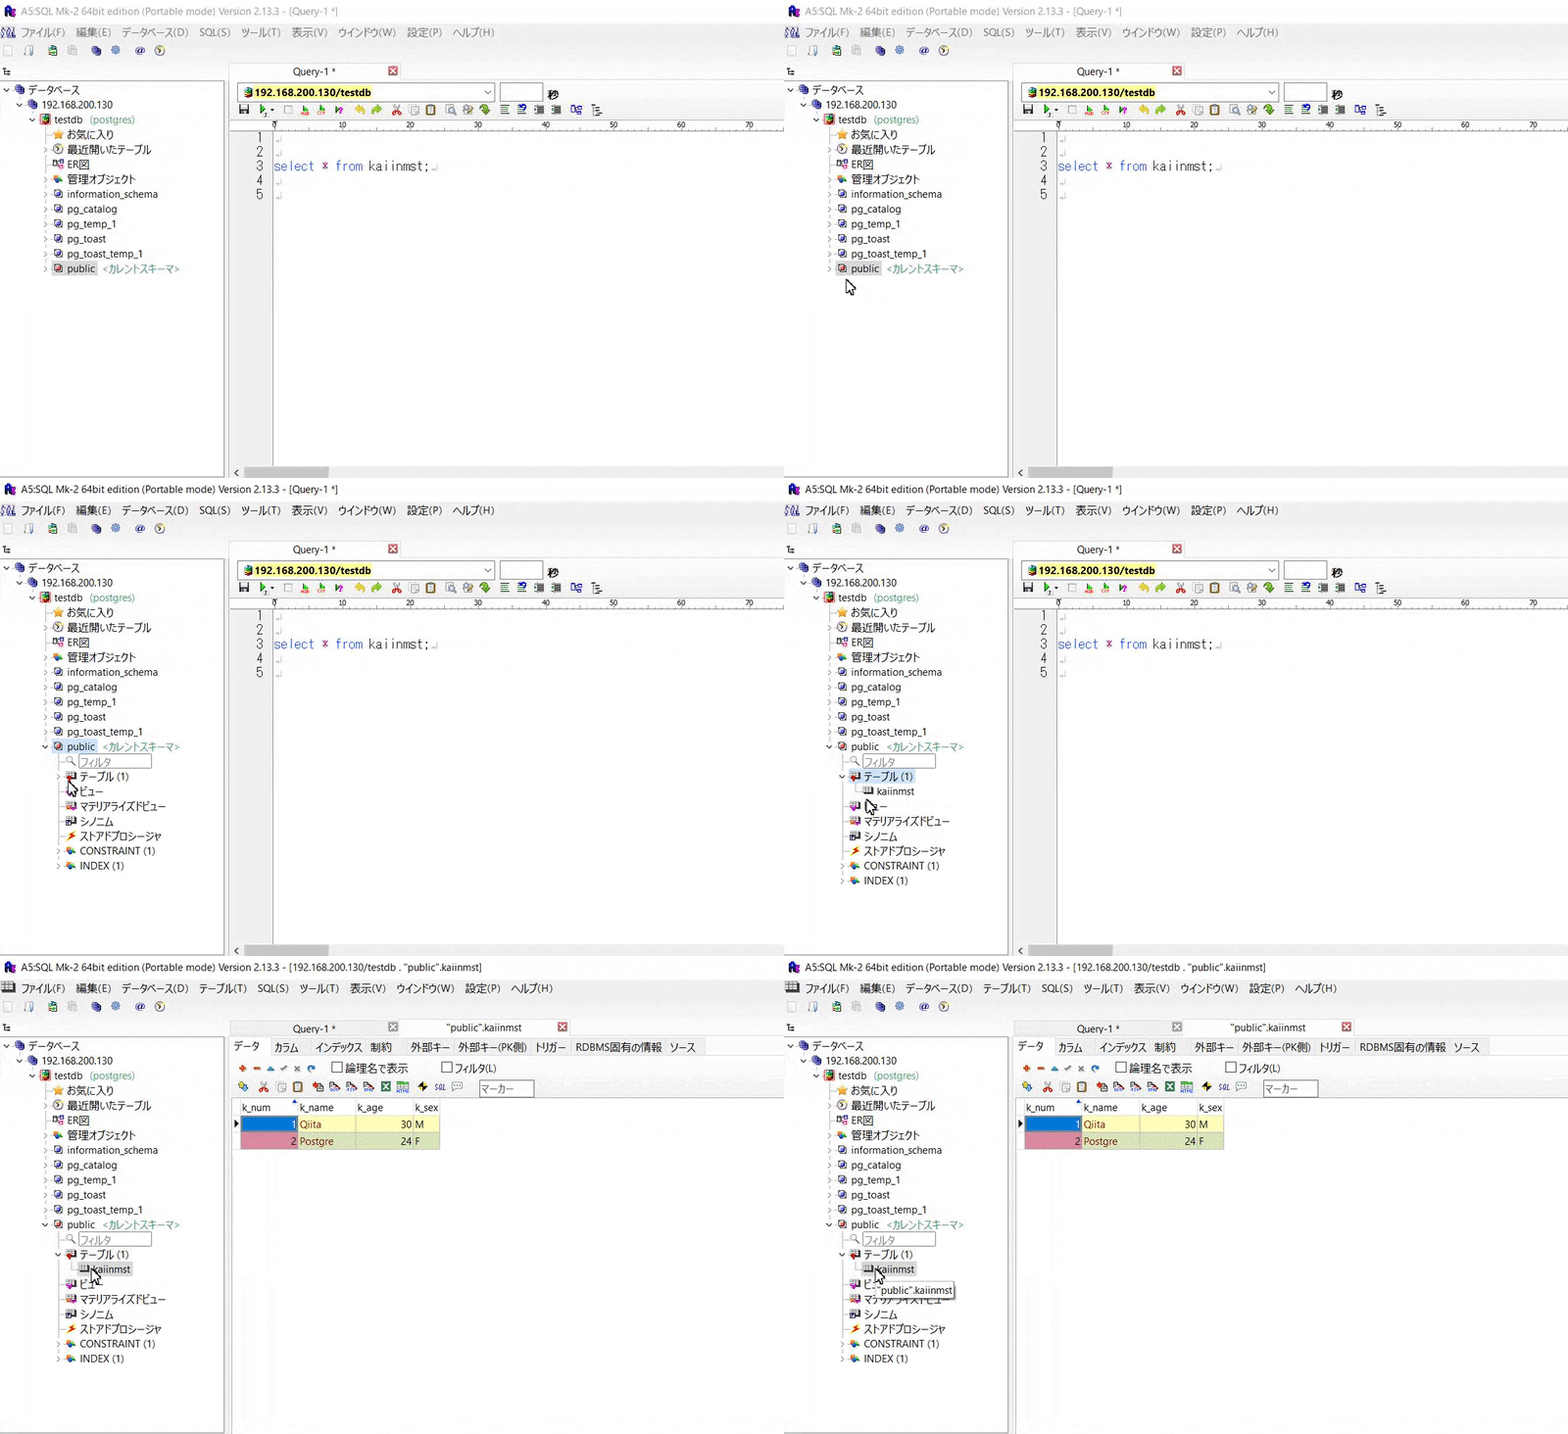
以上。
