はじめに
この記事はマイコンで遊ぶBlenderシリーズの5番目です。
- 準備編
- Blenderの基本操作
- モデリング
- M5StickCとの連携①BlenderからM5StickCに値を送る
- M5StickCとの連携②M5StickCからBlenderに値を送る←イマココ
M5StickCとの連携2回目です。
今回はM5StickC内蔵の加速度・ジャイロ6軸センサの値をBlenderに送って3D空間上のオブジェクトを回していきたいと思います。
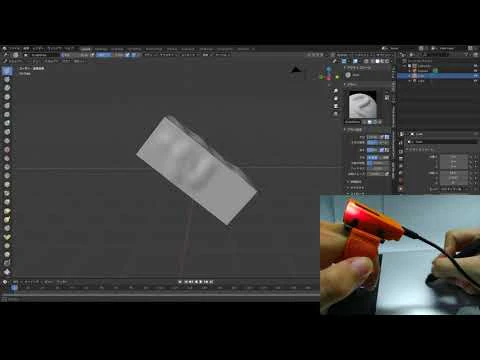
こんなことができたりします。
プログラムの設計
プログラムの流れは次の通りです。
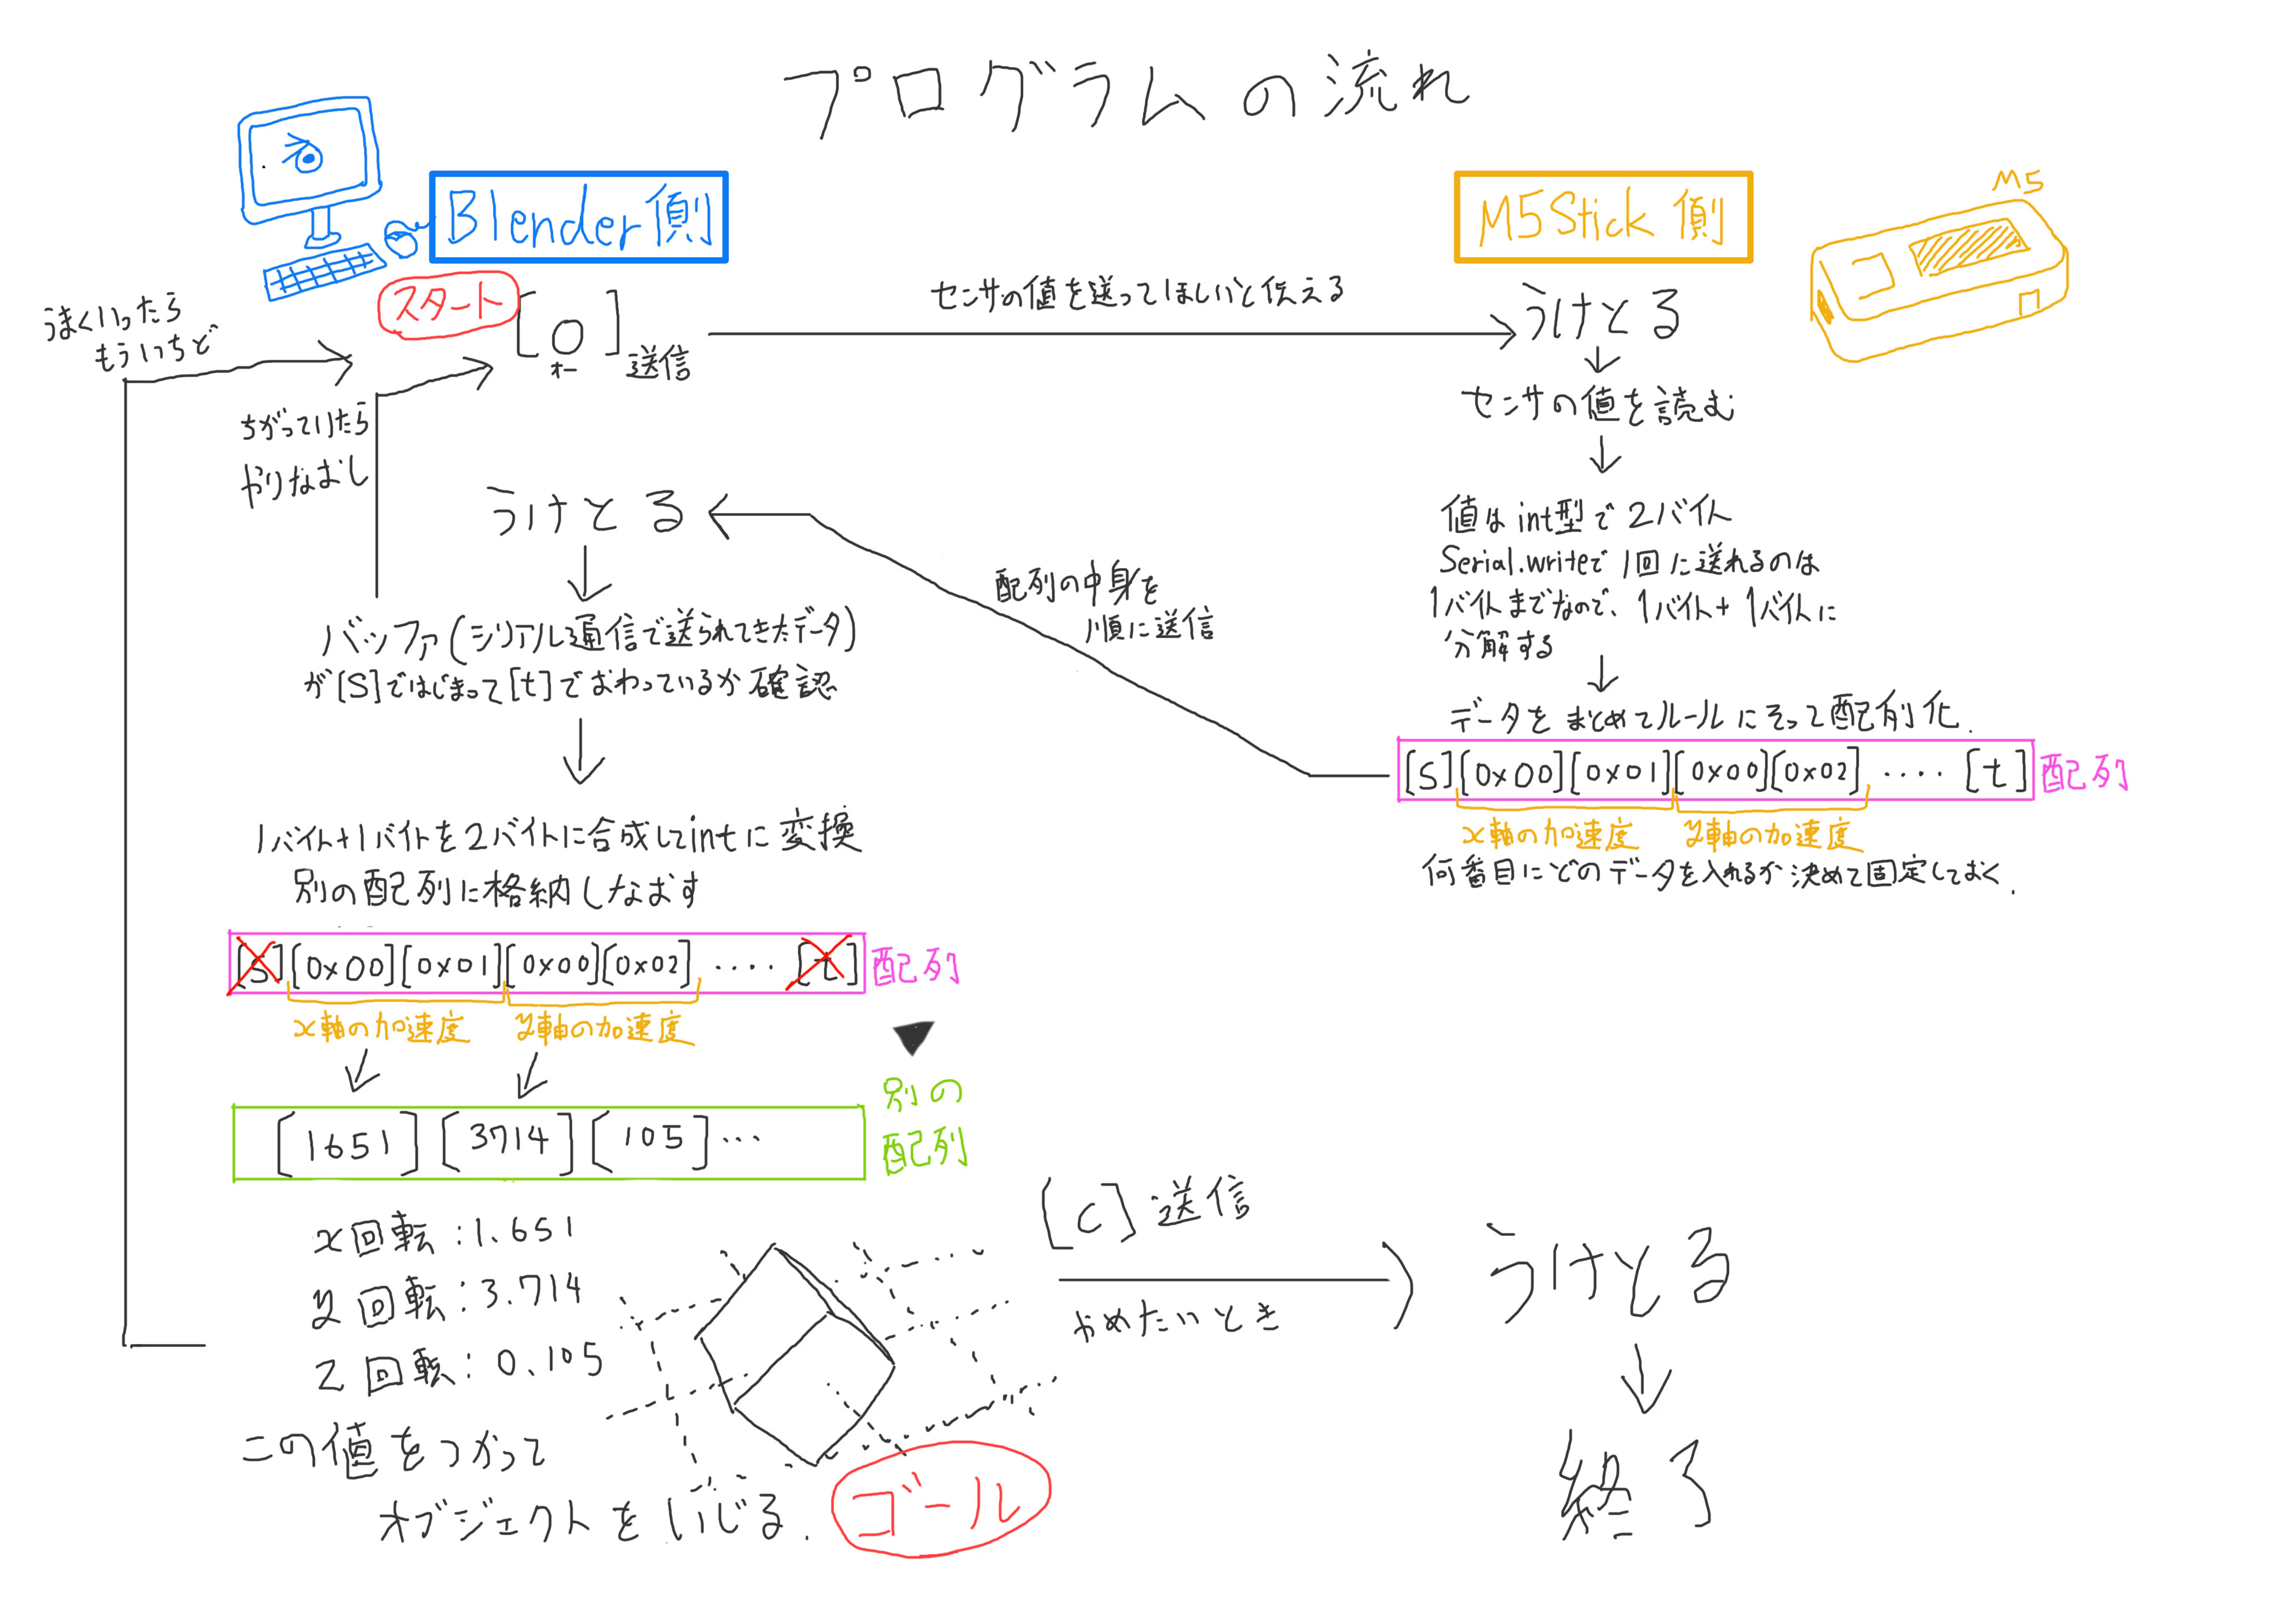
Blenderからデータの送信要求を送る
↓
M5StickCがセンサの値を読む
↓
M5StickCが配列の中身を順にシリアル通信でPCに送る
↓
Blenderがデータを受け取って内容を確認
↓
受け取った値を使ってオブジェクトのプロパティの値を置き換える
↓
一番最初に戻る
という流れです。
Arduino IDE(M5StickC)側のソースコード
以上を踏まえてコードを書いていきます。
Arduinoのコードは以下の通りです。
/*
  M5StickC内蔵の加速度センサの値をBlenderにおくるよ
*/

#include <M5StickC.h>

int16_t accX, accY, accZ;
int16_t gyroX, gyroY, gyroZ;
float temp = 0;

byte fromBle;
byte outBuf[14];
void setup() {
  M5.begin();
  M5.MPU6886.Init();

  Serial.begin(115200);

  pinMode(GPIO_NUM_10, OUTPUT);
  digitalWrite(GPIO_NUM_10, HIGH);  //  初期化
}

void loop() {
  M5.MPU6886.getGyroAdc(&gyroX,&gyroY,&gyroZ);
  M5.MPU6886.getAccelAdc(&accX,&accY,&accZ);

  //Blenderからの読み取り
  if (Serial.available() == 1) {
    byte inBuf[1];
    Serial.readBytes(inBuf, 1);

    if (inBuf[0] == 'o'){
      	digitalWrite(GPIO_NUM_10, LOW);
      	// start
      	outBuf[0]  = 's';  // 1
      	//  get 14bytes
      	outBuf[1]  = lowByte(accX);
      	outBuf[2]  = highByte(accX);
      	outBuf[3]  = lowByte(accY);
      	outBuf[4]  = highByte(accY);
      	outBuf[5]  = lowByte(accZ);
      	outBuf[6]  = highByte(accZ);
      	outBuf[7]  = lowByte(gyroX);
      	outBuf[8]  = highByte(gyroX);
      	outBuf[9]  = lowByte(gyroY);
      	outBuf[10]  = highByte(gyroY);
      	outBuf[11]  = lowByte(gyroZ);
      	outBuf[12]  = highByte(gyroZ);
      	//end
      	outBuf[13]  = 't';
      	Serial.write(outBuf, 14);
    }else if (inBuf[0] == 'c'){
      	digitalWrite(GPIO_NUM_10, HIGH);
    }else{
    	while (Serial.available() > 0)Serial.read();
    }
  }

  if (Serial.available() > 1) {
    while (Serial.available() > 0)Serial.read();
  }
}
センサの値はint型で帰ってくるので、通信するためには2バイトのデータを1バイトづつ分割する必要があります。
lowbyte() とhighbyte()はそれぞれ2バイト値を1バイトに分割して下位1バイト/上位1バイトにに変換してくれる便利な奴です。Serial.write()基本的に1バイトづつしか送れないのですが、配列とその中身の数を引数に入れると配列の中身を順に送ってくれます。
Blender側のソースコード
前回のソースコードを基に、if event.type == 'TIMER':とreturn {'PASS_THROUGH'}の間を書き換えます。
import datetime
import serial
import bpy
import math
import mathutils
import struct


bl_info = {
    "name": "Blender with Arduino",
    "author": "Shimashima",
    "version": (3, 0),
    "blender": (2, 80, 0),
    "location": "3Dビューポート > Sidebar > Blender with Arduino",
    "description": "BlenderとArudinoを連携させるアドオン",
    "warning": "",
    "support": "TESTING",
    "wiki_url": "",
    "tracker_url": "",
    "category": "Object"
}


# モーダルモードでオブジェクトを動かすオペレータ
class BLENDER_WITH_M5(bpy.types.Operator):

    bl_idname = "object.blender_with_m5"
    bl_label = "Arduinoと連携"
    bl_description = "Blender with Arduino"

    # タイマのハンドラ
    __timer = None
    # テキストオブジェクトの名前
    __text_object_name = None

    #Serial port
    __ser = serial.Serial('COM11', 115200, timeout = 0)
    samplingtime = 0.1

    @classmethod
    def is_running(cls):
        # モーダルモード中はTrue
        return True if cls.__timer else False

    def __handle_add(self, context):
        blwm5 = BLENDER_WITH_M5
        if not self.is_running():
            # タイマを登録
            blwm5.__timer = \
                context.window_manager.event_timer_add(
                    blwm5.samplingtime, window=context.window
                )
            # モーダルモードへの移行
            context.window_manager.modal_handler_add(self)

    def __handle_remove(self, context):
        if self.is_running():
            # タイマの登録を解除
            context.window_manager.event_timer_remove(
                BLENDER_WITH_M5.__timer)
            BLENDER_WITH_M5.__timer = None

    def modal(self, context, event):
        blwm5 = BLENDER_WITH_M5
        active_obj = context.active_object

        # エリアを再描画
        if context.area:
            context.area.tag_redraw()

        # パネル [Blender with Arduino] のボタン [終了] を押したときに、モーダルモードを終了
        if not self.is_running():
            return {'FINISHED'}

		#メインのループ内処理はここから
        if event.type == 'TIMER':
        	#送信処理(定期的にセンサーの値を送るようにリクエスト)
            blwm5.__ser.write(b'o')

            #受信処理
            if blwm5.__ser.inWaiting() == 14:
            	inBuf = blwm5.__ser.read(14)
                if inBuf.startswith(b's') and inBuf.endswith(b't'):
                	inBuf = inBuf[1:13]
                    val = struct.unpack('<6h', inBuf)

                    active_obj.rotation_euler[0] += val[3] / 32768 * 3.14
                    active_obj.rotation_euler[1] += val[4] / 32768 * 3.14
                    active_obj.rotation_euler[2] += val[5] / 32768 * 3.14
                    print(val)
                else:
                    print('missmatch')
                	blwm5.__ser.flushInput();

             elif blwm5.__ser.inWaiting() > 14:
             	inBuf = blwm5.__ser.read( blwm5.__ser.inWaiting() )
                print( "overflow" )
                print( inBuf )
                blwm5.__ser.flushInput();
      return {'PASS_THROUGH'}
      #ここまで

    def invoke(self, context, event):
        blwm5 = BLENDER_WITH_M5
        active_obj = context.active_object

        if context.area.type == 'VIEW_3D':
            # [開始] ボタンが押された時の処理
            if not blwm5.is_running():
                # モーダルモードを開始
                self.__handle_add(context)
                if not blwm5.__ser.is_open:
                    blwm5.__ser.open()
                print("START")
                return {'RUNNING_MODAL'}
            # [終了] ボタンが押された時の処理
            else:
                # モーダルモードを終了
                self.__handle_remove(context)
                blwm5.__ser.flushInput();
                blwm5.__ser.write(b'c')
                blwm5.__ser.close()
                print("STOP")
                return {'FINISHED'}
        else:
            return {'CANCELLED'}


# UI
class BLENDER_WITH_M5_UI(bpy.types.Panel):

    bl_label = "Blender with Arduino"
    bl_space_type = 'VIEW_3D'
    bl_region_type = 'UI'
    bl_category = "Blender with Arduino"
    bl_context = "objectmode"

    def draw(self, context):
        blwm5 = BLENDER_WITH_M5

        layout = self.layout
        # [開始] / [停止] ボタンを追加
        if not blwm5.is_running():
            layout.operator(blwm5.bl_idname, text="開始", icon="PLAY")
        else:
            layout.operator(blwm5.bl_idname, text="終了", icon="PAUSE")


classes = [
    BLENDER_WITH_M5,
    BLENDER_WITH_M5_UI,
]


def register():
    for c in classes:
        bpy.utils.register_class(c)
    print("Registed")


def unregister():
    for c in classes:
        bpy.utils.unregister_class(c)
    print("Unregisted")


if __name__ == "__main__":
    register()

実行出来たら3DビューポートでNキーを押して右側からメニューを出し、赤枠で囲んだタブから開始ボタンを出してオブジェクトが動くか試してみてください。