この記事の概要
Vue3でTypeScriptを使いGraphQLを試してみた
- Vue3対応
- Vue Apollo v3(vue3に正式対応しているのはv4から 開発中)
- GraphQLを実行するまでのサンプル解説
GraphQLについて
APIのためのクエリー言語であり、既存のデータを使ってクエリーを実行するためのランタイム。
クライアントからサーバーのデータを取得する場合REST APIが主な手段だった
REST APIとの比較については以下記事をお勧めする
サンプル
目次
- GraphCMSで簡易サーバー作成
- Vue3にVue Apolloの環境を作成
- VueからGraphQL を実行(GET)
※ POST、PUT、DELETEの サンプルはGitへ
【1】GraphCMSで簡易サーバー作成
GraphCMSはGraphQLでレスポンスを返してくれるCMS
これを使用してDBサーバを作成する
- アカウントとプロジェクトの作成
- Modelの作成
- Fieldの作成
- データの追加
- Tokenの作成と権限の追加
- Content API URLの取得
[1-1] アカウントとプロジェクトの作成
- Create a new project 設定
- Template: Blank
- Project name: test-project
- Project description: なし
- Select region: Japan
- Plan: Free forever
- Members: -
- 自分以外にメンバーを追加したい場合のみ設定
[1-2] Modelの作成
- Schema > MODELS > Add
- Create Model 設定
- Display name: Task
- API ID: Task
- Plural API ID: Tasks
- Discription: なし
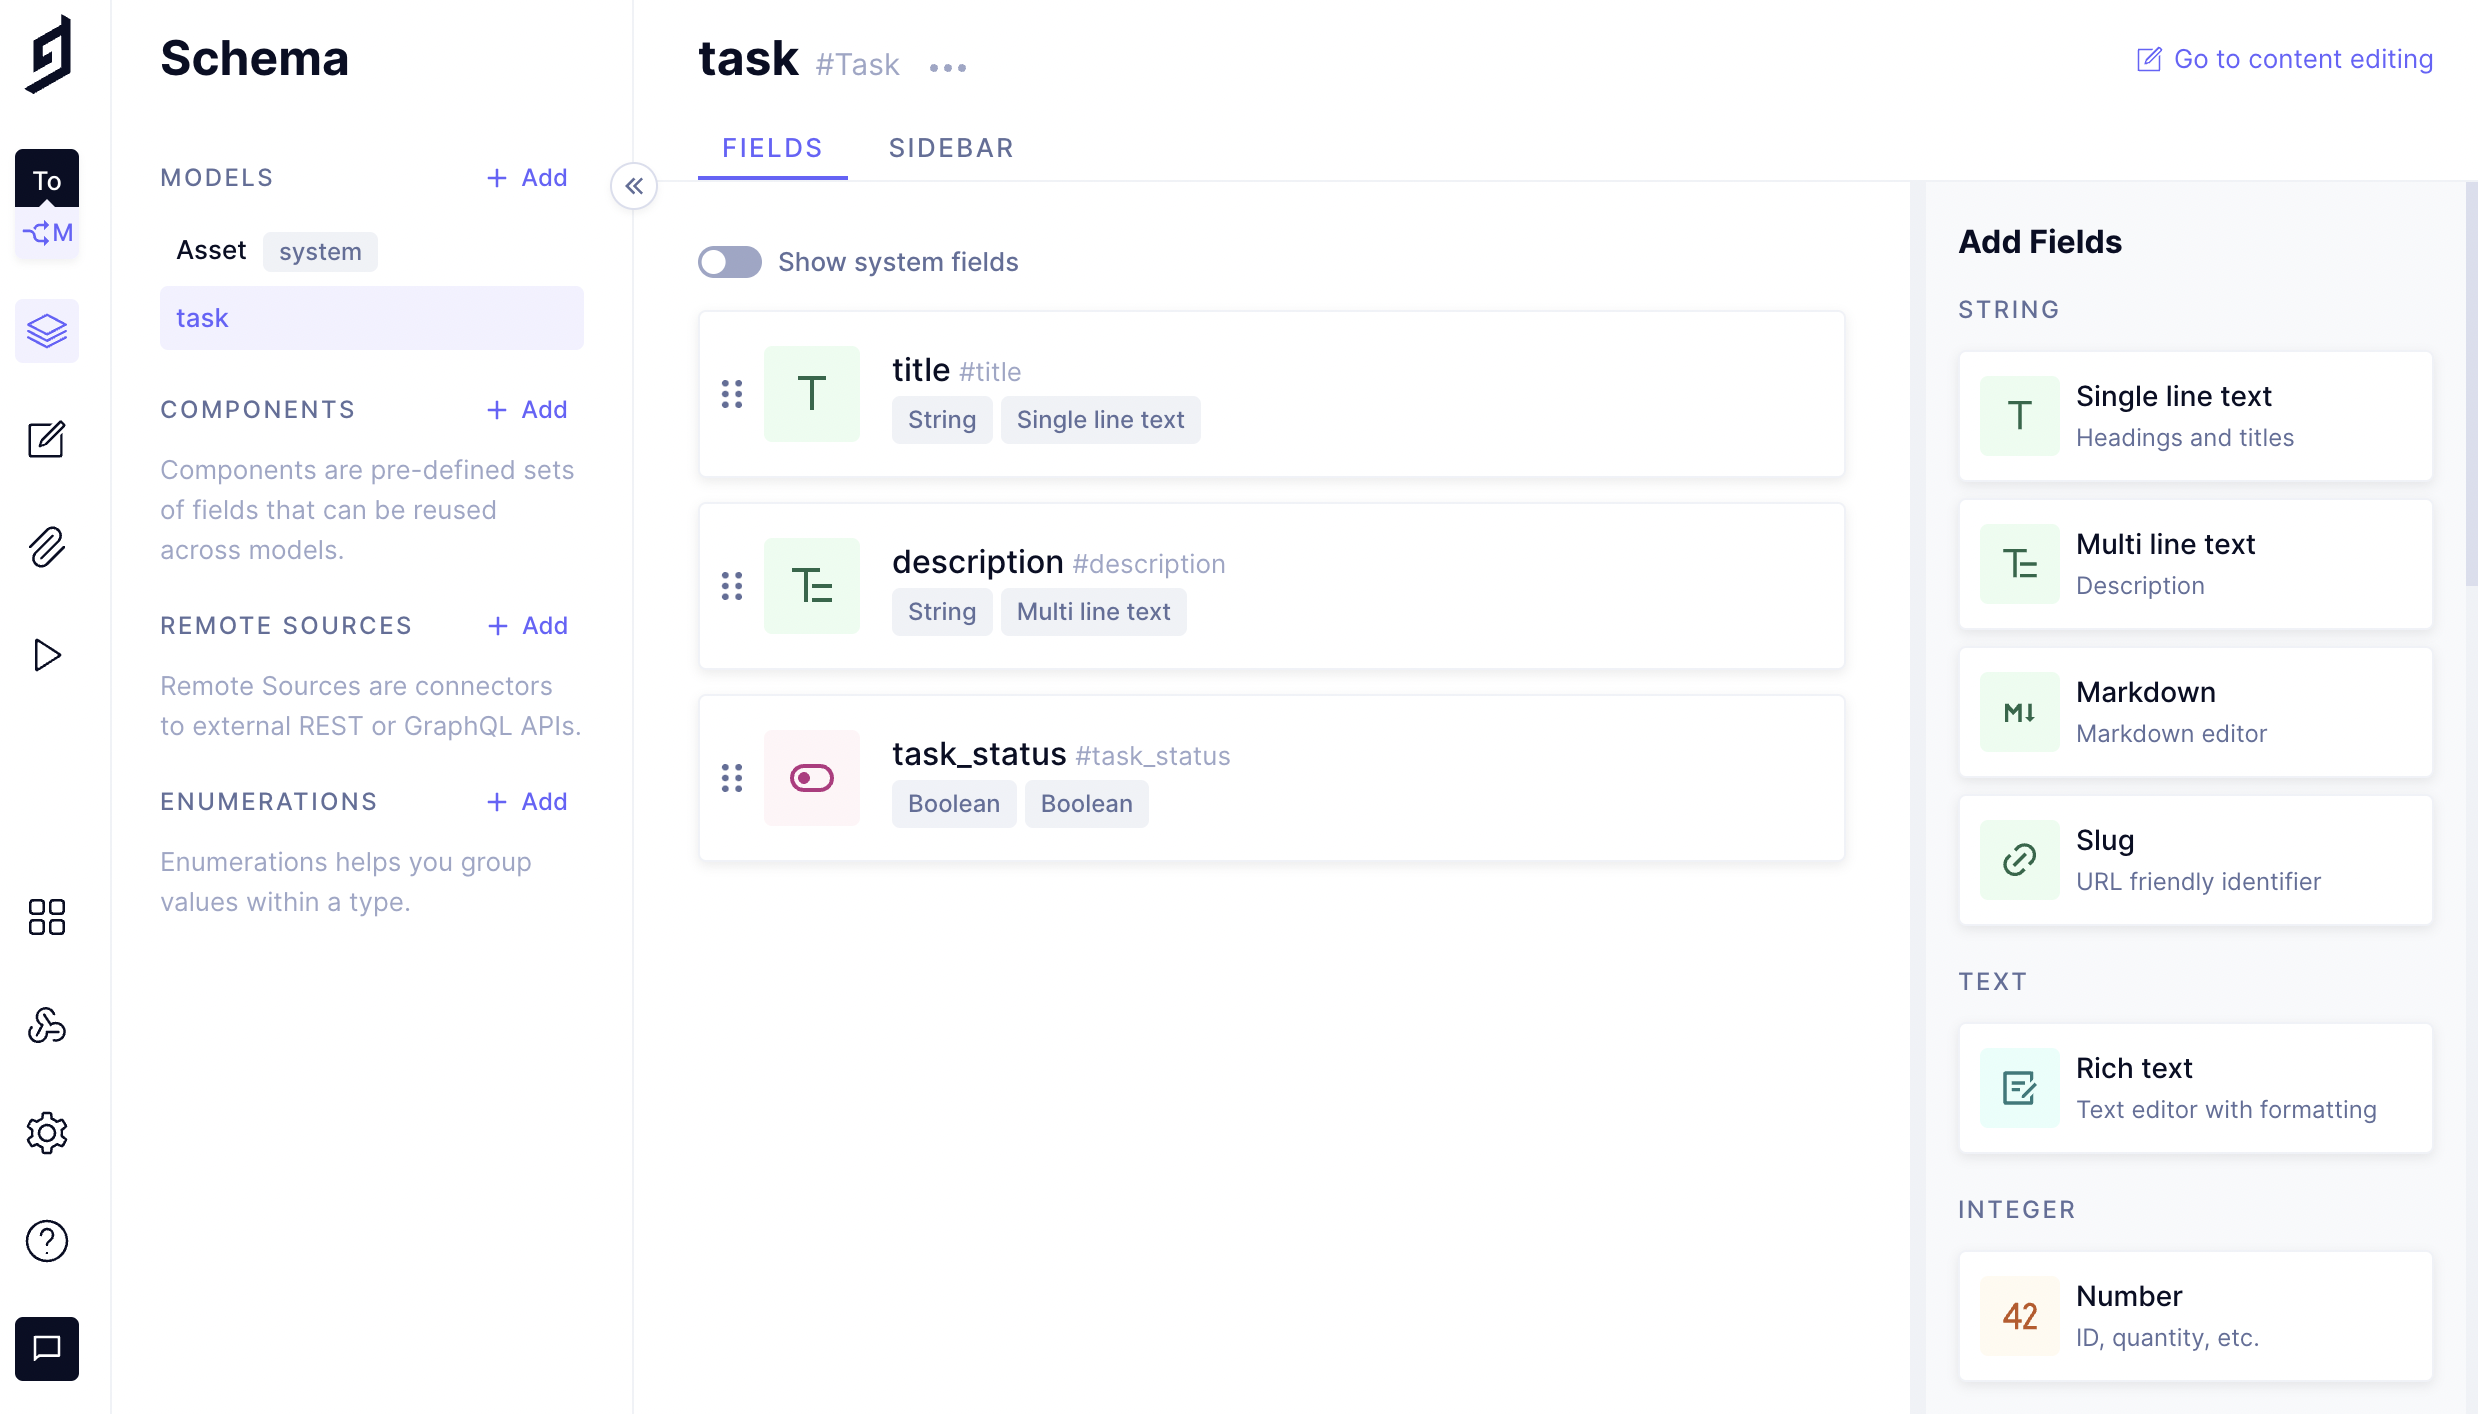
[1-3] Fieldの作成
- FieldのTypeを選択する
- MODELS > task > Add Fields > [Type選択]
- Create Field 設定1
- Type: Single line text
- Display name: title
- API ID title
- Create Field 設定2
- Type: Multi line text
- Display name: discription
- API ID discription
- Create Field 設定3
- Type: Boolean
- Display name: task_status
- API ID task_status
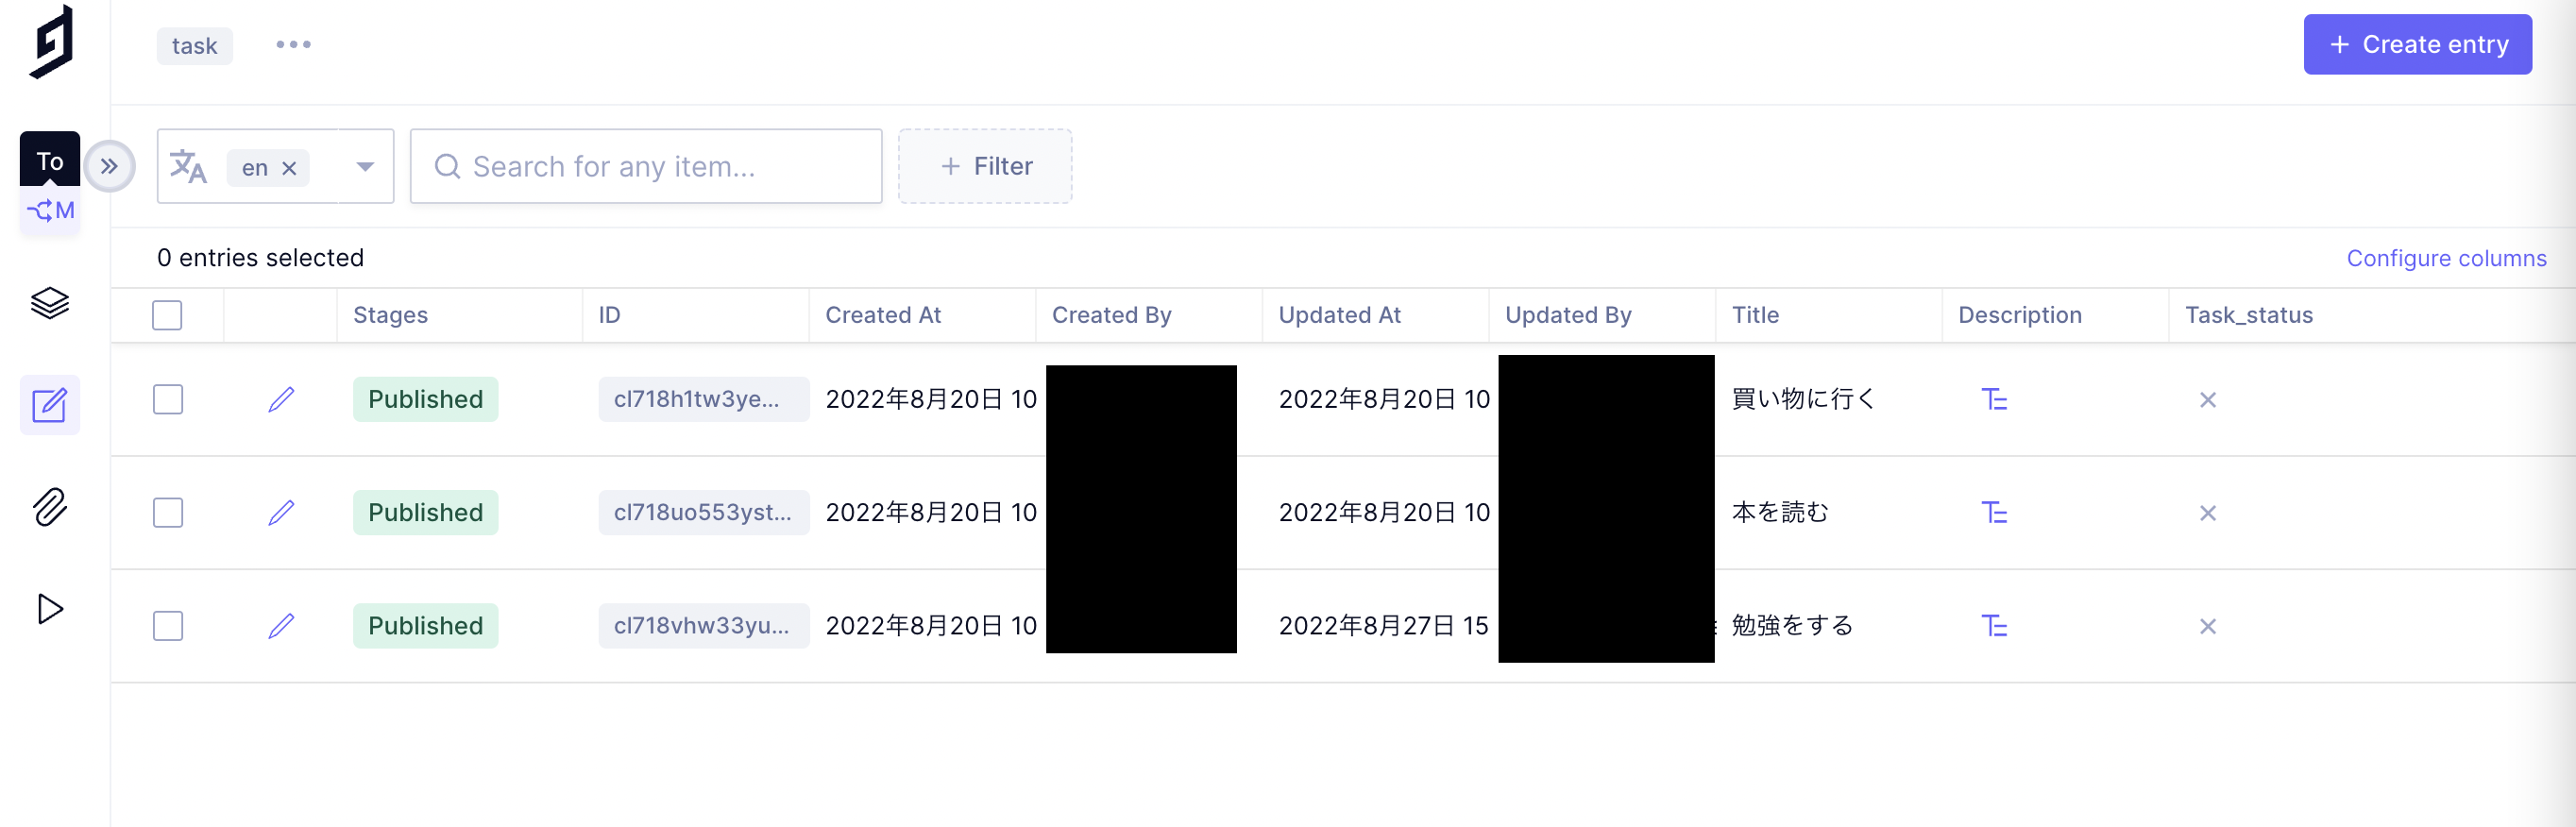
[1-4] データの追加
- Content > DEFAULT VIEWS > [Model Name(Workflow)] > Create Entry
[1-5] Tokenの作成と権限の追加
Project Settings > API Access ページでTokenを作成
Project Settings > API Access > Permanent Auth Tokens > Create token
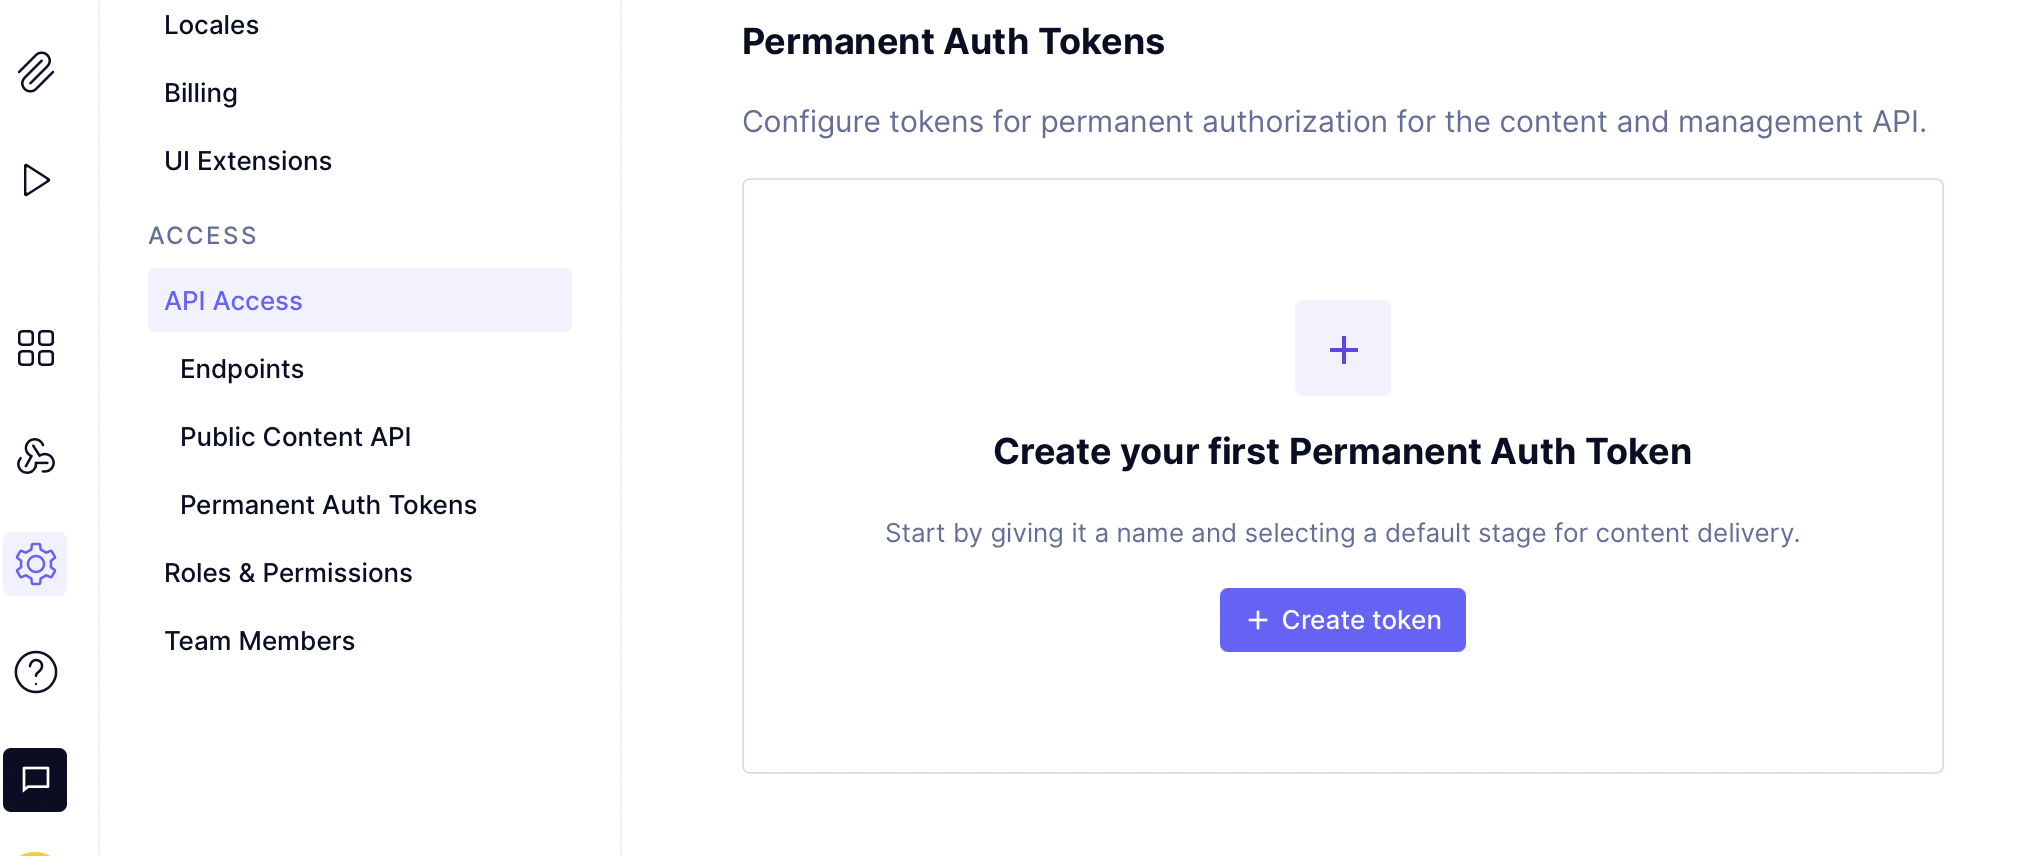
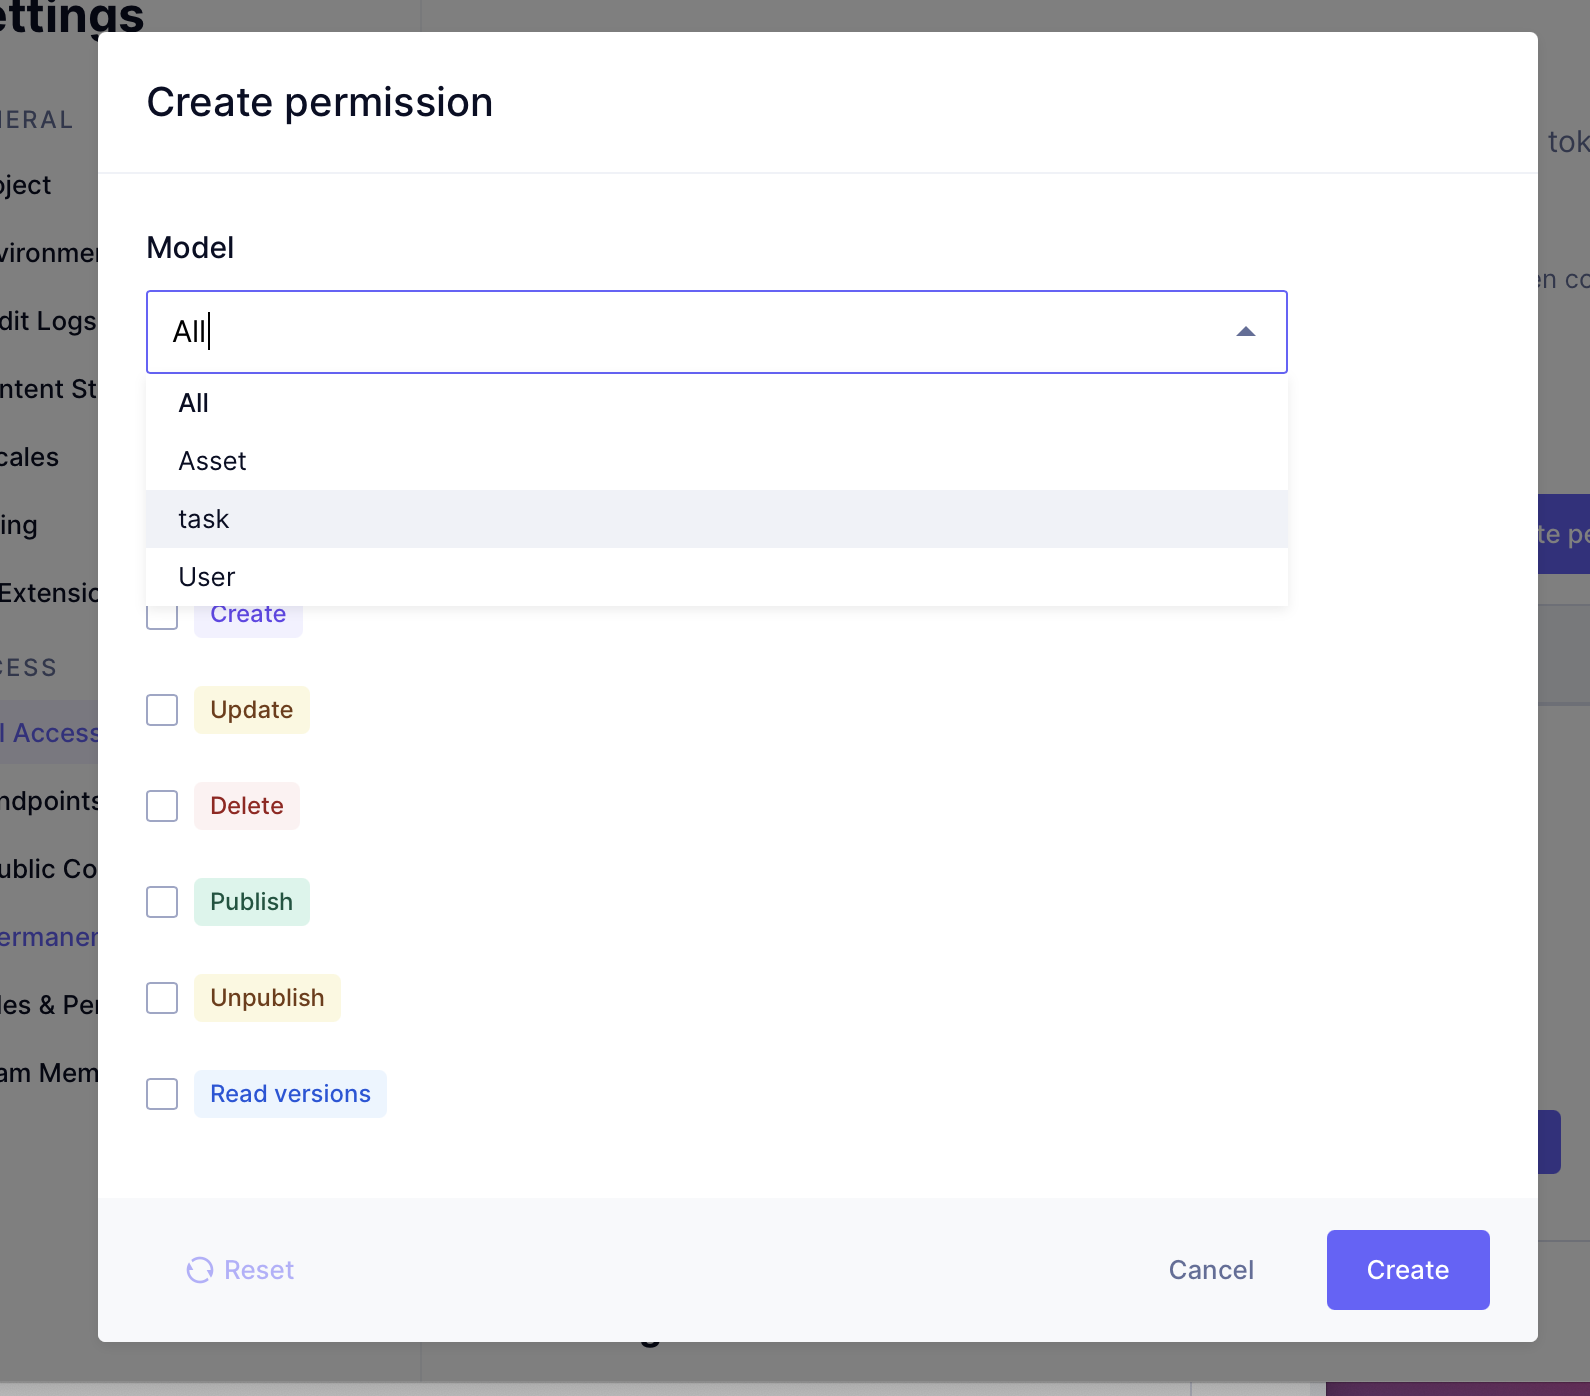
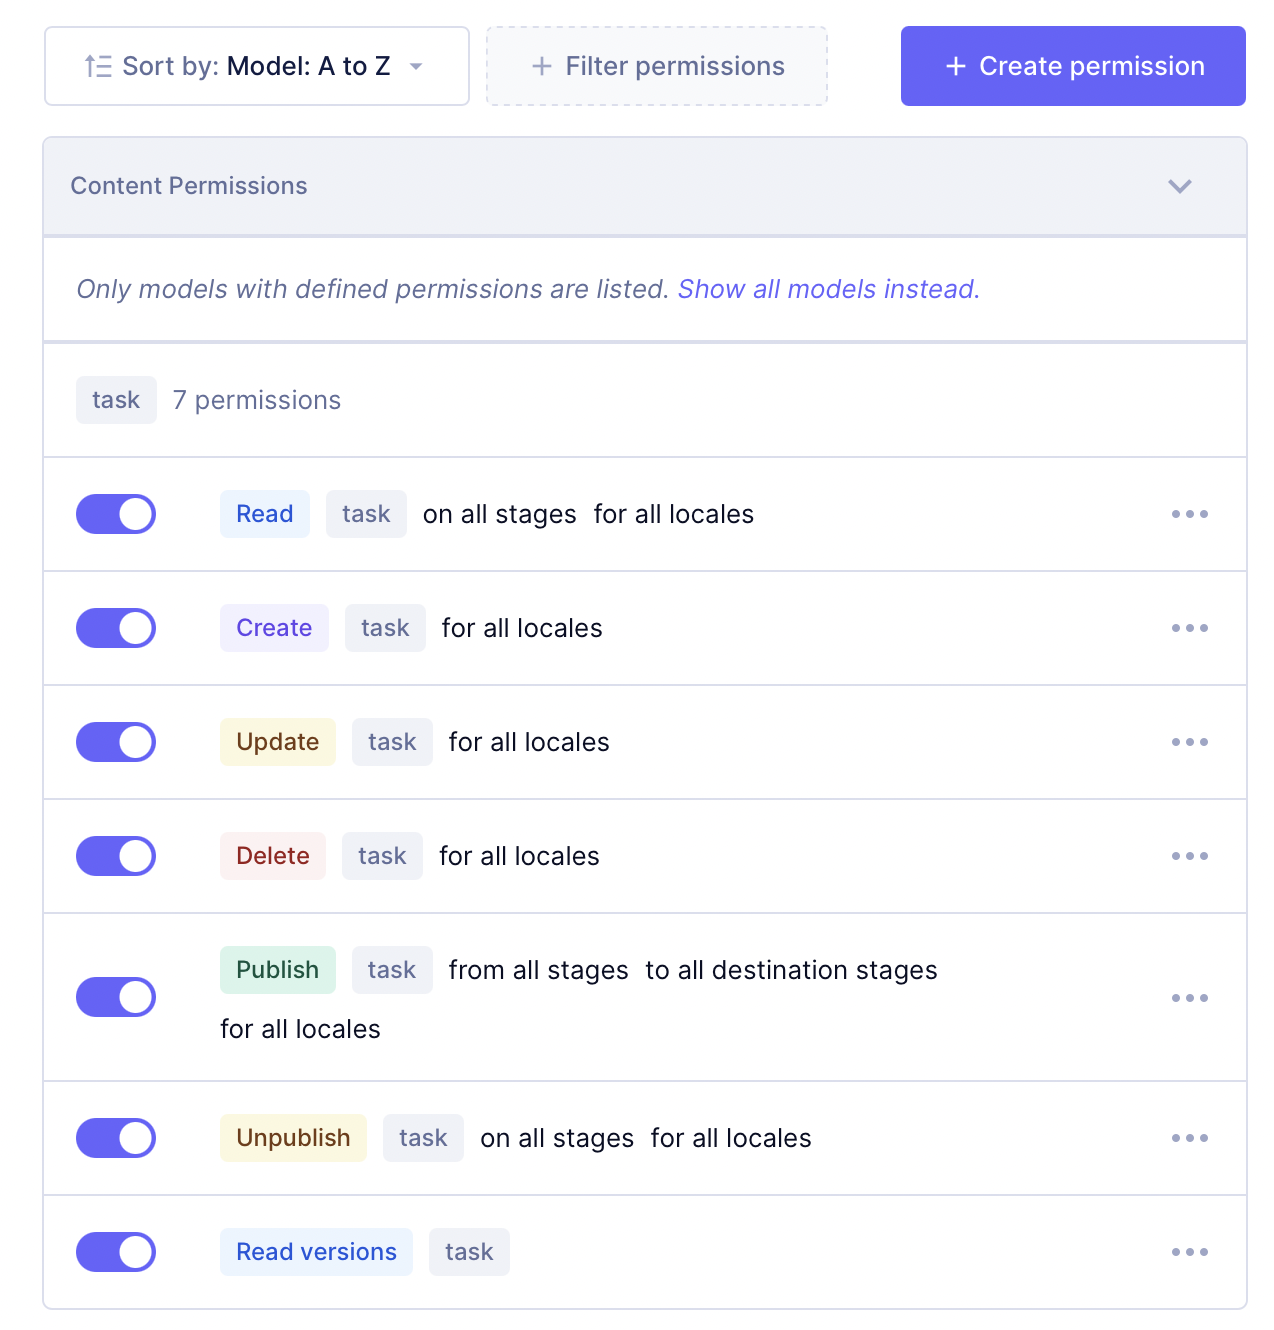
作成したTokenに権限を設定する
権限を与えるModelを作成したTaskにして追加
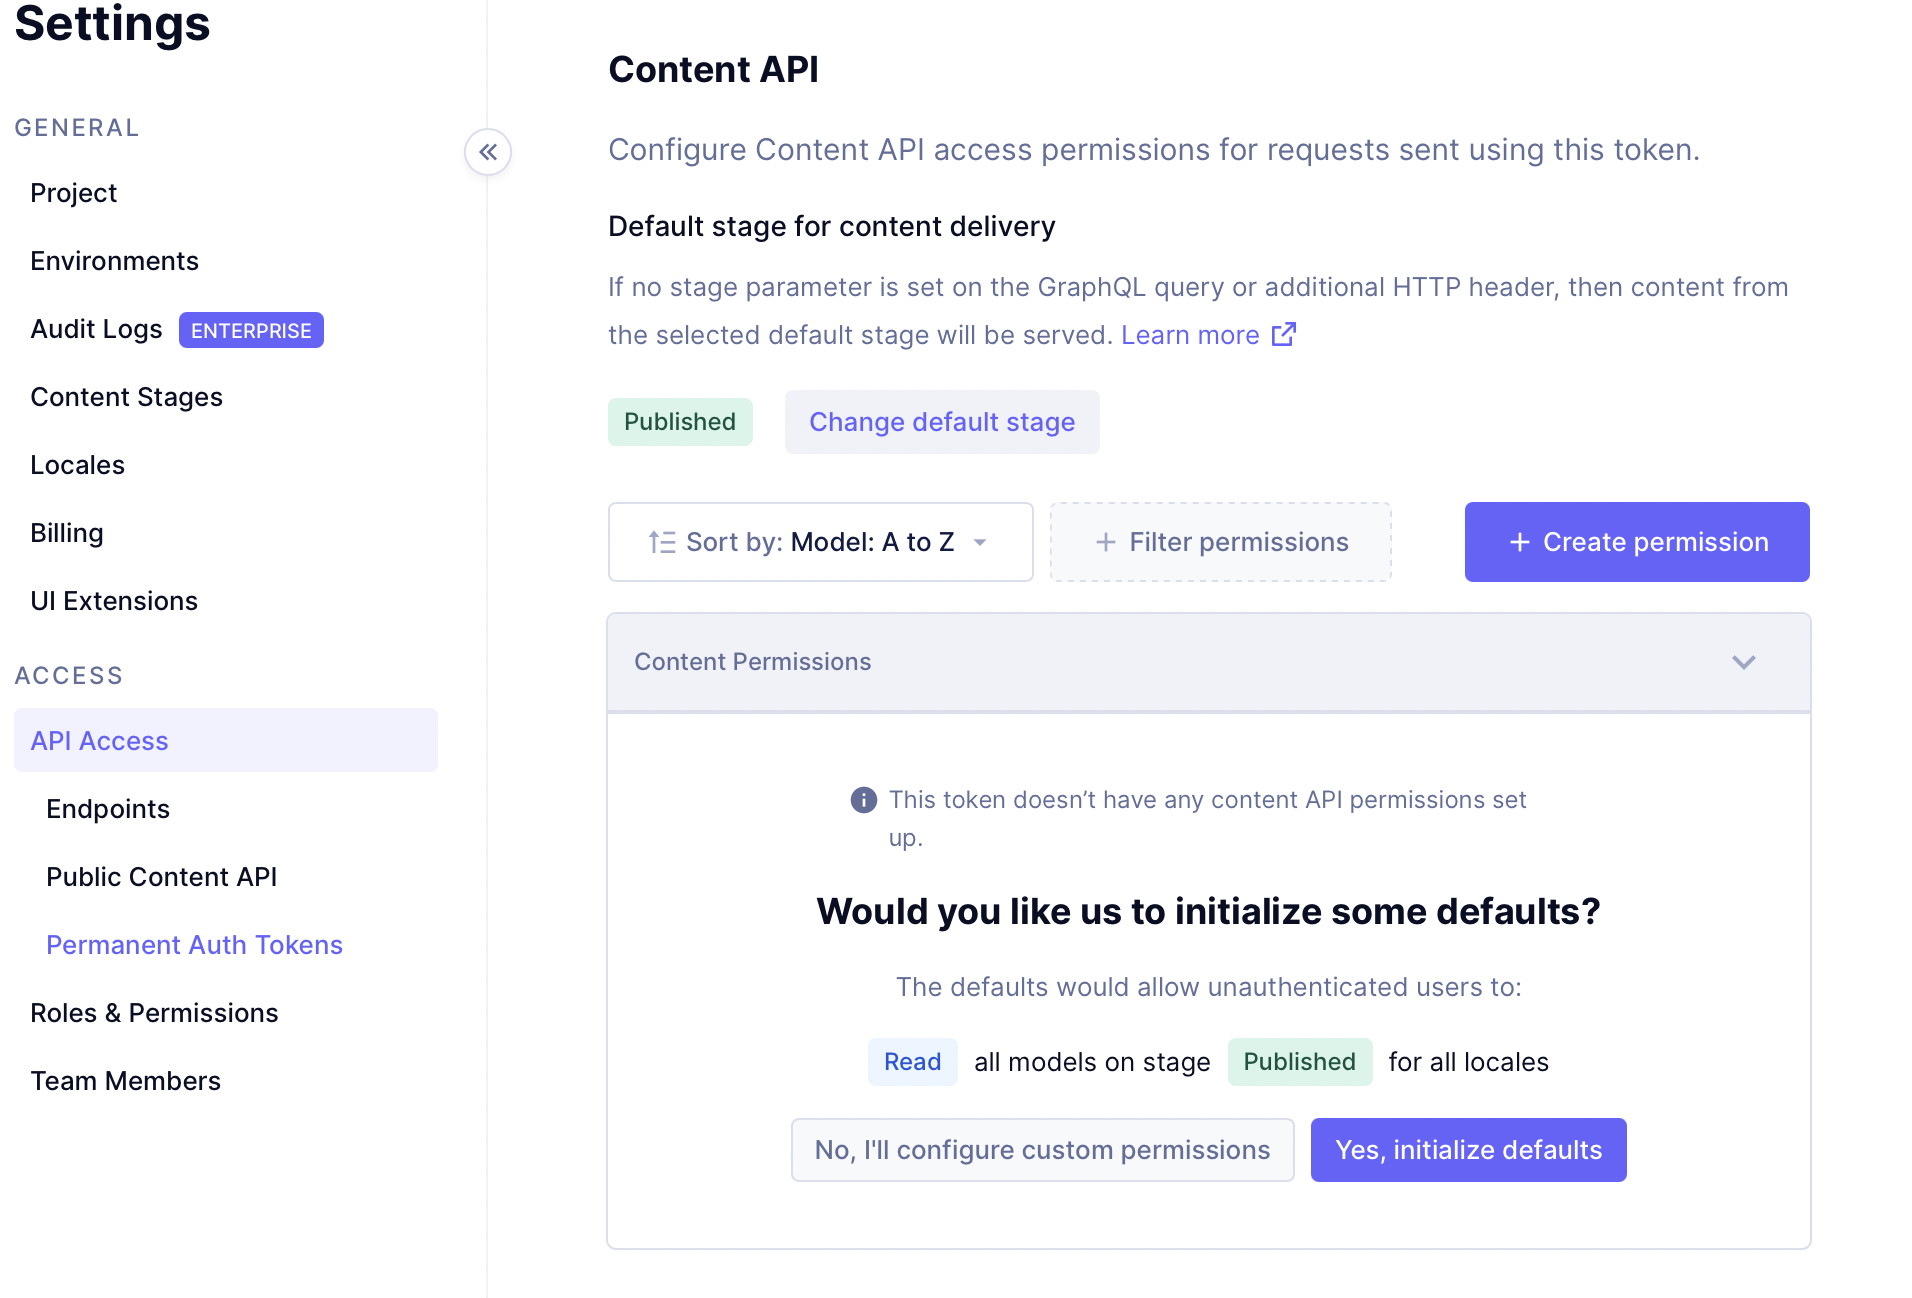
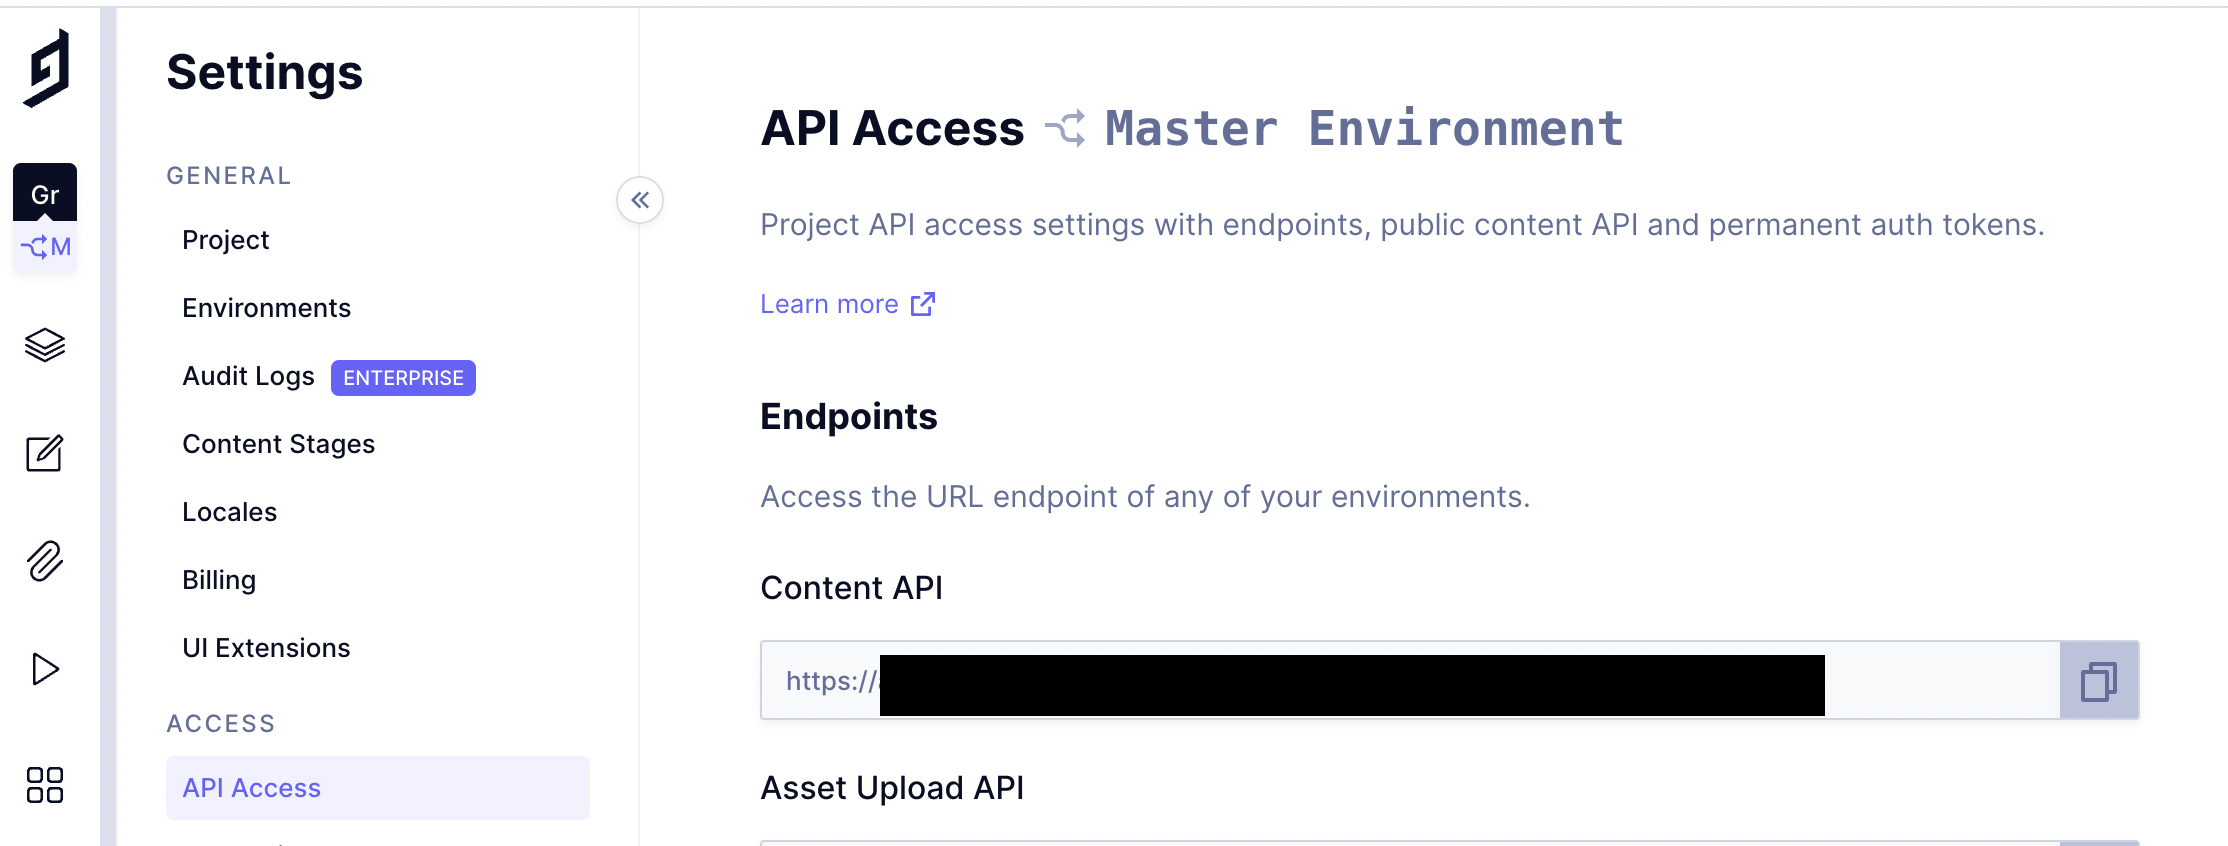
[1-6] Content API URLの取得
- Content API URL
- Project Settings > API Access > Endpoints > Content API
- Project Settings > API Access > Endpoints > Content API
【2】Vue3 プロジェクトの作成と設定
- Vue3プロジェクトの作成
- vue-routerの設定
- vue-apolloの設定
- eslintの設定
[2-1] Vue3プロジェクトの作成
# yarn create vite <プロジェクト名> --template vue-ts
yarn create vite vite_ts --template vue-ts

cd <プロジェクト名>
yarn
yarn dev
作業しやすいようにポートとエイリアスを設定しておく
vite.config.ts
import { defineConfig } from "vite";
import vue from "@vitejs/plugin-vue";

export default defineConfig({
  plugins: [vue()],
  server: {
    port: 8888,
  },
  resolve: {
    alias: {
      "~/": `${__dirname}/src/`,
    },
  },
});
tsconfig.jsonにもpathの設定を追加
{
  "compilerOptions": {
    "target": "ESNext",
    "useDefineForClassFields": true,
    "module": "ESNext",
    "moduleResolution": "Node",
    "strict": true,
    "jsx": "preserve",
    "sourceMap": true,
    "resolveJsonModule": true,
    "isolatedModules": true,
    "esModuleInterop": true,
    "lib": ["ESNext", "DOM"],
    "skipLibCheck": true,
    "baseUrl": "./src",
    "paths": {
      "~/*": [
        "./*"
      ]
    }
  },
  "include": ["src/**/*.ts", "src/**/*.d.ts", "src/**/*.tsx", "src/**/*.vue"],
  "references": [{ "path": "./tsconfig.node.json" }]
}
[2-2] vue-routerの設定
yarn add vue-router@4
以下のファイルを作成
src/App.vue(router-view部分がpageごとに切り替わる)
<template>
  <router-view />
</template>
<style>
table{
  width: 100%;
  border-spacing: 0;
}

table th{
  border-bottom: solid 2px #ccc;
  padding: 10px 0;
}

table td{
  border-bottom: solid 1px #ddd;
  text-align: center;
  padding: 5px 0;
}

input[type="text"] {
  width: 100%;
}

textarea {
  width: 100%;
}

button {
    display: inline-block;
    width: 100%;
    max-width: 100px;
    margin: auto;
    padding: 4px 8px;
    border: none;
    border-radius: 4px;
    background-color: #269dff;
    color: #fff;
    font-size: 12px;
    font-weight: bold;
    appearance: none;
    -webkit-appearance: none;
    -moz-appearance: none;
    cursor: pointer;
    border: 2px solid transparent;
}
button:hover {
  opacity: 0.5;
}
button.small {
  padding: 2px 4px;
  font-size: 10px;
}
button:disabled {
  background-color: #bababa;
  cursor: default;
  opacity: 1;
}
button.outlined:not(:disabled) {
  background-color: #fff;
  border: 1px solid #fb4444;
  color: #fb4444;
}
button.delete:not(:disabled) {
  background-color: #fb4444;
}
button.complete:not(:disabled) {
  background-color: #00b209;
}
</style>
src/router.ts([2-3] vue-apolloの設定時に main.tsで読み込む)
import { createRouter, createWebHistory } from "vue-router";
import Home from "./pages/index.vue";
import getPage from "./pages/get.vue";

const routes = [
  { path: "/", name: "home", component: Home },
  { path: "/get", name: "get", component: getPage },
];

const router = createRouter({
  history: createWebHistory(),
  routes,
});

export default router;
[2-3] vue-apolloの設定
- 追加 plugin
- "@vue/apollo-option": "^4.0.0-alpha.20"
- "vue-apollo": "^3.1.0"
- "graphql-tag": "^2.12.6"
- "vue-cli-plugin-apollo": "^0.22.2"
yarn add -D graphql-tag vue-cli-plugin-apollo vue-apollo @vue/apollo-option
.env.localに「TokensとContent API URLの取得」で控えた情報を設定
VITE_GRAPHQL_AUTH_TOKEN=[あなたのTOKEN]
VITE_GRAPHQL_HTTP=[あなたのAPI ENDPOINT]
- main.ts
- vue-apolloの設定コードを追加
- vue-routerを読み込み
import "./style.css";
import { ApolloClient, InMemoryCache, HttpLink } from "@apollo/client/core";
import { createApolloProvider } from "@vue/apollo-option";
import { createApp } from "vue";

import router from "./router";
import App from "./App.vue";

const AUTH_TOKEN = import.meta.env.VITE_GRAPHQL_AUTH_TOKEN || "";
const httpEndpoint =
  import.meta.env.VITE_GRAPHQL_HTTP || "http://localhost:4000/graphql";
const httpLink = new HttpLink({
  uri: httpEndpoint,
  headers: {
    "Content-Type": "application/json",
    Authorization: `Bearer ${AUTH_TOKEN}`,
  },
});

/**
 * Create the Apollo client
 */
const cache = new InMemoryCache();
const apolloClient = new ApolloClient({
  cache,
  link: httpLink,
});

/**
 * Create the Apollo provider
 */
const apolloProvider = createApolloProvider({
  defaultClient: apolloClient,
});

/**
 * Add the provider to your app
 */
const app = createApp(App);
app.use(router);
app.use(apolloProvider);

app.mount("#app");
[2-3] eslintの設定
- 追加 plugin
- "eslint": "^8.21.0"
- "eslint-plugin-vue": "^9.3.0"
- "@vue/eslint-config-typescript": "^11.0.0"
- "@typescript-eslint/eslint-plugin": "^5.32.0"
- "@typescript-eslint/parser": "^5.32.0"
yarn add -D eslint eslint-plugin-vue @vue/eslint-config-typescript @typescript-eslint/parser @typescript-eslint/eslint-plugin
eslintの設定ファイル(.eslintrc.yml)を追加
touch .eslintrc.yml
.eslintrc.yml
env:
  browser: true
  es2021: true
extends:
  - 'plugin:vue/vue3-recommended'
  - 'eslint:recommended'
  - '@vue/typescript/recommended'
parser: 'vue-eslint-parser'
parserOptions:
  parser: '@typescript-eslint/parser'
  ecmaVersion: 12
plugins:
  - vue
  - '@typescript-eslint'
Vscodeの拡張機能でVeturを利用してる場合
vue3から利用できる<script setup lang="ts">にVeturは未対応(2022.08.07)
以下手順で拡張機能を変更する
- Veturを利用するワークスペースでだけ無効化
- Disable(Workspace)
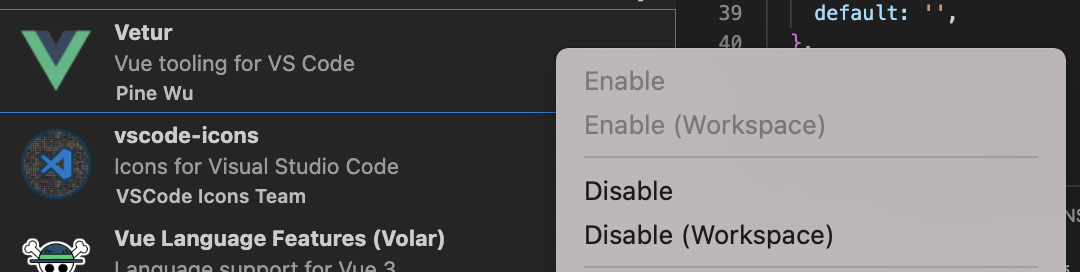
- Disable(Workspace)
-
Vue Language Features (Volar)を追加

【3】VueからGraphQLを実行(GET)
設定が終わったので実際に動かしてみる
- GraphQL文を書く(GET ワークフローの全ての情報を取得)
- Vue Apolloで実行する
[3-1] GraphQL文を書く(GET)
src/constants/task.ts
export const ALL_WORKFLOWS = gql`
query allWorkflows {
    workflows(orderBy: id_ASC) {
      id
      title
      description
      createdAt
    }
  }
`;
titleとdescriptionは自分で設定した項目
idとcreatedAtはpost時に自動で追加される項目
query allWorkflows
「allWorkflows」は好きな名称でよい
このQL文はワークフローの全ての情報を取得するためのものなので「allWorkflows」とした
workflows(orderBy: id_ASC) {
「workflows」はModel名の複数形にすることで「複数データの取得」となる
「orderBy: 項目名_昇順・降順」でソート順を決められる
「id_ASC」はidの昇順、「createdAt_DESC」なら作成した日時順で降順となる
[3-2] Vue Apolloで実行する
apolloの設定はすでにしてあるので
Vueでアポロを使って先ほど作成したQL文章を渡して実行する
src/pages/get.vue
<template>
  <div>
    <table>
      <tr>
        <th width="200">
          ID
        </th>
        <th width="200">
          TITLE
        </th>
        <th width="300">
          DESCRIPTION
        </th>
        <th width="100">
          STATUS
        </th>
      </tr>
      <tr
        v-for="task in tasks"
        :key="task.id"
      >
        <td>{{ task.id }}</td>
        <td>{{ task.title }}</td>
        <td>{{ task.description }}</td>
        <td>{{ task.task_status }}</td>
      </tr>
    </table>
  </div>
</template>

<script lang="ts">
import { defineComponent } from 'vue'

import {
  ALL_TASKS,
} from '~/constants/task';

interface task {
  id: string,
  title: string
  description: string
  task_status: boolean
}

interface Data {
  tasks: task[],
}

export default defineComponent({
  name: 'TodoList',
  data(): Data {
    return {
      tasks: [],
    };
  },
  apollo: {
    tasks: ALL_TASKS,
  },
});
</script>
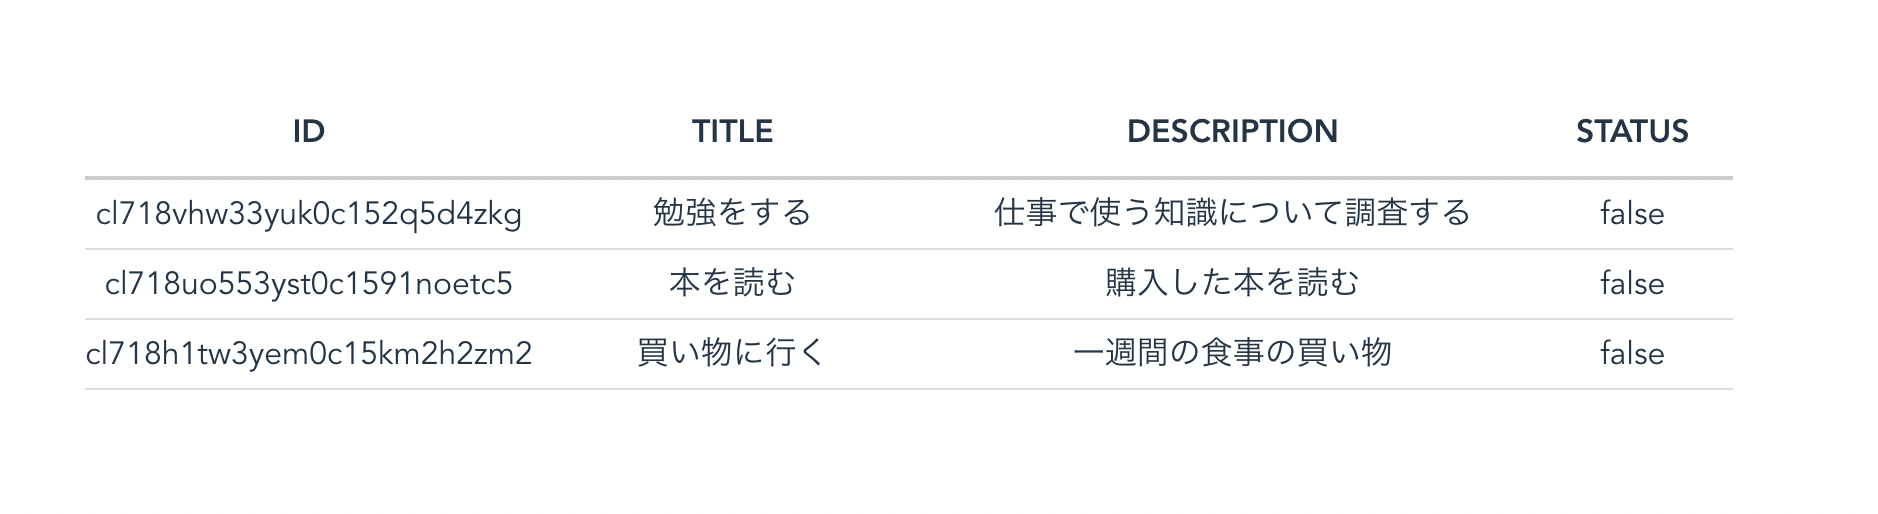
これを実行する
yarn dev
以下のように表示される。
データの取得が行えた。
以上