はじめに
「第4回:気圧センサで高度を維持させる」から久しぶりの投稿になります
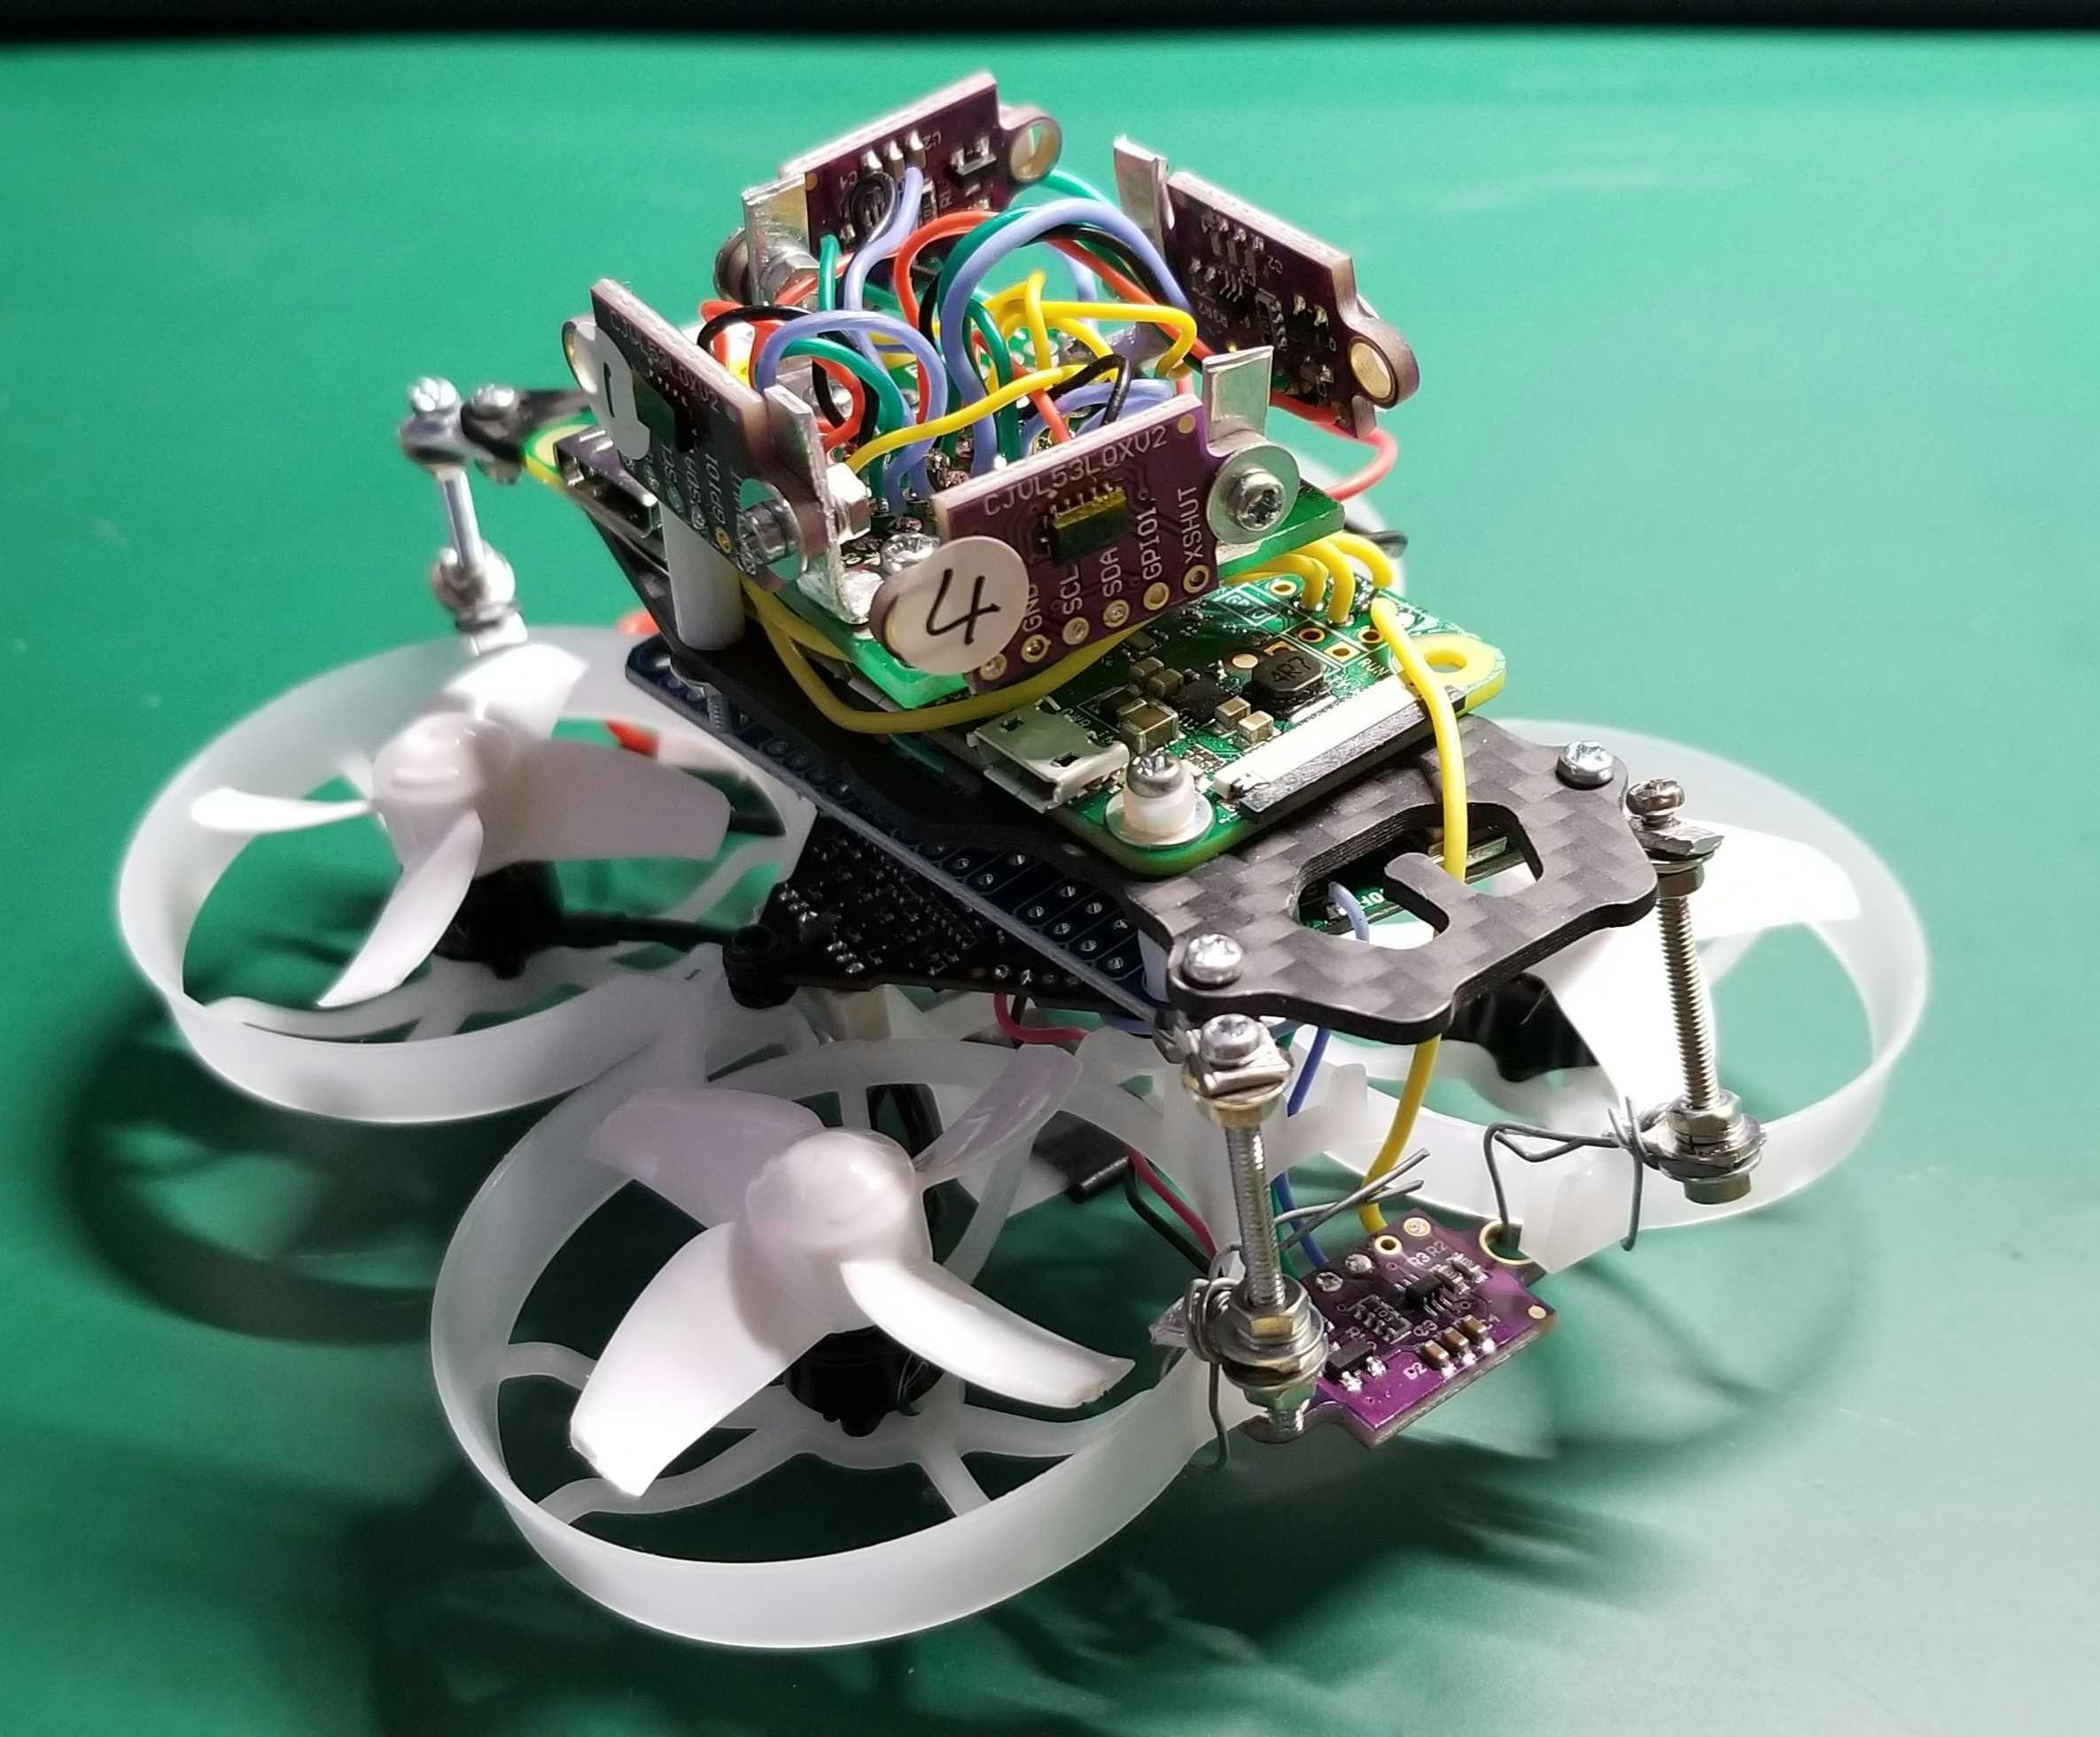
今回は、先日投稿した「Raspberry Pi Zewo Wで距離センサーVL53L0Xのi2cアドレスを変更して複数同時に動作させてみた」で動作確認した距離センサー4つを追加して合計5つのVL53L0Xで高度を維持しつつ前後左右に衝突しない機体の作成に挑戦しました
結果は不十分ですがざっくり投稿します
今回は機体を変更します
今回は199g以下のマイクロドローン(Beta75Pro2)を使用します
前回までの機体は200gオーバーなので部屋で気軽に検証できなかったためです
Raspberry PiからBeta75Pro2を制御する方法に興味がある方は以下を参照してください
https://www.yokochi.jp/post/betafpv-f4-2s-aio/
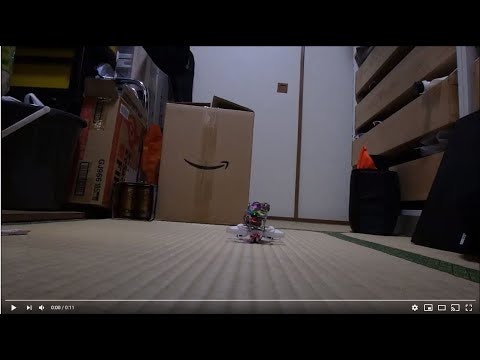
動作テスト
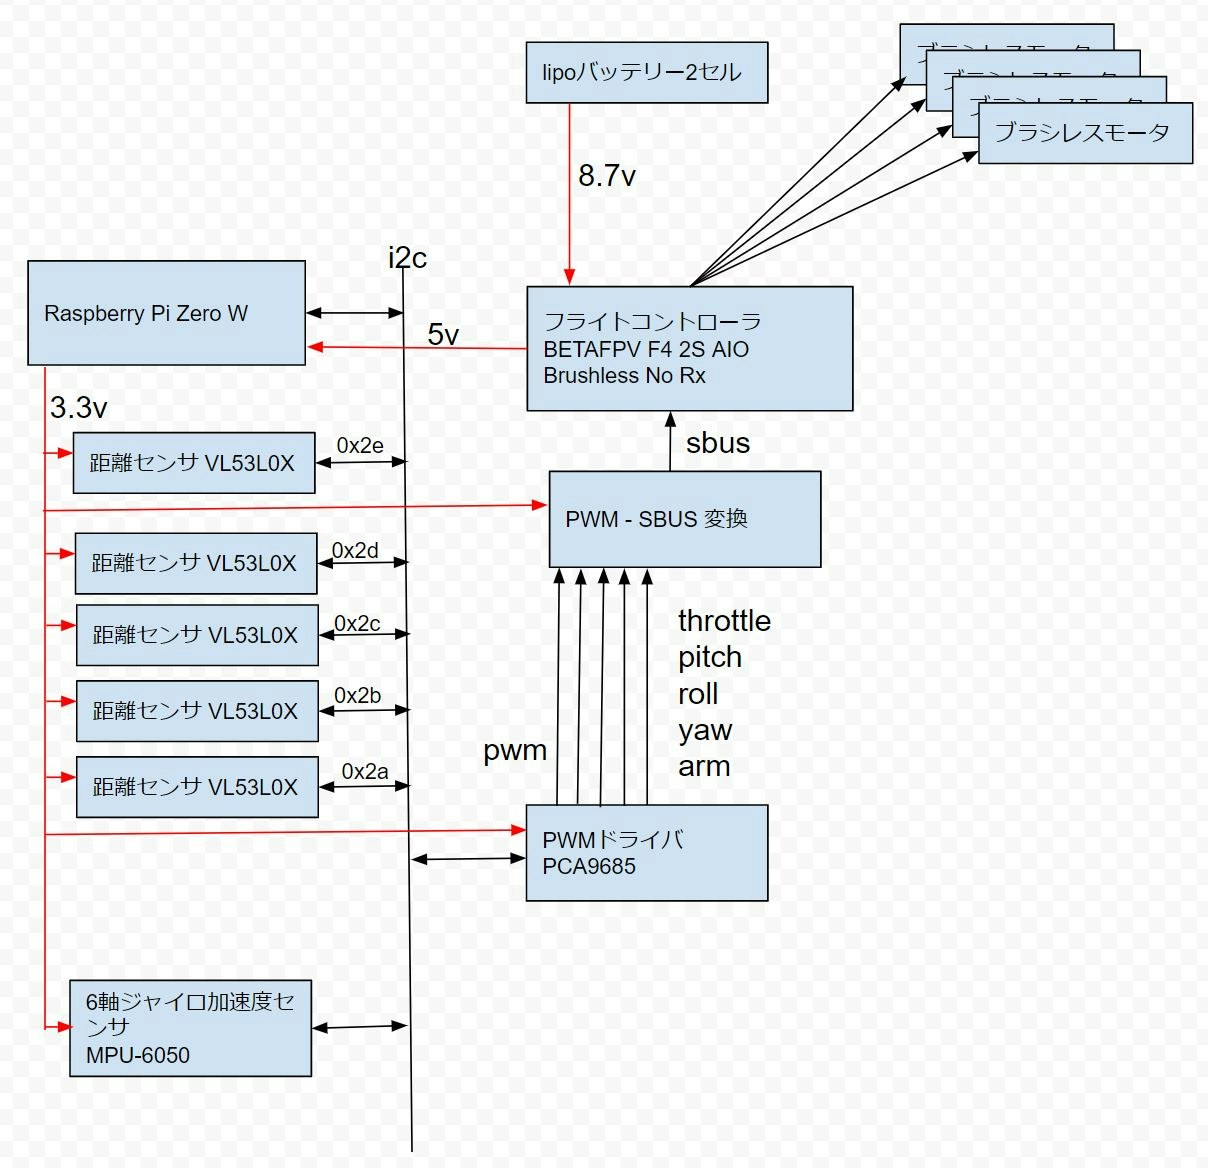
構成図
高度を維持する方法
以下の状態とイベントに分けて処理します
| event\status | 1 停止中 |
2 設定高度以下を上昇中 |
3 設定高度を超えて上昇中 |
4 設定高度以下まで降下待ち |
5 ランディング中 |
|---|---|---|---|---|---|
| 1 開始 |
出力=780 status=2 |
||||
| 2 N/A |
|||||
| 3 現在高度は最大値超え |
出力=600 status=3 |
||||
| 4 下降検知 |
出力=20++ | 出力=780 status=4 |
設定高度未満の場合、出力=780 status=2 |
||
| 5 ランディング |
出力=600 status=5 |
出力=600 status=5 |
出力=600 status=5 |
前後左右に衝突しない方法
- 前後(左右)の距離を測り閾値を超えたら逆方向へ移動する
- 前後(左右)両方の距離が閾値を超えている場合はエラーとする(今回は何も処理しない)
- 逆方向へ移動する出力は固定とする(とりあえず)
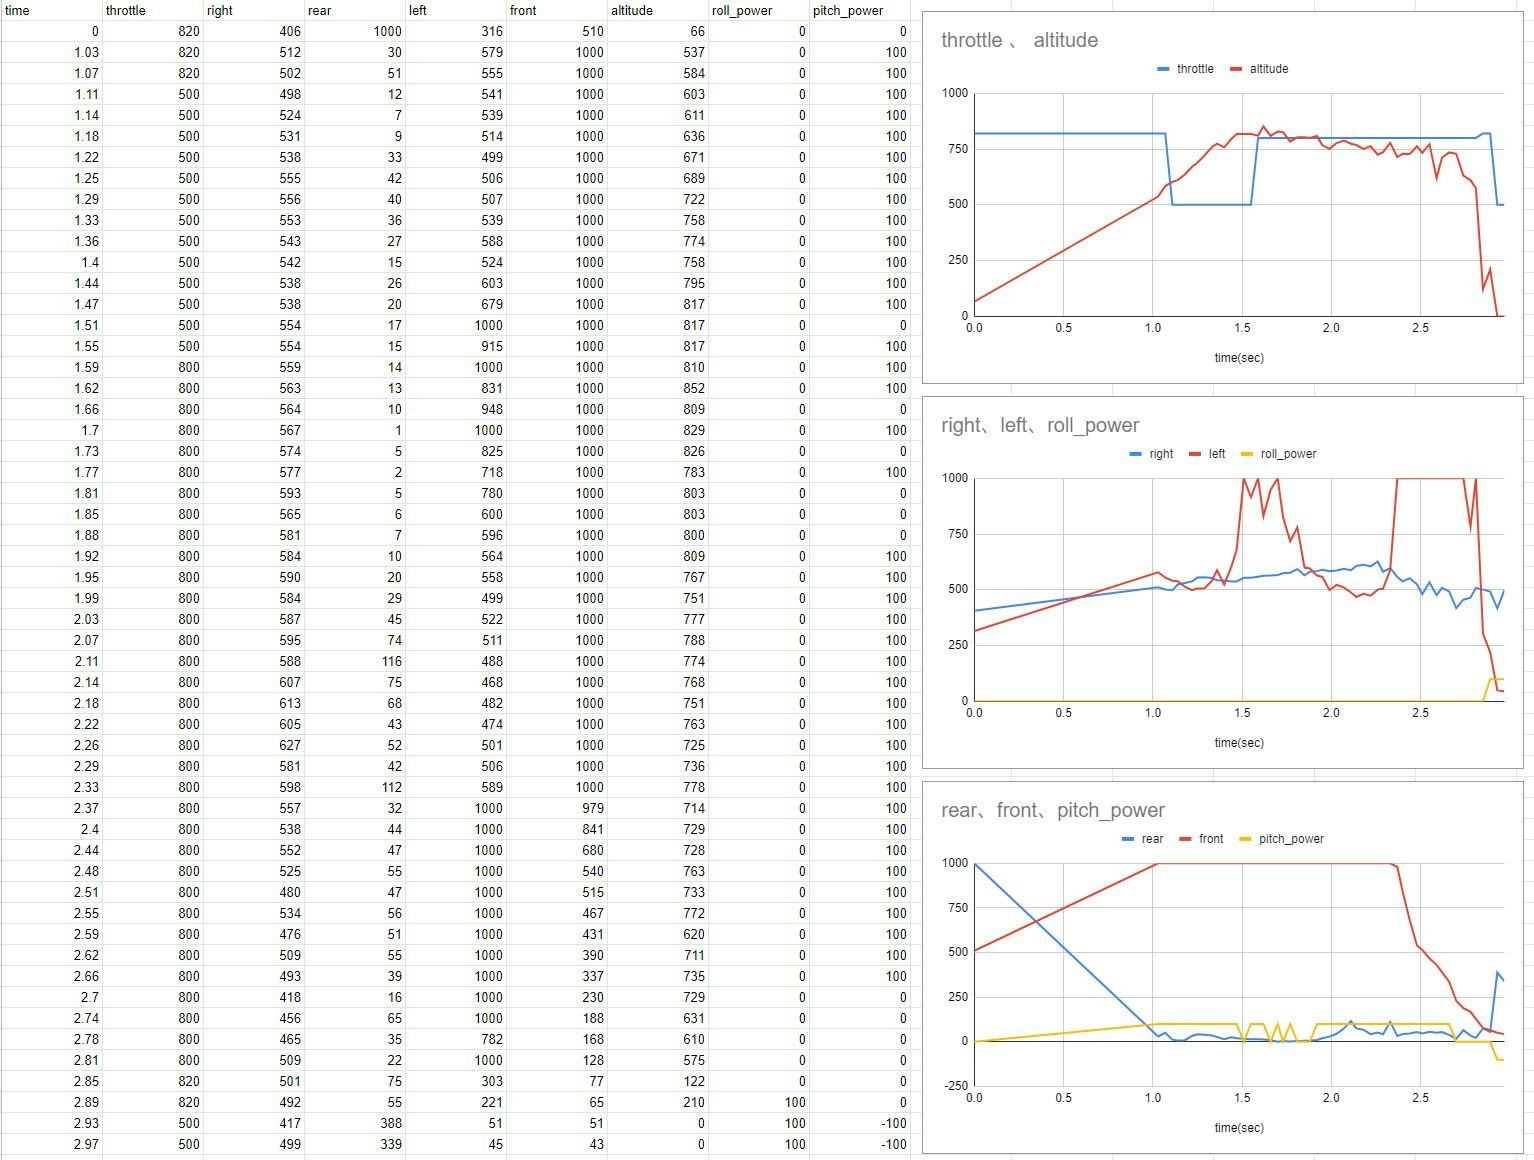
動作結果
高度と前後左右の出力動作は想定通りでしたが、出力値やタイミングについては更に調整しないとダメという感じでした。
コード
全体はgithubにあります
以下に主要な変更箇所を抜粋します
/********************************************************************************
*	BETAFPV F4 2S AIO Brushless No Rx用 メインループ
********************************************************************************/
static void BETAFPV_F4_2S_AIO_Main_Loop(void)
{
	uint16_t VL53L0X_Measurement[VL53L0X_MAX];		//VL53L0X_MAX台分の測定値(mm)
	uint16_t save_altitude = 0;						//前回の高度を保存
	int roll_power = 0; 		//roll補正値
	int pitch_power = 0; 		//pitch補正値
	int altitude_event  = 1;  	//高度制御イベント値
	int altitude_status = 1;  	//高度制御状態値
	int altitude_power = 0;   	//高度制御用出力値
//-------- 省略

	//上昇開始
	altitude_event = 1;
	Get_Altitude_Ctrl_Power(altitude_event,&altitude_status,&altitude_power);
	//throttle
	PCA9685_pwmWrite(BETAFPV_F4_2S_AIO_THROTTLE, (double)(BETAFPV_F4_2S_AIO_NEUTRAL_THROTTLE + altitude_power));

//-------- 省略

	for(;;){

//-------- 省略
	    if (dfFlightTime > FLIGHT_TIME) {
			//ランディング開始
			altitude_event = 5;
			Get_Altitude_Ctrl_Power(altitude_event,&altitude_status,&altitude_power);
			//throttle
			PCA9685_pwmWrite(BETAFPV_F4_2S_AIO_THROTTLE, (double)(BETAFPV_F4_2S_AIO_NEUTRAL_THROTTLE + altitude_power));
		}

		if(VL53L0X_GetMeasurements(&VL53L0X_Measurement[0],0) != VL53L0X_ERROR_NONE)break;	//VL53L0X測定値獲得 1
		if(VL53L0X_GetMeasurements(&VL53L0X_Measurement[1],1) != VL53L0X_ERROR_NONE)break;	//VL53L0X測定値獲得 2
		if(VL53L0X_GetMeasurements(&VL53L0X_Measurement[2],2) != VL53L0X_ERROR_NONE)break;	//VL53L0X測定値獲得 3
		if(VL53L0X_GetMeasurements(&VL53L0X_Measurement[3],3) != VL53L0X_ERROR_NONE)break;	//VL53L0X測定値獲得 4
		save_altitude = VL53L0X_Measurement[4];												//前回の高度を保存
		if(VL53L0X_GetMeasurements(&VL53L0X_Measurement[4],4) != VL53L0X_ERROR_NONE)break;	//VL53L0X測定値獲得 5 高度


//-------- 省略
		//モータ出力
		//障害物回避用の出力補正値獲得(ROLL)
		Get_Correction_Power(VL53L0X_Measurement[0],VL53L0X_Measurement[2],&roll_power);
		PCA9685_pwmWrite(BETAFPV_F4_2S_AIO_ROLL, (double)(BETAFPV_F4_2S_AIO_NEUTRAL + roll_power));
		//障害物回避用の出力補正値獲得(PITCH)
		Get_Correction_Power(VL53L0X_Measurement[3],VL53L0X_Measurement[1],&pitch_power);
		PCA9685_pwmWrite(BETAFPV_F4_2S_AIO_PITCH, (double)(BETAFPV_F4_2S_AIO_NEUTRAL + pitch_power));

		//高度制御イベント値
		altitude_event = Get_Altitude_Ctrl_Event(VL53L0X_Measurement[4],save_altitude);
		Get_Altitude_Ctrl_Power(altitude_event,&altitude_status,&altitude_power);
		//throttle
		PCA9685_pwmWrite(BETAFPV_F4_2S_AIO_THROTTLE, (double)(BETAFPV_F4_2S_AIO_NEUTRAL_THROTTLE + altitude_power));

//-------- 省略
    } //for(;;)
//-------- 省略
}


/********************************************************************************
*	障害物回避用の出力補正値獲得(ROLL補正とPITCH補正に使用する)
* 進行方向の障害物との距離がTHRESHOLD_DISTANCE未満になった場合、進行方向を逆にする
* 進行方向と進行逆方向とも障害物との距離がTHRESHOLD_DISTANCE未満になった場合、failになる
********************************************************************************/
static bool Get_Correction_Power(uint16_t d1,uint16_t d2,int *correction_power)
{
	if(d1 < THRESHOLD_DISTANCE){
		if(d2 < THRESHOLD_DISTANCE){
			//補正不能
			*correction_power = 0;
			printf("+++ THRESHOLD_DISTANCE MINIMUM\n");
			return false;
		}
		//マイナス補正
		*correction_power = CORRECTION_POWER_N;
		return true;
	}
	//プラス補正
	if(d2 < THRESHOLD_DISTANCE){
		*correction_power = CORRECTION_POWER_P;
		return true;
	}
	//補正なし
	*correction_power = 0;
	return true;
}
/********************************************************************************
*	高度制御イベント取得
*  取得イベントは2,3,4
********************************************************************************/
static int Get_Altitude_Ctrl_Event(uint16_t alt,uint16_t alt_save)
{
	//50mmを超えた下降検知
	if(alt+50 < alt_save){
		return 4;
	}
	if(alt > MAXIMUM_GROUND_CLEARANCE){
		return 3;
	}
	return 2;
}
/********************************************************************************
*	高度制御出力取得
********************************************************************************/
static bool Get_Altitude_Ctrl_Power(int event,int *status,int *correction_power)
{
	switch(*status){
		case 1:
			if(event == 1){
				*correction_power = 780;
				*status = 2;
			}
			return true;
		case 2:
			if(event == 3){
				*correction_power = 600;
				*status = 3;
			}
			if(event == 4){
				(*correction_power)+=20;
			}
			if(event == 5){
				*correction_power = 600;
				*status = 5;
			}
			return true;
		case 3:
			if(event == 2){
				*correction_power = 780;
				*status = 2;
			}
			if(event == 4){
				*correction_power = 780;
				*status = 4;
			}
			if(event == 5){
				*correction_power = 600;
				*status = 5;
			}
			return true;
		case 4:
			if(event == 2){
				*status = 2;
			}
			if(event == 5){
				*correction_power = 600;
				*status = 5;
			}
			return true;
		case 5:
			return true;
	}
	printf("*** error Get_Altitude_Power() not status.[%d]\n",*status);
	return false;
}
まとめ
とりあえず動作したのでOKですが、改良して精度をあげなければと思います
進捗がありましたらまた投稿します


