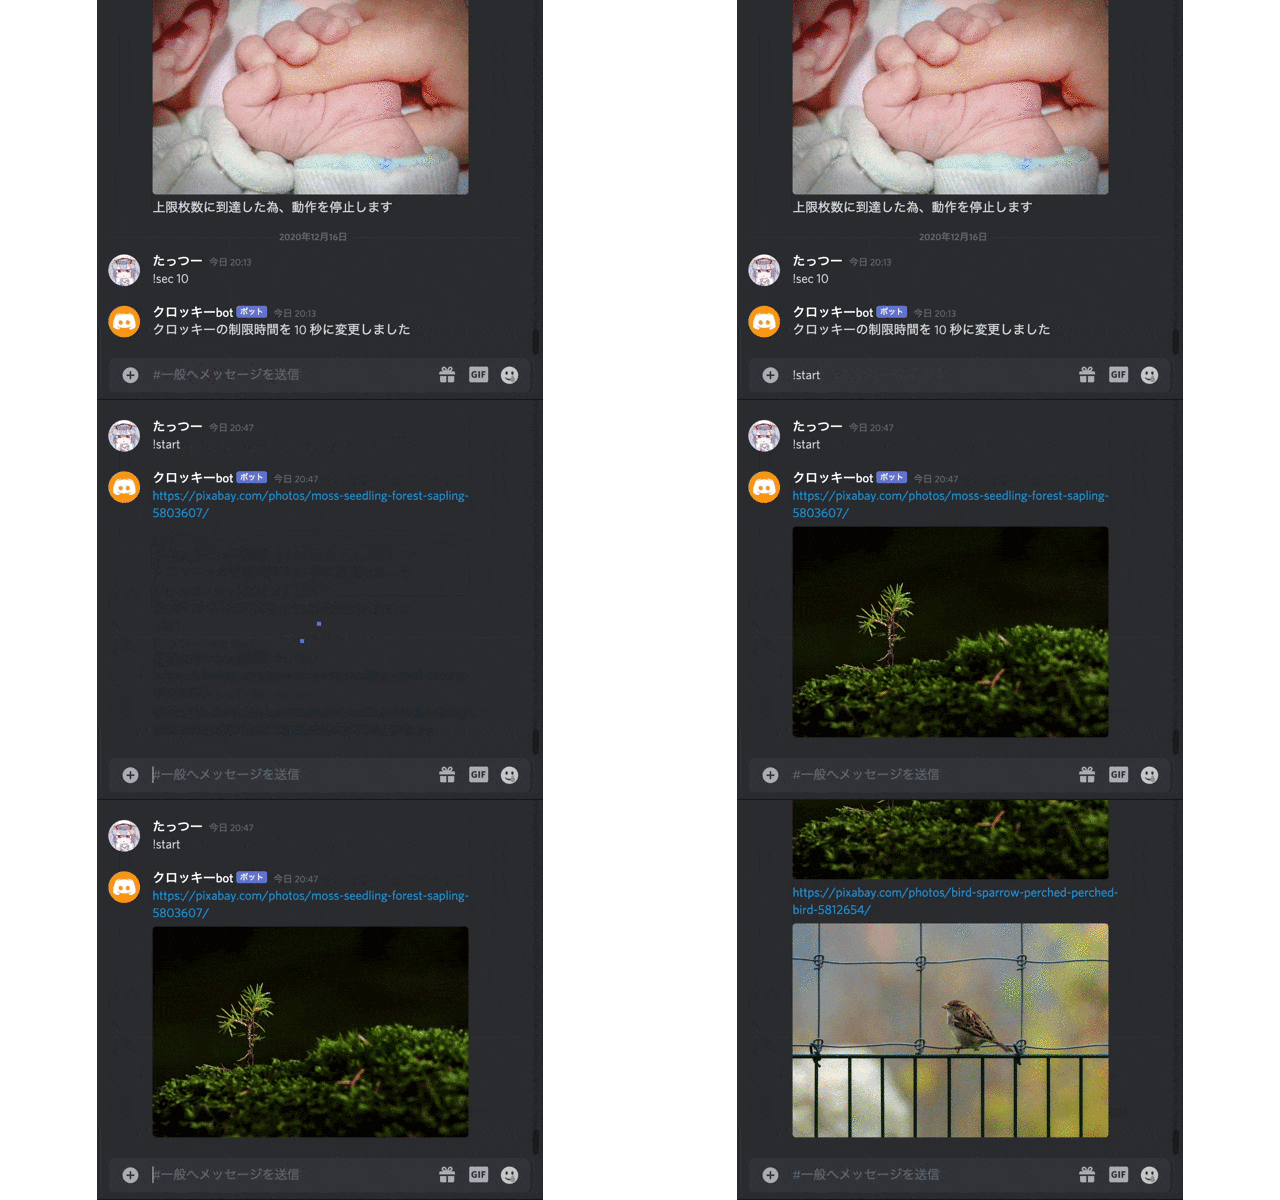
初投稿です。お見苦しい所があると思いますが、よろしくおねがいします。
はじめに
転職のためにプログラミングの勉強を初めてみたのはいいのですが、何を作ったらよいのかわからない問題に直面しました。
そこでアプリのアイデアを何個か考え、現在の技術力でも形にはなりそうなDiscordのbotを作ってみることにしました。
作るもの
今回はdiscord.pyを用いて、自動で任意の画像をチャンネル上にアップロードしていくbotです。
機能は画像のアップロード(検索ワード指定可)のみ。あとはアップロード間隔の設定ができるぐらいです。他にも実装したい機能はあったのですが、方法がわからなかったため今回は実装を見送りました。(これについては最後の方にまとめておきます)
APIの取得
Pixabay API
https://pixabay.com/ja/service/about/api/
まずはクロッキー用の画像が取得するAPIが必要でしたので、今回はPixabayで提供されているAPIを使用させていただきました。(本当はPinterestのAPIを使いたかったのですが、ベータ版らしく枠が空いてませんでした)
取得方法はとても簡単で、会員登録するだけです。
https://pixabay.com/api/docs/
会員登録後にこのページを見れば、自分のAPIキーを見ることができます。
私はこのサイトを参考にしながらAPIキーを取得しました。
120万枚超えの画像をJavaScriptから無料で使える「Pixabay API」で画像検索サイトを作ろう!
Discord bot
https://discord.com/developers/applications
botの作成方法は他の方が詳しく説明してくれているので、省略します。
モジュールのインストール
必要なモジュールは以下の2つです。
pip install discord.py
pip install responses
プログラムの作成
以下のコードをmain.pyという名前で保存します。
import discord
import json
import requests
import random
import aiohttp
import asyncio
from discord.ext import commands


# PixabayのAPI
PIXABAY_URL = 'https://pixabay.com/api/?key=ここにAPIキーを入力'

# BotのTOKEN
TOKEN = 'ここにbotのTOKENを入力'

bot = commands.Bot(command_prefix='!')

# クロッキー時間
croquis_sec = 30

# 起動時の動作
@bot.event
async def on_ready():
    print('ログインしました')

# クロッキー秒数変更
@bot.command()
async def sec(ctx, arg):
    croquis_sec = arg
    await ctx.send("クロッキーの制限時間を {} 秒に変更しました".format(arg))


# クロッキーの実行
@bot.command()
async def start(ctx, *args):
    #検索キーワードの追加
    queries = "&q="
    if len(args) != 0:
        for word in args:
            queries = queries + word + "+"

    #イメージタイプの指定
    image_type = "&image_type=photo"

    url = PIXABAY_URL + queries + image_type

    async with aiohttp.ClientSession() as session:
        async with session.get(url) as r:
            if r.status == 200:
                js = await r.json()
                js_hits = js["hits"]
                random.shuffle(js_hits) #画像をランダムに並び替え
                for img in js_hits:
                    await ctx.channel.send(img["pageURL"])
                    await ctx.channel.send(img["largeImageURL"])
                    await asyncio.sleep(croquis_sec)

                await ctx.channel.send("上限枚数に到達した為、動作を停止します")


bot.run(TOKEN)
機能の説明
クロッキー秒数変更
# クロッキー秒数変更
@bot.command()
async def sec(ctx, arg):
    croquis_sec = arg
    await ctx.send("クロッキーの制限時間を {} 秒に変更しました".format(arg))
画像の投稿間隔を変更できるコマンドです。
argで引数をcroquis_secに格納することで、任意の秒数に設定ができます。
クロッキーの実行(検索ワードの指定)
# クロッキーの実行
@bot.command()
async def start(ctx, *args):
    #検索キーワードの追加
    queries = "&q="
    if len(args) != 0:
        for word in args:
            queries = queries + word + "+"

    #イメージタイプの指定
    image_type = "&image_type=photo"

    url = PIXABAY_URL + queries + image_type

    async with aiohttp.ClientSession() as session:
        async with session.get(url) as r:
            if r.status == 200:
                js = await r.json()
                js_hits = js["hits"]
                random.shuffle(js_hits) #画像をランダムに並び替え
                for img in js_hits:
                    await ctx.channel.send(img["pageURL"])
                    await ctx.channel.send(img["largeImageURL"])
                    await asyncio.sleep(croquis_sec)

                await ctx.channel.send("上限枚数に到達した為、動作を停止します")
arg*とすることで引数を複数受け取ることができます。ただし、検索ワードは100文字以内にしなければなりません。(参照:Pixabay API Documentation)
イメージタイプの指定
    #イメージタイプの指定
    image_type = "&image_type=photo"
Pixabay APIでは検索時にイメージタイプの指定が行なえます。
検索時にall photo illustration vectorの4種類を選択できます。(デフォルトはall)
今回はクロッキー目的であるため、photoを指定しました。
コマンドの実装はこちらを元に行いました。
コマンド — discord.py 1.6.0a ドキュメント
Herokuでbotを稼働させる
詳しい説明はこちらの記事を参考にしてください。
Pythonで実用Discord Bot(discordpy解説)
Discord Bot 最速チュートリアル【Python&Heroku&GitHub】
デプロイに必要なファイルの作成
基本はこちらのテンプレートと同じです。
https://github.com/DiscordBotPortalJP/discordpy-startup
requirements.txt
使用する外部モジュールを入力します。
今回はdiscord.pyの他にもrequestsも使用しておりますので、記載を忘れないでください。
discord.py>=1.5.1
requests>=2.25.0
runtime.txt
ご自身の実行環境を記載してください。
python-3.8.2
Procfile
discordbot: python main.py
実装したかった機能
- 一時停止機能
- 中止機能
- スキップ機能
非同期関数の実行時にどう割り込んで、これらの処理をすればよいのかわかりませんでした。非同期処理についてはよくわかっていないので、理解が進んだら実装してみたいです。
終わりに
完成するか不安でしたが、一応最低限使えるものは出来たので良かったです。非同期処理の理解はまだまだ浅いことを実感できたので、これから勉強をしていきたいです。


