目的
距離センサモジュールVL53L0XをArduinoを使って距離を測った際の備忘録です
準備
Arduino
VL53L0X Time-of-Flight 距離センサモジュール
回路図
以下をジャンパーピンで接続すれば良い。
Arduino側 - 距離センサ側
SCL - SCL
SDA - SDA
VCC - VCC
GND - GND
コード
/* This example shows how to use continuous mode to take
range measurements with the VL53L0X. It is based on
vl53l0x_ContinuousRanging_Example.c from the VL53L0X API.

The range readings are in units of mm. */

# include <Wire.h>
# include <VL53L0X.h>

VL53L0X sensor;

void setup()
{
  Serial.begin(9600);
  Wire.begin();

  sensor.setTimeout(500);
  if (!sensor.init())
  {
    Serial.println("Failed to detect and initialize sensor!");
    while (1) {}
  }

  // Start continuous back-to-back mode (take readings as
  // fast as possible).  To use continuous timed mode
  // instead, provide a desired inter-measurement period in
  // ms (e.g. sensor.startContinuous(100)).
  sensor.startContinuous();
}

void loop()
{
  Serial.print(sensor.readRangeContinuousMillimeters());
  if (sensor.timeoutOccurred()) { Serial.print(" TIMEOUT"); }

  Serial.println();
}
テスト
距離センサを近づけてRGB値を取得できればOK
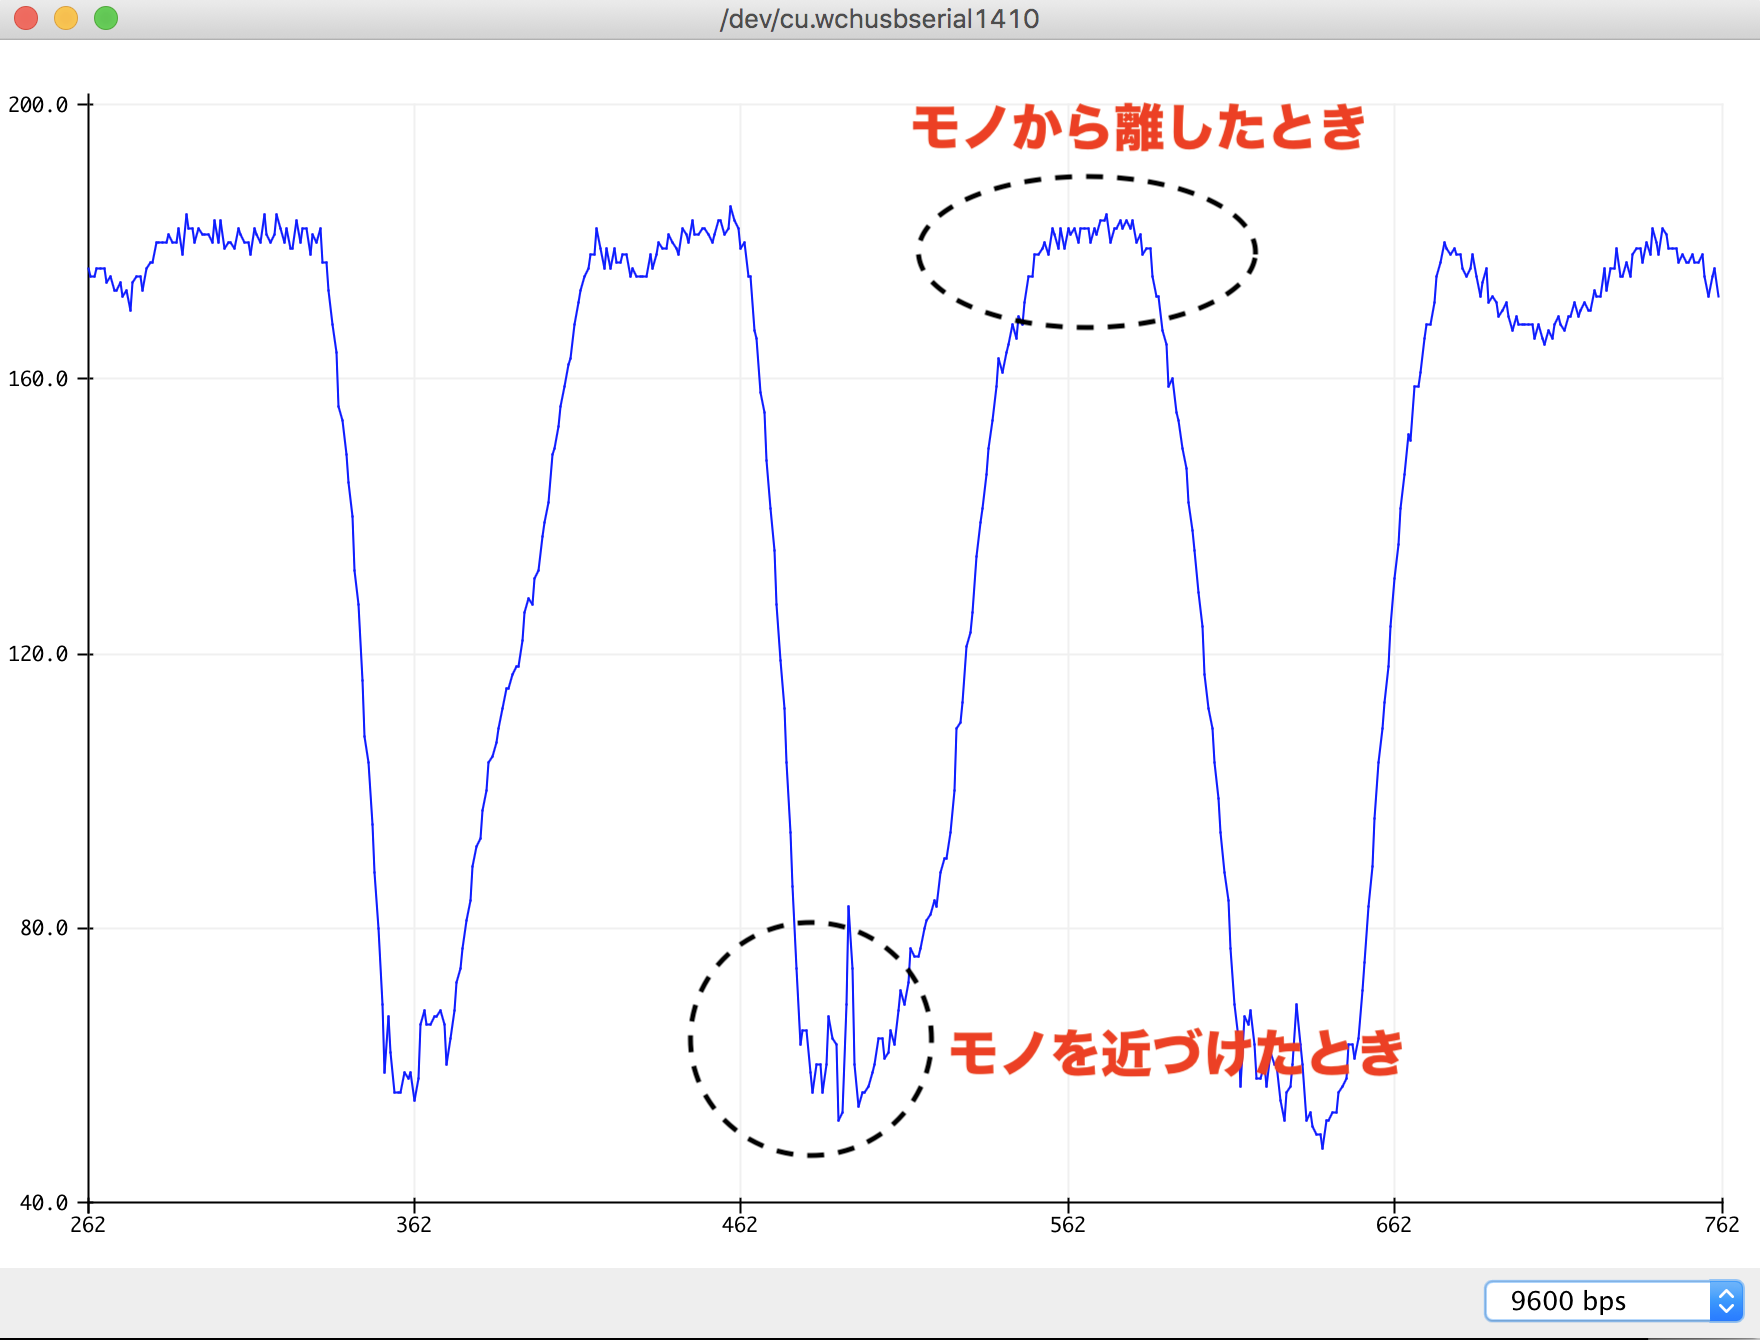
距離センサを使って距離情報をプロット pic.twitter.com/IN7jI2Z4mN
— st (@st17890027) January 2, 2020
以下はシリアルプロッタで取得したグラフです。
CodingError対策
特になし
参考
VL53L0X Time-of-Flight 距離センサモジュール
Arduino UNOでVL53L0X Time-of-Flight 距離センサモジュールを使う
Arduino IDEで数値をグラフ表示する「シリアルプロッター」