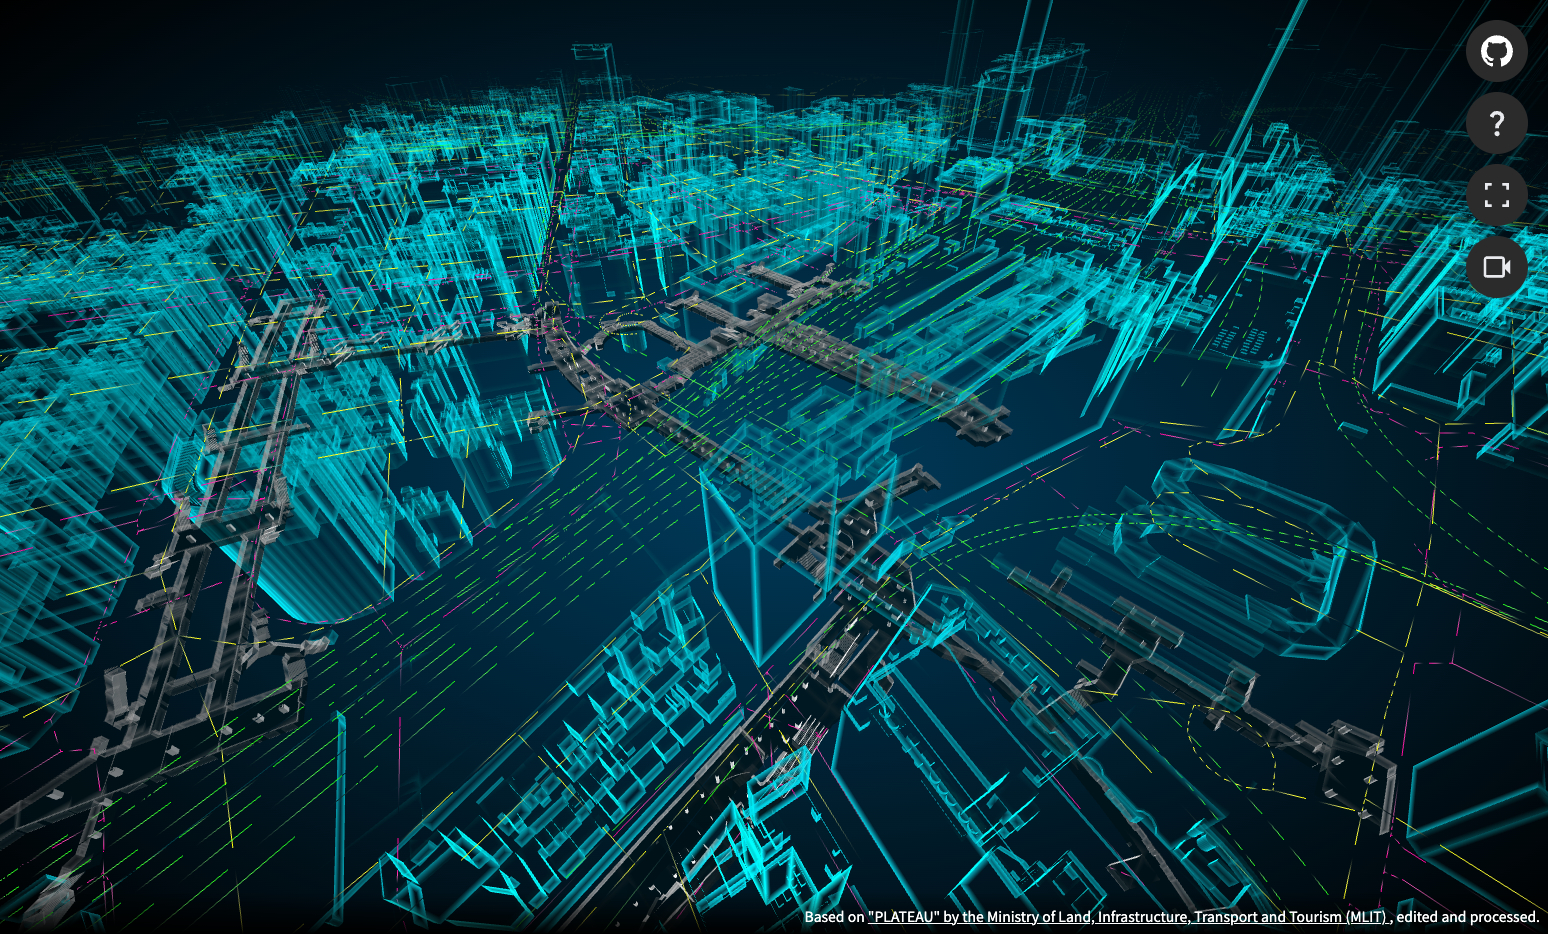
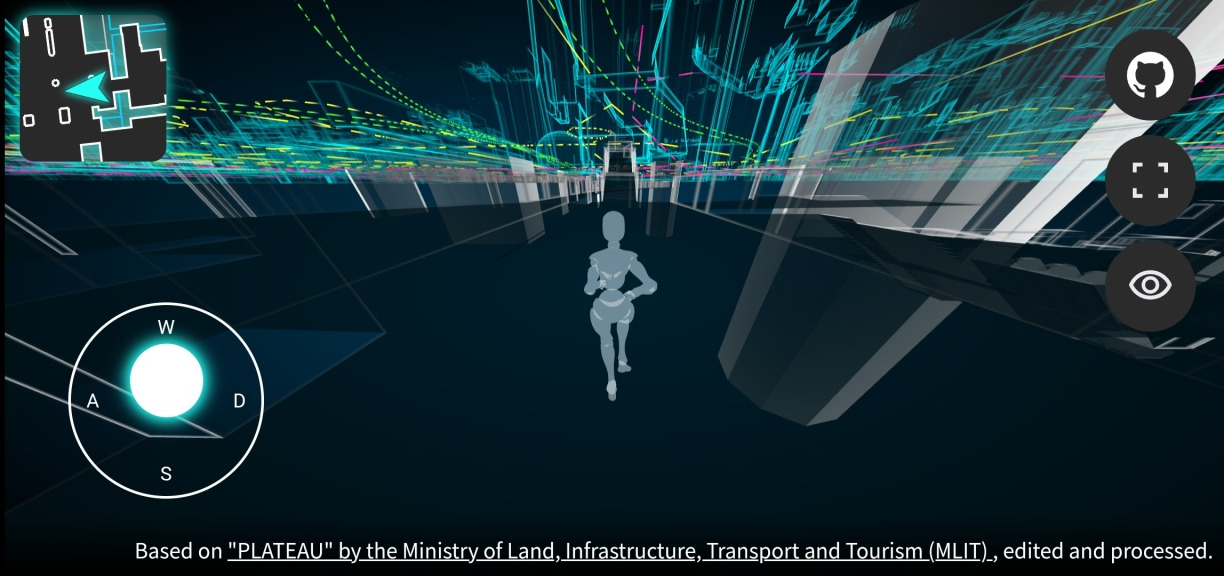
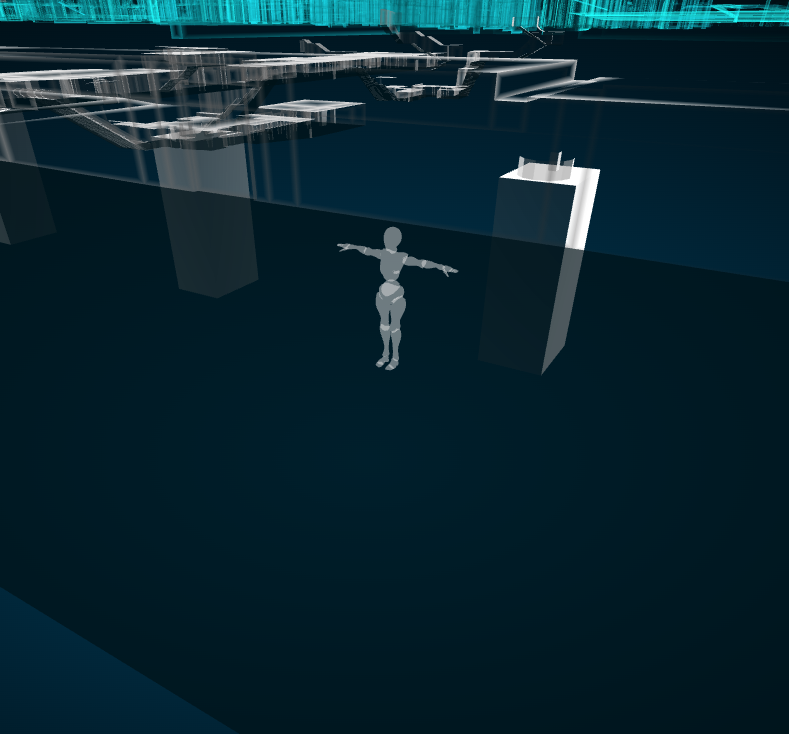
DEMOはこちら
https://satoshi7190.github.io/three-plateau-tps/
ソースコードはこちら
はじめに
この記事では、Three.js を使って新宿駅構内を 3D で探索する Web ゲームを作る試みを紹介します。とはいえ、今回の内容は TPS(Third Person Shooter)視点でキャラクターを歩かせるだけのシンプルな実装なので、「探索ゲーム」と呼べるかどうかは少し疑問が残るかもしれません。
データの準備
今回はPLATEAU3D都市モデルの新宿区(2023年度)のデータにある新宿駅の地下街モデルのデータを使用します。
PLATEAU3D都市モデルとは
PLATEAU 3D都市モデルは、国土交通省が提供する日本の都市を詳細に再現したデータセットです。このデータは主に CityGML形式 で提供されており、建物、道路、地形など多岐にわたる情報が詰め込まれています。
CityGMLは、行政が好むような多様な情報を記述できる柔軟性が特徴ですが、その反面、XMLベースのデータフォーマットであるため、階層構造が非常に複雑です。そのままでは解析や活用が難しく、大容量のデータ処理が必要になることも少なくありません。
3D都市モデル標準製品仕様には、データ仕様が詳細に記載されていますが、その情報量は膨大で、全体像を把握するのが非常に難しい状態です。
QGISでFlatGeobufに変換する
CityGML形式のままでは扱いづらいのでQGISとPLATEAU QGIS Pluginを使用して、データをFlatGeobuf形式変換します。
新宿駅構内のデータである「地下街モデル」を読み込みます。座標系は平面直角座標系のEPSG:6677にします。
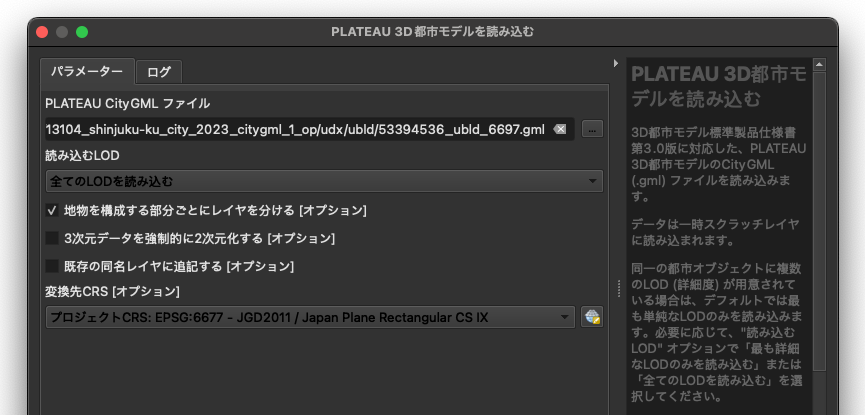
LOD1とLOD4のモデルが読み込まれます。
さらにLOD4の地下街モデルを「地物型」と呼ばれる定義の種類ごとに分類します。
3D都市モデル標準製品仕様書より引用
地物型はQGISプラグインで読み込んだ場合type属性に格納されるので、プロセシングツールのベクタジオメトリから「QGIS式によるジオメトリ」を実行して、typeの属性ごとに地物を抽出しtypeごとのデータに分けます。
QGIS式の例
"type" = 'bldg:GroundSurface'
以下のようにデータを分けました。
| type | 概要 |
|---|---|
| RoofSurface | 屋根面 |
| WallSurface | 壁面 |
| InteriorWallSurface | 内壁面 |
| GroundSurface | 底面 |
| ClosureSurface | 閉鎖面 |
| CeilingSurface | 天井面 |
| FloorSurface | 床面 |
| Window | 窓 |
| Door | 扉 |
| IntBuildingInstallation | 階段、スロープ、柱など |
※GroundSurfaceは今回使いません。
さらにLOD1の地物とLOD4のIntBuildingInstallation(柱のみ)、InteriorWallSurfaceをQGIS上でマージしてHitboxという命名でデータを作成します。これはゲーム内の衝突判定に使用します。
それぞれのデータをFlatGeobuf形式で保存します。ちなみにJavaScriptで読み込む地理情報データの形式としてGeoJSONが先に挙げられると思います。こちらでも良いですがFlatGeobufはバイバリ形式なので、GeoJSONの約半分ぐらいに容量を圧縮できるため、こちらのデータ形式を今回採用しました。
Three.jsで描画する。
本題のThree.jsを触ります。ビルドツールはViteを使用してます。TypeScriptで書いていきます。
シーンの作成
npm install three
<body>
    <canvas id="three-canvas"></canvas>
</body>
body {
    padding: 0;
    margin: 0;
    overflow: hidden;
}

/* three.js canvas */
#three-canvas {
    background-image: radial-gradient(#003d5e, #000000);
    width: 100vw;
    height: 100vh;
}
import './main.css';
import * as THREE from 'three';
import { TrackballControls } from 'three/examples/jsm/controls/TrackballControls.js';
import { OrbitControls } from 'three/examples/jsm/controls/OrbitControls.js';

// シーンの作成
const scene = new THREE.Scene();

// カメラ
const camera = new THREE.PerspectiveCamera(75, window.innerWidth / window.innerHeight, 0.1, 100000);

camera.position.set(100, 100, 100);
scene.add(camera);

// キャンバス
const canvas = document.getElementById('three-canvas') as HTMLCanvasElement;
const context = canvas.getContext('webgl2') as WebGL2RenderingContext;

// コントロール
const orbitControls = new OrbitControls(camera, canvas);
orbitControls.enableDamping = true;
orbitControls.enablePan = false;
orbitControls.enableZoom = false;

const zoomControls = new TrackballControls(camera, canvas);
zoomControls.noPan = true;
zoomControls.noRotate = true;
zoomControls.zoomSpeed = 0.2;

// レンダラー
const renderer = new THREE.WebGLRenderer({
    canvas,
    context,
    alpha: true,
});
renderer.setSize(window.innerWidth, window.innerHeight);
renderer.setPixelRatio(Math.min(window.devicePixelRatio, 2));

// 画面リサイズ時にキャンバスもリサイズ
const onResize = () => {
    // サイズを取得
    const width = window.innerWidth;
    const height = window.innerHeight;

    // レンダラーのサイズを調整する
    renderer.setPixelRatio(window.devicePixelRatio);
    renderer.setSize(width, height);

    // カメラのアスペクト比を正す
    camera.aspect = width / height;
    camera.updateProjectionMatrix();
};
window.addEventListener('resize', onResize);

// アニメーション
const animate = () => {
    requestAnimationFrame(animate);
    const target = orbitControls.target;
    orbitControls.update();
    zoomControls.target.set(target.x, target.y, target.z);
    zoomControls.update();
    renderer.render(scene, camera);
};
animate();
このシーンにオブジェクト(地下街モデル)を追加します
FlatGeobufを読み込む
QGISで変換した3次元座標を持つ平面直角座標系(EPSG:6677)のFlatGeobufですが、Three.jsにはFlatGeobufを読み込むためのクラスは用意されてないので今回FGB3DLoaderというクラスを自作しました。全体のコードのはこちらです。
import * as THREE from 'three';
import { Earcut } from 'three/src/extras/Earcut.js';
import { geojson } from 'flatgeobuf';

interface Feature {
    type: string;
    properties: {
        [key: string]: any;
    };
    geometry: {
        type: string;
        coordinates: number[][][][];
    };
}

type Vec3 = [number, number, number];

export class FGB3DLoader {
    private center: [number, number];

    constructor(center: [number, number]) {
        this.center = center;
    }

    // ファイルを読み込み、BufferGeometryを返すメソッド
    public async load(url: string): Promise<THREE.BufferGeometry> {
        const response = await fetch(url);
        const featureIterator = geojson.deserialize(response.body as ReadableStream) as AsyncIterable<Feature>;

        // 頂点・インデックス・UV格納用
        const mergeVertices: number[] = [];
        const mergeIndex: number[] = [];
        const allUVs: number[] = [];

        let indexId = 0;

        for await (const feature of featureIterator) {
            this.processFeature(feature, mergeVertices, mergeIndex, allUVs);
            indexId++;
        }

        return this.createBufferGeometry(mergeVertices, mergeIndex, allUVs);
    }

    //  Featureを処理するメソッド
    private processFeature(feature: Feature, mergeVertices: number[], mergeIndex: number[], allUVs: number[]) {
        const coordinates = feature.geometry.coordinates;

        coordinates.forEach((surface) => {
            const { vertices, outerVertices2D, holes, axis } = this.extractSurfaceData(surface);
            const uvs = this.computeUVs(vertices, axis);
            allUVs.push(...uvs);

            const triangles = this.triangulateSurface(outerVertices2D, holes);
            this.mergeVerticesAndIndices(mergeVertices, mergeIndex, vertices, triangles);
        });
    }

    // 法線計算、軸判定、verticesとouterVertices2Dの取得
    private extractSurfaceData(surface: any[]): { vertices: number[]; outerVertices2D: number[]; holes: number[][]; axis: string } {
        const vertices: number[] = []; // 現在の面の頂点配列
        const outerVertices2D: number[] = []; // earcut用の2D頂点配列
        const holes: number[][] = []; // 穴の頂点配列
        let axis: string = 'z'; // 初期値

        surface.forEach((segments, index) => {
            const points: Vec3[] = [];
            segments.forEach((vec3: Vec3, idx: number) => {
                if (idx < 3) points.push([vec3[0] - this.center[0], vec3[1] - this.center[1], vec3[2]]);
            });

            // 法線ベクトルの計算
            const vector1 = this.subtractVectors(points[1], points[0]);
            const vector2 = this.subtractVectors(points[2], points[0]);
            const normal = this.normalizeVector(this.crossProduct(vector1, vector2));

            // 法線の向きから軸を判断
            const normalX = Math.abs(normal[0]);
            const normalY = Math.abs(normal[1]);
            const normalZ = Math.abs(normal[2]);

            if (normalX > normalY && normalX > normalZ) {
                axis = 'x'; // YZ平面
            } else if (normalY > normalX && normalY > normalZ) {
                axis = 'y'; // XZ平面
            } else {
                axis = 'z'; // XY平面
            }

            // アウトラインの頂点配列を作成
            if (index === 0) {
                segments.forEach((vec3: Vec3, idx: number) => {
                    if (idx + 1 !== segments.length) { // 最後の頂点を無視
                        vertices.push(vec3[0] - this.center[0], vec3[1] - this.center[1], vec3[2]);
                        if (axis === 'x') {
                            outerVertices2D.push(vec3[1] - this.center[0], vec3[2] - this.center[1]);
                        } else if (axis === 'y') {
                            outerVertices2D.push(vec3[0] - this.center[0], vec3[2] - this.center[1]);
                        } else if (axis === 'z') {
                            outerVertices2D.push(vec3[0] - this.center[0], vec3[1] - this.center[1]);
                        }
                    }
                });
            } else {
                const holeVertices2D: number[] = [];
                segments.forEach((vec3: Vec3, idx: number) => {
                    if (idx + 1 !== segments.length) { // 最後の頂点を無視
                        vertices.push(vec3[0] - this.center[0], vec3[1] - this.center[1], vec3[2]);
                        if (axis === 'x') {
                            holeVertices2D.push(vec3[1] - this.center[0], vec3[2] - this.center[1]);
                        } else if (axis === 'y') {
                            holeVertices2D.push(vec3[0] - this.center[0], vec3[2] - this.center[1]);
                        } else if (axis === 'z') {
                            holeVertices2D.push(vec3[0] - this.center[0], vec3[1] - this.center[1]);
                        }
                    }
                });
                holes.push(holeVertices2D);
            }
        });
        return { vertices, outerVertices2D, holes, axis };
    }

    // Earcutを使用して三角形分割するメソッド
    private triangulateSurface(outerVertices2D: number[], holes: number[][]): number[] {
        let triangles: number[];
        if (holes.length > 0) {
            const holeIndices: number[] = [];
            let holesOffset = outerVertices2D.length / 2;
            holes.forEach((hole) => {
                holeIndices.push(holesOffset);
                holesOffset += hole.length / 2;
            });
            triangles = Earcut.triangulate(outerVertices2D.concat(...holes), holeIndices);
        } else {
            triangles = Earcut.triangulate(outerVertices2D);
        }

        // 頂点の順序を確認し、必要なら反転
        if (this.isClockwise(outerVertices2D)) {
            triangles.reverse(); // 時計回り (CW) の場合は反転
        }
        return triangles;
    }

    // 頂点とインデックスをマージするメソッド
    private mergeVerticesAndIndices(mergeVertices: number[], mergeIndex: number[], vertices: number[], triangles: number[]) {
        // グローバルな頂点配列に追加
        const vertexOffset = mergeVertices.length / 3;
        mergeVertices.push(...vertices);

        // インデックスをオフセットして追加
        const offsetIndices = triangles.map((i) => i + vertexOffset);
        mergeIndex.push(...offsetIndices);
    }

    // BufferGeometryを作成するメソッド
    private createBufferGeometry(mergeVertices: number[], mergeIndex: number[], allUVs: number[]): THREE.BufferGeometry {
        const geometry = new THREE.BufferGeometry();
        geometry.setAttribute('position', new THREE.BufferAttribute(new Float32Array(mergeVertices), 3));
        geometry.setIndex(mergeIndex);
        geometry.setAttribute('uv', new THREE.BufferAttribute(new Float32Array(allUVs), 2));

        // 回転 X軸
        const matrix = new THREE.Matrix4().makeRotationX(Math.PI / -2);
        geometry.applyMatrix4(matrix);
        geometry.computeVertexNormals();

        return geometry;
    }

    // 多角形の頂点配列がCWかCCWかを判定するメソッド
    private isClockwise(vertices2D: number[]): boolean {
        let area = 0;
        for (let i = 0; i < vertices2D.length; i += 2) {
            const x1 = vertices2D[i];
            const y1 = vertices2D[i + 1];
            const x2 = vertices2D[(i + 2) % vertices2D.length];
            const y2 = vertices2D[(i + 3) % vertices2D.length];
            area += x1 * y2 - x2 * y1;
        }
        return area / 2 < 0; // true: CW(時計回り)、false: CCW(反時計回り)
    }

    // 面のUV座標を計算するメソッド
    private computeUVs(vertices: number[], axis: string): number[] {
        const uvs: number[] = [];

        // 軸選択用の関数
        const getUV = (x: number, y: number, z: number): [number, number] => {
            switch (axis) {
                case 'x':
                    return [y, z]; // YZ平面
                case 'y':
                    return [x, z]; // XZ平面
                default:
                    return [x, y]; // XY平面
            }
        };

        // 最小・最大値の初期化
        let minU = Infinity,
            maxU = -Infinity;
        let minV = Infinity,
            maxV = -Infinity;

        // 最小・最大値を計算
        for (let i = 0; i < vertices.length; i += 3) {
            const [u, v] = getUV(vertices[i], vertices[i + 1], vertices[i + 2]);
            minU = Math.min(minU, u);
            maxU = Math.max(maxU, u);
            minV = Math.min(minV, v);
            maxV = Math.max(maxV, v);
        }

        // 範囲が無効ならUVゼロ配列を返す
        const rangeU = maxU - minU;
        const rangeV = maxV - minV;
        if (rangeU === 0 || rangeV === 0) {
            return new Array((vertices.length / 3) * 2).fill(0);
        }

        // UV座標を正規化して格納
        for (let i = 0; i < vertices.length; i += 3) {
            const [u, v] = getUV(vertices[i], vertices[i + 1], vertices[i + 2]);
            uvs.push((u - minU) / rangeU, (v - minV) / rangeV);
        }

        return uvs;
    }

    // ベクトルの差を計算するメソッド
    private subtractVectors(a: Vec3, b: Vec3): Vec3 {
        return [a[0] - b[0], a[1] - b[1], a[2] - b[2]];
    }

    // ベクトルの外積を計算するメソッド
    private crossProduct(a: Vec3, b: Vec3): Vec3 {
        return [a[1] * b[2] - a[2] * b[1], a[2] * b[0] - a[0] * b[2], a[0] * b[1] - a[1] * b[0]];
    }

    // ベクトルを正規化するメソッド
    private normalizeVector(v: Vec3): Vec3 {
        const length = Math.sqrt(v[0] ** 2 + v[1] ** 2 + v[2] ** 2);
        return length === 0 ? [0, 0, 0] : [v[0] / length, v[1] / length, v[2] / length];
    }
}
各メソッドを解説します。
load メソッド
指定されたURLパスからFlatGeoBufデータを非同期に読み込み、ジオメトリを構築する。
-
fetchを使用してデータを取得。 -
geojson.deserializeを使ってFlatGeoBufをGeoJSON形式に変換。 - 非同期イテレータで各フィーチャを処理。
※flatgeobufのライブラリをインストールする必要があります。
npm install flatgeobuf
processFeature メソッド
地物の座標データを解析し、3Dモデルのための頂点データを生成します。
- 個々のサーフェス(面)を処理。
- UV座標や法線を計算し、全体の頂点リストに統合。
extractSurfaceData メソッド
面ごとの頂点、穴、法線ベクトルを計算します。
- 法線計算: ベクトルの外積を使用。
- 軸判定: 法線ベクトルの向きを基にXY、XZ、YZ平面を特定。
- 地理情報データなので平面直角座標系をワールド座標に合わせるためにXとZに対してオフセットをかける。
- 地理情報データのポリゴンは閉じるための頂点データがあるので、これを無視する。
{
  "type": "Polygon",
  "coordinates": [
    [
      [100.0, 0.0],
      [101.0, 0.0],
      [101.0, 1.0],
      [100.0, 1.0],
      [100.0, 0.0] // 閉じるための頂点
    ]
  ]
}
triangulateSurface メソッド
Earcutクラスを使用して2Dポリゴンを三角形に分割します。
- 穴を考慮した三角形分割。
- 頂点が時計回りか反時計回りかを確認し、反転処理。
createBufferGeometry メソッド
生成した頂点データやインデックスを基にBufferGeometryを作成します。
- 頂点法線の計算 (
computeVertexNormals)。 - X軸回転で平面を調整。
このFGB3DLoaderを初期化してloadメソッドで地下街モデルを読み込み、シーンに描画します。引数に、ワールド座標の中心にしたいEPSG:6677の座標を指定することで、地下街モデルをシーンの中心に描画できます。
import { FGB3DLoader } from './plateauGeometryLoader';

// シーンの中心にする地理座標[x, y] (EPSG:6677)
const SCENE_CENTER_COORDS: [number, number] = [-12043, -34145];

// 3D都市モデルの読み込み(flatgeobuf)
const plateauLoader = new FGB3DLoader(SCENE_CENTER_COORDS);
const addPlateauObj = async (url: string, name: string, material: THREE.Material) => {
    plateauLoader.load(url).then((geometry: THREE.BufferGeometry) => {

        const obj = new THREE.Mesh(geometry, material);
        obj.name = name;

        // シーンに追加
        scene.add(obj);
    });
};

// オブジェクトを読み込み
const loadObjs = async () => {
    const plateauObjPromises = [
        // 地下街モデルの各地物を追加する。使用するマテリアルとオブジェクト名を引数に入れる。
        addPlateauObj('plateau_shinjuku/ubld/FloorSurface.fgb', 'FloorSurface', ubldfloorMaterial),
        addPlateauObj('plateau_shinjuku/ubld/IntBuildingInstallation.fgb', 'IntBuildingInstallation', ubldIntBuildingInstallationMaterial),
        addPlateauObj('plateau_shinjuku/ubld/ClosureSurface.fgb', 'ClosureSurface', ubldWallCeilingMaterial),
        addPlateauObj('plateau_shinjuku/ubld/RoofSurface.fgb', 'RoofSurface', ubldWallCeilingMaterial),
        addPlateauObj('plateau_shinjuku/ubld/InteriorWallSurface.fgb', 'InteriorWallSurface', ubldWallCeilingMaterial),
        addPlateauObj('plateau_shinjuku/ubld/Window.fgb', 'Window', ubldWallCeilingMaterial),
        addPlateauObj('plateau_shinjuku/ubld/Door.fgb', 'Door', ubldWallCeilingMaterial),
    ];

    await Promise.all(plateauObjPromises);
};
マテリアルを定義します。床(FloorSurface)以外はシェーダーマテリアルを使います。
import ubldIntBuildingInstallationVS from './shader/ubldIntBuildingInstallation/vertex.glsl?raw';
import ubldIntBuildingInstallationFS from './shader/ubldIntBuildingInstallation/fragment.glsl?raw';
import ubldWallCeilingVS from './shader/ubldWallCeiling/vertex.glsl?raw';
import ubldWallCeilingFS from './shader/ubldWallCeiling/fragment.glsl?raw';


// 地下街モデルの階段、柱のマテリアル
const ubldIntBuildingInstallationMaterial = new THREE.ShaderMaterial({
    transparent: true,
    vertexShader: ubldIntBuildingInstallationVS,
    fragmentShader: ubldIntBuildingInstallationFS,
    glslVersion: THREE.GLSL3,
    depthWrite: false, // 半透明面のチラつき防止
});

// 地下街モデルの壁、天井のマテリアル
const ubldWallCeilingMaterial = new THREE.ShaderMaterial({
    transparent: true,
    vertexShader: ubldWallCeilingVS,
    fragmentShader: ubldWallCeilingFS,
    glslVersion: THREE.GLSL3,
    depthWrite: false, // 半透明面のチラつき防止
});

// 地下街モデルの床のマテリアル
const ubldfloorMaterial = new THREE.MeshBasicMaterial({
    transparent: true,
    color: new THREE.Color('rgb(0, 17, 23)'),
    opacity: 0.7,
    side: THREE.DoubleSide,
});
地下街モデルの階段、柱のシェーダー
IntBuildingInstallation
ライティングを応用して、陰影の部分を半透明にした見た目にします。
precision highp float;

out vec3 v_normal;
out vec3 v_position;
out mat4 v_modelMatrix;

void main() {
    v_normal = normal;
    v_position = position;

    // ワールド座標を計算
    vec4 worldPosition = modelMatrix * vec4(position, 1.0);
    v_modelMatrix = modelMatrix;

    gl_Position = projectionMatrix * modelViewMatrix * vec4(position, 1.0);
}
precision highp float;

in vec3 v_normal;
in vec3 v_position;
in mat4 v_modelMatrix;

out vec4 fragColor;

void main() {

    float coefficient = 1.2;
    float power = 1.0;

    vec3 worldPosition = (v_modelMatrix * vec4(v_position, 1.0)).xyz;
    vec3 cameraToVertex = normalize(worldPosition - cameraPosition);
    float intensity = pow(coefficient + dot(cameraToVertex, normalize(v_normal)), power);

    vec3 color = vec3(1.0);

    fragColor = vec4(color, 1.0) * intensity;
}
地下街モデルの壁、天井類のシェーダー
WindowDoorWallSurfaceRoofSurfaceInteriorWallSurfaceClosureSurfaceCeilingSurface
こちらはさらにUV座標からエッジを作り、地下街モデルの中身がよく見えるようにします。
precision highp float;

out vec2 v_uv;
out vec3 v_normal;
out vec3 v_position;
out mat4 v_modelMatrix;

void main() {
    v_uv = uv;
    v_normal = normal;
    v_position = position;

       // ワールド座標を計算
    vec4 worldPosition = modelMatrix * vec4(position, 1.0);
    v_modelMatrix = modelMatrix;

    gl_Position = projectionMatrix * modelViewMatrix * vec4(position, 1.0);
}
precision highp float;

in vec2 v_uv;
in vec3 v_normal;
in vec3 v_position;
in mat4 v_modelMatrix;

out vec4 fragColor;

 float edgeFactor(vec2 p){
    float thickness = 5.0;
    	vec2 grid = abs(fract(p - 0.5) - 0.5) / fwidth(p) / thickness;
  		return min(grid.x, grid.y);
    }

void main() {

    float coefficient = 1.2;
    float power = 1.0;

    vec3 worldPosition = (v_modelMatrix * vec4(v_position, 1.0)).xyz;
    vec3 cameraToVertex = normalize(worldPosition - cameraPosition);
    float intensity = pow(coefficient + dot(cameraToVertex, normalize(v_normal)), power);

    float a = edgeFactor(v_uv);

    vec3 color = vec3(0.76);

    fragColor = vec4(color, 1.0 - a) * intensity;
}
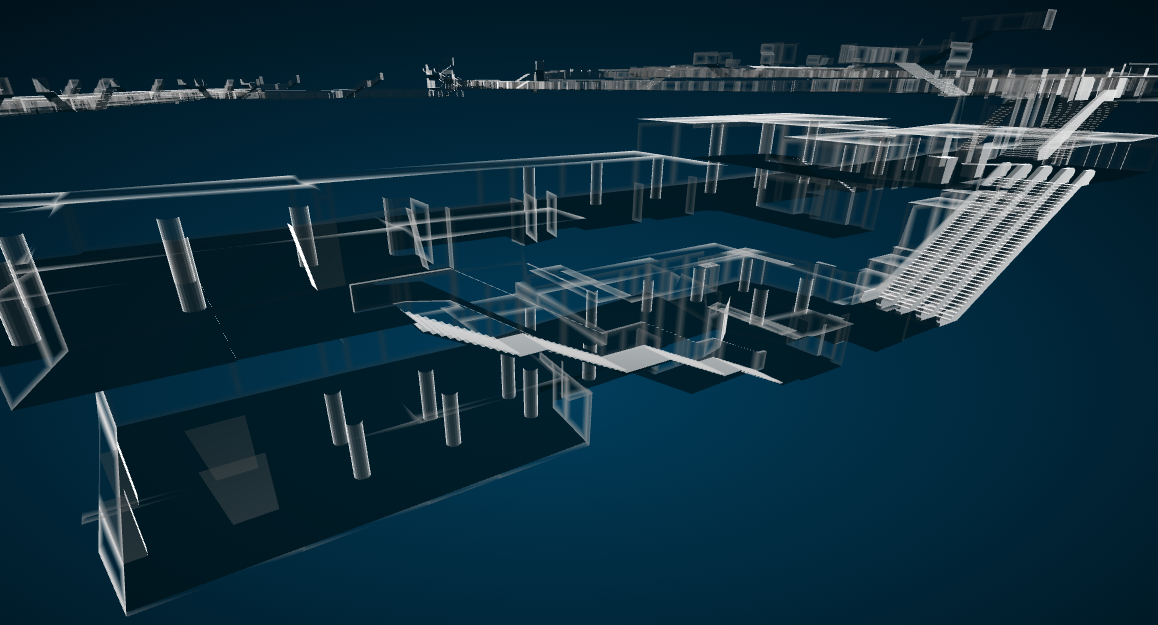
地下街モデルの描画ができました。
フィギュアケースみたいな感じになったので外側から中身がよく見えます。
ついでに他の3D都市モデルも描画しちゃいましょう。建物モデル(LOD2)と橋梁モデル(LOD2)を先ほどと同じ手順でQGISに読み込みEPSG:6677の座標系に変換してFlatGeobuf形式でエクスポートします。

シーンに追加していきます。
// オブジェクトを読み込み
const loadObjs = async () => {
    const plateauObjPromises = [
        // 地下街モデルの読み込み 省略

        // 建物モデルの読み込み
        addPlateauObj('plateau_shinjuku/bldg/53394525_Building.fgb', '53394525_Building', bldgbridMaterial),
        addPlateauObj('plateau_shinjuku/bldg/53394535_Building.fgb', '53394535_Building', bldgbridMaterial),
        addPlateauObj('plateau_shinjuku/bldg/53394526_Building.fgb', '53394526_Building', bldgbridMaterial),
        addPlateauObj('plateau_shinjuku/bldg/53394536_Building.fgb', '53394536_Building', bldgbridMaterial),

        // 橋梁モデルの読み込み
        addPlateauObj('plateau_shinjuku/brid/53394525_Bridge.fgb', '53394525_Bridge', bldgbridMaterial),
        addPlateauObj('plateau_shinjuku/brid/53394526_Bridge.fgb', '53394526_Bridge', bldgbridMaterial),
        addPlateauObj('plateau_shinjuku/brid/53394535_Bridge.fgb', '53394535_Bridge', bldgbridMaterial),
    ];

    await Promise.all(plateauObjPromises);
};
マテリアルを定義し、シェーダーを書いていきます。uniforms変数も定義します。(u_timeは別のシェーダーで使います。)
import bldgbridVS from './shader/bldgbrid/vertex.glsl?raw';
import bldgbridFS from './shader/bldgbrid/fragment.glsl?raw';

type UniformValue<T> = { value: T };

export type Uniforms = {
    u_time: UniformValue<number>;
    u_fogFar: UniformValue<number>;
    u_fogNear: UniformValue<number>;
};

export const uniforms: Uniforms = {
    u_time: { value: 0 },
    u_fogFar: { value: 900.0 },
    u_fogNear: { value: 150.0 },
};

// 建物、橋梁のマテリアル
const bldgbridMaterial = new THREE.ShaderMaterial({
    transparent: true,
    uniforms: uniforms,
    vertexShader: bldgbridVS,
    fragmentShader: bldgbridFS,
    glslVersion: THREE.GLSL3,
    depthWrite: false, // 半透明面のチラつき防止
});
先ほどのエッジに加え、フォッグ効果を加えたものを描画します。
precision highp float;

out vec2 v_uv;
out vec3 v_normal;
out vec3 v_position;
out mat4 v_modelMatrix;
out float v_fogDistance;

void main() {
    v_uv = uv;
    v_normal = normal;
    v_position = position;

    // ワールド座標を計算
    vec4 worldPosition = modelMatrix * vec4(position, 1.0);
    v_modelMatrix = modelMatrix;

    // 中心 (0, 0, 0) からの距離を計算
    v_fogDistance = length(worldPosition.xyz);

    gl_Position = projectionMatrix * modelViewMatrix * vec4(position, 1.0);
}
precision highp float;

in vec2 v_uv;
in vec3 v_normal;
in vec3 v_position;
in mat4 v_modelMatrix;
in float v_fogDistance;
uniform float u_fogFar;
uniform float u_fogNear;

out vec4 fragColor;

 float edgeFactor(vec2 p){
    float thickness = 5.0;
    	vec2 grid = abs(fract(p - 0.5) - 0.5) / fwidth(p) / thickness;
  		return min(grid.x, grid.y);
    }

void main() {

    //  フォッグの割合を計算 (線形補間)
    float fogFactor = smoothstep(u_fogNear,u_fogFar,  v_fogDistance);
    float alpha = 1.0 - fogFactor; // フォッグが濃いほど透明に

    float coefficient = 1.2;
    float power = 1.0;

    vec3 worldPosition = (v_modelMatrix * vec4(v_position, 1.0)).xyz;
    vec3 cameraToVertex = normalize(worldPosition - cameraPosition);
    float intensity = pow(coefficient + dot(cameraToVertex, normalize(v_normal)), power);

    float a = edgeFactor(v_uv);

    vec3 color = vec3(0.0, 0.9215686274509803, 1.0);

    fragColor = vec4(color, alpha - a) * intensity;
}
建物モデルと橋梁モデルも描画し、舞台が整いました。
キャラクターを歩かせる
地下街モデルの中にキャラクターを歩かせて、新宿駅構内を探索したいと思います。
キャラクターモデルを追加する
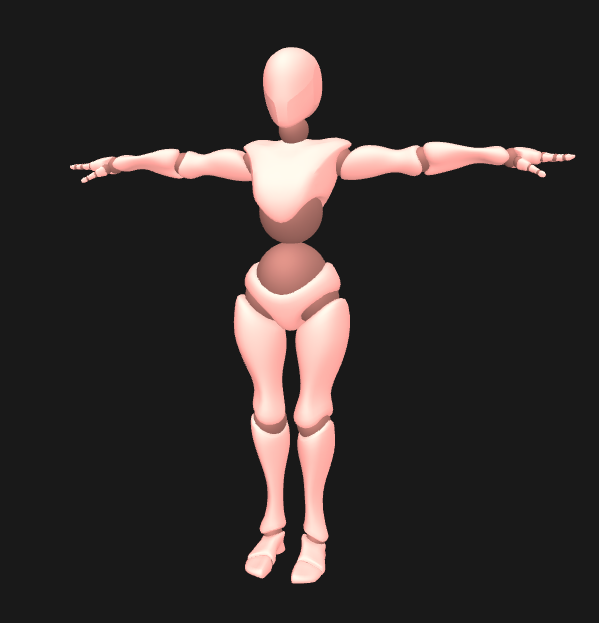
Three.jsのexamplesで使用されているこちらのモデルを使用します。
キャラクターモデルを読み込む
GLTFLoaderで読み込みます。先ほど追加した地下街モデルの床の上にキャラクターを載せたいので、レイキャスト(Raycaster)を使って下方向にレイを飛ばし、床の高さを計算します。
// キャラクターのマテリアル
const characterMaterial = new THREE.MeshBasicMaterial({
    color: new THREE.Color('rgb(220, 220, 220)'),
    transparent: true,
    opacity: 0.5,
});

// レイキャスト
const raycaster = new THREE.Raycaster();

// 下向きベクトル
const downDirection = new THREE.Vector3(0, -1, 0);

// キャラクターモデルの追加
const addModel = (url: string) => {
    new GLTFLoader().load(url, function (gltf) {
        const model = gltf.scene;
        model.traverse((object: any) => {
            if (object.isMesh) {
                object.material.needUpdate = true;
                object.material = characterMaterial;
            }
        });

        // だいたいの人間の大きさに合わせる
        model.scale.set(0.9, 0.9, 0.9);

        model.position.set(0, 500, 0);

        // シーン内の床のオブジェクトを取得
        const ground = objs.FloorSurface;

        if (ground) {
            // レイキャストの設定
            raycaster.set(model.position, downDirection);
            const intersects = raycaster.intersectObject(ground, true);

            if (intersects.length > 0) {
                model.position.y = intersects[0].point.y;
            }
        }
        scene.add(model);
    });
};


// オブジェクトを読み込み
const loadObjs = async () => {
    const plateauObjPromises = [
    // 3D都市モデルの読み込み 省略
    ];

    await Promise.all(plateauObjPromises);

    // キャラクターモデルの追加
    await addModel('./models/Xbot.glb');
};
キャラクターモデルを操作する
次にこのキャラクターをユーザーが操作できるようにします。キーボード操作(wasdキー)による実装に加えます。
まずはUIの見た目を作ります(wasdのどのキーを押しているのかユーザーにわかるようにします)。
 <body>
    <!-- 省略 -->
    <div id="key-control" class="key-control">
        <div id="key-s" class="key-item" style="--index: 1"><span>S</span></div>
        <div id="key-a" class="key-item" style="--index: 2"><span>A</span></div>
        <div id="key-w" class="key-item" style="--index: 3"><span>W</span></div>
        <div id="key-d" class="key-item" style="--index: 4"><span>D</span></div>
    </div>
</body>
/* キーコントロール */
.key-control {
    position: absolute;
    z-index: 10;
    bottom: 50px;
    left: 30px;
    width: 140px;
    height: 140px;
    transition: all 0.3s;
    pointer-events: none;
}

/* 各キーのスタイル */
.key-control > .key-item {
    transition: all 0.15s;
    z-index: 20;
    position: absolute;
    top: 50%;
    left: 50%;
    --d: 50px;
    --angle: calc(360deg / 4 * var(--index));
    --x: calc(cos(var(--angle)) * var(--d));
    --y: calc(sin(var(--angle)) * var(--d));
    translate: calc(var(--x) - 50%) calc(var(--y) - 50%);
    user-select: none;
    color: #ffffff;
    background-color: #2b2b2b;
    display: grid;
    place-items: center;
    width: 50px;
    height: 50px;
    border-radius: 10px;
    font-size: 1rem;
    font-weight: bold;
}

/* キーが押された時のスタイル */
.key-control > .active {
    background-color: #24fff4;
    filter: drop-shadow(0 0 5px #24fff4);
}
一応、矢印キーにも対応しておきます
// 矢印キーとWASDキーの対応表
const keyDict: Record<string, string> = {
    arrowup: 'w',
    arrowleft: 'a',
    arrowdown: 's',
    arrowright: 'd',
};

// キーの操作を管理するクラス
export class KeyInputManager {
    private keyState: Record<string, boolean> = {};

    constructor() {
        this.initializeKeys();
        this.addEventListeners();
    }

    // 初期化処理
    private initializeKeys(): void {
        Object.values(keyDict).forEach((key) => {
            const element = document.getElementById(`key-${key}`);
            if (!element) throw new Error(`Key element "key-${key}" not found.`);
        });
    }

    // イベントリスナー登録
    private addEventListeners(): void {
        window.addEventListener('keydown', this.handleKeyDown.bind(this));
        window.addEventListener('keyup', this.handleKeyUp.bind(this));
    }

    // キー押下時の処理
    private handleKeyDown(e: KeyboardEvent): void {
        const key = this.normalizeKey(e.key);
        if (!key) return;

        this.keyState[key] = true;
        this.setKeyActive(key, true);
    }

    // キー解放時の処理
    private handleKeyUp(e: KeyboardEvent): void {
        const key = this.normalizeKey(e.key);
        if (!key) return;

        this.keyState[key] = false;
        this.setKeyActive(key, false);
    }

    // キー名の正規化
    private normalizeKey(key: string): string | undefined {
        const lowerKey = key.toLowerCase();
        return keyDict[lowerKey] || lowerKey;
    }

    // キーのアクティブ状態を設定
    private setKeyActive(key: string, isActive: boolean): void {
        const element = document.getElementById(`key-${key}`);
        if (element) {
            element.classList.toggle('active', isActive);
        }
    }

    // キーが押されているかチェック
    public isKeyPressed(key: string): boolean {
        return !!this.keyState[key.toLowerCase()];
    }
}
ただし、キー操作だけだとスマホの場合は出来なくなっちゃうのでスマホなどのタッチデバイスに対応するため、さらにジョイスティックUIを追加します。
こちらの記事を参考にさせていただきました。
JoystickControlというクラスでタップによる入力を管理しつつ、先ほどのKeyInputManagerも呼び出してキー入力にも対応させます。
<body>
    <!-- 省略 -->
    <div id="joystick-control" class="joystick-control">
        <div id="joystick-frame" class="joystick-frame"></div>
        <div id="joystick-ball" class="joystick-ball">
            <div class="joystick-ball-inner"></div>
        </div>
        <div class="triangle" style="--index: 1"><span></span></div>
        <div class="triangle" style="--index: 2"><span></span></div>
        <div class="triangle" style="--index: 3"><span></span></div>
        <div class="triangle" style="--index: 4"><span></span></div>
    </div>
</body>
/* PCはジョイスティックUIを非表示 */
#joystick-control {
    display: none;
}

/* スマホ */
@media (max-width: 768px) {
    * {
        /* スマホのスワイプリロード無効 */
        overscroll-behavior-y: none !important;
        /* スマホのタップのハイライト非表示 */
        -webkit-tap-highlight-color: transparent;
    }

    /* スマホはキーのUIを非表示 */
    #key-control {
        display: none;
    }

    /* ジョイスティックUI */
    #joystick-control {
        display: block;
        position: absolute;
        z-index: 10;
        width: 100%;
        height: 240px;
        bottom: 0;
        pointer-events: none;
        display: grid;
        place-items: center;
    }
    #joystick-control > .joystick-frame {
        width: 130px;
        height: 130px;
        border-radius: 100rem;
        border: 2px white solid;
    }

    /* ジョイスティックのボール(これをタップして操作する) */
    #joystick-control > .joystick-ball {
        pointer-events: auto;
        width: 80px;
        height: 80px;
        border-radius: 100rem;
        position: absolute;
        filter: drop-shadow(0 0 5px #24fff4);
        display: grid;
        place-items: center;
    }

    /* ジョイスティックのボールの見た目 */
    #joystick-control > .joystick-ball > .joystick-ball-inner {
        pointer-events: none;
        width: 50px;
        height: 50px;
        background: white;
        border-radius: 100rem;
        position: absolute;
        filter: drop-shadow(0 0 5px #24fff4);
    }

    /* 中の三角形 */
    #joystick-control > .triangle {
        z-index: 20;
        position: absolute;
        top: 50%;
        left: 50%;
        --angle: calc(360deg / 4 * var(--index));
        --d: 50px;
        --x: calc(cos(var(--angle)) * var(--d));
        --y: calc(sin(var(--angle)) * var(--d));
        translate: calc(var(--x) - 50%) calc(var(--y) - 50%);
        rotate: calc(var(--angle) + 90deg);
        user-select: none;
        pointer-events: none;
        background: #ffffff;
        height: calc(tan(60deg) * 10px / 2);
        width: 19px;
        clip-path: polygon(50% 0, 100% 100%, 0 100%);
    }
}
import { KeyInputManager } from './keyInputManager';

// ジョイスティックの操作を管理するクラス
export class JoystickControl {
    private joystickBall: HTMLElement;
    private joystickCenterX: number = 0;
    private joystickCenterY: number = 0;
    private joystickLimit: number;
    private touchX: number = 0; // タッチ入力の X 値
    private touchY: number = 0; // タッチ入力の Y 値

    private keyManager: KeyInputManager;

    constructor(joystickId: string, joystickLimit: number = 35) {
        const element = document.getElementById(joystickId);
        if (!element) throw new Error(`Joystick element with ID "${joystickId}" not found.`);

        this.joystickBall = element;
        this.joystickLimit = joystickLimit;

        // キー入力マネージャの初期化
        this.keyManager = new KeyInputManager();

        this.init();
    }

    // 初期化
    private init(): void {
        this.updateJoystickCenter();
        this.addEventListeners();
        window.addEventListener('resize', () => this.updateJoystickCenter());
    }

    // ジョイスティックの中心位置を更新
    private updateJoystickCenter(): void {
        const rect = this.joystickBall.getBoundingClientRect();
        this.joystickCenterX = rect.left + this.joystickBall.clientWidth / 2;
        this.joystickCenterY = rect.top + this.joystickBall.clientHeight / 2;
    }

    // イベントリスナーを追加
    private addEventListeners(): void {
        this.joystickBall.addEventListener('touchmove', (event) => this.dragMove(event));
        this.joystickBall.addEventListener('touchend', () => this.dragLeave());
    }

    // タッチ移動処理
    private dragMove(event: TouchEvent): void {
        event.preventDefault();

        const pageX = event.touches[0].pageX;
        const pageY = event.touches[0].pageY;

        this.touchX = Math.min(Math.max(pageX - this.joystickCenterX, -this.joystickLimit), this.joystickLimit);
        this.touchY = Math.min(Math.max(pageY - this.joystickCenterY, -this.joystickLimit), this.joystickLimit);

        this.updateJoystickBall();
    }

    // タッチリリース処理
    private dragLeave(): void {
        this.touchX = 0;
        this.touchY = 0;
        this.updateJoystickBall();
    }

    // ジョイスティックの位置を更新
    private updateJoystickBall(): void {
        const keyX = this.keyManager.isKeyPressed('a') ? -this.joystickLimit : this.keyManager.isKeyPressed('d') ? this.joystickLimit : 0;
        const keyY = this.keyManager.isKeyPressed('w') ? -this.joystickLimit : this.keyManager.isKeyPressed('s') ? this.joystickLimit : 0;

        // タッチとキー入力を合算
        let totalX = this.touchX + keyX;
        let totalY = this.touchY + keyY;

        // 円の範囲内に制限
        const distance = Math.sqrt(totalX * totalX + totalY * totalY);
        if (distance > this.joystickLimit) {
            const angle = Math.atan2(totalY, totalX);
            totalX = Math.cos(angle) * this.joystickLimit;
            totalY = Math.sin(angle) * this.joystickLimit;
        }

        this.joystickBall.style.translate = `${totalX}px ${totalY}px`;
    }

    // ジョイスティックの方向を取得
    public getDirection(): { x: number; y: number } {
        const keyX = this.keyManager.isKeyPressed('a') ? -this.joystickLimit : this.keyManager.isKeyPressed('d') ? this.joystickLimit : 0;
        const keyY = this.keyManager.isKeyPressed('w') ? -this.joystickLimit : this.keyManager.isKeyPressed('s') ? this.joystickLimit : 0;

        const totalX = this.touchX + keyX;
        const totalY = this.touchY + keyY;

        const magnitude = Math.sqrt(totalX ** 2 + totalY ** 2);
        if (magnitude === 0) {
            return { x: 0, y: 0 }; // ジョイスティックが動いていない
        }

        return {
            x: totalX / this.joystickLimit, // Xの正規化 (-1 ~ 1)
            y: -totalY / this.joystickLimit, // Yの反転で上が正
        };
    }
}
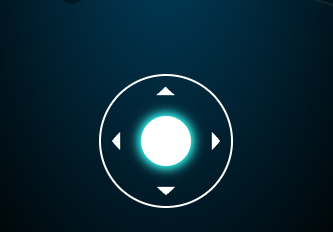
レスポンシブ対応により、スマホの時はジョイスティックのUIが表示されます。タッチデバイスからの操作にも対応できます。
キャラクターモデルを動かす
ユーザー側からの入力によりキャラクターモデルを歩かせます。キャラクターを動かす時にはglbのモデルに含まれている以下2つのアニメーションを使用します
agree
- キャラクターを動かしてない時のアニメーション
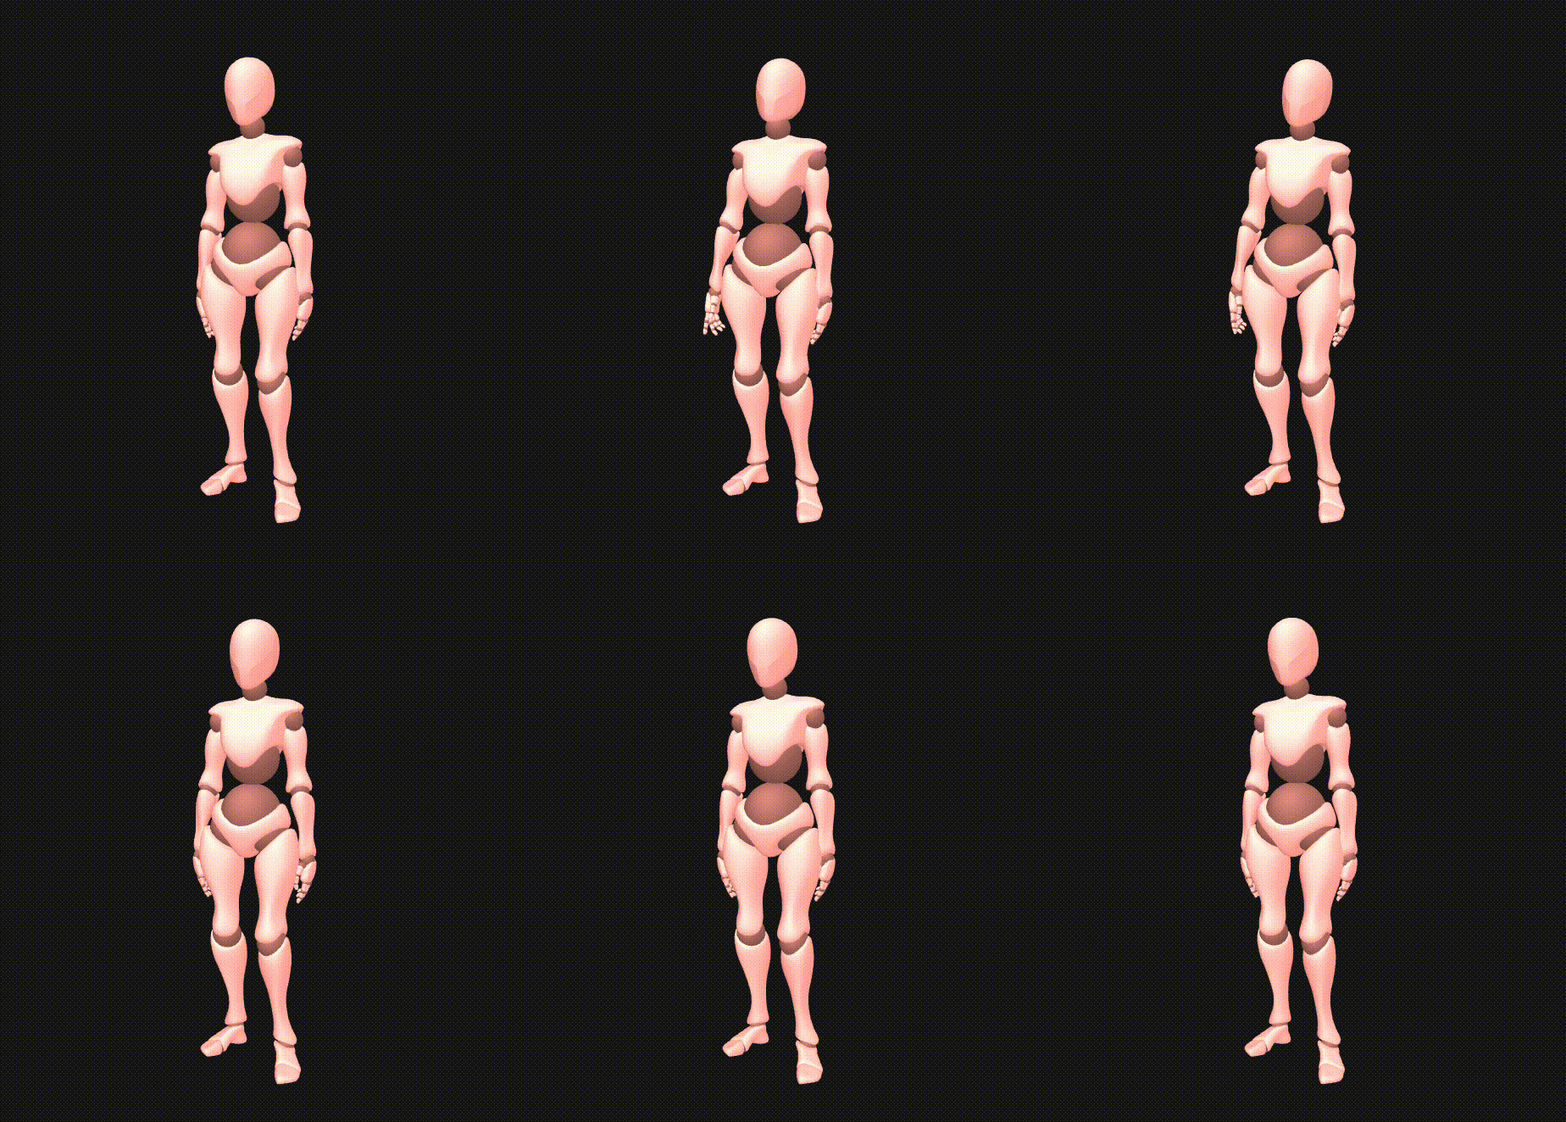
run
- キャラクターを動かしてるときのアニメーション

床の高さを取得して、その上にキャラクターを歩かせる必要があります。
イメージとしてはこんな感じです。
キャラクターの操作を管理するTPSControlsクラスを作成します。
ちなみに実装にはこちらのリポジトリを参考にしています。
import * as THREE from 'three';
import { OrbitControls } from 'three/examples/jsm/controls/OrbitControls.js';
import { TrackballControls } from 'three/examples/jsm/controls/TrackballControls.js';

const groundRay = new THREE.Raycaster(); // 地面用のレイキャスター
const downDirection = new THREE.Vector3(0, -1, 0); // 下方向のベクトル

export class TPSControls {
    private model: THREE.Group;
    private mixer: THREE.AnimationMixer;
    private animationsMap: Map<string, THREE.AnimationAction> = new Map(); // run, agree
    private orbitControl: OrbitControls;
    private zoomControls: TrackballControls;
    private camera: THREE.PerspectiveCamera;
    private y: number = 100;

    // 状態
    private toggleRun: boolean = true;
    private currentAction: string;

    // 一時的なデータ
    private walkDirection = new THREE.Vector3();
    private rotateAngle = new THREE.Vector3(0, 1, 0);
    private rotateQuarternion: THREE.Quaternion = new THREE.Quaternion();
    private cameraTarget = new THREE.Vector3();

    // 定数
    private fadeDuration: number = 0.2; // フェード時間
    private runVelocity: number = 7; // 速度

    constructor(
        model: THREE.Group,
        mixer: THREE.AnimationMixer,
        animationsMap: Map<string, THREE.AnimationAction>,
        orbitControl: OrbitControls,
        zoomControls: TrackballControls,
        camera: THREE.PerspectiveCamera,
        currentAction: string,
    ) {
        this.model = model;
        this.mixer = mixer;
        this.animationsMap = animationsMap;
        this.currentAction = currentAction;
        this.animationsMap.forEach((value, key) => {
            if (key == currentAction) {
                value.play();
            }
        });
        this.orbitControl = orbitControl;
        this.zoomControls = zoomControls;
        this.camera = camera;
        this.updateTarget();
    }

    // `Run`アニメーション切り替え
    public switchRunToggle() {
        this.toggleRun = !this.toggleRun;
    }

    // キャラクターの位置を取得するメソッド
    public getPosition() {
        return this.model.position;
    }

    // キャラクターの更新処理
    public update(delta: number, joystickDirection: { x: number; y: number }, groundMesh: THREE.Mesh) {
        const directionPressed = joystickDirection.x !== 0 || joystickDirection.y !== 0;

        const characterPosition = this.getPosition();
        const rayPosition = characterPosition.clone();

        // レイの位置を少し上にずらす
        rayPosition.y += 1.5;

        // 下方向のレイを作成
        groundRay.set(rayPosition, downDirection);

        // レイと地面の交差判定
        const intersects = groundRay.intersectObject(groundMesh, true);

        // 地面の高さを取得
        let y = this.y;
        if (intersects.length > 0) {
            y = intersects[0].point.y;
            this.y = y;
        }

        // アニメーション切り替え
        let play = '';
        if (directionPressed && this.toggleRun) {
            play = 'run';
        } else {
            play = 'agree';
        }
        if (this.currentAction != play) {
            const toPlay = this.animationsMap.get(play);
            const current = this.animationsMap.get(this.currentAction);

            if (!current || !toPlay) return;
            current.fadeOut(this.fadeDuration);
            toPlay.reset().fadeIn(this.fadeDuration).play();

            this.currentAction = play;
        }

        this.mixer.update(delta);

        if (this.currentAction == 'run') {
            // カメラの向きに基づく基準角度を計算
            const angleYCameraDirection = Math.atan2(this.camera.position.x - this.model.position.x, this.camera.position.z - this.model.position.z);

            // ジョイスティック方向をカメラ基準で回転
            this.walkDirection.set(joystickDirection.x, 0, -joystickDirection.y); // XとZを入れ替え
            this.walkDirection.normalize();
            this.walkDirection.applyAxisAngle(this.rotateAngle, angleYCameraDirection); // カメラ基準で回転

            // 衝突判定
            const velocity = this.runVelocity;
            const moveDistance = velocity * delta;

            // モデルの回転を調整
            const moveAngle = Math.atan2(this.walkDirection.x, this.walkDirection.z);
            this.rotateQuarternion.setFromAxisAngle(this.rotateAngle, moveAngle);
            this.model.quaternion.rotateTowards(this.rotateQuarternion, 0.2);

            // 移動計算
            const moveX = this.walkDirection.x * moveDistance;
            const moveZ = this.walkDirection.z * moveDistance;
            this.model.position.x += moveX;
            this.model.position.z += moveZ;

            // 地面の高さ更新
            this.model.position.y = y;

            // カメラターゲット更新
            this.updateTarget();
        }
    }

    // カメラ、コントロールのターゲットの更新
    private updateTarget() {
        // 現在のカメラ位置とターゲットの差分を計算
        const cameraOffset = new THREE.Vector3().subVectors(this.camera.position, this.orbitControl.target);

        // モデルの現在位置を取得
        const modelY = this.model.position.y;

        // カメラターゲットの更新
        this.cameraTarget.set(
            this.model.position.x,
            modelY + 1, // 必要ならオフセットを調整
            this.model.position.z,
        );

        // カメラの新しい位置をターゲットのオフセットを基準に更新
        this.camera.position.copy(this.cameraTarget).add(cameraOffset);

        // コントロールのターゲット更新
        this.orbitControl.target.copy(this.cameraTarget);
        this.zoomControls.target.copy(this.cameraTarget);

        // カメラの更新を確定
        this.orbitControl.update();
        this.zoomControls.update();
        this.camera.updateProjectionMatrix();
    }
}
キャラクターモデルを追加する時にTPSControlsクラスを初期化します。またアニメーション処理に床のオブジェクトをTPSControlsクラスのupdateメソッドの引数として渡すことで、キャラクターを動かすたびに床の高さを計算し、床の上を歩くように動かすことができます。キャラクターが動く方向はJoystickControlクラスのgetDirectionメソッドを呼び出して、スティックが倒された方向もしくはキー操作による方向を取得して方向が決まります。
また、JoystickControlクラスのgetDirectionメソッドを呼び出して、ステックが倒れた方向にも対応させます。
import { JoystickControl } from './joystickControl';
import { TPSControls } from './tpsControls';


// モデルの読み込みとキャラクターコントロールの設定
let tpsControls: TPSControls;

// モデルの追加
const addModel = (url: string) => {
    new GLTFLoader().load(url, (gltf) => {
        // 省略

        // GLTFアニメーションの管理
        const gltfAnimations: THREE.AnimationClip[] = gltf.animations;
        const mixer = new THREE.AnimationMixer(model);
        const animationsMap: Map<string, THREE.AnimationAction> = new Map();
        gltfAnimations.forEach((a: THREE.AnimationClip) => {
            animationsMap.set(a.name, mixer.clipAction(a));
        });

        // TPSコントロールの初期化処理
        tpsControls = new TPSControls(model, mixer, animationsMap, orbitControls, zoomControls, camera, 'agree');
        tpsControls.update;
    });
};


// 経過時間の管理
const clock = new THREE.Clock();

// ジョイスティックコントロールの設定
const joystick = new JoystickControl('joystick-ball');

// アニメーション
const animate = () => {
    requestAnimationFrame(animate);

    // 省略

    let mixerUpdateDelta = clock.getDelta();
    if (tpsControls) {

        // ユーザーが入力した方向を取得
        const joystickDirection = joystick.getDirection();

        // 床のオブジェクトを取得
        const ground = scene.getObjectByName('FloorSurface');

        if (ground) {
            // 床が存在すればキャラクターの位置の更新
            tpsControls.update(mixerUpdateDelta, joystickDirection, ground);
        }
    }

    // 省略
};
animate();
ついでにTPS用に、カメラ操作に制限を加えておきます。
orbitControls.minDistance = 1; // カメラが近づける最小距離
orbitControls.maxDistance = 7; // カメラが遠ざかれる最大距離
orbitControls.maxPolarAngle = Math.PI / 2 + 0.35; // カメラが上を向ける最大角度
orbitControls.minPolarAngle = Math.PI / 2 - 0.8; // カメラが下を向ける最小角度
orbitControls.update(); // 初期化
こんな感じで床の上をキャラクターを歩き回れるようになりました。
壁の衝突判定をする
床の上を歩けるようにはなりましたが、柱や壁を突き抜けしまうので、横方向にレイを飛ばして障害物の衝突判定をします。
障害物の衝突判定用にQGISで作ったHitBoxという命名のFlatGeobufのデータを読み込みます。
床と合わせて三角形のメッシュが多くなり、レイキャストの計算に負荷がかかるので、効率化のためthree-mesh-bvhを使用します。また、見えないようにマテリアルには非表示設定をしておきます。
npm install three-mesh-bvh
import { MeshBVH, acceleratedRaycast } from 'three-mesh-bvh';

// BVHの高速化されたレイキャストを有効にする
THREE.Mesh.prototype.raycast = acceleratedRaycast;

// レイキャストの高速化対象にするオブジェクトの指定
type IsRaycastObjectName = 'FloorSurface' | 'HitBox';
const raycastObjectNames: IsRaycastObjectName[] = ['FloorSurface', 'HitBox'];

const addPlateauObj = async (url: string, name: string, material: THREE.Material) => {
    plateauLoader.load(url).then((geometry: THREE.BufferGeometry) => {
        // レイキャストの高速化
        if (raycastObjectNames.includes(name as IsRaycastObjectName)) {
             geometry.boundsTree = new MeshBVH(geometry);
        }

    // 省略
    });
};

// 衝突判定マテリアル
export const hitBoxMaterial = new THREE.MeshBasicMaterial({
    transparent: true,
    side: THREE.DoubleSide, // 両面
    visible: false, // 非表示にする
});

// オブジェクトを読み込み
const loadObjs = async () => {
    const plateauObjPromises = [
        // 省略
        // 衝突判定用のオブジェクトを読み込む
        addPlateauObj('plateau_shinjuku/ubld/HitBox.fgb', 'HitBox', hitBoxMaterial),
    ];

    // 省略
};

// 読み込み開始
loadObjs();
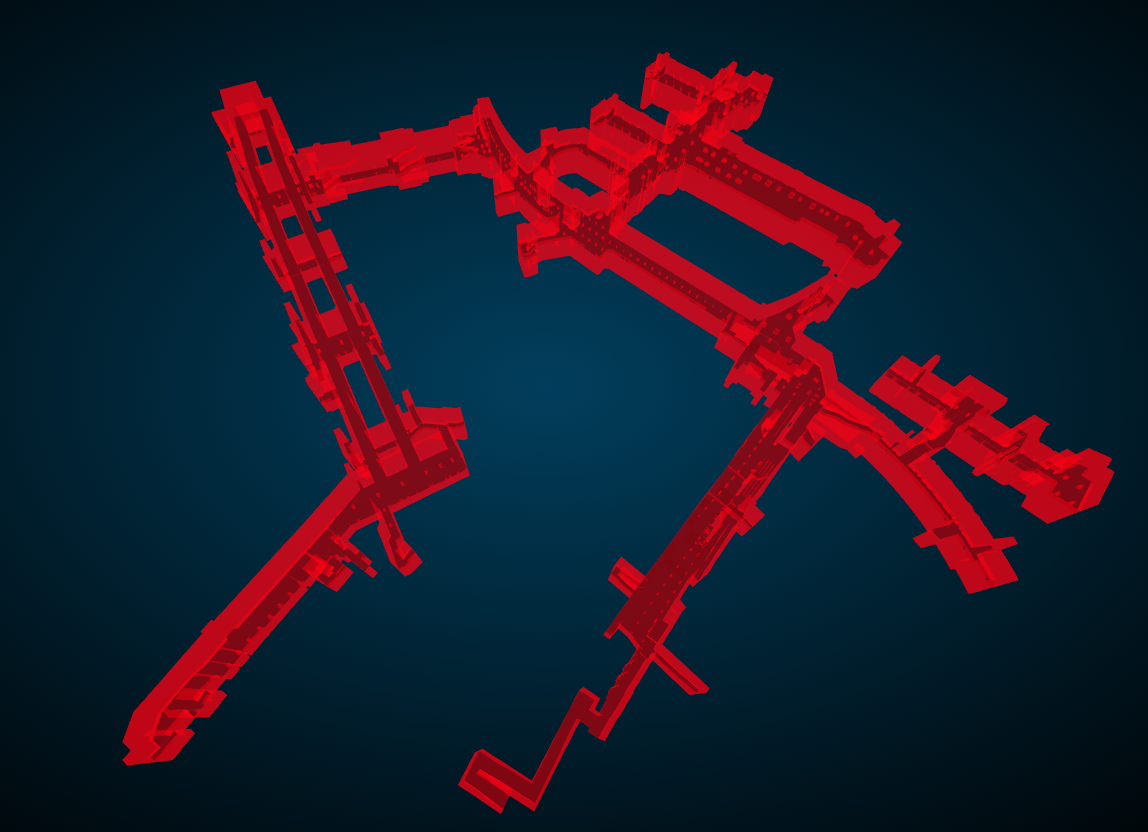
ちなみにマテリアルに色をつけて衝突判定の部分を可視化するとこんな感じになります(赤色の部分)。

LOD1の地下街モデルで床を包むことでキャラクターが床から落ちないようにしてます。
アニメーションの処理を修正し、床と一緒に衝突判定用のオブジェクトをupdateメソッドの引数にわたします。
// アニメーション
const animate = () => {
    // 省略

    let mixerUpdateDelta = clock.getDelta();
    if (tpsControls) {
        const joystickDirection = joystick.getDirection();
        const ground = scene.getObjectByName('FloorSurface'); // 床
        const hitBox = scene.getObjectByName('HitBox'); // 当たり判定

        // 床と衝突判定の2つのオブジェクトが存在する場合のみアップデート
        if (ground && hitBox) {
            tpsControls.update(mixerUpdateDelta, joystickDirection, ground, hitBox);
        }
    }

    // 省略
};
animate();
TPSControlsクラスのupdateメソッドを修正し、衝突判定にも対応させ壁や柱をすり抜けないようにします。具体的には障害物に当たったらそこで処理をとめることでキャラクターをそれ以上動かないようにします。
const wallRay = new THREE.Raycaster(); // 壁用のレイキャスター

export class TPSControls {
    // 省略

    // 衝突判定のメソッド
    public checkCollision(mesh: THREE.Mesh, distance: number): boolean {
        // 現在のモデルの位置を取得
        const origin = this.model.position.clone();
        origin.y += 1.0; // 1.0 の値は適宜調整

        // モデルの向きを基準にしたレイの方向
        const direction = this.walkDirection;
        direction.normalize();

        // レイキャスターの設定
        wallRay.set(origin, direction);
        wallRay.far = distance + 0.5; // チェックする範囲を設定

        // 衝突判定
        const intersects = wallRay.intersectObject(mesh, true);
        return intersects.length > 0; // 衝突があれば true を返す
    }


    // キャラクターの更新処理(collisionMeshを追加)
    public update(delta: number, joystickDirection: { x: number; y: number }, groundMesh: THREE.Mesh, collisionMesh: THREE.Mesh) {
        // 省略

        if (this.currentAction == 'run') {
            // 省略

            // 衝突判定
            const velocity = this.runVelocity;
            const moveDistance = velocity * delta;

            if (this.checkCollision(collisionMesh, moveDistance)) {
                return; // 衝突があった場合は移動をキャンセル
            }

           // 省略
        }
    }

    // 省略
}
地理情報データから動的にThree.jsに描画するメリット
ここまでで、FlatGeobuf形式を頑張って動的に変換しThree.jsに描画するという行為を行ってますが、CityGMLをOBJやglb形式に変換するPLATEAU GIS Converterというのを使えば3D都市モデルを簡単にThree.jsに取り込めます。
しかし、欠点としてOBJやglb形式に変換する際に地平直交座標系 (ENU座標系)に変換されるため(※2024年12月現在)、元の位置情報を失うこととなり、PLATEAU以外の他の位置情報データと重ね合わせるのがすこし困難になるデメリットがあるため、今回はあえてこのような手法をとってます。
PLATEAU以外の地理情報データの描画
では、他の地理情報データも重ねてみましょう。以下のラインデータを使用します。
-
基盤地図情報 軌道の中心線(Railroad Track Centerline)
https://fgd.gsi.go.jp/download/menu.php -
地理院ベクトル 道路中心線
https://github.com/gsi-cyberjapan/experimental_rdcl?tab=readme-ov-file -
R1整備_歩行空間ネットワークデータ(新宿駅周辺)(2018年3月版適用)
https://www.hokoukukan.go.jp/metadata/resource/251
※道路中心線はgeojsonタイルとなっているので、下記のようなシェルスクリプトで各タイルをダウンロードし、QGIS上でマージする必要があります。
#!/bin/bash

# タイル範囲の設定
z=16
x_min=58197
x_max=58201
y_min=25802
y_max=25806

# 出力フォルダ
output_dir="tiles"
mkdir -p $output_dir

# ダウンロード
for x in $(seq $x_min $x_max); do
    for y in $(seq $y_min $y_max); do
        url="https://cyberjapandata.gsi.go.jp/xyz/experimental_rdcl/$z/$x/$y.geojson"
        output_file="$output_dir/${z}_${x}_${y}.geojson"

        # ファイルをダウンロード
        echo "Downloading $url..."
        curl -s -o "$output_file" "$url"
    done
done
同様にQGISで各データをEPSG:6677系のFlatGeobuf形式で保存し、Three.jsに読み込ませるためのクラスを自作します。
ここで問題となったのが、これらのラインデータは2次元データので、正確な高さを合わせるのが困難だったので、あえて宙に浮かせる表現にします。
また、アニメーション用に累積距離の情報a_distanceを計算し、頂点に加えてます。マテリアルを使いまわせるように色情報a_colorとアニメーションの速度の情報a_speedも加えます。
import * as THREE from 'three';
import { geojson } from 'flatgeobuf';

interface Feature {
    type: string;
    properties: {
        [key: string]: any;
        z?: number;
    };
    geometry: {
        type: string;
        coordinates: number[][][];
    };
}

type Vec2 = [number, number];

export type FGB2DLineOption = {
    color: THREE.Color;
    height?: number;
    speed?: number;
};

/** fgbを読み込みライン用のBufferGeometryを作成するクラス */
export class FGB2DLineLoader {
    private center: Vec2;

    constructor(center: Vec2) {
        this.center = center;
    }

    public async load(
        url: string,
        option: FGB2DLineOption = {
            color: new THREE.Color(0xffffff),
            height: 0,
            speed: 1.0,
        },
    ): Promise<THREE.BufferGeometry> {
        const response = await fetch(url);

        // フィーチャのイテレータを作成
        const featureIterator = geojson.deserialize(response.body as ReadableStream) as AsyncIterable<Feature>;

        const mergeVertices: number[] = []; // 全ての頂点を格納する配列
        const mergeIndices: number[] = []; // 全てのインデックスを格納する配列
        const mergeDistances: number[] = [];
        const mergeColors: number[] = [];
        const mergeSpeeds: number[] = [];

        let indexOffset = 0;
        let indexId = 0;

        for await (const feature of featureIterator) {
            const coordinates = feature.geometry.coordinates;

            coordinates.forEach((segments) => {
                const vertices: number[] = []; // 現在のラインの頂点配列
                const indices: number[] = []; // 現在のラインのインデックス配列
                const distances: number[] = []; // 現在のラインの距離配列
                const colors: number[] = []; // 現在のラインの色配列
                const speeds: number[] = []; // 現在のラインの速度配列
                let cumulativeDistance = 0; // 累積距離
                segments.forEach((vec3, idx) => {
                    vertices.push(vec3[0] - this.center[0], vec3[1] - this.center[1], 0);
                    colors.push(option.color.r, option.color.g, option.color.b);
                    speeds.push(option.speed || 1.0);

                    // 累積距離を計算
                    if (idx > 0) {
                        const v1 = new THREE.Vector3(vertices[(idx - 1) * 3], vertices[(idx - 1) * 3 + 1], vertices[(idx - 1) * 3 + 2]);
                        const v2 = new THREE.Vector3(vec3[0], vec3[1], 0);
                        cumulativeDistance += v1.distanceTo(v2);
                    }
                    distances.push(cumulativeDistance);
                });

                // ラインのインデックスを作成
                for (let i = 0; i < segments.length - 1; i++) {
                    indices.push(indexOffset + i, indexOffset + i + 1);
                }

                indexOffset += segments.length;

                // グローバルな頂点・インデックス配列に追加
                mergeVertices.push(...vertices);
                mergeIndices.push(...indices);
                mergeDistances.push(...distances);
                mergeColors.push(...colors);
                mergeSpeeds.push(...speeds);
            });

            indexId++;
        }

        // BufferGeometryを作成
        const geometry = new THREE.BufferGeometry();
        geometry.setAttribute('position', new THREE.Float32BufferAttribute(mergeVertices, 3));
        geometry.setIndex(mergeIndices);
        geometry.setAttribute('a_distance', new THREE.Float32BufferAttribute(mergeDistances, 1));
        geometry.setAttribute('a_color', new THREE.Float32BufferAttribute(mergeColors, 3));
        geometry.setAttribute('a_speed', new THREE.Float32BufferAttribute(mergeSpeeds, 1));

        // 回転
        const matrix = new THREE.Matrix4().makeRotationX(Math.PI / -2);
        geometry.applyMatrix4(matrix);

        // y方向に移動
        geometry.translate(0, option.height as number, 0);

        return geometry;
    }
}
import { FGB2DLineLoader } from './lineGeometryLoader';
import type { FGB2DLineOption } from './lineGeometryLoader';

const lineLoader = new FGB2DLineLoader(SCENE_CENTER_COORDS);
const addLineObj = async (url: string, name: string, option: FGB2DLineOption) => {
    lineLoader.load(url, option).then((geometry: THREE.BufferGeometry) => {
        const obj = new THREE.LineSegments(geometry, lineMaterial);
        obj.name = name;

        // シーンに追加
        scene.add(obj);
    });
};

// オブジェクトを読み込み
const loadObjs = async () => {
    const plateauObjPromises = [
        // 省略
        addLineObj('line/shinjuku_link.fgb', 'link', { color: new THREE.Color('rgb(255, 0, 204)'), height: 40, speed: 0.8 }),
        addLineObj('line/gsi_RailCL.fgb', 'RailCL', { color: new THREE.Color('rgb(85, 255, 0)'), height: 60, speed: 1.2 }),
        addLineObj('line/gsi_road.fgb', 'road', { color: new THREE.Color('rgb(255, 255, 0)'), height: 50, speed: 1.0 }),
    ];

    // 省略
};

// 読み込み開始
loadObjs();
ラインにアニメーションを加えるためにuniforms変数のu_timeの数値がレンダリングするたびに更新するようにします。
// アニメーション
const animate = () => {
    requestAnimationFrame(animate);

    // 省略

    uniforms.u_time.value = clock.getElapsedTime();
};
animate();
マテリアルを定義しシェーダーを書きます。
import lineVS from './shader/line/vertex.glsl?raw';
import lineFS from './shader/line/fragment.glsl?raw';

// ラインマテリアル
const lineMaterial = new THREE.ShaderMaterial({
    transparent: true,
    uniforms: uniforms,
    vertexShader: lineVS,
    fragmentShader: lineFS,
    glslVersion: THREE.GLSL3,
});
precision highp float;

in float a_distance;
in vec3 a_color;
in float a_speed;

uniform float u_time;

out vec2 v_uv;
out vec3 v_normal;
out float v_cumulativeDistance;
out vec3 v_color;
out float v_fogDistance;
out float v_speed;

void main() {
    v_uv = uv;
    v_normal = normal;
    v_cumulativeDistance = a_distance;
    v_color = a_color;
    v_speed = a_speed;

    // 中心 (0, 0, 0) からの距離を計算
    vec4 worldPosition = modelMatrix * vec4(position, 1.0);
    v_fogDistance = length(worldPosition.xyz);

    gl_Position = projectionMatrix * modelViewMatrix * vec4(position, 1.0);
}
precision highp float;

in vec2 v_uv;
in vec3 v_normal;
in vec3 v_color;
in float v_cumulativeDistance;
in float v_fogDistance;
in float v_speed;
uniform float u_time;
uniform float u_fogFar;
uniform float u_fogNear;

out vec4 fragColor;

void main() {
    float t = u_time * 5.0 * v_speed; // 速度

    // UV座標を計算
    vec2 uv = v_uv;

    // 色の範囲を設定
    vec3 sub_color = vec3(1.0); // 白
    vec3 main_color = v_color; // 頂点色

    // 累積距離に基づいたアニメーション
    float scale = 0.00005; // 色変化の広がり
    float gradient = mod(v_cumulativeDistance * scale + t * -0.5, 1.0); // 0から1の範囲でループ

    // フォッグの割合を計算 (線形補間)
    float fogFactor = smoothstep(u_fogNear, u_fogFar, v_fogDistance);

    // アルファ値の統一
    float gradientAlpha = smoothstep(0.2, 0.8, gradient); // グラデーションでの透明度
    float alpha = (1.0 - fogFactor) * gradientAlpha; // フォッグとグラデーションのアルファ値を掛け合わせる

    // 色を補間
    vec3 color = mix(sub_color, main_color, gradient);

    fragColor = vec4(color, alpha); // アルファ値を適用
}
PLATEAU3D都市モデルとうまく位置が重なりました(高さは諦めました)。

また、平面直角座標系を基準として各モデルの位置を合わせているので、proj4などで世界測地系に座標を変換する関数を自作すれば、キャラクターの位置を世界測地系の経緯度情報で出力できます。JavaScriptで動く地図ライブラリに現在のキャラクターの位置を表示させゲーム内マップを作ることもできます。
npm install proj4
import proj4 from 'proj4';

// EPSG:6677の座標変換プロジェクションを定義
proj4.defs('EPSG:6677', '+proj=tmerc +lat_0=36 +lon_0=139.833333333333 +k=0.9999 +x_0=0 +y_0=0 +ellps=GRS80 +units=m +no_defs');

// シーンの中心にする地理座標[x, y] (EPSG:6677)
const SCENE_CENTER_COORDS: [number, number] = [-12043, -34145];

/* ワールド座標XZを経緯度に変える **/
export const worldPotisonToMapPotison = (x: number, z: number): [number, number] => {
    const lon = SCENE_CENTER_COORDS[0] + x;
    const lat = SCENE_CENTER_COORDS[1] + z * -1;
    const lnglat = proj4('EPSG:6677', 'WGS84', [lon, lat]) as [number, number];
    return lnglat;
};

/* 経緯度をワールド座標XZに変える **/
export const mapPotisonToWorldPotison = (
    lng: number,
    lat: number,
): {
    x: number;
    z: number;
} => {
    const vec2 = proj4('WGS84', 'EPSG:6677', [lng, lat]) as [number, number];
    const x = vec2[0] - SCENE_CENTER_COORDS[0];
    const z = (vec2[1] - SCENE_CENTER_COORDS[1]) * -1;
    return { x, z };
};
MapLibre GL JSでゲーム内マップを作成した例
外部APIを叩いてリアルタイムの位置情報を載せることもできるので、スマホの現在地情報をキャラクターの位置にするということも実質可能ではありますが、通常の地図アプリと比べて精度がかなり求められるのと、今回のような構内の3D表現となると屋内測位による正確な位置と高さ情報が求められるのに注意が必要です。
おわりに
PLATEAU 3D都市モデルは、属性情報に基づいた可視化や分析を主な目的として設計されています。そのため、今回使用した地下街モデルのデータには、普段開放されている通路や出入り口のところに「壁」や「障害物」のようなオブジェクトが含まれている場合が見受けられました。これらはキャラクターを移動させる際に通行を妨げる要因となることがあります。
こうした点から、ゲーム制作で実用的に利用する場合には、ある程度の手動加工やデータの調整が必要になりそうです。
