SwiftUIが出て数年経ちましたが、既存のUIKitのプロジェクトに導入しようとするとリアクティブプログラミングの学習やアーキテクチャの切り替えなど導入障壁が高いと感じていました
そのため、既存のUIKitのプロジェクトのアーキテクチャやロジックを変更することなく、レイアウトを組む部分を宣言的に書けるようにするライブラリを作りました(と言いつつ宣言的UIとは何かが分かってないので根本的に違うかもしれませんw)
このライブラリを使用しても既存の通りの記述(つまり手続的に書く記述)と混ぜることもできるため、ひとつのViewController内のさらに一部だけ導入するといったことも可能です
まとめると以下のような要件で使ってもらえることを期待しています
・既存のアーキテクチャや実装をなるべく変えたくないよ
・SwiftUIはバージョンあがればどうせ書き方変わるだろうしまだ手は出せないよ
・RxSwift,Combineとか難しそうだし、ただ宣言的にUIを組みたいだけだよ
この記事では使い方を紹介していきます
ライブラリのリンクはこちらです
環境
| 名前 | バージョン |
|---|---|
| DeclarativeUIKit | 0.17.0 |
| Installation | SwiftPackageManager/ CocoaPods |
| iOS | 11以上 |
| Swift | 5.0 |
| Simulator | iPhone13 |
基本
宣言的にレイアウトを書く準備
宣言的にレイアウトを組むにはUIViewControllerでdeclarativeメソッドを呼び出します
import UIKit
import DeclarativeUIKit

class DeclarativeViewController: UIViewController {

    override func viewDidLoad() {
        super.viewDidLoad()
        self.view.backgroundColor = .white

         //宣言的にレイアウトを組んでいくためのメソッド
        self.declarative {
            //セーフエリア内にViewを配置
            UIView()
                .backgroundColor(.red)
        }

       return
    }
}
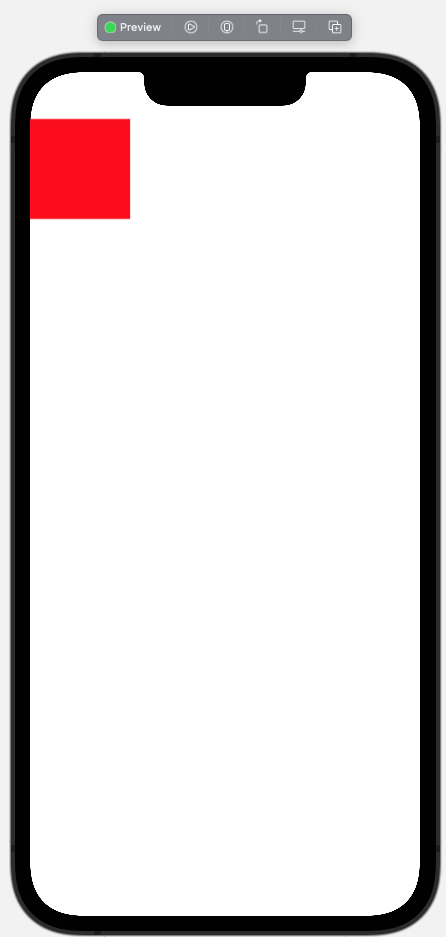
実行結果はこのようになります

Xcode Previewで確認
Xcode PreviewはUIKitでも使えるため、当然DeclarativeUIKitで組んだレイアウトもXcode Previewで確認することができます
import SwiftUI

private struct ViewController_Wrapper: UIViewControllerRepresentable {
    typealias ViewController = SimpleViewController
    func makeUIViewController(context: Context) -> ViewController {
        let vc = ViewController()
        return vc
    }

    func updateUIViewController(_ vc: ViewController, context: Context) {
    }
}

struct SimpleViewController_Previews: PreviewProvider {
    static var previews: some View {
        Group {
            ViewController_Wrapper()
        }
    }
}
UIStackView
DeclarativeUIKitはUIStackViewを使ってレイアウトを組むことを基本とします
縦に並べる
self.declarative {
    UIStackView.vertical {
        UIView()
            .backgroundColor(.red)
        UIView()
            .backgroundColor(.green)
        UIView()
            .backgroundColor(.blue)
    }
    .spacing(10)
    .distribution(.fillEqually)
}

横に並べる
self.declarative {
    UIStackView.horizontal {
        UIView()
            .backgroundColor(.red)
        UIView()
            .backgroundColor(.green)
        UIView()
            .backgroundColor(.blue)
    }
    .spacing(10)
    .distribution(.fillEqually)
}

指定した大きさにする
UIViewのパラメータと組み合わせて配置します
指定した大きさにして左上寄せに配置する
self.declarative {
    UIStackView.vertical {
        UIView()
            .backgroundColor(.red)
            //大きさを指定する
            .size(width: 100, height: 100)
            //こう指定することもできる
//          .width(100)
//          .height(100)

        //下に余白をつける
        UIView.spacer()

    }
    //UIStackViewのパラメータで左寄せにする
    .alignment(.leading)
}

指定した大きさにして上中央に配置する
self.declarative {
    UIStackView.vertical {

        UIView()
            .backgroundColor(.red)
            .size(width: 100, height: 100)

        UIView.spacer()

    }
    //UIStackViewのパラメータで中央寄せにする
    .alignment(.center)
}

指定した大きさにして右中央に配置する
self.declarative {
    UIStackView.vertical {

        UIView()
            .backgroundColor(.red)
            .size(width: 100, height: 100)

        UIView.spacer()

    }
    //UIStackViewのパラメータで右寄せにする
    .alignment(.trailing)
}

指定した大きさにして真ん中(左寄せ or 中央 or右寄せ)に配置する
self.declarative {
    UIStackView.vertical {

        //上側の余白
        UIView.spacer()

        //センターに配置したいView
        UIView()
            .backgroundColor(.red)
            .size(width: 100, height: 100)

        //下側の余白
        UIView.spacer()
    }
    .alignment(.center)
    //UIStackViewのパラメータで真ん中にする
    .distribution(.equalCentering)
}

配列からビューを生成して並べる
//カラーの配列を用意
let colors: [UIColor] = [
    .red,
    .green,
    .blue,
    .yellow,
    .purple
]

self.declarative {
    UIStackView.vertical {
        //色の配列からビューの配列に変換
        colors.compactMap {
            UIView()
                .backgroundColor($0)
        }
    }
    .distribution(.fillEqually)
}

UIView
UIViewの主要なパラメータの設定を宣言的にメソッドを用いて記述することができます
また、円形にするといったよく使う設定もメソッドを用意しています
基本的なパラメータ
UIView()
    .tag(1)
    .backgroundColor(.red)
    .isUserInteractionEnabled(true)
    .clipsToBounds(true)
    .contentMode(.scaleAspectFit)
    .alpha(0.5)
    .isHidden(false)
    .transform(.init(rotationAngle: 45.0/Double.pi))
特殊なパラメータ
ボーダーラインを付ける
UIStackView.vertical {
    UIView.spacer()

    UIView()
        .backgroundColor(.red)
        .size(width: 200, height: 200)
         // *
        .border(color: .blue, width: 10)

    UIView.spacer()
}
.alignment(.center)
.distribution(.equalCentering)

角丸を付ける
UIStackView.vertical {
    UIView.spacer()

    UIView()
        .backgroundColor(.red)
        .size(width: 200, height: 200)
         //maskedCornersで丸くする箇所を指定する
         //指定しなければ四隅が丸くなる
        .cornerRadius(100, maskedCorners: [.layerMaxXMaxYCorner, .layerMaxXMinYCorner])

    UIView.spacer()
}
.alignment(.center)
.distribution(.equalCentering)

影を付ける
UIStackView.vertical {
    UIView.spacer()

    UIView()
        .backgroundColor(.red)
        .size(width: 200, height: 200)
         // *
        .shadow(color: .black, radius: 10, x: 10, y: 10)

    UIView.spacer()
}
.alignment(.center)
.distribution(.equalCentering)

特殊なパラメータ2
周りに余白を付ける
borderとは違い、自身の外側に新たな領域が追加されます
self.declarative {
    UIStackView.vertical {

        UIView()
            .backgroundColor(.red)
            //四隅に10の余白を付ける
            .padding(insets: UIEdgeInsets.init(all: 10))
            //paddingの後に指定するメソッドは余白側の設定となる
            .backgroundColor(.blue)

    }
}

親ビューの大きさから比率で自身の大きさを決める
※親ビューはUIStackViewしか指定できません
self.declarative {
    UIStackView.vertical { superview in

        UIView.spacer()

        UIView()
            .backgroundColor(.red)
            //横幅を superview(UIStackView)の横幅 * 0.8 + 10 にする
            .widthEqual(to: superview, constraint: superview.widthAnchor * 0.8 + 10)
            //縦幅を superview(UIStackView)の縦幅 * 0.5 にする
            .heightEqual(to: superview, constraint: superview.heightAnchor * 0.5)

        UIView.spacer()

    }
    .alignment(.center)
    .distribution(.equalCentering)
}

ビューを重ねる
UIStackView.vertical {
    UIView.spacer()

    UIView()
        .backgroundColor(.red)
        .size(width: 300, height: 500)
        //addSubviewでも同じ
        .zStack {
            UIStackView.vertical {
                UIView().backgroundColor(.blue)
                UIView().backgroundColor(.green)
                UIView().backgroundColor(.yellow)
            }
            .spacing(10)
            .distribution(.fillEqually)
            .padding(10)
        }

    UIView.spacer()
}
.alignment(.center)
.distribution(.equalCentering)

UIScrollView
縦スクロール
self.declarative {
    UIScrollView.vertical {
        UIStackView.vertical {
            UIView()
                .backgroundColor(.red)
                .height(400)

            UIView()
                .backgroundColor(.green)
                .height(400)

            UIView()
                .backgroundColor(.blue)
                .height(400)
        }.spacing(10)
    }
}

横スクロール
self.declarative {
    UIScrollView.horizontal {
        UIStackView.horizontal {
            UIView()
                .backgroundColor(.red)
                .width(200)

            UIView()
                .backgroundColor(.green)
                .width(200)

            UIView()
                .backgroundColor(.blue)
                .width(200)
        }.spacing(10)
    }
}

その他のパラメータの設定
self.declarative {
    UIScrollView.vertical {
        UIStackView.vertical {
            UIView()
                .backgroundColor(.red)
                .height(400)

            UIView()
                .backgroundColor(.green)

            UIView()
                .backgroundColor(.blue)
        }
        .spacing(10)
        .distribution(.fillEqually)
    }
    // *
    .isScrollEnabled(true)
    .showsScrollIndicator(true)
    //縦横のインジケータの表示を個別に設定もできる
    //.showsVerticalScrollIndicator(true)
    //.showsHorizontalScrollIndicator(true)
}
手続的に記述する
addTargetなどレイアウトに関わらない部分の設定は宣言的な記述が非対応のため、それらを既存の通り手続的に設定するやり方を解説します
逆にいうとレイアウト以外の記述は既存のソースコードを流用させることができます
初期値を手続的に設定する
self.declarative {
    UIScrollView.vertical {
        UIStackView.vertical {
            //imperativeメソッドの中で手続的に記述する
            UILabel().imperative {
                let label = $0 as! UILabel
                label.text = "手続的だね"
                label.font = UIFont.systemFont(ofSize: 20)
            }
            //下線を引く
            UIView.divider()

            //imperativeメソッドは省略できる (ver0.15.0で記述が変更されている)
            UILabel {
                let label = $0 as! UILabel
                label.text = "手続的だね"
                label.font = UIFont.systemFont(ofSize: 20)
            }

            UIView.spacer()
        }
        .spacing(20)
        .padding(insets: .init(top: 10, left: 12, bottom: 10, right: 12))
    }
}
ver0.15.0で以下の記述が変更されました
//ver0.15.0より前
UILabel {
    let label = $0 as! UILabel
    label.text = "手続的だね"
    label.font = UIFont.systemFont(ofSize: 20)
}

//ver0.15.0以降
//`imperative`と明示する
UILabel.imperative {
    let label = $0 as! UILabel
    label.text = "手続的だね"
    label.font = UIFont.systemFont(ofSize: 20)
}
手続的にパラメータを更新する
宣言的にレイアウトを組むとlet label = UILabel()のようにパラメータに代入されていないため、あとからアクセスすることができません
そのためassignでパラメータに代入するか、imperative内で代入させます
//クラスのパラメータを用意する
private var label1: UILabel!
private var label2: UILabel!
private var label3: UILabel!

self.declarative {
    UIStackView.vertical {

        UIView.spacer()

        UILabel.imperative {
            self.label1 = $0 as! UILabel
            label1.text = "パラメータに代入"
        }

        UILabel("パラメータに代入").assign(to: &label2)

        //assignはイニシャライザでも指定できる
        UILabel(assign: &label3).text("パラメータに代入")

        UIView.spacer()
    }
    .spacing(20)
    .distribution(.equalSpacing)
}
これらを設定することで既存のUIKitの記述をそのまま利用してパラメータの更新ができます
final class SimpleViewController: UIViewController {

    private var count: Int = 0

    private var countLabel: UILabel!

    override func viewDidLoad() {
        super.viewDidLoad()
        self.view.backgroundColor = .white

        self.declarative {
            UIStackView.vertical {

                UIView.spacer()

                UILabel().imperative {
                    let label = $0 as! UILabel
                    label.text = count.description
                    label.font = UIFont.systemFont(ofSize: 40)
                    label.textAlignment = .center
                    label.textColor = .blue
                    //あとから更新するのでcountLabelに代入
                    self.countLabel = label
                }

                UIButton().imperative {
                    let button = $0 as! UIButton
                    button.setTitle("カウントアップボタン", for: .normal)
                    button.setTitleColor(.black, for: .normal)
                    //ボタンをタップした時のアクションを指定
                    button.addTarget(self, action: #selector(tapButton), for: .touchUpInside)
                }

                UIView.spacer()
            }
            .spacing(20)
            .distribution(.equalSpacing)
        }
    }
}

@objc private extension SimpleViewController {
    func tapButton(_ sender: UIButton) {
        //ボタンがタップされた時の処理
        //普通のUIKitの記述
        count += 1
        countLabel.text = count.description
    }
}

カスタムビュー
UIViewにもdeclarativeメソッドがあるため、それを使って宣言的にレイアウトを組みます
UICollectionViewCellのカスタムセルの場合は以下のようになります
final class LandmarkRow: UICollectionViewCell {

    private enum ViewTag: Int {
        case icon = 1
        case text
        case star
    }

    override init(frame: CGRect) {
        super.init(frame: frame)

        self.contentView.declarative {
            UIStackView.vertical {
                UIView.spacer()

                UIStackView.horizontal {
                    UIImageView(tag: ViewTag.icon.rawValue)
                    .size(width: 50, height: 50)

                    UILabel(tag: ViewTag.text.rawValue)

                    UIView.spacer()

                    UIImageView(tag: ViewTag.star.rawValue) {
                        let imageView = $0 as! UIImageView
                        imageView.image = UIImage(systemName: "star.fill")?.withRenderingMode(.alwaysTemplate)
                        imageView.tintColor = .systemYellow
                    }
                    .isHidden(true)
                }
                .spacing(8)
                .alignment(.center)

                UIView.divider()
            }
            .spacing(10)
        }
    }

    required init?(coder: NSCoder) {
        fatalError("init(coder:) has not been implemented")
    }
}

セーフエリア
セーフエリアを無視する
セーフエリア外までレイアウトを広げたい場合はdeclarativeメソッドのパラメータで指定します
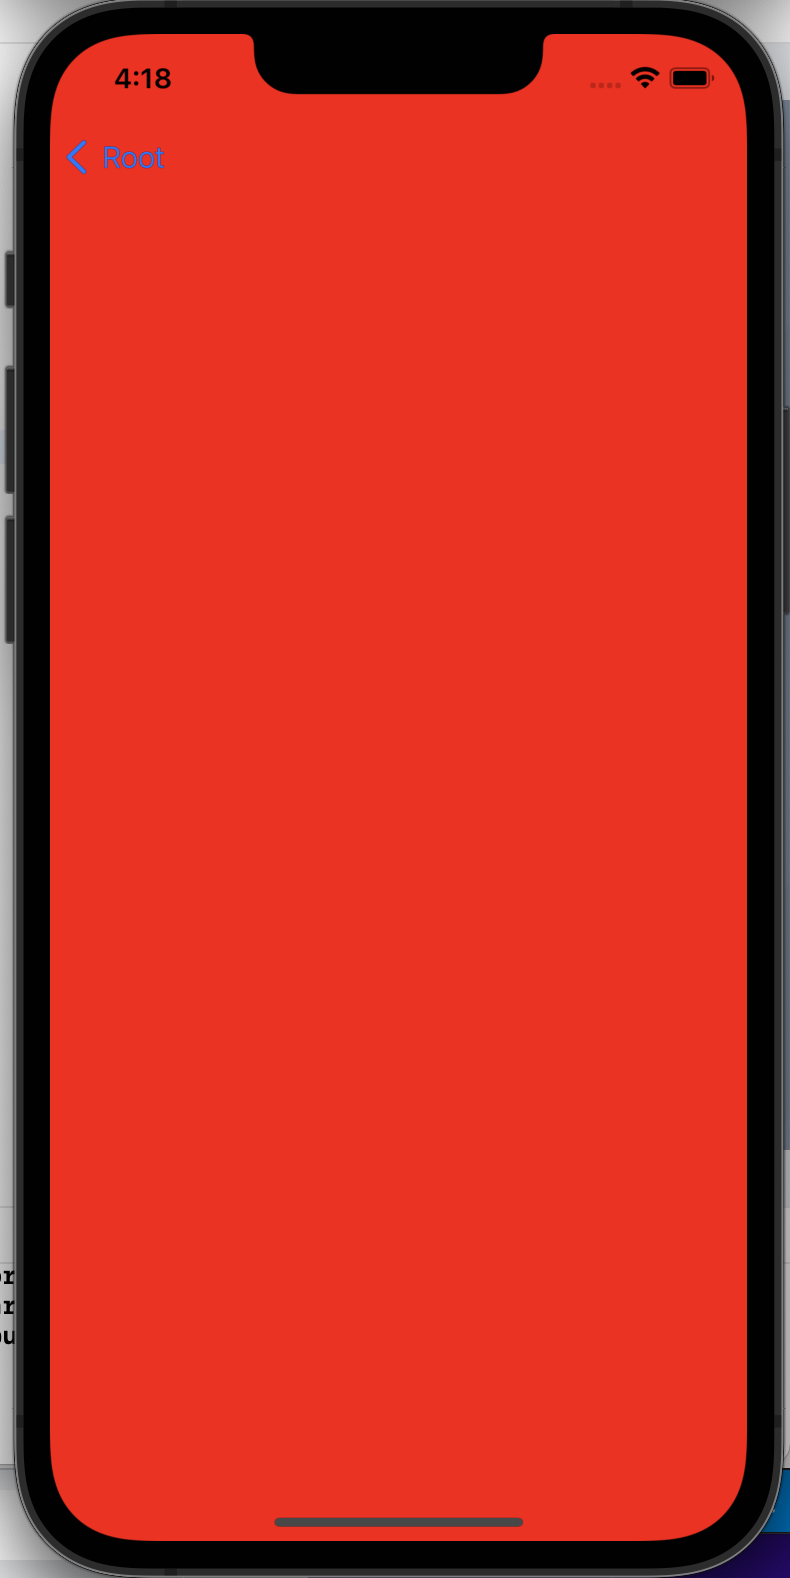
self.declarative(safeAreas: .init(all: false)) {
    UIView().backgroundColor(.red)
}

セーフエリア外のレイアウトを組む
同じく declarativeメソッドのパラメータで指定します
self.declarative(outsideSafeAreaTop: {
    //セーフエリアの外の上側の実装
    UIView().backgroundColor(.blue)
}, outsideSafeAreaLeading: {
  //leadingの外側は何もせず
}, outsideSafeAreaBottom: {
    //セーフエリアの外の下側の実装
    UIView().backgroundColor(.green)
}, outsideSafeAreaTrailing: {
  //trailingの外側は何もせず
}) {
    //セーフエリア内の実装
    UIView().backgroundColor(.red)
}

終わり
まだベータ版のつもりでしたが意外と問題なくレイアウトが組めたのでまとめてみました
Apple公式のSwiftUIチュートリアルを真似たレイアウトも組めましたのでデモプログラムも参考にしてください
以下のようなレイアウトが組めます

ご意見やバグなどありましたらご連絡いただけると幸いです