gRPC
gRPCはHTTP/2通信でRPC(remote procedure callができるフレームワークです。.protoファイルというインタフェースを定義をサーバとクライアントで共有して、フレームワークがパラメータのチェックなどしてくれます。
他の言語だとOpenAPI/Swaggerのようにコード生成が必要ですが、node.jsではコード生成が不要で、さらにNode-REDを使えばほとんど設定だけで簡単に実装できます。開発中のソフトのエミュレータやテストスタブ/ドライバとして便利に使うことができます。
gRPCはバイナリを送ることやストリーム通信も可能であるなどのメリットがあるのですが、普通の通信でもHTTP/2によって早くなっているはずですし、一度試してみたかったので、Node-REDで動かしてみました。
構築
今回はWSL(V1)のNode-RED内のローカル通信をしてみました。
- パレットの管理:ハンバーガーメニュー=>パレットの管理=>ノードを追加でnode-red-contrib-grpcノードを検索して追加しました。
- フローの作成:ひとまず並べます(↓は完成イメージ)。
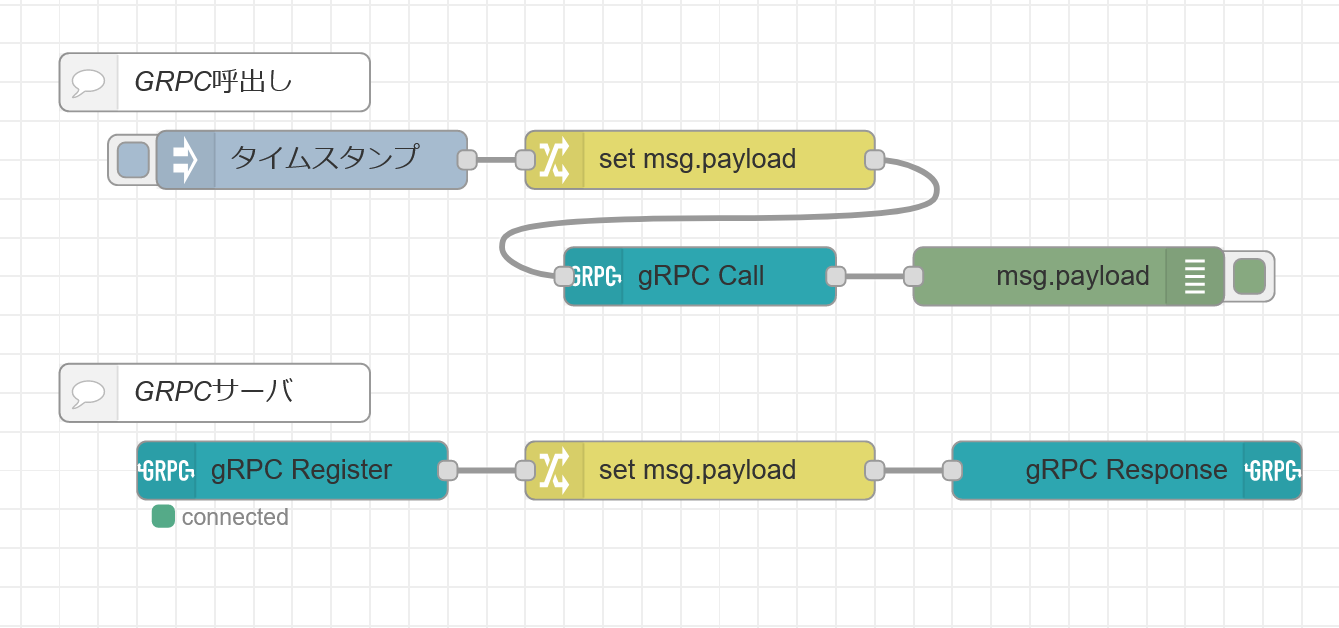
- IFの定義:呼出し側もサーバ側も同じです。
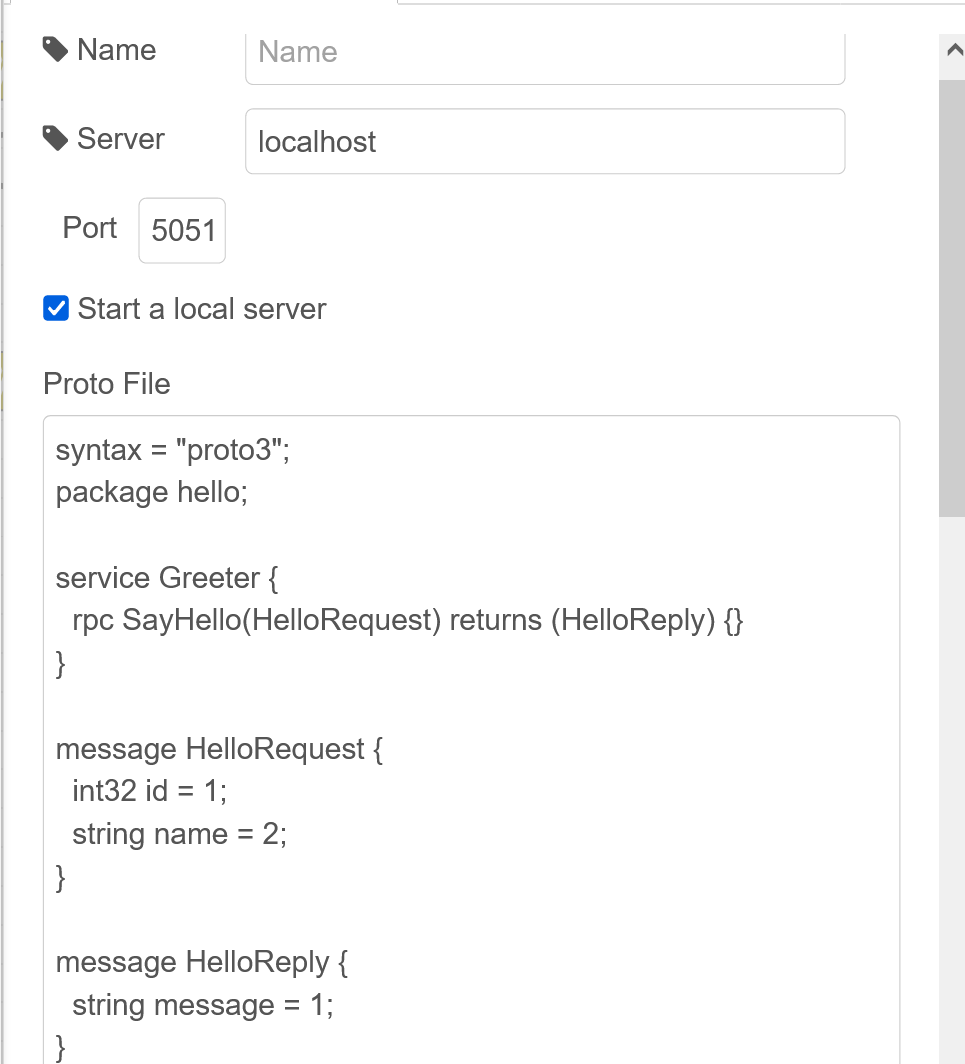
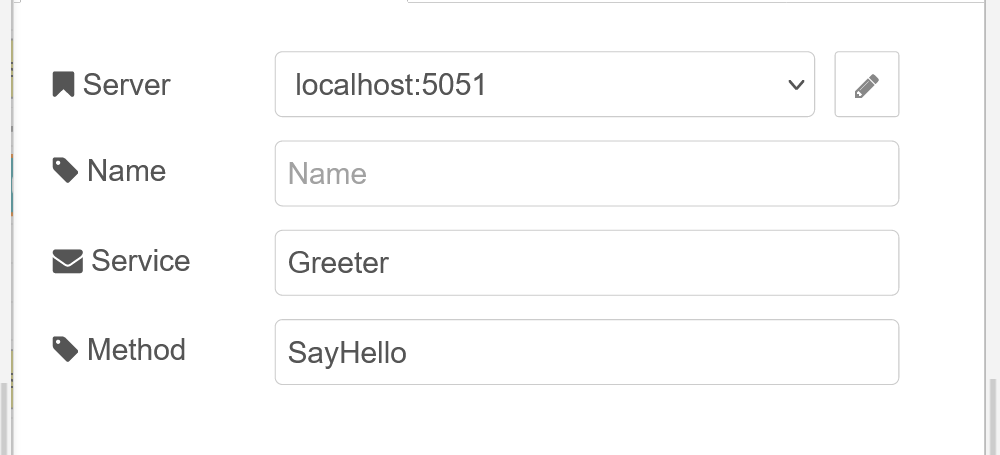 Serverの右端のペンで下の編集画面になります。
今回は同じ設定でサーバも作りますので「Start a local server」にチェックを入れます(クライアント側だからとチェックを外すとサーバが止まります)
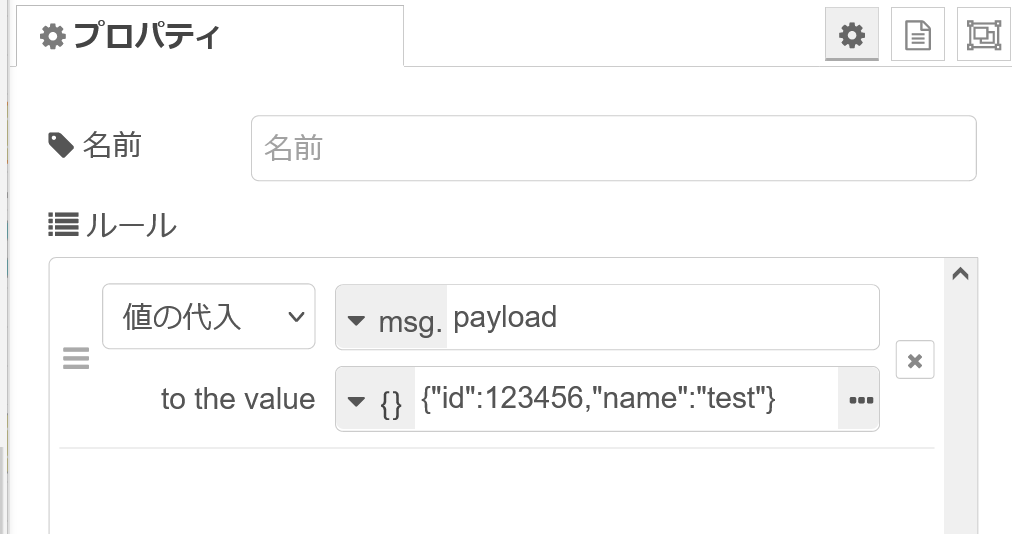
- 呼び出しパラメータの設定:
- レスポンスの設定:
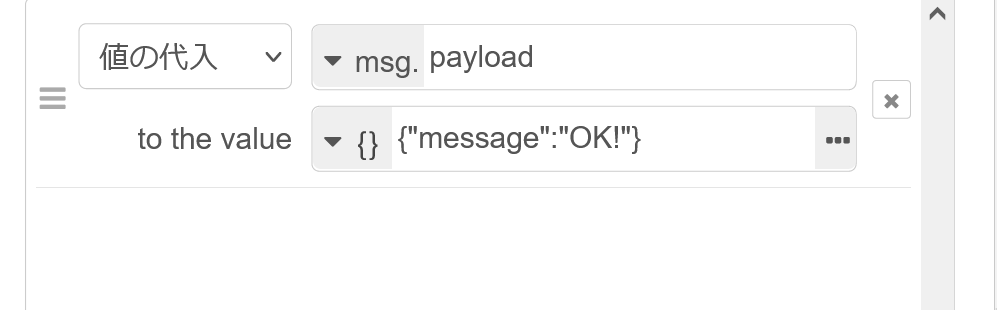
- 実行:インジェクトノード(青いグレー)のノードの矢印の左の■い部分を押します
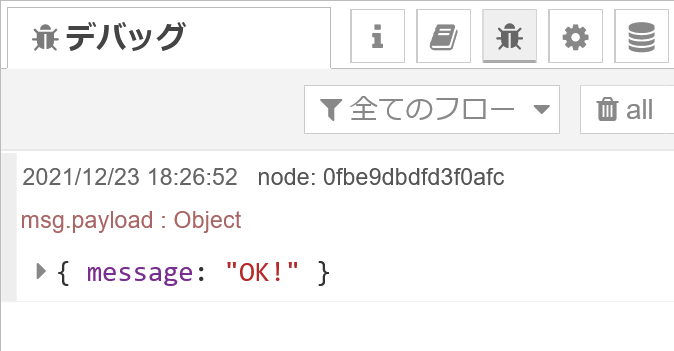
- 右のペーンのデバッグタブで確認:OK!
コード
読み込んで使ってください
[{"id":"865dc9a401832970","type":"tab","label":"gRPC","disabled":false,"info":"","env":[]},{"id":"0fbe9dbdfd3f0afc","type":"debug","z":"865dc9a401832970","name":"","active":true,"tosidebar":true,"console":false,"tostatus":false,"complete":"false","statusVal":"","statusType":"auto","x":560,"y":180,"wires":[]},{"id":"ab27870dace27248","type":"grpc-response","z":"865dc9a401832970","name":"","x":590,"y":280,"wires":[]},{"id":"682171c1e01767e7","type":"grpc-register-function","z":"865dc9a401832970","name":"","server":"dc25df065ab0760b","service":"Greeter","method":"SayHello","x":160,"y":280,"wires":[["66446f872d871a61"]]},{"id":"01254826e1945150","type":"grpc-call","z":"865dc9a401832970","name":"","server":"dc25df065ab0760b","service":"Greeter","method":"SayHello","chain":"","key":"","x":370,"y":180,"wires":[["0fbe9dbdfd3f0afc"]]},{"id":"dbd688c6329fdfb7","type":"inject","z":"865dc9a401832970","name":"","props":[{"p":"payload"}],"repeat":"","crontab":"","once":false,"onceDelay":0.1,"topic":"","payloadType":"date","x":170,"y":120,"wires":[["9e679610e5420b64"]]},{"id":"66446f872d871a61","type":"change","z":"865dc9a401832970","name":"","rules":[{"t":"set","p":"payload","pt":"msg","to":"{\"message\":\"OK!\"}","tot":"json"}],"action":"","property":"","from":"","to":"","reg":false,"x":370,"y":280,"wires":[["ab27870dace27248"]]},{"id":"9409abb6dff60988","type":"comment","z":"865dc9a401832970","name":"GRPC呼出し","info":"","x":120,"y":80,"wires":[]},{"id":"378917ae476cee38","type":"comment","z":"865dc9a401832970","name":"GRPCサーバ","info":"","x":120,"y":240,"wires":[]},{"id":"9e679610e5420b64","type":"change","z":"865dc9a401832970","name":"","rules":[{"t":"set","p":"payload","pt":"msg","to":"{\"id\":123456,\"name\":\"test\"}","tot":"json"}],"action":"","property":"","from":"","to":"","reg":false,"x":370,"y":120,"wires":[["01254826e1945150"]]},{"id":"dc25df065ab0760b","type":"grpc-server","port":"5051","name":"","server":"localhost","protoFile":"syntax = \"proto3\";\npackage hello;\n \nservice Greeter {\n rpc SayHello(HelloRequest) returns (HelloReply) {}\n}\n \nmessage HelloRequest {\n int32 id = 1;\n string name = 2;\n}\n \nmessage HelloReply {\n string message = 1;\n}","ca":"","chain":"","key":"","mutualTls":false,"localServer":true}]
感想
- protoファイルさえ用意できれば簡単でした。インタフェースを修正する場合もコンパイルが不要ですので簡単に変更できます。いろいろ試したり、テスト環境に使うにはとても便利な環境だと思います。
- protoファイルが同じなら、ほかの言語・環境とも簡単に通信できますので、大規模なシステムに組み込むことも容易でしょう。
- HTTPよりどのくらい高速化できるか気になったので、計測してみました。
- Node-REDでgRPC:1000x10回の処理時間をhttpと比較
参考文献
参考にさせていただきました。ありがとうございます。