はじめに
過去の記事では、Packstack利用したOpenstackの構築について記載しましたが、
本記事では、検証環境をKolla Ansibleで構築した内容をメモとして共有します。
具体的には、Kolla Ansibleで構築したOpenStack AntelopeをBlock StorageでONTAPを利用する方法に焦点を当てています。
まずこの記事では、Hyper-V上の仮想マシンにKolla Ansibleを使用してOpenStackをAll in One構成でインストールする部分について記載します。
何をしたい?できる?
- OpenStack AntelopeをHyper-V上の仮想マシン(Ubuntu)にInstall
- OpenStackの構築はKolla Ansibleを利用する
Kolla Ansibleとは
OpenStack KollaとはNovaやCinderのようなOpenStackの各コンポーネントをDockerコンテナの形でデプロイするプロジェクトです。
Kolla-Ansibleは端的に言うとOpenStack環境のデプロイメントツールであり、OpenStackの各コンポーネントであるコンテナ群をAnsibleを使って自動展開・設定・運用するためのツールになります。
記事における環境情報
本記事では、以下の環境で実施した内容となります。
分かり易くするために、Network構成は単純化しています。
- Linux : Ubuntu 22.04.5 LTS
- Openstack: Antelope

OpenStack AntelopeのAll in One Install手順
1. Hyper-Vで仮想マシンの作成
Hyper-V上で新規の仮想マシンを作成します。
この記事では、以下の設定となっています。
CPUは4個
メモリは16GB
仮想Diskは120GB
NICは2つ

2. Ubuntu 22.04.5 LTSのInstall
2-1. ISOイメージを接続して起動
仮想マシンにUbuntu 22.04.5のISOイメージ(ubuntu-22.04.5-live-server-amd64)を接続し、
電源を入れてInstallを実施します。

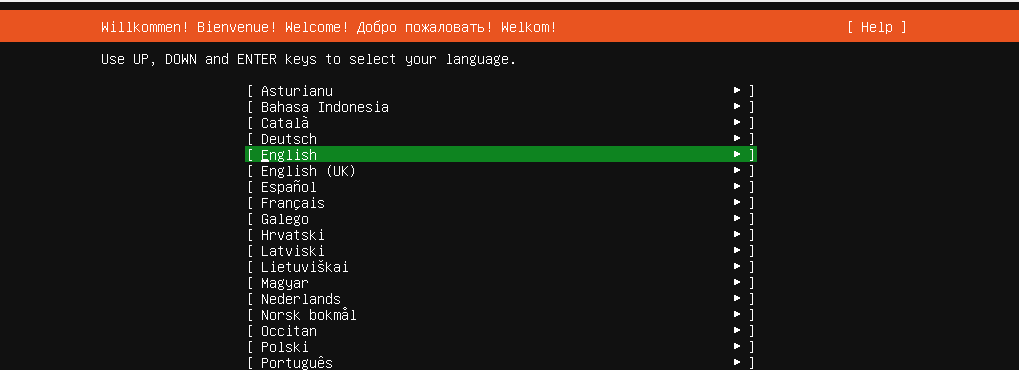
2-2. 言語の選択
本記事では、英語を指定します。
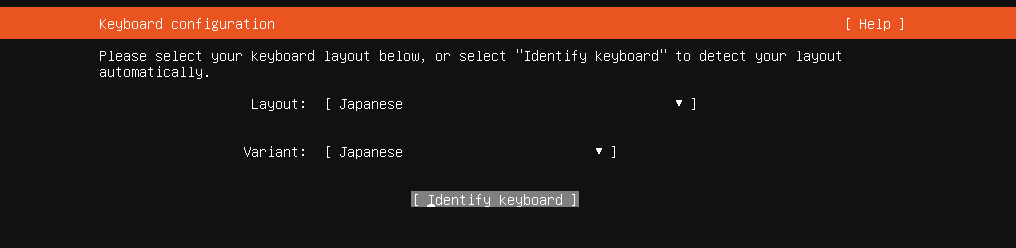
2-3. キーボード操作は日本語指定にする
本環境では日本語キーボード操作の設定にします。
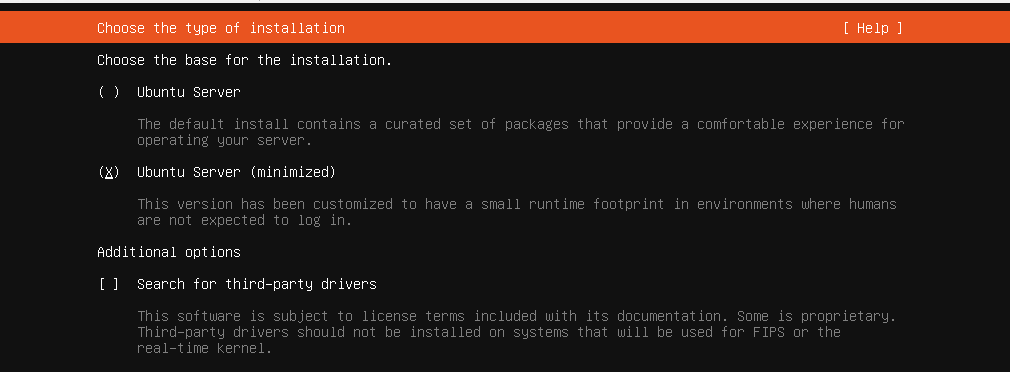
2-4. Installの種類
本環境ではUbuntu Server (minimized)を指定して構築します。
2-5. Network設定
導入環境のネットワーク構成に合わせてIPやDNSを設定します。

2-6. Proxy Configration
外部のネットワークへ出る為に、Proxyサーバを越える必要がある環境の場合、
指定を行います。

2-7. Ubuntu archive mirror configration
Ubintsuのupdateや使用する機能のinstallを行う際にダウンロードするサイトを指定します。
(自動的に指定されているので、変更は不要なはずです)

2-8. Installer update available
本記事では、Ubuntu 22.04.5で利用したいので、アップデートしないで継続します

2-9. Guided storage configuration
Storageのレイアウト設定を行います。

仮想Diskは120GBのうち全てを使うような設定になっていないので、未使用領域の割り当てを実施します。Doneを選択し、continueを選択します。
(root領域のサイズを拡張)

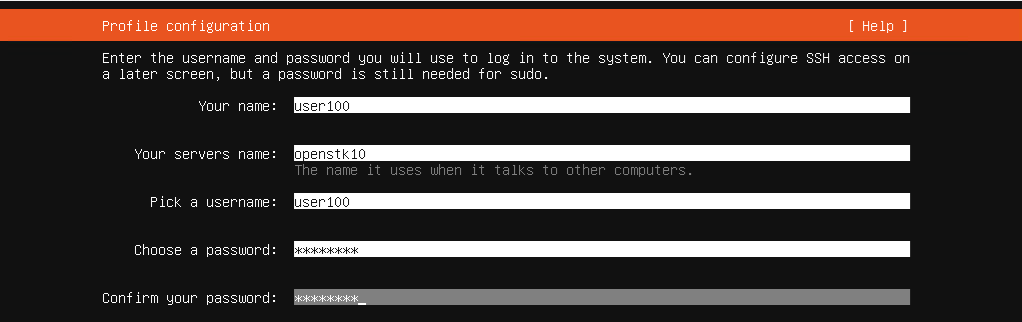
2-11. Profile Configuration
Host名や作成されるUser名の指定を行います。
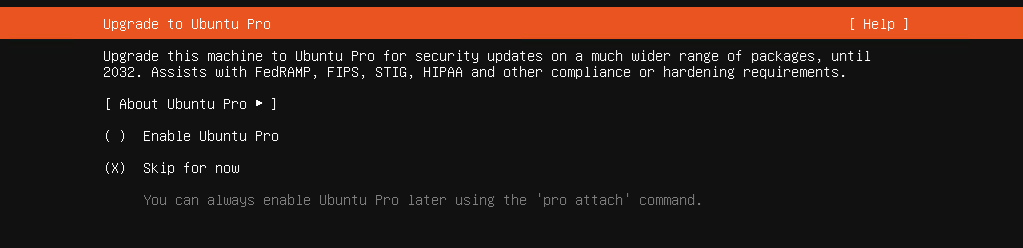
2-12. Upgrade to Ubuntu Pro
有償版のUbuntu ProにUpgradeはしない形で進めます。
2-13. SSH configuration
SSH接続で利用したいので、Install OpenSSH server を選択して有効化します。

2-14. Featured server snaps
追加機能は選択せずに進めます。

Installが開始されるので、暫く待ちます。
Install完了後に、Reboor Nowを選択します。

rootユーザの有効化
本記事では、rootユーザを有効化して導入を進めます。
> sudo passwd root
[sudo] password for user01:
New password:
Retype new password:
passwd: password updated successfully

> su -
Password:
本項目以降はrootユーザで実行しています
2-15. Versionの確認と時刻設定
SSH Clientからアクセスできる事を確認し、導入されているVersionを確認します。
また、logの時間を見やすくする為にTimezoneをAsia/Tokyoに変更します。
# UbuntuのVersion確認
> lsb_release -a
No LSB modules are available.
Distributor ID: Ubuntu
Description:    Ubuntu 22.04.5 LTS
Release:        22.04
Codename:       jammy


# TimeZoneの変更
> timedatectl set-timezone Asia/Tokyo

> date
Mon Nov 24 20:11:29 JST 2025
3. 必要となるモジュールの導入及び追加設定の実施
必要となるモジュールの導入と、Cinder用の領域の作成を実施します。
Ubuntu Server を minimal 版にて Installすると初期設定で vi (vim)も入っていない為、必要となるモジュール類を導入しておきます。
3-1. モジュールの更新
# モジュールリストの更新
> apt update
Get:1 http://security.ubuntu.com/ubuntu jammy-security InRelease [129 kB]
(中略)
Reading state information... Done
46 packages can be upgraded. Run 'apt list --upgradable' to see them.


# モジュールの更新
> apt upgrade
Reading package lists... Done
Building dependency tree... Done
(中略)
3-2. ネットワークツールのインストール
> apt install net-tools
Reading package lists... Done
Building dependency tree... Done
(中略)
No user sessions are running outdated binaries.
No VM guests are running outdated hypervisor (qemu) binaries on this host.
3-3. vimのインストール
> apt install vim
Reading package lists... Done
Building dependency tree... Done
(中略)
No user sessions are running outdated binaries.
No VM guests are running outdated hypervisor (qemu) binaries on this host.
3-4. UFWのインストール
後述するkolla-ansibleのbootstrap-serversにおいて、Debian/Ubuntu 系ホストではUFW を state=disabled にしようとしますが、ufw バイナリが存在しないと、Ansible の ufw モジュールが「実行ファイルが見つからない」とエラーになりますので、インストールしておきます。
> apt install -y ufw
Reading package lists... Done
Building dependency tree... Done
(中略)
No user sessions are running outdated binaries.
No VM guests are running outdated hypervisor (qemu) binaries on this host.
3-5. partedのインストール
Cinder用の領域作成する為に、パーティションツールをインストールします。
(必須では無い)
> apt install parted
Reading package lists... Done
Building dependency tree... Done
(中略)
No user sessions are running outdated binaries.
No VM guests are running outdated hypervisor (qemu) binaries on this host.
3-6. 仮想マシンにCinder領域用にする仮想ディスクの追加
Cinder用の領域作成する為、仮想ディスクの追加を実施します。
(UbuntuをShutdownして実施)

3-7. ディスクパーティション設定
パーティションツールを使ってcinderで使うVolumeを設定します。
# 追加した仮想ディスクをOSが認識している事を確認します
> fdisk -l

Disk /dev/sda: 30 GiB, 32212254720 bytes, 62914560 sectors
Disk model: Virtual Disk
Units: sectors of 1 * 512 = 512 bytes
Sector size (logical/physical): 512 bytes / 4096 bytes
I/O size (minimum/optimal): 4096 bytes / 4096 bytes
(中略)
partedを使ってディスクパーティションを設定します
> parted /dev/sda
GNU Parted 3.4
Using /dev/sda
Welcome to GNU Parted! Type 'help' to view a list of commands.


# mklabel で gpt を指定
(parted) mklabel gpt
(parted) print
Model: Msft Virtual Disk (scsi)
Disk /dev/sda: 32.2GB
Sector size (logical/physical): 512B/4096B
Partition Table: gpt
Disk Flags:
(中略)


# unitで容量の単位をGBにし、ディスク全域を使ってパーティションを作成
(parted) unit
Unit?  [compact]? gb
(parted) mkpart primary 0 100%
(parted) print
Model: Msft Virtual Disk (scsi)
Disk /dev/sda: 32.2GB
Sector size (logical/physical): 512B/4096B
Partition Table: gpt
Disk Flags:

Number  Start   End     Size    File system  Name     Flags
 1      0.00GB  32.2GB  32.2GB               primary


(parted) quit
Information: You may need to update /etc/fstab.
fdisk -lでパーティション作成されている事を確認します。
# 追加した仮想ディスクをOSが認識している事を確認します
> fdisk -l

Disk /dev/sda: 30 GiB, 32212254720 bytes, 62914560 sectors
Disk model: Virtual Disk
Units: sectors of 1 * 512 = 512 bytes
Sector size (logical/physical): 512 bytes / 4096 bytes
I/O size (minimum/optimal): 4096 bytes / 4096 bytes
Disklabel type: gpt
Disk identifier: A93D4B29-FDA6-43A2-B7DD-D46346BE58E9

Device     Start      End  Sectors Size Type
/dev/sda1   2048 62912511 62910464  30G Linux filesystems
(中略)
3-8. Cinder用の領域の作成
後述するOpenstackデプロイに必要な内容を編集時に、
cinder_volume_group: "cinder-volumes"という部分のコメントアウトを実施したいので、 Volume groupも cinder-volumesという名前で追加します。
> vgcreate cinder-volumes /dev/sda1
  Physical volume "/dev/sda1" successfully created.
  Volume group "cinder-volumes" successfully created


> vgs
  VG             #PV #LV #SN Attr   VSize    VFree
  cinder-volumes   1   0   0 wz--n-  <30.00g <30.00g
  ubuntu-vg        1   1   0 wz--n- <116.95g 968.00m


$ vgdisplay
  --- Volume group ---
    VG Name               cinder-volumes
  System ID
  Format                lvm2
  Metadata Areas        1
  Metadata Sequence No  1
  VG Access             read/write
  VG Status             resizable
  MAX LV                0
  Cur LV                0
  Open LV               0
  Max PV                0
  Cur PV                1
  Act PV                1
  VG Size               <30.00 GiB
  (中略)
4. Python環境の構築
Python環境の構築に必要なモジュールのインストールを実施します。
4-1. 依存関係をインストール
> apt install git python3-dev python3-pip libffi-dev gcc libssl-dev
Reading package lists... Done
Building dependency tree... Done
Reading state information... Done
  (中略)
No user sessions are running outdated binaries.
No VM guests are running outdated hypervisor (qemu) binaries on this host.
4-2. python3.11及びpython3.11-venvのInstall
> apt install -y python3.11
Reading package lists... Done
Building dependency tree... Done
Reading state information... Done
  (中略)
No user sessions are running outdated binaries.
No VM guests are running outdated hypervisor (qemu) binaries on this host.


> apt install python3.11-venv
Reading package lists... Done
Building dependency tree... Done
Reading state information... Done
  (中略)
No user sessions are running outdated binaries.
No VM guests are running outdated hypervisor (qemu) binaries on this host.
4-3. venvによる仮想環境の作成
> python3.11 -m venv /path/to/venv
> source /path/to/venv/bin/activate
(venv) >
(venv) > python --version
Python 3.11.0rc1
pipの導入を実施します。
(venv) > pip install -U pip
Requirement already satisfied: pip in /usr/lib/python3/dist-packages (22.0.2)
Collecting pip
Downloading pip-25.3-py3-none-any.whl (1.8 MB)
    (中略)
Successfully installed pip-25.3
5. Kolla-Ansibleのインストールと実行
Python環境の構築に必要なモジュールのインストールを実施します。
なお、OpenStack Antelopeを利用するにはunmaintained/2023.1を指定する必要があります。

5-1. Kolla-Ansibleのインストール
(venv) > pip install git+https://opendev.org/openstack/kolla-ansible@unmaintained/2023.1

Collecting git+https://opendev.org/openstack/kolla-ansible@unmaintained/2023.1
  Cloning https://opendev.org/openstack/kolla-ansible (to revision unmaintained/2023.1) to /tmp/pip-req-build-a9irdqak
  Running command git clone --filter=blob:none --quiet
    (中略)
Successfully installed charset_normalizer-3.4.4 debtcollector-3.0.0 hvac-2.4.0 iso8601-2.1.0 jmespath-1.0.1 kolla-ansible-16.7.1.dev58 netaddr-1.3.0 oslo.config-10.1.0 oslo.i18n-6.7.1 oslo.utils-9.2.0 packaging-25.0 pbr-7.0.3 psutil-7.1.3 requests-2.32.5 rfc3986-2.0.0 stevedore-5.6.0 tzdata-2025.2 wrapt-2.0.1
5-2. Kolla-Ansible設定パスの作成と主要ファイルのコピー
(venv) > mkdir -p /etc/kolla
(venv) > chown $USER:$USER /etc/kolla


# globals.ymlと passwords.ymlのコピー
(venv) > cp -r /path/to/venv/share/kolla-ansible/etc_examples/kolla/* /etc/kolla
(venv) > ls -l /etc/kolla
total 40
-rw-r--r-- 1 root root 32429 Nov 24 22:09 globals.yml
-rw-r--r-- 1 root root  5154 Nov 24 22:09 passwords.yml


# 1台のマシンに導入するインベントリファイルall-in-oneのコピー
(venv) > cp /path/to/venv/share/kolla-ansible/ansible/inventory/all-in-one .
(venv) > ls -l
total 12
-rw-r--r-- 1 root root 9040 Nov 24 22:11 all-in-one
5-3. Ansibleモジュールのインストール
Kolla-ansibleでAntelope利用時は、はansible 2.13か2.14を利用します
(venv) > pip install --no-cache-dir 'ansible>=6,<7'
Collecting ansible<7,>=6
  Downloading ansible-6.7.0-py3-none-any.whl.metadata (6.6 kB)
    (中略)
Successfully installed ansible-6.7.0 ansible-core-2.13.13 resolvelib-0.8.1


(venv) > ansible --version
ansible [core 2.13.13]
  config file = None
  configured module search path = ['/root/.ansible/plugins/modules', '/usr/share/ansible/plugins/modules']
  ansible python module location = /path/to/venv/lib/python3.11/site-packages/ansible
  ansible collection location = /root/.ansible/collections:/usr/share/ansible/collections
  executable location = /path/to/venv/bin/ansible
  python version = 3.11.0rc1 (main, Aug 12 2022, 10:02:14) [GCC 11.2.0]
  jinja version = 3.1.6
  libyaml = True
5-4. Kolla-ansible に必要なモジュールのインストール
(venv) > kolla-ansible install-deps
Installing Ansible Galaxy dependencies
Starting galaxy collection install process
Process install dependency map
(中略)
openstack.kolla:1.0.0 was installed successfully
(venv) > pip install -U pip setuptools wheel
Requirement already satisfied: pip in /path/to/venv/lib/python3.11/site-packages (25.3)
Requirement already satisfied: setuptools in /path/to/venv/lib/python3.11/site-packages (59.6.0)
(中略)
Successfully installed setuptools-80.9.0 wheel-0.45.1
(venv) > pip install 'docker==6.1.3' 'requests==2.31.0' 'urllib3==1.26.18'
Requirement already satisfied: docker==6.1.3 in /path/to/venv/lib/python3.11/site-packages (6.1.3)
Requirement already satisfied: requests==2.31.0 in /path/to/venv/lib/python3.11/site-packages (2.31.0)
(中略)
Successfully installed docker-6.1.3 requests-2.31.0 urllib3-1.26.18 websocket-client-1.9.0
後述するkolla-ansibleのprechecks時に出力されるエラー回避の為に以下を実行しておきます。
# TASK [prechecks : Checking docker SDK version] のエラー回避用
(venv) > sudo python3 -m pip install 'docker<7'

Collecting docker<7
  Downloading docker-6.1.3-py3-none-any.whl (148 kB)
  (中略)


# TASK [mariadb : Get container facts]のエラー回避用
(venv) > sudo python3 -m pip install 'urllib3<2' 'requests<2.32'

Requirement already satisfied: urllib3<2 in /usr/lib/python3/dist-packages (1.26.5)
Collecting requests<2.32
  Downloading requests-2.31.0-py3-none-any.whl (62 kB)
5-5. Openstack パスワードのコピーと編集
kolla-genpwdで作成されたパスワードは/etc/kolla/passwords.yml ファイルに保存されますが、Openstackのlogin用パスワードだけは覚えやすいパスワードに変えておきます。
(venv) > kolla-genpwd
WARNING: Passwords file "/etc/kolla/passwords.yml" is world-readable. The permissions will be changed.


# 任意の長いパスワードが生成
(venv) > tail -3 /etc/kolla/passwords.yml
watcher_keystone_password: AXXXXXw6nY8aXXXXXMutgofiIIXXXXXmsteKp7VY
zun_database_password: keNmItLH1HXXXXXO4BwXXXqn3T0XXXXXrMGjoikp
zun_keystone_password: fmgXDifXXXXXRiOXXXXXGBeeOhFXXXXXGlE1DGzZ


# keystone_admin_passwordのみ覚えやすいパスワードへ変更
(venv) > vi /etc/kolla/passwords.yml

keystone_admin_password: P@Stt1010psq9$
5-6. globals.ymlへOpenstackデプロイに必要な内容を編集
ホストOSのディストリビューションや、有効化するOpenStack Antelopeのコンポーネントについて記載します。
kolla_internal_vip_addressについては、ホストOSのIPをそのまま記載し、合わせて内部向けや外部向けに利用するホストOSのNICを記載します。
本記事ではcinderサービスを検証する為の設定にしていますが、NetAppのONTAP利用の内容については、別の記事で記載します。
# コメントアウトや必要項目の記載を実施
(venv) > vi /etc/kolla/globals.yml

kolla_base_distro: "ubuntu"
openstack_release: "2023.1"
kolla_internal_vip_address: "172.16.10.100"
kolla_external_vip_address: "{{ kolla_internal_vip_address }}"
network_interface: "eth0"
neutron_external_interface: "eth1"
neutron_plugin_agent: "ovn"
enable_openstack_core: "yes"
enable_haproxy: "no"
enable_mariadb: "yes"
enable_memcached: "yes"
enable_neutron: "{{ enable_openstack_core | bool }}"
enable_nova: "{{ enable_openstack_core | bool }}"
enable_rabbitmq: "{{ 'yes' if om_rpc_transport == 'rabbit' or om_notify_transport == 'rabbit' else 'no' }}"
enable_cinder: "yes"
enable_cinder_backup: "yes"
enable_cinder_backend_lvm: "yes"
enable_cinder_backend_ontap_nfs: "yes"
enable_fluentd: "yes"
enable_horizon: "{{ enable_openstack_core | bool }}"
enable_ovn: "{{ enable_neutron | bool and neutron_plugin_agent == 'ovn' }}"
glance_backend_file: "yes"
enable_glance_image_cache: "yes"
cinder_volume_group: "cinder-volumes"
nova_compute_virt_type: "qemu"
nova_console: "novnc"
5-7. bootstrap-serversサブコマンドの実行
OpenStackのコンテナ群を展開するための前提条件を、インベントリに記載されたホストへ設定します。(対象ホストを自動的に初期化しOpenStack本体を展開する為の素地を整える)
(venv) > kolla-ansible -i ./all-in-one bootstrap-servers

Bootstrapping servers : ansible-playbook -e @/etc/kolla/globals.yml  -e @/etc/kolla/passwords.yml -e CONFIG_DIR=/etc/kolla  -e kolla_action=bootstrap-servers /path/to/venv/share/kolla-ansible/ansible/kolla-host.yml  --inventory ./all-in-one
[WARNING]: Invalid characters were found in group names but not replaced, use -vvvv to see details

PLAY [Gather facts for all hosts] *************************************************************************************

TASK [Group hosts to determine when using --limit] ********************************************************************
ok: [localhost]
(中略)
PLAY RECAP ************************************************************************************************************
localhost                  : ok=32   changed=12   unreachable=0    failed=0    skipped=22   rescued=0    ignored=0
5-8. prechecksサブコマンドの実行
OpenStack のデプロイ前に、ホストが要件を満たしているかを検証します。
(venv) > kolla-ansible -i ./all-in-one prechecks

Pre-deployment checking : ansible-playbook -e @/etc/kolla/globals.yml  -e @/etc/kolla/passwords.yml -e CONFIG_DIR=/etc/kolla  -e kolla_action=precheck /path/to/venv/share/kolla-ansible/ansible/site.yml  --inventory ./all-in-one
[WARNING]: Invalid characters were found in group names but not replaced, use -vvvv to see details

PLAY [Gather facts for all hosts] *************************************************************************************

TASK [Group hosts to determine when using --limit] ********************************************************************
ok: [localhost]
(中略)
PLAY [Apply role skyline] *********************************************************************************************
skipping: no hosts matched

PLAY RECAP ************************************************************************************************************
localhost                  : ok=86   changed=0    unreachable=0    failed=0    skipped=66   rescued=0    ignored=0
5-9. デプロイの実行
prechecks時にエラーが無い事を確認し、OpenStack のデプロイを実行します。
(venv) > kolla-ansible -i ./all-in-one deploy

Deploying Playbooks : ansible-playbook -e @/etc/kolla/globals.yml  -e @/etc/kolla/passwords.yml -e CONFIG_DIR=/etc/kolla  -e kolla_action=deploy /path/to/venv/share/kolla-ansible/ansible/site.yml  --inventory ./all-in-one
[WARNING]: Invalid characters were found in group names but not replaced, use -vvvv to see details

PLAY [Gather facts for all hosts] *************************************************************************************

TASK [Group hosts to determine when using --limit] ********************************************************************
ok: [localhost]
(中略)
PLAY RECAP ************************************************************************************************************
localhost                  : ok=346  changed=222  unreachable=0    failed=0    skipped=171  rescued=0    ignored=0
6. Openstack CLIのインストールとアクセス確認
6-1. Openstack CLIのインストール
(venv) > apt install python3-openstackclient -y

Reading package lists... Done
Building dependency tree... Done
(中略)
No user sessions are running outdated binaries.
No VM guests are running outdated hypervisor (qemu) binaries on this host.
管理者ユーザーの認証情報が設定されたファイル/etc/kolla/admin-openrc.shを生成します。
(venv) > kolla-ansible post-deploy

Post-Deploying Playbooks : ansible-playbook -e @/etc/kolla/globals.yml  -e @/etc/kolla/passwords.yml -e CONFIG_DIR=/etc/kolla  /path/to/venv/share/kolla-ansible/ansible/post-deploy.yml
[WARNING]: No inventory was parsed, only implicit localhost is available
[WARNING]: provided hosts list is empty, only localhost is available. Note that the implicit localhost does not match
'all'

PLAY [Creating clouds.yaml file on the deploy node] *******************************************************************

TASK [Gathering Facts] ************************************************************************************************
ok: [localhost]
(中略)
PLAY RECAP ************************************************************************************************************
localhost                  : ok=5    changed=3    unreachable=0    failed=0    skipped=1    rescued=0    ignored=0
6-2. サービス確認
openstackのサービスが立ち上がっている事を確認します。
# コンテナが展開されている事の確認
(venv) > docker ps --format "table {{.Image}}\t{{.Names}}"
IMAGE                                                                NAMES
quay.io/openstack.kolla/horizon:2023.1-ubuntu-jammy                  horizon
quay.io/openstack.kolla/heat-engine:2023.1-ubuntu-jammy              heat_engine
quay.io/openstack.kolla/heat-api-cfn:2023.1-ubuntu-jammy             heat_api_cfn
quay.io/openstack.kolla/heat-api:2023.1-ubuntu-jammy                 heat_api
(中略)

# openstackのサービスが立ち上がっている事を確認
(venv) > source /etc/kolla/admin-openrc.sh
(venv) > openstack endpoint list
+----------------------------------+-----------+--------------+----------------+---------+-----------+---------------------------------------------+
| ID                               | Region    | Service Name | Service Type   | Enabled | Interface | URL                                         |
+----------------------------------+-----------+--------------+----------------+---------+-----------+---------------------------------------------+
| 01d39a00740f4c79b024b9d21b39625f | RegionOne | placement    | placement      | True    | public    | http://172.16.10.100:8780                  |
| 056ceeb67ba748258ed8d6b518f4d934 | RegionOne | glance       | image          | True    | public    | http://172.16.10.100:9292                  |
(中略)
6-3. GUIアクセスの確認
Webブラウザから、http://<ホストのIPアドレス> でOpenStack Dashboardにアクセスできる事を確認します。
