はじめに
Azure 界隈の皆様、IaC 界隈の皆様、ついにきました。
Azure Bicep の MCP サーバーがプレビュー版で公開されました!!!
昨今は様々な MCP サーバーが公開されていますが、IaC に関する MCP サーバーで言えば
等がすでに公開されていましたので、Azure の Bicep も近頃公開されるか、、、と思っておりましたが、2025 年 8 月 2 日に Bicep の v0.37.4 がリリースされ、その中の 1 つの機能として、Bicep MCP Server in VS Code がパブリックプレビュー版として公開されました!
Azure の基盤を IaC で構築している身としては非常に嬉しいお知らせです。
なぜこんなに嬉しいかというと、上記にも記載がありますが Bicep はまだメジャーバージョンが 0 系なのです。そのためまだまだ発展途上ですし、頻繁にアップデートも行われます。
昨今は AI を使った開発も増えてきていますが、IaC に関しては AI が学習している情報が古く、不十分な回答しか生成されないことが多いです。
ですが、この MCP サーバーが出たことで 最新バージョンに追随することができる のです!!!
ちなみに、Azure に関する MCP サーバーについては、以下のようなものがあります。
| MCP サーバー | 説明 |
|---|---|
| Azure MCP Server | MCP を通じて Azure のリソースを操作することができる |
| Microsoft Learn MCP Server | Microsoft Learn の最新公式ドキュメントから情報を取得し、その情報を LLM に付加することができる |
また、GitHub Copilot を使用している方は GitHub Copilot for Azure を利用することで自身の Azure リソースを AI を使って構築することができます。
このあたりの Azure に関する MCP サーバーについては以前の記事をご参照いただければと思います!
それでは本記事では、パブリックプレビュー版となった Bicep MCP Server in VS Code を触っていこうと思います。「in VS Code」とあるように、今回は GitHub Copilot × VS Code を使用します。
Bicep MCP Server in VS Code は現在パブリックプレビュー版です。
一般公開前に実装が大幅に変更される可能性があることにご注意ください。
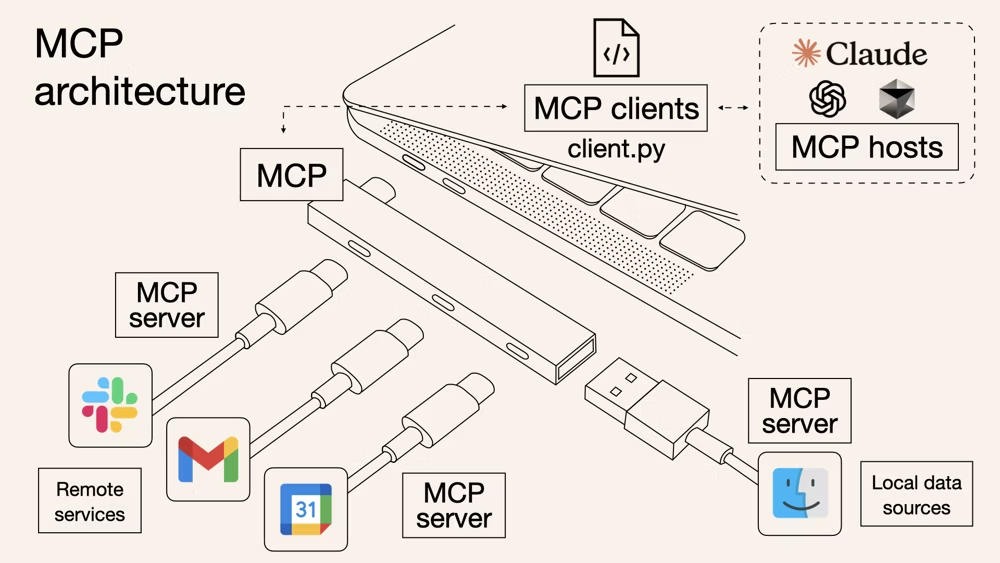
MCP とは
MCP(Model Context Protocol) は、近年注目を集める大規模言語モデル(LLM)がデータソースや外部ツールとやり取りするための、新しいオープン標準プロトコルです。
この登場により生成 AI モデルに文脈情報を渡しやすくなりました。生成 AI 界の USB-C とも言われていますね。
MCP に関する詳しい説明は本記事では割愛させていただきますので、MCP について知りたい方は以下のような記事や資料から学んでいただけるとよいかと思います。
Bicep MCP Server in VS Code 利用準備
Bicep MCP Server in VS Code を利用する方法は非常に簡単です。
VS Code を開き、拡張機能から「Bicep」と入力し Bicep 拡張機能 をインストールします。この時、バージョンが 0.37.4(以上) になっていることを確認してください。

また、GitHub Copilot 上で本 MCP サーバーを活用するため、GitHub Copilot 拡張機能 と GitHub Copilot Chat 拡張機能 が入っていない方はこちらもインストールしておきましょう。
準備はこれだけです。なんと簡単なのでしょうか。
自身で mcp.json を記載しなくても良いのは拡張機能のメリットですね。
Bicep MCP Server in VS Code を使ってみる
それでは Bicep 拡張機能がインストールできたため、実際にこの Bicep MCP Server in VS Code を使ってみましょう。
GitHub Copilot を Chat 画面で開き、Agent モードにしておきます。

そして、Tools の設定から、MCP Server: Bicep(EXPERIMENTAL) の機能にチェックがついていることを確認しておきます。

2025 年 8 月 6 日現在、Bicep MCP Server in VS Code で公開されているツールは以下の 3 つです。おそらく今後も様々なツールが公開されると思います。楽しみですね。
| ツール名 | 説明 |
|---|---|
list_az_resource_types_for_provider |
Bicep で利用可能な Azure のリソースタイプと API バージョンを取得します(例:Microsoft.KeyVault/vaults@2024-11-01)。この情報は Azure Resource Provider API から取得されるため、正確で最新情報が取得できます。 |
get_az_resource_type_schema |
特定の Azure リソースタイプと API バージョンのスキーマ情報を取得します。 こちらも Azure Resource Provider API から取得されるため、正確で最新情報が取得できます。 |
get_bicep_best_practices |
最も推奨される Bicep のベストプラクティスを一覧を取得します。 Bicep コードを生成するよう指示された際に使われ、Bicep ファイルの保守性・セキュリティ・信頼性を向上させるのに役立ちます。 |
それではこの状態で、仮想ネットワークを作成する Bicep を作成してもらいましょう。以下のようにチャットで質問してみます。
Azure で仮想ネットワークを作成する Bicep を教えて
すると、Tools の設定でチェックを入れた Bicep MCP Server の各ツールが実行され、仮想ネットワークを作成する Bicep が生成されました。

この回答で出力してくれた Bicep を全て貼り付けます。
metadata name = 'Virtual Network Template'
metadata description = 'Creates a Virtual Network with subnet in Azure'

@description('The name of the virtual network')
param virtualNetworkName string = 'vnet-example'

@description('The location for the virtual network')
param location string = resourceGroup().location

@description('The address space for the virtual network in CIDR notation')
param addressPrefix string = '10.0.0.0/16'

@description('Resource tags to apply to all resources')
param tags object = {}

resource virtualNetwork 'Microsoft.Network/virtualNetworks@2024-07-01' = {
  name: virtualNetworkName
  location: location
  tags: tags
  properties: {
    addressSpace: {
      addressPrefixes: [
        addressPrefix
      ]
    }
  }
}

@description('The resource ID of the created virtual network')
output virtualNetworkId string = virtualNetwork.id

@description('The name of the created virtual network')
output virtualNetworkName string = virtualNetwork.name
metadata name = 'Virtual Network with Subnets Template'
metadata description = 'Creates a Virtual Network with multiple subnets in Azure'

@description('The name of the virtual network')
param virtualNetworkName string = 'vnet-example'

@description('The location for the virtual network')
param location string = resourceGroup().location

@description('The address space for the virtual network in CIDR notation')
param addressPrefix string = '10.0.0.0/16'

@description('Configuration for subnets')
param subnets array = [
  {
    name: 'subnet-web'
    addressPrefix: '10.0.1.0/24'
  }
  {
    name: 'subnet-app'
    addressPrefix: '10.0.2.0/24'
  }
  {
    name: 'subnet-data'
    addressPrefix: '10.0.3.0/24'
  }
]

@description('Resource tags to apply to all resources')
param tags object = {}

resource virtualNetwork 'Microsoft.Network/virtualNetworks@2024-07-01' = {
  name: virtualNetworkName
  location: location
  tags: tags
  properties: {
    addressSpace: {
      addressPrefixes: [
        addressPrefix
      ]
    }
    subnets: [for subnet in subnets: {
      name: subnet.name
      properties: {
        addressPrefix: subnet.addressPrefix
      }
    }]
  }
}

@description('The resource ID of the created virtual network')
output virtualNetworkId string = virtualNetwork.id

@description('The name of the created virtual network')
output virtualNetworkName string = virtualNetwork.name

@description('Information about the created subnets')
output subnets array = [for (subnet, i) in subnets: {
  name: virtualNetwork.properties.subnets[i].name
  id: virtualNetwork.properties.subnets[i].id
  addressPrefix: virtualNetwork.properties.subnets[i].properties.addressPrefix
}]
metadata name = 'Complete Virtual Network Template'
metadata description = 'Creates a fully configured Virtual Network with advanced features'

@description('The name of the virtual network')
param virtualNetworkName string

@description('The location for the virtual network')
param location string = resourceGroup().location

@description('The address space for the virtual network in CIDR notation')
param addressPrefix string = '10.0.0.0/16'

@description('Enable DDoS protection')
param enableDdosProtection bool = false

@description('DDoS protection plan resource ID (required if enableDdosProtection is true)')
param ddosProtectionPlanId string = ''

@description('Enable VM protection')
param enableVmProtection bool = false

@description('DNS servers for the virtual network')
param dnsServers array = []

@description('Flow timeout in minutes')
param flowTimeoutInMinutes int = 4

@description('Configuration for subnets')
param subnets array = [
  {
    name: 'default'
    addressPrefix: '10.0.1.0/24'
    privateEndpointNetworkPolicies: 'Enabled'
    privateLinkServiceNetworkPolicies: 'Enabled'
  }
]

@description('Virtual network encryption configuration')
param encryption object = {
  enabled: false
  enforcement: 'AllowUnencrypted'
}

@description('Resource tags to apply to all resources')
param tags object = {}

resource virtualNetwork 'Microsoft.Network/virtualNetworks@2024-07-01' = {
  name: virtualNetworkName
  location: location
  tags: tags
  properties: {
    addressSpace: {
      addressPrefixes: [
        addressPrefix
      ]
    }
    dhcpOptions: !empty(dnsServers) ? {
      dnsServers: dnsServers
    } : null
    enableDdosProtection: enableDdosProtection
    ddosProtectionPlan: enableDdosProtection && !empty(ddosProtectionPlanId) ? {
      id: ddosProtectionPlanId
    } : null
    enableVmProtection: enableVmProtection
    flowTimeoutInMinutes: flowTimeoutInMinutes
    encryption: encryption.enabled ? encryption : null
    subnets: [for subnet in subnets: {
      name: subnet.name
      properties: {
        addressPrefix: subnet.addressPrefix
        privateEndpointNetworkPolicies: subnet.?privateEndpointNetworkPolicies ?? 'Disabled'
        privateLinkServiceNetworkPolicies: subnet.?privateLinkServiceNetworkPolicies ?? 'Enabled'
      }
    }]
  }
}

@description('The resource ID of the created virtual network')
output virtualNetworkId string = virtualNetwork.id

@description('The name of the created virtual network')
output virtualNetworkName string = virtualNetwork.name

@description('The address space of the virtual network')
output addressSpace array = virtualNetwork.properties.addressSpace.addressPrefixes

@description('Information about the created subnets')
output subnets array = [for (subnet, i) in subnets: {
  name: virtualNetwork.properties.subnets[i].name
  id: virtualNetwork.properties.subnets[i].id
  addressPrefix: virtualNetwork.properties.subnets[i].properties.addressPrefix
}]
using './virtualNetwork.bicep'

param virtualNetworkName = 'vnet-production'
param location = 'japaneast'
param addressPrefix = '172.16.0.0/16'
param enableDdosProtection = false
param enableVmProtection = true
param dnsServers = [
  '8.8.8.8'
  '8.8.4.4'
]
param subnets = [
  {
    name: 'subnet-web'
    addressPrefix: '172.16.1.0/24'
    privateEndpointNetworkPolicies: 'Disabled'
    privateLinkServiceNetworkPolicies: 'Enabled'
  }
  {
    name: 'subnet-app'
    addressPrefix: '172.16.2.0/24'
    privateEndpointNetworkPolicies: 'Disabled'
    privateLinkServiceNetworkPolicies: 'Enabled'
  }
  {
    name: 'subnet-data'
    addressPrefix: '172.16.3.0/24'
    privateEndpointNetworkPolicies: 'Disabled'
    privateLinkServiceNetworkPolicies: 'Enabled'
  }
]
param tags = {
  Environment: 'Production'
  Project: 'MyApp'
  Owner: 'DevOps Team'
}
いかがでしょう。すごくないですか?
たった一文の指示でここまでの Bicep が生成されます。実践ではもう少し要件や細かい指定もすることになりますが、それでも問題なく出力してくれそうな期待感を持たせてくれます。
ちなみにこの Bicep は以下のポイントに従って作成されているようです。
| # | ポイント | 説明 |
|---|---|---|
| 1 | 最新 API バージョン |
2024-07-01 バージョンを使用 |
| 2 | ベストプラクティス準拠 | ・パラメーターには説明を追加 ・出力値を適切に定義 ・セキュアなデフォルト設定 ・リソースタグのサポート ・柔軟性: 配列を使用してサブネットを動的に作成 |
| 3 | 条件付きプロパティ | 必要に応じて機能を有効/無効にできる |
| 4 | 型安全性 | 適切な型定義と検証 |
この Bicep MCP Server in VS Code が公開されたことで、Bicep の開発体験が一層良くなったと感じます。初心者でも理解しやすいコードを生成できるので安心感もあります。
各ツールの Input / Output
ここではもう少し、Bicep MCP Server の挙動を知るべく、先の例の中で呼び出されていたツールの Input / Output を見ていこうと思います。
get_bicep_best_practices
まず先の例では「Bicep を作成して」と指示をしたため get_bicep_best_practices が呼び出され、ベストプラクティスに関する情報が取得されているようです。
特に Input には何も入っていないため、仮想ネットワークに限らず 一般的な Bicep のベストプラクティス を出力しています。
今まではプロンプトでどのように生成してほしいかを細かく指示を出していましたが、初めからこのベストプラクティスに沿ってコードを生成してくれるため、そのような細かい指示が必要なくなった印象です。

list_az_resource_types_for_provider
次に実行されたのが、list_az_resource_types_for_provider です。
結果を見てみると、仮想ネットワークを作成する、ということで "providerNamespace": "Microsoft.Network" が Input となり、Output として Microsoft.Network のリソースタイプと API バージョンの全てが出力されています。
ここで、仮想ネットワークを作成する上でのリソースタイプと最新バージョン(今回だと Microsoft.Network/virtualNetworks@2024-07-01)を探しているみたいです。

get_az_resource_type_schema
最後に呼ばれたのは get_az_resource_type_schema です。
こちらの結果を見てみると、先の list_az_resource_types_for_provider での出力結果を用いて、そのリソースタイプと API バージョンの スキーマ情報 を取得していることがわかります。
ここで細かくスキーマ情報を取得しているため、パラメータ漏れのない Bicep が生成されるみたいですね。

これで全てのツールの挙動を見てきましたが、どれも高品質な Bicep のソースコードを生成するためには欠かせないツールですね。これから Bicep を用いて IaC を実装する際には欠かせないツールだと感じました!
おわりに
いかがでしたでしょうか。
パブリックプレビュー版とはいえ、非常に簡単に使えますし機能も充実していると感じました。
冒頭にも述べたように、Azure では様々な MCP サーバーが用意されています。それぞれの用途に合わせて使い分けると良いですし、この Bicep MCP Server は Microsoft Learn MCP Server と組み合わせればもっと強力になること間違いなしです。
AI が高品質なコードを書いてくれることは嬉しいことですが、それを判断するのは変わらず我々人間のため、AI が書いたコードはしっかりレビューできるようにならないと、と改めて感じました。
そのためにですが、AI と一緒に学習する、という使い方もできれば良いのではないでしょうか。
みなさんも AI を使った開発現場に順応していきましょう!そして、使えるツールはふんだんに使って開発生産性を爆上げしましょう!
今後の動向にも注目です!最後まで読んでいただきありがとうございました。