前回
スウェーデン発のプロトタイピングツールNoodlを触ってみた - Qiita
HTTP通信
HTTP通信もできるっぽいのでそれを試してみる。
天気予報のAPIを使う
https://openweathermap.org/api
※ 事前にsign upしてAPIキーを取得しましょう。
手順
1. REST Nodeを配置
- Request
- Resource:
/forecast - Method:
GET
- Resource:
- Backend
- Endpoint:
http://api.openweathermap.org/data/2.5
- Endpoint:
- Script
define({
  // The input ports of the REST node, name of input and type
  inputs:{
      apiKey:'string',
      city: 'string'
  },

  // The output ports of the REST node, name of output and type
  outputs:{
      city:'string',
      country:'string',
      weather:'string',
      lat:'number',
      long:'number',
      windangle:'number',
      windspeed:'number',
      temperature:'number',
      humidity: 'number'
  },

  //Add custom code to setup the request object before the request
  //is made.
  //
  //*request.resource     contains the resource path of the request.
  //*request.method       contains the method, GET, POST, PUT or DELETE.
  //*request.headers      is a map where you can add additional headers.
  //*request.parameters   is a map the parameters that will be appended
  //                      to the url.
  //*request.content      contains the content of the request as a javascript
  //                      object.
  //
  // The inputs and outputs maps can also be accessed via *this.inputs and
  // *this.outputs.
  request:function(inputs,request) {
    request.parameters.APPID = inputs.apiKey;
    request.parameters.q = inputs.city;
    request.parameters.v = inputs.country;
  },

  // Add custom code to convert the response content to outputs
  //
  //*response.status    The status code of the response
  //*response.content   The content of the response as a javascript
  //                    object.
  //*response.request   The request object that resulted in the response.
  //
  // The inputs and outputs maps can also be accessed via *this.inputs and
  // *this.outputs.
  response:function(outputs,response) {
      outputs.city = response.content.city.name;
      outputs.country = response.content.city.country;
      outputs.lat = response.content.city.coord.lat;
      outputs.long = response.content.city.coord.lon;
      outputs.weather = response.content.list[2].weather[0].description;

      outputs.windangle = response.content.list[2].wind.deg;
      outputs.windspeed = response.content.list[2].wind.speed;

      outputs.temperature = response.content.list[2].main.temp;
      outputs.humidity = response.content.list[2].main.humidity;

  }
})
- Inputs
- apiKey:
openweathermapのkey - city:
tokyo
- apiKey:
2. 表示するtext nodeをroot配下に配置
- label名:
temperature - text:
tap here
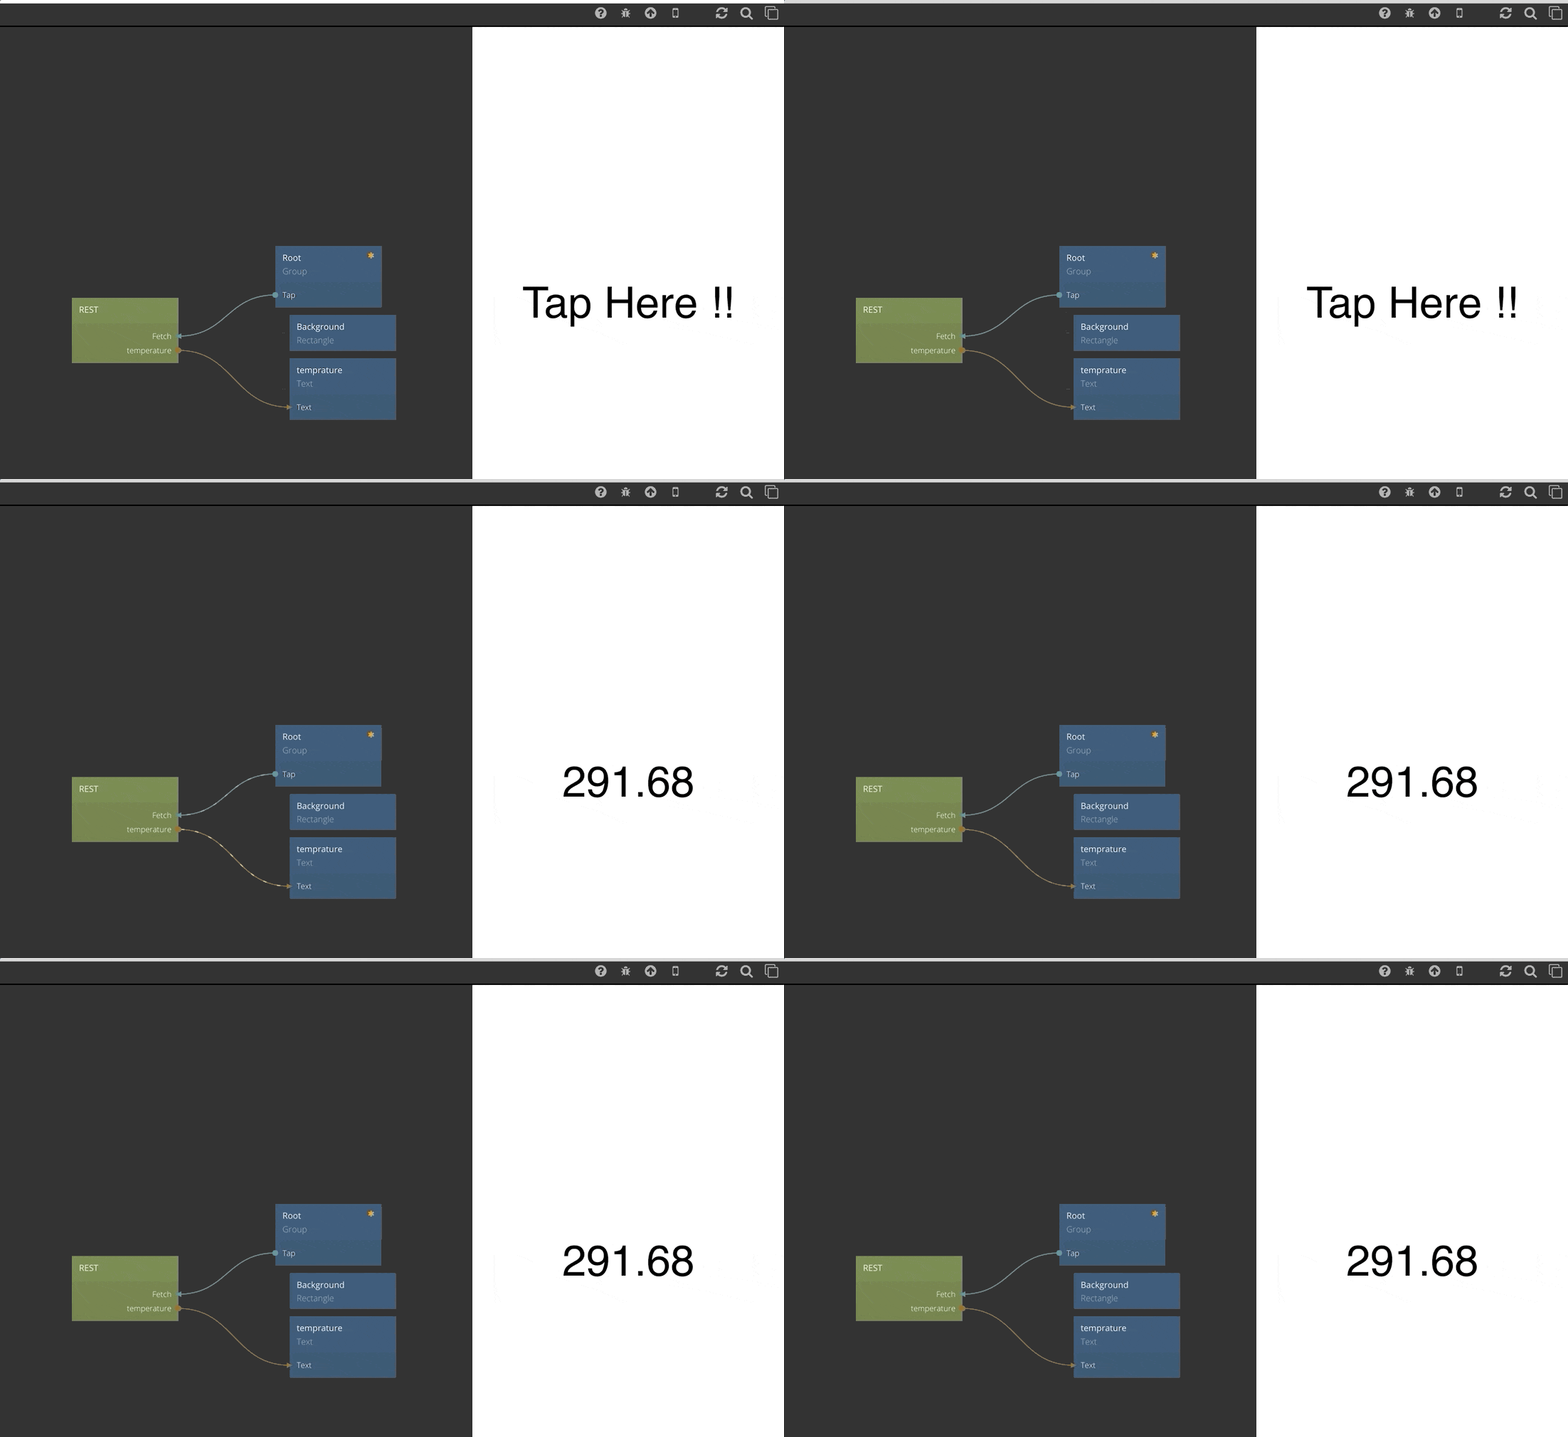
3. コネクト
- RootからREST
- Source:
Tap - Target:
Fetch
- Source:
- RESTからText
- Source:
temperature - Target:
text
- Source:
4. 実行
画面をタップすると数字が表示される
このAPIは摂氏でも華氏でもなくケルビンで帰ってくるので値的には間違っていない。
ここからが真骨頂
Noodlが面白いのはjsも動く。
ということでjsでケルビンから摂氏(℃)へ変換する。
5. jsのノードを追加して以下のコードを書く
runの中が単位を変換するコード。
単純にinputsのケルビンを摂氏へ変換してoutputsに返してる。
define({
    inputs: {
        kelvin: "string"
    },
    outputs: {
        result: "string"
    },
    destroy: function(inputs, outputs) {

    },
    setup: function(inputs, outputs) {

    },
    run: function(inputs, outputs, changedInputs) {
        if (inputs.kelvin !== undefined) {
            let kelvinNum = Number(inputs.kelvin);
            let degree = (kelvinNum - 273.15).toFixed(2);
            outputs.result = String(degree);
        } else {
            outputs.result = 'Tap Here !!'
        }
    }
});
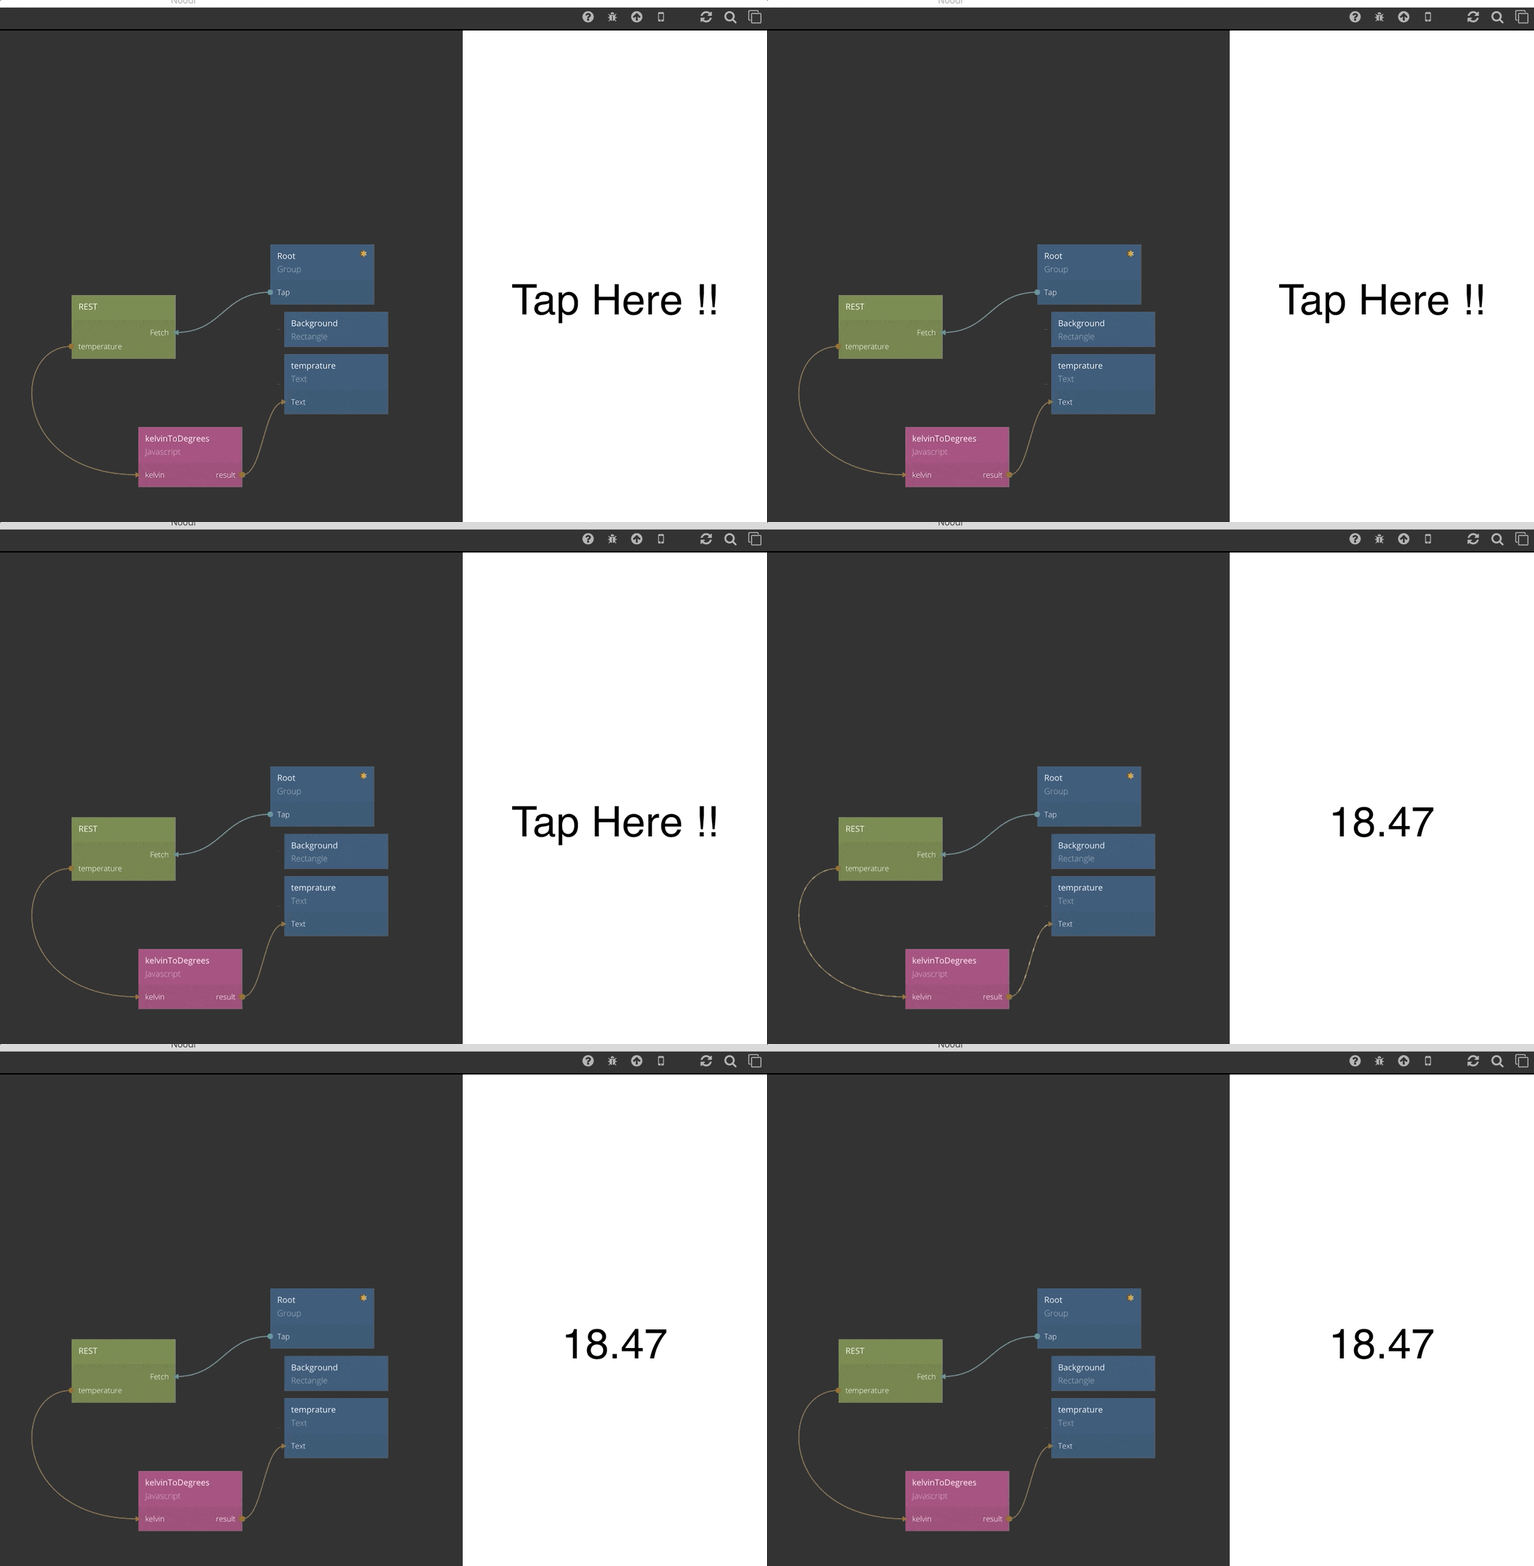
6. コネクト
- RESTからjs
- Source:
temperature - Target:
kelvin
- Source:
- JSからtext
- Source:
result - Target:
text
- Source:
7. 実行
いけた
JSを使えるとなるともはや何でもいけるのでは感すごい。

