Goal
- Do a Hello World with a minimal web server.
Steps
- Set up a VM in the cloud.
- Install necessary tools.
- Create an app.
- Establish connection with WSGI protocol.
- Set up an web server.
- Tada!
1. Set up a VM in the cloud
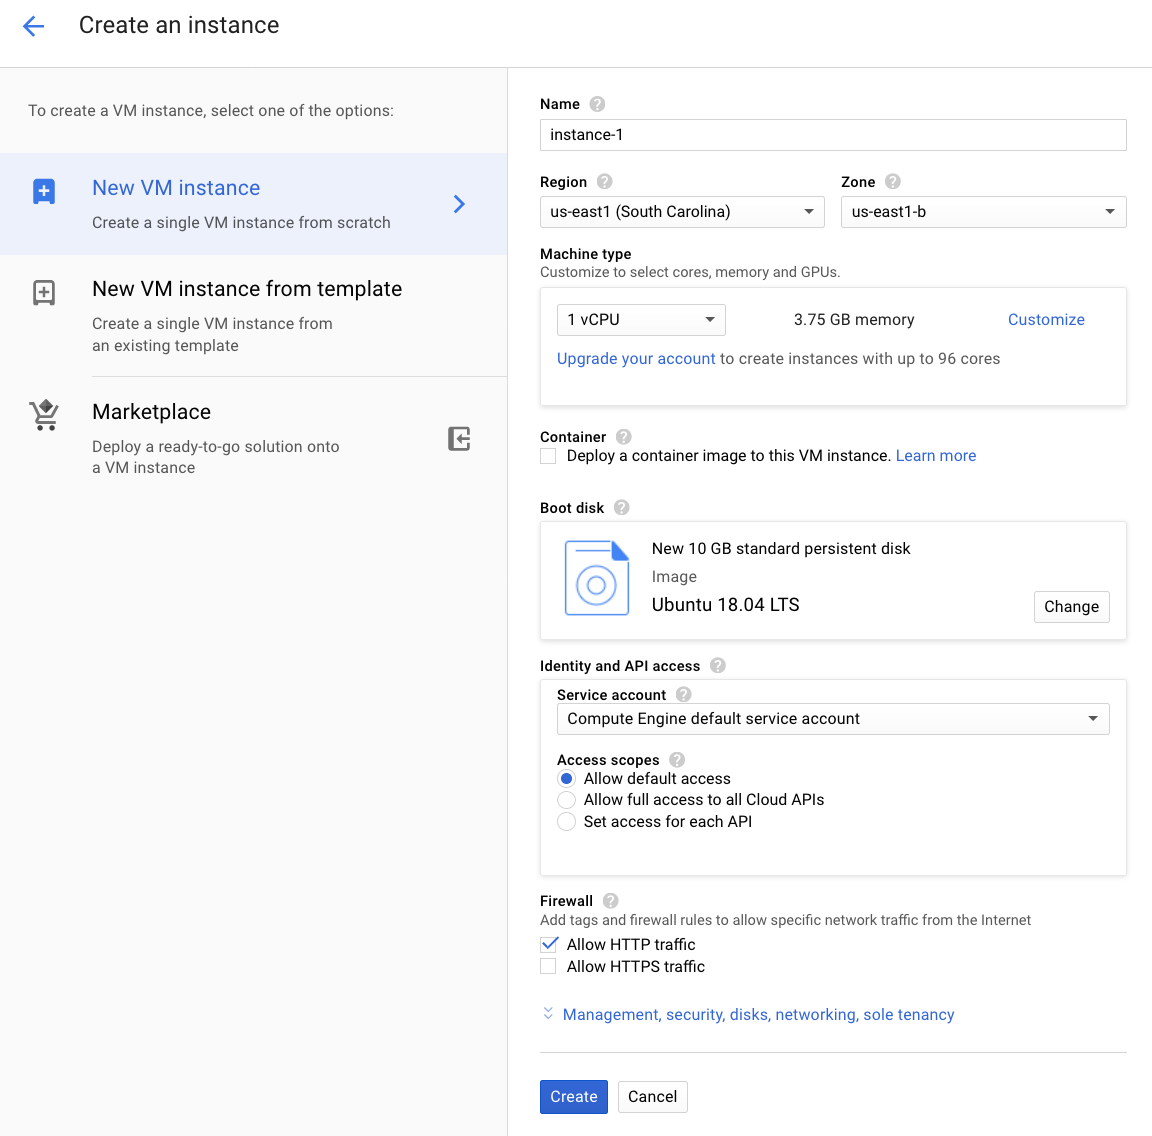
Create a GCE f1-micro instance.
- Required:
- Somewhere in the U.S. for using free tier.
- Allow HTTP traffic.
- This time in GUI.
- Using Ubuntu 18.04.

2. Install necessary tools
-
Open terminal.
-
Install the
gcloudCLI.
$ curl https://sdk.cloud.google.com | bash
$ exec -l $SHELL
$ gcloud init
- SSH into the VM.
- We don't have to remember this command, as it's shown in the web console.
- Go to the instances list page, click triangular icon right next to the
SSHbutton, and then clickview gcloud command.
$ gcloud compute --project "YOUR_PROJECT_ID" ssh --zone "us-east1-b" "YOUR_INSTANCE_NAME"
- Update the package manager and installed packages.
$ sudo apt update
$ sudo apt upgrade
3. Create an app
- Install python3.
- This enables the
pip3command.
- This enables the
$ sudo apt install python3 python3-dev python3-pip
- Install virtualenv (may not be needed).
$ sudo apt install python3-vitualenv
- Install Flask and uWSGI with pip3 (this time not apt).
$ sudo pip3 install flask
- Create a Flask template file in the current directory.
~/hello.py
from flask import Flask

app = Flask(__name__)

@app.route("/")
def index():
    return "Hello World!"

if __name__ == "__main__":
    app.run()
- Tell Flask about the app.
$ export FLASK_APP=hello.py
4. Establish connection with WSGI protocol.
- Install uWSGI.
$ sudo pip3 install uwsgi
- Create an uWSGI ini file.
~/uwsgi.ini
[uwsgi]

socket = /tmp/uwsgi.sock
chmod-socket = 666

chdir = %d
wsgi-file = /home/YOUR_USER_NAME/hello.py
module = hello:app
callable = app

master = 1
processes = 1

logto = /var/log/uwsgi/uwsgi.log
- Create a service definition for systemd.
-
Restart = alwaysallowed? -
ExecStartshould be noted absolute.
-
/etc/systemd/system/uwsgi.service
[Unit]
Description = uwsgi

[Service]
Restart = no
ExecStart = /usr/YOUR_USER_NAME/.local/bin/uwsgi --ini=/home/YOUR_USER_NAME/uwsgi.ini
ExecReload = /bin/kill -s HUP ${MAINPID}
KillSignal = QUIT

[Install]
WantedBy = multi-user.target
- Enable (auto-restart) and start uwsgi manually.
$ sudo systemctl enable uwsgi
$ sudo systemctl start uwsgi
5. Set up an web server.
- Install Nginx.
$ sudo apt install nginx
- Note that configuration files are located under
/etc/nginx.-
nginx.conffile is for global configuration andconf.ddirectory is for local one. - Any
.conffile put here is included intonginx.conf.- Look inside
nginx.confand see anincludedirective.
- Look inside
-
$ ls /etc/nginx | grep conf
conf.d
fastcgi.conf
nginx.conf
- Remove the default conf file.
$ sudo rm /etc/nginx/sites-enabled/default
- Create an Nginx conf file.
-
uwsgi_passdirective specifies an unix socket. - For details, look at this article.
-
/etc/nginx/conf.d/hello.conf
server {
  listen 80 default_server;
  server_name _;

  location / {
    include uwsgi_params;
    uwsgi_pass unix:///tmp/uwsgi.sock;
  }
}
- Enable and start Nginx.
$ sudo systemctl enable nginx
$ sudo systemctl start nginx
6. Tada!
- Open the fixed IP address in browser.

- That's it!
If something's wrong...
- First, do an research by taking a look at:
- on Nginx:
- service status at
$ systemctl status nginx - service declaration at
/etc/systemd/system/uwsgi.service - conf files at
/etc/nginx/nginx.confor/etc/nginx/conf.d/hello.conf
- service status at
- on uWSGI:
- log at
/var/log/uwsgi/uwsgi.log(if specified inlogtodirective in~/uwsgi.ini) - service status at
$ systemctl status uwsgi - conf file at
~/uwsgi.ini
- log at
- in general:
/var/log/syslog$ history
- on Nginx:
References
-
in general:
- Ubuntu 16.04 で Flask アプリケーションを動かすまでにやることまとめ
-
Flask + uWSGI + Nginx でハローワールドするまで @ さくらのVPS (CentOS 6.6)
- for better understanding of each command.
-
Deploying Python Flask using uWSGI and Nginx on Ubuntu 14.04
- for errors like
ImportError: No module named flask
- for errors like
-
uWSGI docs
-
Nginx configuration
-
systemctlcommands -
Flask basics
-
Python environments (e.g. difference among venv, virtualenv or pyenv)