1.前提条件
リンク先の作業を完了させてください。
ファイル構成
2.TEMPLATESフォルダを作成する
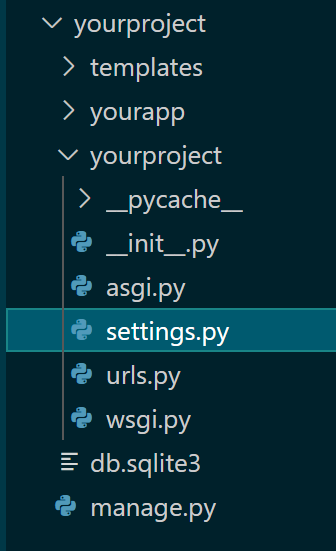
TEMPLATESという名前で、HTMLファイルを格納するフォルダを作成します。
ファイル構成は以下の通りです。
3.TEMPLATEフォルダを紐づける
プロジェクトフォルダのsettings.pyを開いてください。
2行目に下のコードを追加します。
settings.py
import os
55行目TEMPLATESの'DIRS':[ ]を下のように追加してください。
settings.py
TEMPLATES = [
    {
        'BACKEND': 'django.template.backends.django.DjangoTemplates',
        'DIRS': [os.path.join(BASE_DIR, 'templates')], #追加部分
        'APP_DIRS': True,
        'OPTIONS': {
            'context_processors': [
                'django.template.context_processors.debug',
                'django.template.context_processors.request',
                'django.contrib.auth.context_processors.auth',
                'django.contrib.messages.context_processors.messages',
            ],
        },
    },
]
※必ずsettings.pyを更新したあとは、上書き保存をしてください。
4. HTMLファイルを作成する
templatesフォルダの下に、任意の名前でHTMLファイルを作成してください。
HTMLファイルの中身を作ります。
index.html
<!DOCTYPE html>
<html lang="ja">

HELLO WORLD

</html>
5. Djangoのサーバリンクと作成したHTMLファイルを紐づける
アプリフォルダのviews.pyを開いてください。
下のようにコーディングしてください。
views.py
from django.shortcuts import render
from django.http import HttpResponse

def index(request):
    return render(request, "index.html")
6. 作業が成功していることを確認する
terminalでコマンドをうってください。
python manage.py runserver
リンクを踏み、画像のような画面が表示されていることを確認する
うまくいかない場合は、編集した全てのファイルに上書き保存をしてください。
次の作業


