概要
Spring Framework (Spring Boot)のTipsです。随時更新していく予定です。
ある程度ボリュームのある内容は別記事として投稿し、そこへリンクしています。
また、最初のころのtipsは2015年投稿で使用バージョンが古く、現在では参考にならないかもしれませんのでご注意ください。
Tips
1. プロパティファイルの値をフィールドのデフォルト値に設定する
- 環境: Spring Boot 1.3.0.M5, Java 1.8.0_60
Valueアノテーション
Valueアノテーションを使用してプロパティファイルの値をフィールドのデフォルト値とすることができます。
- [Annotation Type Value] (http://docs.spring.io/spring/docs/current/javadoc-api/org/springframework/beans/factory/annotation/Value.html)
myapp:
  string:
    property: Some text
    propertyDefault:
#    propertyUnresolvable:
  int:
    property: 123
  boolean:
    property: true
@Value("${myapp.string.property}")
private String stringProperty;
@Value("${myapp.int.property}")
private int intProperty;
@Value("${myapp.boolean.property}")
private boolean boolProperty;
logger.info("String:{} int:{} bool:{}", stringProperty, intProperty, boolProperty);
// ⇒ String:Some text int:123 bool:true
定義されていないプロパティ
定義されていないプロパティを参照すると例外が発生します。
@Value("${myapp.string.propertyUnresolvable}")
private String stringPropertyUnresolvable;
Caused by: java.lang.IllegalArgumentException: Could not resolve placeholder 'myapp.string.propertyUnresolvable' in string value "${myapp.string.propertyUnresolvable}"
この問題を解決するためにPropertySourcesPlaceholderConfigurerをカスタマイズします。
setIgnoreUnresolvablePlaceholdersメソッドで解決できないプロパティは無視するようにします。
@Bean
public static PropertySourcesPlaceholderConfigurer placeholderConfigurer() {
  PropertySourcesPlaceholderConfigurer config = new PropertySourcesPlaceholderConfigurer();
  config.setIgnoreUnresolvablePlaceholders(true);
  return config;
}
次にデフォルト値を設定します。デフォルト値は:で区切って指定します。
@Value("${myapp.string.propertyUnresolvable:defaultValue}")
private String stringPropertyUnresolvable;
結果は下記の通りです。
logger.info("String Unresolvable:{}", stringPropertyUnresolvable);
// ⇒ String Unresolvable:defaultValue
デフォルト値
プロパティの値が定義されていない場合、Valueアノテーションで指定したデフォルト値が反映されません。
myapp:
  string:
    propertyDefault:
@Value("${myapp.string.propertyDefault:defaultValue}")
private String stringPropertyDefault;
Valueアノテーションのデフォルト値がフィールドに反映されず空文字が出力されます。
logger.info("String Default:{}", stringPropertyDefault);
// ⇒ String Default:
この問題を解決するためにPropertySourcesPlaceholderConfigurerをカスタマイズします。
setNullValueメソッドを使用して空文字をnullに変換します。
@Bean
public static PropertySourcesPlaceholderConfigurer placeholderConfigurer() {
  PropertySourcesPlaceholderConfigurer config = new PropertySourcesPlaceholderConfigurer();
  config.setIgnoreUnresolvablePlaceholders(true);
  config.setNullValue("");
  return config;
}
しかし、デフォルト値はセットされずnullになります。
logger.info("String Default:{}", stringPropertyDefault);
// ⇒ String Default:null
そこでValueアノテーションでデフォルト値は指定せず、Optionalに代えます。
@Value("${myapp.string.propertyDefault}")
private Optional<String> stringPropertyDefault;
結果は下記の通りです。
logger.info("String Default:{}", stringPropertyDefault.orElse("defaultValue"));
// ⇒ String Default:defaultValue
コレクション
- [Class DefaultFormattingConversionService] (http://docs.spring.io/spring/docs/current/javadoc-api/org/springframework/format/support/DefaultFormattingConversionService.html)
yamlで配列を定義するには下記のように記述しますが、springはこの形式の配列定義に対応していないようです。
(この件は[@Value annotation should be able to inject List from YAML properties] (https://jira.spring.io/browse/SPR-11759)としてチケット化されています。)
myapp:
  intList:
    property:
     - 1
     - 2
     - 3
     - 4
     - 5
現状ではカンマ区切りで値を列挙して配列を表現します。
myapp:
  intList:
    property: 1,2,3,4,5
  stringArray:
    property: a,b,c,d,e
@Value("${myapp.intList.property}")
private List<Integer> intList;
@Value("${myapp.stringArray.property}")
private List<String> stringArray;
しかし、このままでは例外が発生します。
Caused by: java.lang.NumberFormatException: For input string: "1,2,3,4,5"
この問題を解決するためにConversionServiceにDefaultFormattingConversionServiceを使用します。
@Bean
public static ConversionService conversionService() {
  ConversionService conversionService = new DefaultFormattingConversionService();
  return conversionService;
}
結果は下記の通りです。
logger.info("intList:{}", intList.toString());
// ⇒ intList:[1, 2, 3, 4, 5]
logger.info("stringArray:{}", stringArray.toString());
// ⇒ stringArray:[a, b, c, d, e]
LocalDate
日時をフィールドのデフォルト値にするにはValueアノテーションのほかにDateTiemFormatアノテーションを使用します。
myapp:
  localDate:
    property: 2015-09-28
  localDateTime:
    property: 2015-09-28 10:05:00
DateTimeFormatアノテーションでパターンを宣言します。
@Value("${myapp.localDate.property}")
@DateTimeFormat(pattern = "yyyy-MM-dd")
private LocalDate localDate;
@Value("${myapp.localDateTime.property}")
@DateTimeFormat(pattern = "yyyy-MM-dd HH:mm:ss")
private LocalDateTime localDateTime;
結果は下記の通りです。
logger.info("localDate:{}", localDate.toString());
// ⇒ localDate:2015-09-28
logger.info("localDateTime:{}", localDateTime.toString());
// ⇒ localDateTime:2015-09-28T10:05
thymeleaf
thymeleafテンプレートからプロパティファイルの値を参照することができます。
myapp:
  version: 1.0.1
<p th:text="${@environment.getProperty('myapp.version')}"></p>
結果は下記の通りです。
<p>1.0.1</p>
2. ConversionServiceをカスタマイズ
- 環境: Spring Boot 1.3.0.M5, Java 1.8.0_60
型変換サービスをカスタマイズして日付文字列をDateやLocalDateクラスへ変換します。
- [Interface ConversionService] (http://docs.spring.io/spring/docs/current/javadoc-api/org/springframework/core/convert/ConversionService.html)
- [Class FormattingConversionServiceFactoryBean] (http://docs.spring.io/spring/docs/current/javadoc-api/org/springframework/format/support/FormattingConversionServiceFactoryBean.html)
import java.text.ParseException;
import java.text.SimpleDateFormat;
import java.time.LocalDate;
import java.time.LocalDateTime;
import java.time.format.DateTimeFormatter;
import java.util.Date;
import java.util.HashSet;
import java.util.Set;

import org.springframework.context.annotation.Bean;
import org.springframework.context.annotation.Configuration;
import org.springframework.core.convert.ConversionService;
import org.springframework.core.convert.converter.Converter;
import org.springframework.format.support.FormattingConversionServiceFactoryBean;

@Configuration
public class ConversionConfig {

  @Bean
  public static ConversionService conversionService() {

    FormattingConversionServiceFactoryBean factoryBean = new FormattingConversionServiceFactoryBean();
    factoryBean.setConverters(getConverters());
    factoryBean.afterPropertiesSet();
    ConversionService conversionService = factoryBean.getObject();

    return conversionService;
  }

  private static final DateTimeFormatter DATE_FORMATTER = DateTimeFormatter.ofPattern("yyyy-MM-dd");
  private static final DateTimeFormatter DATETIME_FORMATTER = DateTimeFormatter.ofPattern("yyyy-MM-dd HH:mm:ss");

  private static Set<Converter<String, ?>> getConverters() {
    Set<Converter<String, ?>> converters = new HashSet<Converter<String, ?>>();

    converters.add(
      new Converter<String, Date>() {
        @Override
        public Date convert(String str) {
          SimpleDateFormat sdf = new SimpleDateFormat("yyyy-MM-dd");
          try {
            return sdf.parse(str);
          } catch (ParseException e) {
            return null;
          }
        }
    });

    converters.add(
      new Converter<String, LocalDate>() {
        @Override
        public LocalDate convert(String str) {
          return LocalDate.parse(str, DATE_FORMATTER);
        }
    });

    converters.add(
      new Converter<String, LocalDateTime>() {
        @Override
        public LocalDateTime convert(String str) {
          return LocalDateTime.parse(str, DATETIME_FORMATTER);
        }
    });

    return converters;
  }
}
動作確認コード
@Autowired
ConversionService conversionService;

public void confirm() {

  Integer i = conversionService.convert("2015", Integer.class);
  Long l = conversionService.convert("2015", Long.class);
  BigDecimal b = conversionService.convert("124.45", BigDecimal.class);

  logger.info("Integer:{} Long:{} BigDecimal:{}", i, l, b);
  // ⇒ Integer:2015 Long:2015 BigDecimal:124.45

  Date d = conversionService.convert("2015-10-03", Date.class);
  logger.info("Date:{}", d.toString());
  // ⇒ Date:Sat Oct 03 00:00:00 JST 2015

  LocalDate ld = conversionService.convert("2015-10-03", LocalDate.class);
  logger.info("localDate:{}", ld.toString());
  // ⇒ localDate:2015-10-03

}
3. EventListenerアノテーションでアプリケーションイベントを実装する
- 環境: Spring Boot 1.3.0.M5, Java 1.8.0_60
Spring 4.2よりアプリケーションイベントの実装にEventListenerアノテーションが使用できます。
- [Annotation Type EventListener] (https://docs.spring.io/spring/docs/current/javadoc-api/org/springframework/context/event/EventListener.html)
- [Class ApplicationEvent] (http://docs.spring.io/spring/docs/current/javadoc-api/org/springframework/context/ApplicationEvent.html)
- [Interface ApplicationListener] (http://docs.spring.io/spring/docs/current/javadoc-api/org/springframework/context/ApplicationListener.html)
- [Interface ApplicationEventPublisher] (http://docs.spring.io/spring/docs/current/javadoc-api/org/springframework/context/ApplicationEventPublisher.html)
アノテーションを使用しない実装方法
import java.io.Serializable;
import java.util.Date;

public class Blog implements Serializable {

  private static final long serialVersionUID = -5011335950988850583L;

  private Long id;
  private String title;
  private Date published;

  public Blog(Long id, String title) {
    this.id = id;
    this.title = title;
    this.published = null;
  }

  ... getter/setter省略 ...

  @Override
  public String toString() {
    return "Blog [id=" + id + ", title=" + title + ", published=" + published
        + "]";
  }

}
イベントクラス
import org.springframework.context.ApplicationEvent;

public class BlogEvent extends ApplicationEvent {

  private static final long serialVersionUID = 6029200135885343599L;

  private Blog blog;

  public BlogEvent(Object source, Blog blog) {
    super(source);
    this.blog = blog;
  }

  public Blog getBlog() {
    return blog;
  }

  public void setBlog(Blog blog) {
    this.blog = blog;
  }

}
リスナークラス
import java.util.Date;

import org.slf4j.Logger;
import org.slf4j.LoggerFactory;
import org.springframework.context.ApplicationListener;
import org.springframework.stereotype.Component;

@Component
public class BlogListener implements ApplicationListener<BlogEvent> {
  final static Logger logger = LoggerFactory.getLogger(BlogListener.class);

  @Override
  public void onApplicationEvent(BlogEvent event) {
    logger.info("Blog Event is occured!!");
    logger.info(event.getBlog().toString());
    event.getBlog().setPublished(new Date());
  }

}
ApplicationEventPublisherAware
import org.slf4j.Logger;
import org.slf4j.LoggerFactory;
import org.springframework.context.ApplicationEventPublisher;
import org.springframework.context.ApplicationEventPublisherAware;
import org.springframework.stereotype.Service;

@Service
public class BlogService implements ApplicationEventPublisherAware {
  final static Logger logger = LoggerFactory.getLogger(BlogService.class);

  private ApplicationEventPublisher publisher;

  @Override
  public void setApplicationEventPublisher(ApplicationEventPublisher publisher) {
    this.publisher = publisher;
  }

  public void createBlog(Blog blog) {
    logger.info("Publishing Blog Create Event");
    BlogEvent event = new BlogEvent(this, blog);
    publisher.publishEvent(event);
  }

}
動作確認コード
@Autowired
BlogService blogService;

public void confirm() {

  Blog blog = new Blog(1L, "浜省だらけの野球対決を観賞する");
  logger.info(blog.toString());
  // ⇒ Blog [id=1, title=浜省だらけの野球対決を観賞する, published=null]

  blogService.createBlog(blog);
  logger.info(blog.toString());
  // ⇒ Blog [id=1, title=浜省だらけの野球対決を観賞する, published=Sun Oct 04 20:25:33 JST 2015]

}
EventListenerアノテーションを使用した実装
import java.io.Serializable;
import java.util.Date;

public class Product implements Serializable {

  private static final long serialVersionUID = 886343041195980987L;

  private Long id;
  private String productName;

  private Date createdAt;
  private Date completedAt;

  public Product(Long id, String productName) {
    this.id = id;
    this.productName = productName;
    this.createdAt = null;
    this.completedAt = null;
  }

  ... getter/setter省略 ...

  @Override
  public String toString() {
    return "Product [id=" + id + ", productName=" + productName
        + ", createdAt=" + createdAt + ", completedAt=" + completedAt + "]";
  }

}
イベントクラス
ApplicationEventを継承する必要がありません。
public class ProductEvent {

  private Product product;
  private String status;

  public ProductEvent(Product product) {
    this.product = product;
    this.status = "CREATE";
  }

  public Product getProduct() {
    return product;
  }
  public void setProduct(Product product) {
    this.product = product;
  }
  public String getStatus() {
    return status;
  }
  public void setStatus(String status) {
    this.status = status;
  }

}
リスナークラス
ApplicationListenerを実装する必要がありません。代わりにメソッドにEventListenerアノテーションを付けてイベントリスナーを登録します。
import java.util.Date;

import org.slf4j.Logger;
import org.slf4j.LoggerFactory;
import org.springframework.context.event.EventListener;
import org.springframework.stereotype.Component;

@Component
public class ProductListener {
  final static Logger logger = LoggerFactory.getLogger(ProductListener.class);

  @EventListener(condition = "#event.status == 'CREATE'")
  public void createEvent(ProductEvent event) {
    logger.info("Product Create Event is occured!!");

    try {
      TimeUnit.SECONDS.sleep(3L);
    } catch (InterruptedException e) {
      e.printStackTrace();
    }

    event.getProduct().setCreatedAt(new Date());
   }

  @EventListener(condition = "#event.status == 'COMPLETE'")
  public void closeEvent(ProductEvent event) {
    logger.info("Product Complete Event is occured!!");

    try {
      TimeUnit.SECONDS.sleep(3L);
    } catch (InterruptedException e) {
      e.printStackTrace();
    }

    event.getProduct().setCompletedAt(new Date());
  }

}
イベントを発行するクラス
ApplicationEventPublisherAwareを実装する必要がありません。
import org.slf4j.Logger;
import org.slf4j.LoggerFactory;
import org.springframework.beans.factory.annotation.Autowired;
import org.springframework.context.ApplicationEventPublisher;
import org.springframework.stereotype.Service;

@Service
public class ProductService {
  final static Logger logger = LoggerFactory.getLogger(ProductService.class);

  @Autowired
  ApplicationEventPublisher publisher;

  public void createProduct(Product product) {
    logger.info("Publishing Product Create Event");
    ProductEvent event = new ProductEvent(product);
    publisher.publishEvent(event);
  }

  public void completeProduct(Product product) {
    logger.info("Publishing Product Complete Event");
    ProductEvent event = new ProductEvent(product);
    event.setStatus("COMPLETE");
    publisher.publishEvent(event);
  }

}
動作確認コード
@Autowired
ProductService productService;

public void confirm() {

  Product product = new Product(1L, "Mazda RX-7");
  logger.info(product.toString());
  // ⇒ Product [id=1, productName=Mazda RX-7, createdAt=null, completedAt=null]

  productService.createProduct(product);
  logger.info(product.toString());
  // ⇒ Product [id=1, productName=Mazda RX-7, createdAt=Sun Oct 04 20:25:36 JST 2015, completedAt=null]

  try {
    TimeUnit.SECONDS.sleep(3L);
  } catch (InterruptedException e) {
    e.printStackTrace();
  }

  productService.completeProduct(product);
  logger.info(product.toString());
  // ⇒ Product [id=1, productName=Mazda RX-7, createdAt=Sun Oct 04 20:25:36 JST 2015, completedAt=Sun Oct 04 20:25:42
}
4. ResourceLoaderでリソースファイルを取得する
- 環境: Spring Boot 1.3.0.M5, Java 1.8.0_60
リソースファイルの取得にApplicationContextのインスタンスが使用できないような場合、代わりにResourceLoaderを使用することでリソースファイルを取得することができます。
- [Interface ResourceLoader] (http://docs.spring.io/spring/docs/current/javadoc-api/org/springframework/core/io/ResourceLoader.html)
リソースファイル
動作確認で使用するリソースファイルを/src/main/resourcesに作成します。
/src/main/resources/resource1.txt
123
456
789
/src/main/resources/resource2.txt
ABC
DEF
GHI
/src/main/resources/resource3.txt
あいうえお
かきくけこ
さしすせそ
動作確認コード
- ApplicationContextを使用する方法
- ResourceLoaderを使用する方法
- DefaultResourceLoaderを使用する方法
import java.io.BufferedReader;
import java.io.InputStreamReader;
import java.io.IOException;

import org.slf4j.Logger;
import org.slf4j.LoggerFactory;
import org.springframework.beans.factory.annotation.Autowired;
import org.springframework.context.ApplicationContext;
import org.springframework.core.io.DefaultResourceLoader;
import org.springframework.core.io.Resource;
import org.springframework.core.io.ResourceLoader;
import org.springframework.stereotype.Service;

@Service
public class ResourceLoaderService {
  final static Logger logger = LoggerFactory.getLogger(ResourceLoaderService.class);

  @Autowired
  ResourceLoader resourceLoader;

  @Autowired
  ApplicationContext context;

  // (1)
  public void execute1() {
    try {
      Resource resource = context.getResource("classpath:resource1.txt");
      try (BufferedReader reader = new BufferedReader(new InputStreamReader(resource.getInputStream()))) {
        reader.lines().forEach(line -> {
          logger.info(line);
          // ⇒ 123
          // ⇒ 456
          // ⇒ 789
        });
      }
    } catch (IOException e) {
      logger.error(e.getMessage());
    }
  }

  // (2)
  public void execute2() {
    try {
      Resource resource = resourceLoader.getResource("classpath:resource2.txt");
      try (BufferedReader reader = new BufferedReader(new InputStreamReader(resource.getInputStream()))) {
        reader.lines().forEach(line -> {
          logger.info(line);
          // ⇒ ABC
          // ⇒ DEF
          // ⇒ GHI
        });
      }
    } catch (IOException e) {
      logger.error(e.getMessage());
    }
  }

  // (3)
  public void execute3() {
    try {
      Resource resource = new DefaultResourceLoader().getResource("classpath:resource3.txt");
      try (BufferedReader reader = new BufferedReader(new InputStreamReader(resource.getInputStream()))) {
        reader.lines().forEach(line -> {
          logger.info(line);
          // ⇒ あいうえお
          // ⇒ かきくけこ
          // ⇒ さしすせそ
        });
      }
    } catch (IOException e) {
      logger.error(e.getMessage());
    }
  }

}
以下の例のようにResource.getFileでリソースファイルを読み取ろうとすると、アプリケーションをjarファイルにパッケージして実行した時にFileNotFoundExceptionが発生します。
try (BufferedReader reader = new BufferedReader(new FileReader(resource.getFile()))) {
    reader.lines().forEach(line -> {
        //...処理
    });
}
java.io.FileNotFoundException: class path resource [resource3.txt] cannot be resolved to absolute file path because it does not reside in the file system: jar:file: 省略...
5. MessageSourceでメッセージソースを取得する
- 投稿: 2015/10/08
- 環境: Spring Boot 1.3.0.M5, Java 1.8.0_60
メッセージリソースの設定はspring.messages.*プロパティで行います。
# INTERNATIONALIZATION (MessageSourceAutoConfiguration)
spring:
  messages:
    basename: messages,views
    cache-seconds: -1
    encoding: utf-8
- basename
- メッセージソースファイルのベース名を指定します。複数指定する場合はカンマで区切ります。デフォルトはmessagesです。
- cache-seconds
- メッセージソースをキャッシュする秒数を指定します。デフォルトは-1でキャッシュの期限は無期限です。 0を指定するとキャッシュされません。
- encoding
- メッセージソースのエンコードを指定します。デフォルトはutf-8です。
メッセージソースファイルのベース名に例えば_jaや_enの様にロケールを付加することで国際化することができます。
1つの言語だけ対応すればよい場合はロケールは不要です。
message.text1 = abc
message.text2 = 123
message.text3 = hello {0}.
layout.header = \u30D8\u30C3\u30C0\u30FC
layout.footer = Copyright {0} - {1}.
controller
例えばControlerクラス内でメッセージソースを参照したい場合はMessageSourceのインスタンスを使用します。
@Autowired
MessageSource messageSource;
@RequestMapping(value = "/", method = RequestMethod.GET)
public String index(Model model, Locale locale) {

  String text1 = messageSource.getMessage("message.text1", null, locale);
  String text2 = messageSource.getMessage("message.text2", null, locale);
  String text3 = messageSource.getMessage("message.text3", new Object[]{"world!"}, locale);
  logger.info("message: text1:{} text2:{} text3:{}", text1, text2, text3);
  // ⇒ message: text1:abc text2:123 text3:hello world!.

  return "Index/index";
}
thymeleaf
thymeleafテンプレートからメッセージリソースを参照するには#{リソースキー}という記法を使います。
<h1 th:text="#{layout.header}">header</h1>
<h3 th:text="#{layout.footer('2014','2015')}">footer</h3>
結果は下記の通りです。
<h1>ヘッダー</h1>
<h3>Copyright 2014 - 2015.</h3>
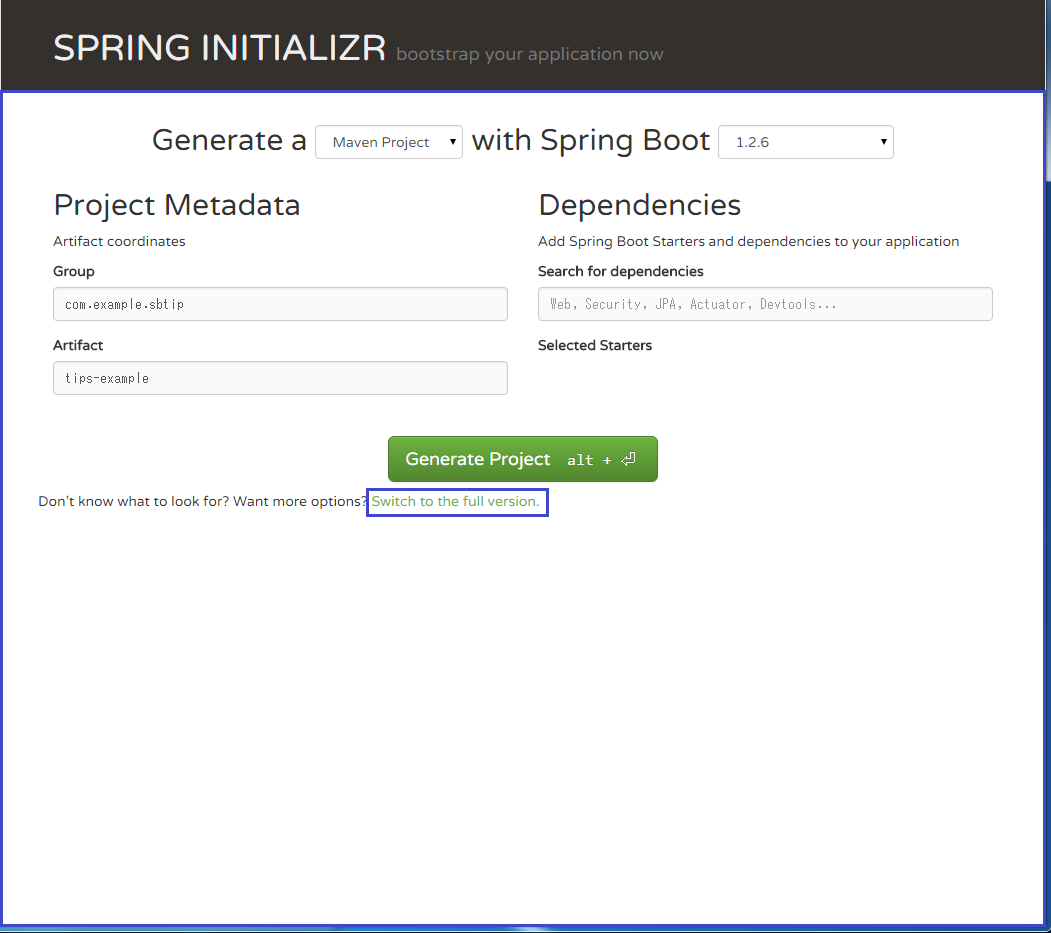
6. SPRING INITIALIZRでアプリケーションの雛形を生成する
- 投稿: 2015/10/08
[SPRING INITIALIZR] (https://start.spring.io/)でpom.xmlやbuild.gradleの雛形を生成することができます。
プロジェクトのタイプ(Maven or Gradle)とSpring-Bootのバージョンを指定、Project Metadataを入力します。
次に"Switch to the full version."というリンクテキストをクリックします。
必要なコンポーネントにチェックを入れて、最後に"Generate Project"ボタンをクリックするとプロジェクトの雛形のzipファイルのダウンロードが始まります。
ダウンロード: tips-example.zip
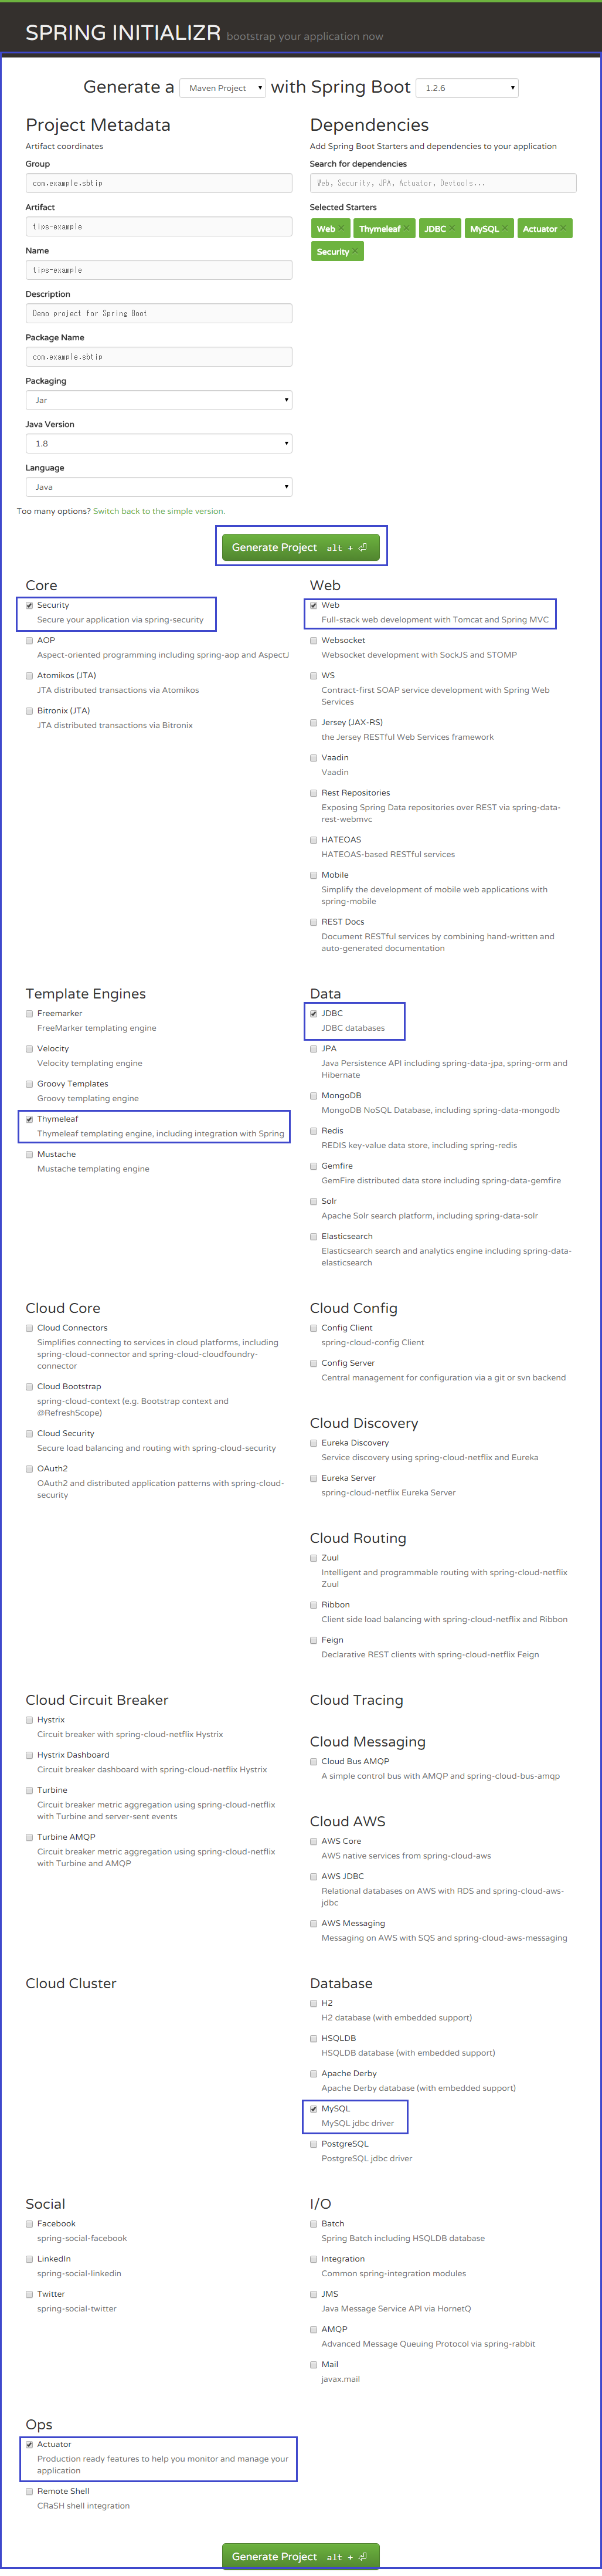
zipファイルを展開したディレクトリの構成は下記の通りです。
tips-example
  ├─.mvn
  │  └─wrapper
  └─src
      ├─main
      │  ├─java
      │  │  └─com
      │  │      └─example
      │  │          └─sbtip
      │  └─resources
      │      ├─static
      │      └─templates
      └─test
          └─java
              └─com
                  └─example
                      └─sbtip
このアプリケーションをeclipseにインポートするには展開したディレクトリへ移動して下記のコマンドを実行します。
> mvn eclipse:eclipse
7. Shutdown Hook
- 投稿: 2015/10/20
- 環境: Spring Boot 1.3.0.M5, Java 1.8.0_60
アプリケーションの終了時に任意のメソッドを実行するにはPreDestroアノテーションを使用します。
@PreDestroy
public static void exit() {
  System.out.println("appliation exit");
}
8. プロパティファイルの値に他のキーの値を設定する
- 投稿: 2016/02/07
- 環境: Spring Boot 1.3.0, Java 1.8.0_65
プロパティファイルの値の定義にspel式が使用できます。
myapp:
  configA:
    var1: ABC
    var2: DEF
  configB:
    var1: 123
    var2: ${myapp.configA.var1}
Thymeleafで直接出力して確認します。
<div class="row">
  <p th:text="${@environment.getProperty('myapp.configA.var1')}"></p>
  <p th:text="${@environment.getProperty('myapp.configA.var2')}"></p>
  <p th:text="${@environment.getProperty('myapp.configB.var1')}"></p>
  <p th:text="${@environment.getProperty('myapp.configB.var2')}"></p>
</div>
<div class="row">
  <p>ABC</p>
  <p>DEF</p>
  <p>123</p>
  <p>ABC</p>
</div>
9. [Spring BootでHandlerメソッドのパラメータに任意のクラスを書き、引数にそのインスタンスを受け取る] (http://qiita.com/rubytomato@github/items/37d58c2748c9f0a8566a)
- 投稿: 2016/10/09
- 環境: Spring Boot 1.3.0, Java 1.8.0_65
10. [Spring Bootでリダイレクト先のURLを組み立てる] (http://qiita.com/rubytomato@github/items/8d132dec042f695e50f6)
- 投稿: 2016/10/09
- 環境: Spring Boot 1.4.1, Java 1.8.0_101
11. [Spring Boot devtoolsのAutomatic restartについて] (http://qiita.com/rubytomato@github/items/6f5dc142f32d9e9c1e2a)
- 投稿: 2016/10/13
- 環境: Spring Boot 1.4.1, Java 1.8.0_101
12. [Spring Frameworkの”org.springframework.web.util”パッケージの便利なクラス] (https://qiita.com/rubytomato@github/items/4eff1ae1bcb6af1c8732)
- 投稿: 2016/10/27
- 環境: Spring Boot 1.4.1, Java 1.8.0_101
13. [Interceptorを使ってResponse Headerをセットする] (https://qiita.com/rubytomato@github/items/d7c3604c0d213da29738)
- 投稿: 2016/11/09
- 環境: Spring Boot 1.4.1, Java 1.8.0_101
14. [Spring AOP ポイントカット指定子の書き方について] (https://qiita.com/rubytomato@github/items/de1019aeaaab51c8784d)
- 投稿: 2017/05/02
- 環境: Spring Boot 1.5.3, Java 1.8.0_131
15. [Spring Boot 1.5で複数データベースを扱うウェブアプリケーションのサンプル] (https://qiita.com/rubytomato@github/items/8d2ac025ba8974983cdd)
- 投稿: 2017/05/04
- 環境: Spring Boot 1.5.3, Java 1.8.0_131
16. [プロパティファイルの値を期待する型のフィールドに代入するサンプルコード] (https://qiita.com/rubytomato@github/items/d86039eca031ac1ed511)
- 投稿: 2017/08/20
- 環境: Spring Boot 1.5.4, Java 1.8.0_144
17. [Spring Bootアプリケーションをmavenのmulti moduleで構成する] (https://qiita.com/rubytomato@github/items/118817023845b4284553)
- 投稿: 2017/09/25
- 環境: Spring Boot 1.5.6, Java 1.8.0_144
18. [アプリケーションの独自プロパティ編集でコード補完ができるようにする] (https://qiita.com/rubytomato@github/items/abbf0ee15662a7252bd8)
- 投稿: 2018/02/25
- 環境: Spring Boot 2.0.0.RC2, Java 1.8.0_162
19. [Spring Bootで開発したアプリケーションのGitHubリポジトリ] (https://qiita.com/rubytomato@github/private/4ddfdf710fd5b7ce5e98)
- 投稿: 2018/03/15
今までに勉強や検証を目的に開発したSpring BootアプリケーションのGitHubリポジトリの一覧です。
20. [Spring Bootのキャッチアップ] (https://qiita.com/rubytomato@github/private/ad340625c05ee2c4f1bd)
- 投稿: add 2018/04/03
キャッチアップに有効な情報源のまとめです。
Spring Data JpaのTips
1. [JPQLでJSON型カラムを持つテーブルを検索する] (https://qiita.com/rubytomato@github/items/5041aedbc44c9579e9a4)
- 投稿: 2017/09/15
- 環境: Spring Boot 1.5.6, Java 1.8.0_144
2. [Spring Data JPAのQBE(Query by Example)を使った検索のサンプルコード] (https://qiita.com/rubytomato@github/items/b685d33308c57e99d4e2)
- 投稿: 2017/09/13
- 環境: Spring Boot 1.5.6, Java 1.8.0_144
3. [JPQLからデータベースのユーザー定義関数を利用する] (https://qiita.com/rubytomato@github/items/bb05c75c918ba004575a)
- 投稿: 2017/09/12
- 環境: Spring Boot 1.5.6, Java 1.8.0_144
4. [Repositoryを使った検索で特定カラムだけをPOJOへマッピングする] (https://qiita.com/rubytomato@github/items/857f2534a6b4bd750d3b)
- 投稿: 2017/09/12
- 環境: Spring Boot 1.5.6, Java 1.8.0_144
5. [Spring Boot 1.5.9でクエリの非同期実行を調べた] (https://qiita.com/rubytomato@github/items/26bd03b08fce1be6ff04)
- 投稿: 2017/12/23
- 環境: Spring Boot 1.5.9, Java 1.8.0_144
6. [Java Persistence API 2.1のおさらいメモ] (https://qiita.com/rubytomato@github/items/6781e91bcf7ab8a68c40)
- 投稿: 2018/03/11
- 環境: Spring Boot 2.0.0, Spring Data JPA 2.0.5, Java 9.0.4
7. [JPAでストアドプロシージャを実行する方法] (https://qiita.com/rubytomato@github/items/5de00bc7fb084d026322)
- 投稿: 2018/03/25
- 環境: Spring Boot 2.0.0, Spring Data JPA 2.0.5, Java 1.8.0_162
TestingのTips
1. [Spring Bootとユニットテスト環境の設計について] (https://qiita.com/rubytomato@github/items/0baf1df5b3eb7094cc41)
- 投稿: 2018/3/20
- 環境: Spring Boot 2.0.0, Java 1.8.0_162
2. Pageableを引数にとるコントローラーのハンドラメソッドのユニットテストが失敗する
- 投稿: 2018/06/30
- 環境: Spring Boot 2.0.3, Java 10.0.1
下記のようなPageableを引数にとるハンドラメソッドのユニットテストを実行すると、このようなエラーメッセージを出力して失敗します。
No primary or default constructor found for interface org.springframework.data.domain.Pageable
コントローラーのハンドラメソッド
@GetMapping(path = "list", produces = MediaType.APPLICATION_JSON_UTF8_VALUE)
public ResponseEntity<List<Memo>> list(Pageable page) {

  //...省略

}
テストコード
@RunWith(SpringRunner.class)
@WebMvcTest(MemoController.class)
public class MemoControllerTests {

  @Autowired
  private MockMvc mvc;

  @Test
  public void getList() throws Exception {

    RequestBuilder builder = MockMvcRequestBuilders.get("/memo/list")
                               .param("page", "0")
                               .param("size", "5")
                               .accept(MediaType.APPLICATION_JSON_UTF8);

    MvcResult result = mvc.perform(builder)
                            .andExpect(status().isOk())
                            .andExpect(content().contentType(contentType))
                            .andDo(print())
                            .andReturn();

  }

}
失敗する原因は、WebMvcTestアノテーションを利用するテストでは、PageableにインスタンスをセットするためのPageableHandlerMethodArgumentResolverが有効にならないためで、この問題を解決するためのIssueが作られています。
[@WebMvcTest should also auto-configure Spring Data web integration] (https://github.com/spring-projects/spring-boot/issues/9028)
暫定的にテストクラスに下記の行を追加することで回避できます。
@Import(SpringDataWebAutoConfiguration.class)
開発環境のTips
1. [Google Cloud Platform with Spring Boot 2.0.0] (https://qiita.com/rubytomato@github/items/a270abacd0f481fd484a)
- 投稿: 2018/03/29
- 環境: Spring Boot 2.0.0, Java 1.8.0_162
Google Cloud PlatformでSpring Bootを利用したwebアプリケーションを実行するまでのまとめ記事です
2. [Java 10でSpring Boot 2.0 アプリケーションを開発するときの初歩的な注意点] (https://qiita.com/rubytomato@github/items/3d9f657196c1e941699a)
- 投稿: 2018/06/04
- 環境: Spring Boot 2.0.2, Java 10.0.1
Java 10での開発、実行環境の注意点のメモです
3. [Eclipse Photon (4.8)とJava 10でSpring Bootアプリケーションの開発環境を構築する] (https://qiita.com/rubytomato@github/private/1a48aef867d3cfc9b563)
- 投稿: 2018/6/30
- 環境: Spring Boot 2.0.3, OpenJDK 10.0.1