概要
タイトルの通り、Eclipse Photon (4.8)とJava 10 (OpenJDK 10.0.1)を使ったSpring Bootアプリケーションの開発環境の構築手順です。
環境
- Windows 10 Professional
- OpenJDK 10.0.1
- Eclipse Photon (4.8)
参考
- [Eclipse IDE, Photon Edition New and Noteworthy] (https://www.eclipse.org/photon/noteworthy/index.php)
- [Eclipse Plugins, Bundles and Products - Eclipse Marketplace] (https://marketplace.eclipse.org/)
インストール
OpenJDK
OpenJDKの[JDK 10のダウンロードページ] (http://jdk.java.net/10/)より、Windows版のアーカイブファイルをダウンロードします。
tar.gzでアーカイブされているので7-zip等の対応ツールを使って適当なディレクトリへ展開します。
このディレクトリをJAVA_HOMEシステム環境変数へ、またbinディレクトリをpathシステム環境変数に追加します。
JAVA_HOMEを変えたくない場合は、Eclipseインストール後にeclipse.iniを下記のように編集してEclipse自体がこのOpenJDKを利用するようにします。
-vmargs行の直前に下記の2行を追加
省略...
-vm
D:\openjdk\jdk-10.0.1\bin\server\jvm.dll
-vmargs
省略...
Eclipse Photon
Eclipseのインストールにインストーラー版(exeファイル)ではなく、手動でインストールするzipファイル版を使用します。
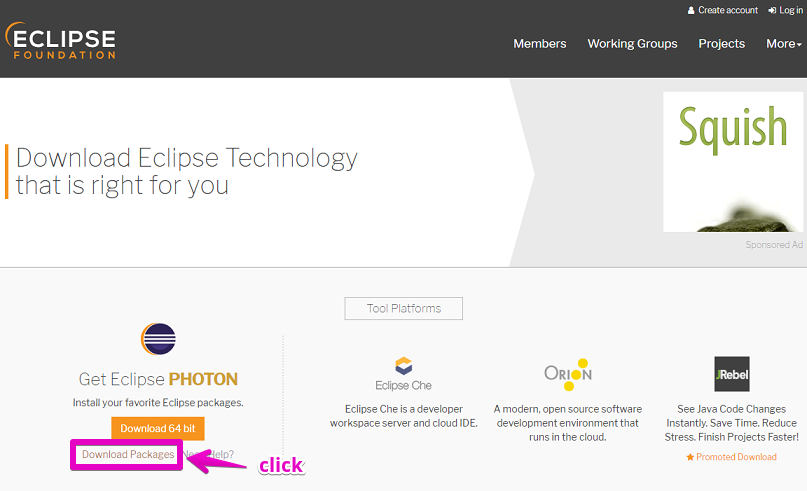
[Eclipse Download | The Eclipse Foundation] (https://www.eclipse.org/downloads/)にアクセスします。
ダウンロードボタンの下にある"Download Packages"というリンクをクリック。
(ダウンロードボタンをクリックするとインストーラー版がダウンロードされます。)
"Eclipse IDE for Java EE Developers"の"64bit"というリンクをクリック。zipファイルのダウンロードが始まります。
この記事のときは"eclipse-jee-photon-R-win32-x86_64.zip"というファイル名です。

ダウンロードしたzipファイルを適当な場所へ展開し、展開ディレクトリにあるeclipse.exeのショートカットをデスクトップに作成します。
Eclipseの使用メモリの割り当てを増やしたい場合は、eclipse.iniファイルの下記の行を編集します。(この例では最小1GB、最大2GBを割り当て)
-Xms1024m
-Xmx2048m
これでインストールは終了です。
Preference
Eclipseの初期設定を行います。設定は個人の好みや開発チームのルールによってさまざまだと思いますが、以下の設定は私が個人の開発時に設定する内容です。
メニューバーの"Window" → "Preference"を選択して下記の設定を行います。
General
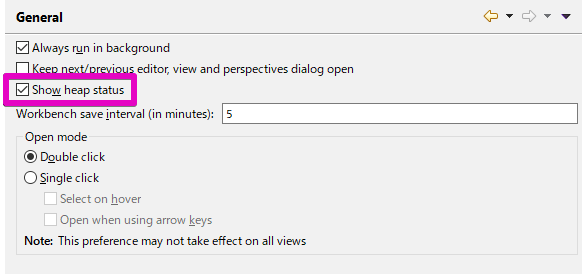
- "Show heap status"にチェック
Editors
Text Editors
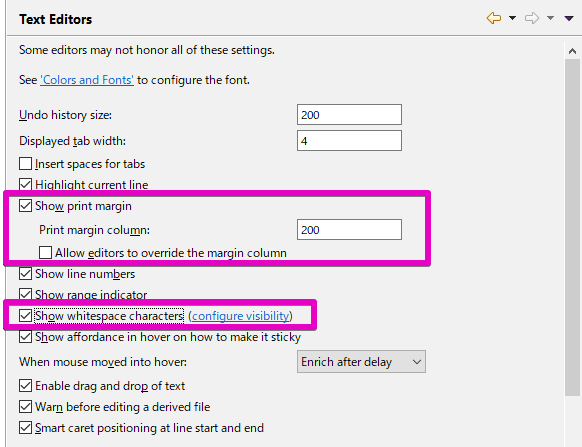
- "Show print margin"の"Print margin column"に「200」
- "Show whitespace characters"にチェック
Configure visibility

- "Space"の"Leading"のチェックを外す
Workspace
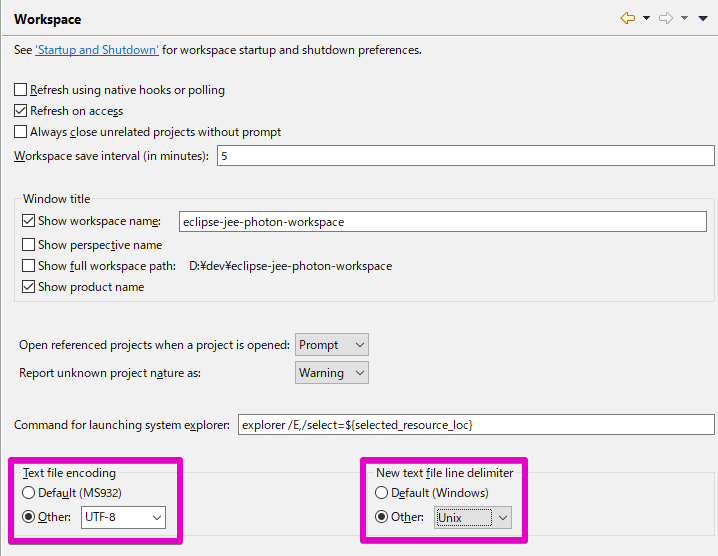
- "Text file encoding"に「UTF-8」
- "New text file line delimiter"に「Unix」
Java
Code Style
Formatter
Indentation

- "Tab policy"に「Spaces only」
- "Indentation size"に「2」
- "Tab size"に「2」
New Lines
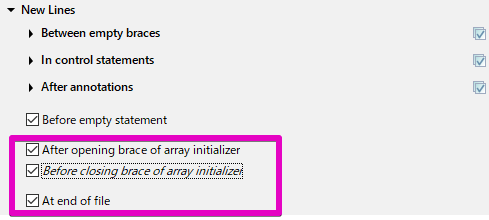
- "After opening brace of array initializer"にチェック
- "Before closing brace of array initializer"にチェック
- "At end of file"にチェック
Line wrapping

- "Maximum line width"に「200」
Wrapping settings
Function Calls

- Qualified invocations
- "Line wrapping policy:"に"Wrap all elements, expect first element if not necessary"を選択
- "Force split, even if line shorter than maximum line width"をチェック
- "Indentation policy:"に"Indent on column"を選択
この設定を行うと以下のようにフォーマットされます。
someObject.a().b().c();
someObject.a()
          .b()
          .c();
Comments
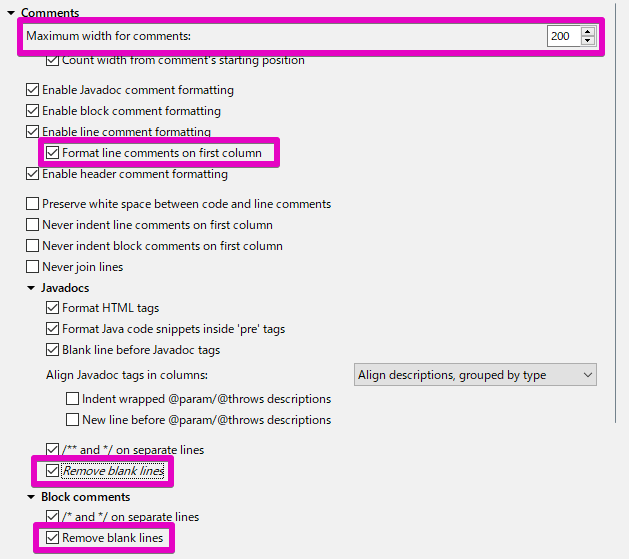
- "Maximum line width for comments"に「200」
- "Format line comments on first column"にチェック
- "Remove blank lines"にチェック
Off/On Tags

- "Enabel Off/On tags"にチェック
この設定を行うと設定したタグで囲んだ範囲をフォーマットしないようにします。
// @formatter:off

// offからonの間にあるコードはフォーマットされません

// @formatter:on
Compiler
Building
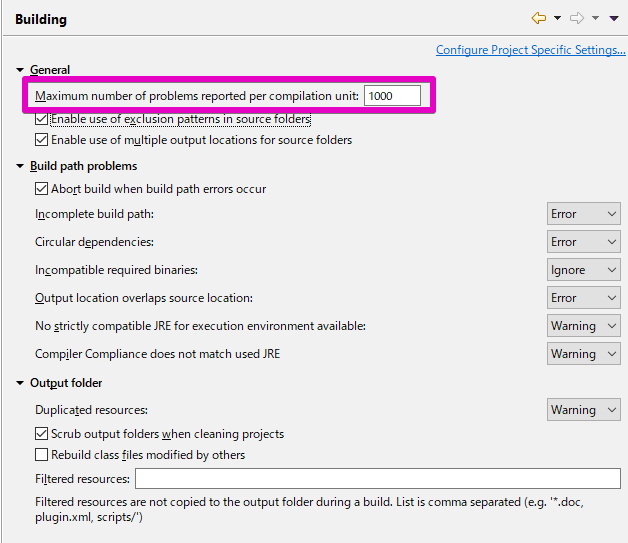
- "Maximum number of problems reported per compilation unit"に「1000」
Editor
Save Actions

- "Perform the selected actions on save"にチェック
- "Format source code"にチェック
- "Organize imports"にチェック
- "Additional actions"にチェック
Configure...
"Configure..."ボタンをクリックしてさらに下記のタブで追加の設定を行います。
Code Organizing

- "Formatter"の"Remove trailing whitespace"にチェック
Code Style

- "Control statements"の"Use blocks in if/while/for/do statements"にチェック
- "Functional interface instances"の"Convert functional interface instances"にチェック
Member Accesses

- "Non static accesses"の"Use 'this' qualifier for field accesses"にチェック
- "Non static accesses"の"Use 'this' qualifier for method accesses"にチェック
Unnecessary Code
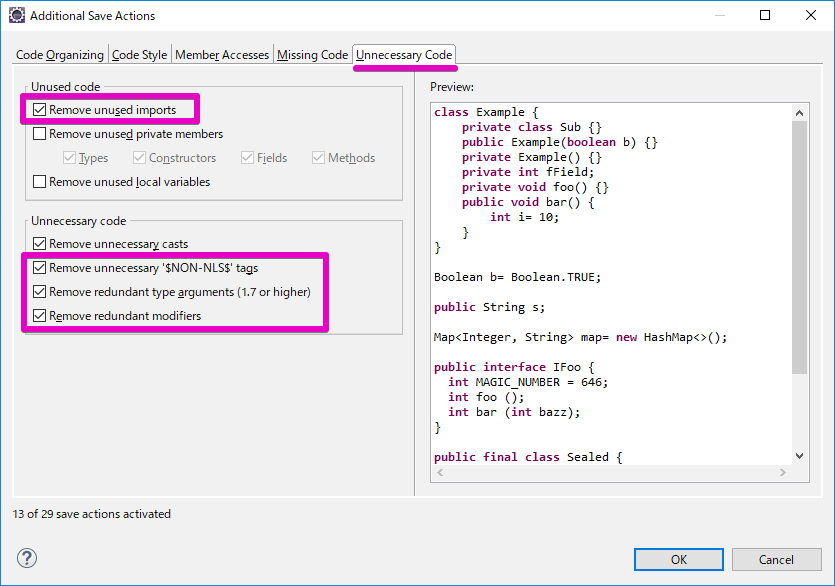
- "Unused code"の"Remove unused imports"にチェック
- "Unnecessary code"の"Remove unnecessary '$NON-NLS$' tags"にチェック
- "Unnecessary code"の"Remove redundant type arguments (1.7 or higher)"にチェック
- "Unnecessary code"の"Remove redundant modifiers"にチェック
Typing

- "Automatically insert at correct position"の"Semicolons"にチェック
この設定はカーソルがどの位置にあっても入力したセミコロンを行末に挿入します。
JSON
JSON Files
Editor

- "Line width"に「120」
- "Indent using spaces"の"Indentation size"に「2」
JavaのソースファイルではSave Actionsを有効にするとファイル保存時にフォーマットされますが、JSONやHTML、CSS、XMLファイルはSave Actionsが適用されません。このためFormattingの設定は明示的にフォーマット(Ctrl + Shift + F)しないと反映されません。
Web
CSS Files
Editor
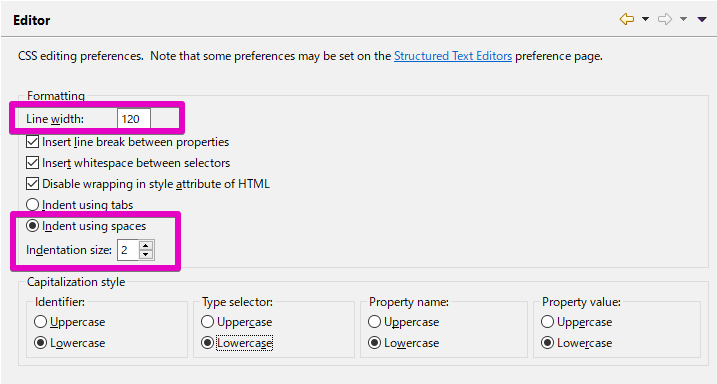
- "Line width"に「120」
- "Indent using spaces"の"Indentation size"に「2」
HTML Files
Editor

- "Line width"に「120」
- "Indent using spaces"の"Indentation size"に「2」
XML
XML Files
Editor

- "Line width"に「120」
- "Indent using spaces"の"Indentation size"に「2」
Terminal

- "Invert terminal colors"にチェック
- "Terminal buffer lines"に「2000」
Pluginのインストール
PluginをEclipseのマーケットプレースから追加します。(lombokだけは別途インストール)
[Spring Tools (aka Spring IDE and Spring Tool Suite)] (https://www.eclipse.org/community/eclipse_newsletter/2018/february/springboot.php)
- marketplace: https://marketplace.eclipse.org/content/spring-tools-aka-spring-ide-and-spring-tool-suite
- version: 3.9.5.RC1
Spring Framework / Spring Bootを利用したアプリケーションの開発環境を提供します。
[SonarLint] (https://www.sonarlint.org/eclipse/)
- marketplace: https://marketplace.eclipse.org/content/sonarlint
- version: 3.6.0
ソースコードの静的解析ツールです。
Autodetect Encoding
- marketplace: https://marketplace.eclipse.org/content/autodetect-encoding
- version 1.8.5
ステータスバーにファイルのファイルエンコードと改行コードの種類を表示します。
DevStyle
- marketplace: https://marketplace.eclipse.org/content/darkest-dark-theme-devstyle
- version: 1.11.0
Eclipseのカラーテーマです。
[Lombok] (https://projectlombok.org/)
- marketplace: なし
- version: 1.18.0
インストールはLombokのサイトよりインストールファイル(lombok.jar)をダウンロードして実行します。