やること
- ブラウザからカメラを起動する
- 起動したカメラを使って録画する.
- 録画したデータをサーバにアップロードする
動作環境
- ブラウザ: Firefox(推奨), IE以外
- サーバ: Node.js / Express.js
本編
ここから実装に入ります.
ブラウザ
カメラ・マイクの使用
MediaDevices.getUserMedia()を使います.
ただし,安全でない環境では動作しません(undefinedになってたはず)
OK: https://, file:///
NG: http://
カメラを起動するには,jsファイルに以下を記述します.
//オプションみたいなものです.
const constraints = {
  audio: true,
  video: true
};

//boolean以外にも色々なオプションがあります.
//デバイスIDから利用する機器を指定することもできますが,
//Firefoxではユーザが簡単に選択できるポップアップを自動で利用できます.(Firefoxが推奨の理由)
//Chromeではデバイス一覧を取得してユーザに選択させるためのフォームを作る必要があります.
const constraints2 = {
  audio: true,
  video: {
    width: 1920,
    height: 1080
  }
};

//getUserMediaはPromiseでmediaStreamを返してきます.
navigator.mediaDevices.getUserMedia(constraints)
.then(stream => {
  //streamはhtmlのvideoタグのsrcObjectに代入することでブラウザ上で見ることができます.
  //<video src="" id="camera" autoplay></video>
  const cameraView = document.getElementById("camera");
  const cameraView.srcObject = stream;
})
.catch(err => {
  console.error(`error occurred: ${err}`);
});

//もしくは(async/await)
try {
  const stream = await navigator.mediaDevices.getUserMedia(constraints);
  const cameraView = document.getElementById("camera");
  const vameraView.srcObject = stream;
} catch(err) {
  console.error(`error occurred: ${err}`);
}
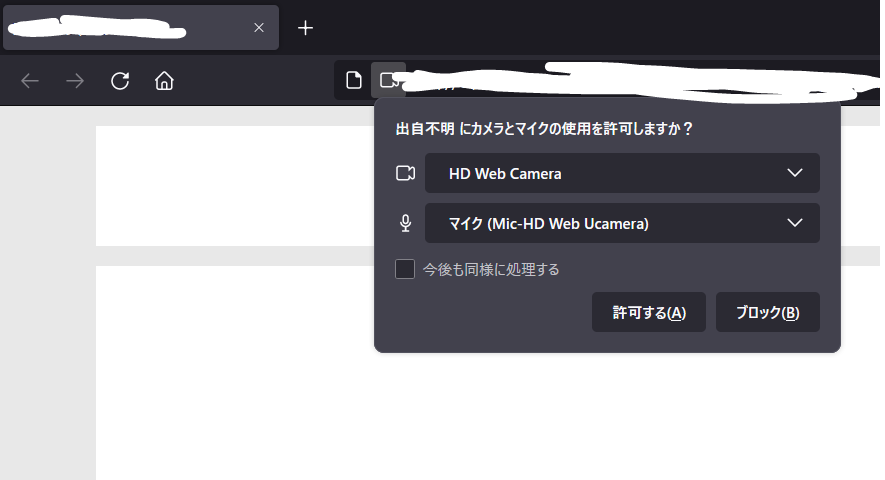
こんな感じでユーザにカメラとマイクの使用許可を求めるポップアウトが出現します.

カメラを利用して録画する
ここまでで,カメラ・マイクを起動して映像を画面に表示するまで実装しました.
次は,この映像・音声を記録してサーバにアップロードできるようにします.
記録にはMediaRecorderを使用します.
const constraints = {
    audio: true,
    video: {
      width: 1920,
      height: 1080
    }
};

navigator.mediaDevices.getUserMedia(constraints)
  .then(stream => {
    //streamはhtmlのvideoタグのsrcObjectに代入することでブラウザ上で見ることができます.
    //<video src="" id="camera" autoplay></video>
    const cameraView = document.getElementById("camera");
    cameraView.srcObject = stream;

    //ボタンから録画開始,録画終了できるようにしておきます.
    const buttonStartRecording = document.getElementById('button-start');
    const buttonStopRecording = document.getElementById('button-stop');
    let isRecording = false;

    //録画形式などを指定します.
    const recordingOptions = {
      audioBitsPerSecond: 256*1000,
      videoBitsPerSecond: 6000*1000,
      mimeType: 'video/webm'   //mimeTypeはmp4とか, codecの指定もできます.
    };
    const fileExtension = '.webm';

    //MediaRecorderを作成します.
    const recorder = new MediaRecorder(stream, recordingOptions);
    const recordedChunks = [];
    const intervalPushData = 1000;

    //記録開始
    buttonStartRecording.addEventListener('click', () => {
      if(!isRecording){
        recorder.start(intervalPushData);
        isRecording = true;
        console.log('recording started');
      }
    });

    //記録終了
    buttonStopRecording.addEventListener('click', () => {
      if(isRecording){
        recorder.stop();
        isRecording = false;
        console.log('recording stopped');
      }
    });


    //イベントハンドラの登録
    //データを配列にプッシュする.
    //これは,MediaRecorder.start(timeslice)で引数に指定したtimesliceミリ秒ごとに実行されます
    //今回は1000ms = 1秒ごと
    recorder.ondataavailable = ev => {
      if(ev.data){
        recordedChunks.push(ev.data);
      }
    };

    //記録を停止したときに実行される
    recorder.onstop = ev => {
      const blob = new Blob(recordedChunks, {type: recorder.mimeType});  //記録したデータ全体をblobに
      const filename = "yourFileName" + fileExtension;
      uploadVideoToSever(blob, filename);
      recordedChunks.splice(0);  //記録したデータを削除
    };

  })
  .catch(err => {
    console.error(`error occurred: ${err}`);
  });

  //録画データをサーバに送信する(POST)
const destinationUpload = 'http://localhost:8888/upload';
function uploadVideoToSever(data, filename){
    const formData = new FormData();
    formData.append('video', data, filename);
    const request = new XMLHttpRequest();
    request.open('POST', destinationUpload);
    request.send(formData);
}
サーバの作成
ここまでで,クライアントの実装が完了しました.
次は,アップロードされた録画データを受け取って保存するサーバを作ります.
サーバにはExpress.jsを使い,ミドルウェアにmulterを使います.
multerを使う事で,multipart/form-dataを超簡単に処理することができます.
Node.js, npmを使えるようにしておいてください
モジュールのインポート
$ npm install express multer
実装
const fs = require('fs');
const pathUploadedFiles = './uploads/';  //uploadsフォルダを作っておいてください
const portListen = 8888;

const express = require('express');
const app = express();
app.use(express.static('public'));

const multer = require('multer');
const multerMiddleware = multer({dest: pathUploadedFiles});

//POSTされたデータを処理
app.post('/upload', multerMiddleware.single('video'), (req, res) => {
  const tempPath = pathUploadedFiles + req.file.filename;  //multerが一時的に保存したファイル名
  const originalName = req.file.originalname; //formData.append()で指定したファイル名を取得

  try{
    fs.copyFileSync(tempPath, pathUploadedFiles + originalName);  //tempファイルをオリジナルのファイル名でコピー
    fs.unlink(tempPath, err => {
      if(err){
        console.error(`error occurred while removing uploaded temp file: ${err}`);
      }
    });
  }catch(err){
    console.error(`error occurred while copying uploaded temp file: ${err}`);
  }
  console.log(`video uploaded successfully on ${pathUploadedFiles + originalName}`);

  res.sendStatus(200);
});

app.listen(portListen, err => {
  if(err){
    console.error(`error occurred while building express server: ${err}`);
  }else{
    console.log(`express server built successfully on port ${portListen}`);
  }
});
おわりに
プログラム全体はgithubに置いてあります
https://github.com/Nikkei225Futures/MediaRecorderSample
