前回
はい続きです。
③DB周りの設定
コンテナ内のExpress環境においてDB設定がなされているファイルがあります。
ここでdocker-compose.ymlで設定したDBへのアクセス情報が明記されています。
module.exports = {
    pg_client: function () {
        const { Client } = require('pg')

        const client = new Client({
            user: process.env.DB_USER,
            host: process.env.DB_HOST,
            port: process.env.DB_PORT,
            database: process.env.DB_NAME
        })
        return client
    },
  };
一応現状でもDBにアクセス自体はできると思います。
routes内のindex.jsを見てみましょう!
'URL/'にGETでアクセスした時にどういった挙動をするかを書きます。
先ほどのsb_client.jsを読み取って、DBとの接続を可能にしています。
router.get('/', function (req, res, next) {
  const client = require("../db_client").pg_client()

  client.connect()
     .then(() => console.log("success!!"))
     .then(() => client.query("select * from chat order by timestamp desc"))
     .then(function (results) {
      console.table(results.rows)
       res.render('index', { result: results.rows })
     })
しかし6行目を見ていただくと、DB処理をSQL文で呼び出しています。
これでもSQLの勉強としては良いのですが、複数のテーブルを用意して、それらを繋ぎ合わせるリレーションなどの処理を行う際はもっと楽なORMを活用します。
④ORMの活用
オブジェクト関係マッピング(英: Object-relational mapping、O/RM、ORM)とは、データベースとオブジェクト指向プログラミング言語の間の非互換なデータを変換するプログラミング技法である。 wikipedia参照
Node.jsを使用する際にORMとしてSequelizeを活用します。
# npm install -g sequelize sequelize-cli

# sequelize-cli init
この時点で作業ディレクトリにconfig.jsonやmodelディレクトリが生成されます。
config
{
  "development": {
    "username": "postgres",
    "password": null,
    "database": "mydatabase",
    "host": "database",
    "dialect": "postgres",
    "operatorsAliases": false
  },
config.jsonでhostに127.0.0.1を指定するのが一般的だそうですが、Dockerの場合だとmigrationの時点で、DBにアクセスできないよ、とエラーを吐くことがあります。その為docker-compose.ymlで設定したDB_HOST(=database)をそのまま活用します。
とりあえず作成するテーブルとカラム情報を決めて、DBを作成します!
# sequelize-cli model:generate --name user --attributes firstName:string,lastName:string,email:string

# sequelize-cli db:migrate
migration
migrationが完了すると、DBのカラム情報がmigrationフォルダ内に表示されます。
module.exports = {
  up: async (queryInterface, Sequelize) => {
    await queryInterface.createTable('users', {
      id: {
        allowNull: false,
        autoIncrement: true,
        primaryKey: true,
        type: Sequelize.INTEGER
      },
      firstName: {
        type: Sequelize.STRING
      },
      lastName: {
        type: Sequelize.STRING
      },
      email: {
        type: Sequelize.STRING
      },
      createdAt: {
        allowNull: false,
        type: Sequelize.DATE
      },
      updatedAt: {
        allowNull: false,
        type: Sequelize.DATE
      }
    });
  },
  down: async (queryInterface, Sequelize) => {
    await queryInterface.dropTable('users');
  }
};
model
migrationが完了すると、Modelに入力したDBのカラム情報が表示されます。
これを確認できたら一応完了です。
user.init({
    firstName: DataTypes.STRING,
    lastName: DataTypes.STRING,
    email: DataTypes.STRING
  }, {
    sequelize,
    modelName: 'user',
  });
model/index.jsや今回作成したmodel/user.jsはリレーション設定やアソシエーションなどで編集しますが、この時点ではノータッチです。
ユーザー登録→ユーザー表示の一連の流れ
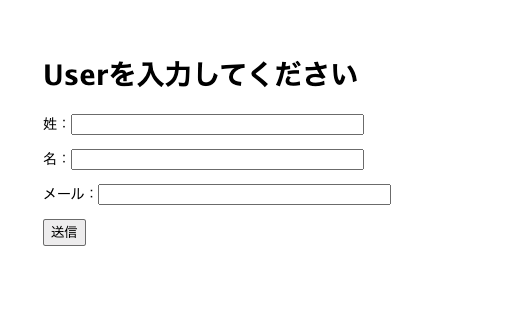
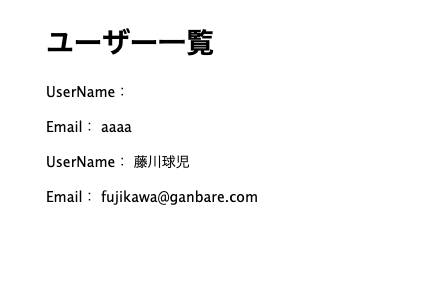
簡単にユーザー登録アプリでも作ります。
フォームからユーザー:藤川球児を入力して表示させました。
#参考記事
PostgreSQLへのアクセス
https://qiita.com/yusuke-ka/items/448843020c0406363ba5
ORM関連
https://qiita.com/izszzz/items/31d448c501d24d31c846
ORM関連
https://qiita.com/KoKeCross/items/144949ba03e5138fc6d5

