Introduction
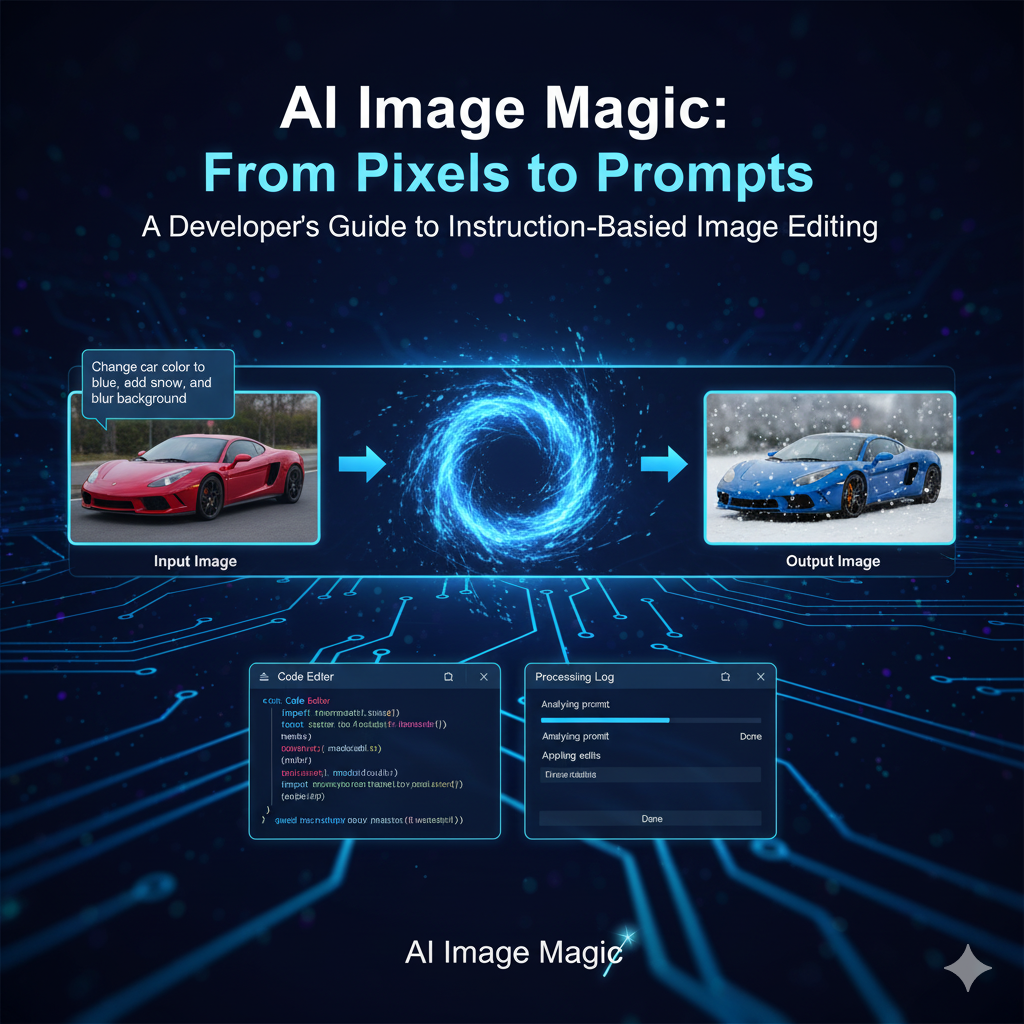
The world of image editing is undergoing a revolutionary transformation. What once required years of mastering complex software like Photoshop with layers, sliders, and masks can now be accomplished with simple text instructions like "Change the car color to red." This paradigm shift represents one of the most significant advances in computer vision and generative AI, making professional-level image editing accessible to everyone.
In this comprehensive guide, we'll explore the technical foundations, implementation strategies, and practical applications of instruction-based image editing systems that are reshaping how we interact with visual content.
The Evolution: From Complex Tools to Simple Instructions
The Old Way: Technical Expertise Required
Traditional image editing demanded:
- Technical Skill: Understanding layers, blend modes, selections, and masks
- Software Mastery: Years of experience with complex interfaces
- Time Investment: Hours for sophisticated edits
- Hardware Requirements: High-performance workstations
The New Way: Natural Language Control
Modern AI-powered editing enables:
- Intuitive Communication: "Make the sky more dramatic" or "Remove the background"
- Instant Results: Complex edits in seconds
- Accessibility: No specialized training required
- Democratization: Professional-quality results for everyone
Technical Foundation: How Instruction-Based Editing Works
Core Architecture
Instruction-based image editing systems typically combine three fundamental components:
[Input Image] + [Text Instruction] → [Vision-Language Model] → [Edited Image]
The architecture leverages:
- Vision Encoder: Processes and understands the input image
- Language Encoder: Interprets the editing instruction
- Diffusion Model: Generates the edited output while preserving content consistency
InstructPix2Pix: The Breakthrough Model
InstructPix2Pix, developed by researchers at UC Berkeley, represents the current state-of-the-art in instruction-based editing. Here's how it works:
Training Process
# Conceptual training pipeline
def train_instruct_pix2pix():
    # Step 1: Generate instruction dataset using GPT-3
    instructions = gpt3.generate_edit_instructions(base_captions)

    # Step 2: Create before/after image pairs using Stable Diffusion
    image_pairs = stable_diffusion.generate_pairs(instructions)

    # Step 3: Train conditional diffusion model
    model = ConditionalDiffusion()
    model.train(image_pairs, instructions)

    return model
Key Technical Features
- Forward Pass Editing: No iterative optimization required
- Classifier-Free Guidance: Balances instruction following vs. image preservation
- Dual Conditioning: Uses both text and image inputs simultaneously
- Real-time Performance: Edits complete in seconds
Implementation Guide: Building Your Own System
1. Using Pre-trained Models
InstructPix2Pix with Hugging Face Diffusers
import torch
from PIL import Image
from diffusers import StableDiffusionInstructPix2PixPipeline

class InstructionEditor:
    def __init__(self, model_id="timbrooks/instruct-pix2pix"):
        self.pipe = StableDiffusionInstructPix2PixPipeline.from_pretrained(
            model_id,
            torch_dtype=torch.float16,
            safety_checker=None
        )
        self.pipe.to("cuda")

    def edit_image(self, image_path, instruction, **kwargs):
        """Edit image based on text instruction"""
        # Load and preprocess image
        image = Image.open(image_path).convert("RGB")

        # Default parameters for stable results
        params = {
            "num_inference_steps": 50,
            "image_guidance_scale": 1.5,
            "guidance_scale": 7.5,
            **kwargs
        }

        # Generate edited image
        result = self.pipe(
            prompt=instruction,
            image=image,
            **params
        ).images[0]

        return result

# Usage example
editor = InstructionEditor()
edited_image = editor.edit_image(
    "input.jpg",
    "Change the car color to red"
)
edited_image.save("output.jpg")
Advanced Configuration
class AdvancedInstructionEditor(InstructionEditor):
    def __init__(self, model_id="timbrooks/instruct-pix2pix"):
        super().__init__(model_id)
        self.setup_optimizations()

    def setup_optimizations(self):
        """Optimize for production use"""
        # Enable memory efficient attention
        self.pipe.enable_attention_slicing()

        # Use faster scheduler
        from diffusers import EulerAncestralDiscreteScheduler
        self.pipe.scheduler = EulerAncestralDiscreteScheduler.from_config(
            self.pipe.scheduler.config
        )

    def batch_edit(self, image_paths, instructions, batch_size=4):
        """Process multiple images efficiently"""
        results = []

        for i in range(0, len(image_paths), batch_size):
            batch_images = []
            batch_instructions = []

            for j in range(i, min(i + batch_size, len(image_paths))):
                image = Image.open(image_paths[j]).convert("RGB")
                batch_images.append(image)
                batch_instructions.append(instructions[j])

            # Process batch
            batch_results = self.pipe(
                prompt=batch_instructions,
                image=batch_images,
                num_inference_steps=30,
                guidance_scale=7.5
            ).images

            results.extend(batch_results)

        return results

    def edit_with_mask(self, image_path, instruction, mask_path=None):
        """Targeted editing with optional mask"""
        image = Image.open(image_path).convert("RGB")

        if mask_path:
            mask = Image.open(mask_path).convert("L")
            # Apply mask-aware editing (implementation varies by model)
            pass

        return self.pipe(
            prompt=instruction,
            image=image,
            num_inference_steps=50
        ).images[0]
2. Web API Implementation
from flask import Flask, request, jsonify, send_file
from werkzeug.utils import secure_filename
import io
import base64

app = Flask(__name__)
editor = AdvancedInstructionEditor()

@app.route('/edit', methods=['POST'])
def edit_image():
    try:
        # Parse request
        if 'image' not in request.files:
            return jsonify({'error': 'No image provided'}), 400

        file = request.files['image']
        instruction = request.form.get('instruction', '')

        if not instruction:
            return jsonify({'error': 'No instruction provided'}), 400

        # Save uploaded file temporarily
        filename = secure_filename(file.filename)
        filepath = f"/tmp/{filename}"
        file.save(filepath)

        # Process edit
        result = editor.edit_image(
            filepath,
            instruction,
            num_inference_steps=int(request.form.get('steps', 30)),
            guidance_scale=float(request.form.get('guidance', 7.5))
        )

        # Convert to base64 for response
        buffer = io.BytesIO()
        result.save(buffer, format='JPEG')
        img_str = base64.b64encode(buffer.getvalue()).decode()

        return jsonify({
            'success': True,
            'image': f"data:image/jpeg;base64,{img_str}",
            'instruction': instruction
        })

    except Exception as e:
        return jsonify({'error': str(e)}), 500

@app.route('/health')
def health_check():
    return jsonify({'status': 'healthy', 'model': 'instruct-pix2pix'})

if __name__ == '__main__':
    app.run(host='0.0.0.0', port=5000)
3. Real-time Frontend Integration
class ImageEditor {
    constructor(apiUrl = '/edit') {
        this.apiUrl = apiUrl;
        this.setupEventListeners();
    }

    setupEventListeners() {
        const editBtn = document.getElementById('edit-btn');
        const imageInput = document.getElementById('image-input');
        const instructionInput = document.getElementById('instruction-input');

        editBtn.addEventListener('click', () => {
            this.editImage(imageInput.files[0], instructionInput.value);
        });
    }

    async editImage(imageFile, instruction) {
        if (!imageFile || !instruction) {
            alert('Please provide both image and instruction');
            return;
        }

        const formData = new FormData();
        formData.append('image', imageFile);
        formData.append('instruction', instruction);
        formData.append('steps', '30');
        formData.append('guidance', '7.5');

        try {
            this.showLoading(true);

            const response = await fetch(this.apiUrl, {
                method: 'POST',
                body: formData
            });

            const result = await response.json();

            if (result.success) {
                this.displayResult(result.image);
            } else {
                throw new Error(result.error);
            }

        } catch (error) {
            console.error('Edit failed:', error);
            alert('Edit failed: ' + error.message);
        } finally {
            this.showLoading(false);
        }
    }

    displayResult(imageDataUrl) {
        const resultImg = document.getElementById('result-image');
        resultImg.src = imageDataUrl;
        resultImg.style.display = 'block';
    }

    showLoading(show) {
        const loader = document.getElementById('loading');
        loader.style.display = show ? 'block' : 'none';
    }
}

// Initialize editor
const editor = new ImageEditor();
Advanced Techniques and Optimizations
1. Prompt Engineering for Better Results
class PromptOptimizer:
    def __init__(self):
        self.style_modifiers = {
            'artistic': ['oil painting style', 'watercolor effect', 'sketch-like'],
            'photorealistic': ['high resolution', 'professional photography', 'detailed'],
            'vintage': ['sepia tone', '1950s style', 'aged photograph']
        }

    def optimize_instruction(self, base_instruction, style=None, specificity='medium'):
        """Enhance instruction for better results"""
        instruction = base_instruction

        # Add specificity
        if specificity == 'high':
            instruction += ', highly detailed and realistic'
        elif specificity == 'medium':
            instruction += ', detailed'

        # Add style modifiers
        if style and style in self.style_modifiers:
            style_mod = random.choice(self.style_modifiers[style])
            instruction += f', {style_mod}'

        return instruction

    def generate_variations(self, base_instruction, count=3):
        """Generate multiple instruction variations"""
        variations = []

        modifiers = [
            'carefully', 'precisely', 'artistically', 'professionally',
            'with attention to detail', 'maintaining high quality'
        ]

        for i in range(count):
            modifier = random.choice(modifiers)
            variation = f"{modifier} {base_instruction}"
            variations.append(variation)

        return variations
2. Quality Assessment and Filtering
import clip
from torchvision import transforms

class QualityAssessor:
    def __init__(self):
        self.clip_model, self.clip_preprocess = clip.load("ViT-B/32")

    def assess_edit_quality(self, original_image, edited_image, instruction):
        """Evaluate edit quality using multiple metrics"""
        metrics = {}

        # CLIP similarity between instruction and edited image
        metrics['instruction_alignment'] = self.compute_clip_similarity(
            edited_image, instruction
        )

        # Structural similarity with original
        metrics['structure_preservation'] = self.compute_ssim(
            original_image, edited_image
        )

        # Perceptual quality score
        metrics['perceptual_quality'] = self.compute_lpips(
            original_image, edited_image
        )

        return metrics

    def compute_clip_similarity(self, image, text):
        """Compute CLIP similarity between image and text"""
        image_features = self.clip_model.encode_image(
            self.clip_preprocess(image).unsqueeze(0)
        )
        text_features = self.clip_model.encode_text(
            clip.tokenize([text])
        )

        similarity = torch.cosine_similarity(
            image_features, text_features
        ).item()

        return similarity
3. Production Deployment with Caching
import redis
import hashlib
from typing import Optional

class CachedImageEditor:
    def __init__(self, redis_url="redis://localhost:6379"):
        self.editor = AdvancedInstructionEditor()
        self.cache = redis.from_url(redis_url)
        self.cache_ttl = 86400  # 24 hours

    def _generate_cache_key(self, image_hash: str, instruction: str) -> str:
        """Generate unique cache key"""
        combined = f"{image_hash}:{instruction}"
        return hashlib.md5(combined.encode()).hexdigest()

    def _hash_image(self, image_path: str) -> str:
        """Generate hash of image content"""
        with open(image_path, 'rb') as f:
            return hashlib.md5(f.read()).hexdigest()

    def edit_with_cache(self, image_path: str, instruction: str) -> Image.Image:
        """Edit image with caching support"""
        # Generate cache key
        image_hash = self._hash_image(image_path)
        cache_key = self._generate_cache_key(image_hash, instruction)

        # Check cache first
        cached_result = self.cache.get(cache_key)
        if cached_result:
            # Deserialize cached image
            buffer = io.BytesIO(cached_result)
            return Image.open(buffer)

        # Process edit
        result = self.editor.edit_image(image_path, instruction)

        # Cache result
        buffer = io.BytesIO()
        result.save(buffer, format='JPEG', quality=90)
        self.cache.setex(cache_key, self.cache_ttl, buffer.getvalue())

        return result

    def get_cache_stats(self) -> dict:
        """Get cache performance statistics"""
        info = self.cache.info()
        return {
            'cache_hits': info.get('keyspace_hits', 0),
            'cache_misses': info.get('keyspace_misses', 0),
            'memory_usage': info.get('used_memory_human', '0B')
        }
Practical Applications and Use Cases
1. E-commerce Product Customization
class ProductCustomizer:
    def __init__(self):
        self.editor = CachedImageEditor()
        self.product_templates = self.load_product_templates()

    def customize_product(self, product_image, customization_request):
        """Customize product based on customer request"""
        # Validate customization request
        if not self.is_valid_customization(customization_request):
            raise ValueError("Invalid customization request")

        # Generate instruction
        instruction = self.generate_product_instruction(customization_request)

        # Apply customization
        result = self.editor.edit_with_cache(product_image, instruction)

        return {
            'customized_image': result,
            'instruction': instruction,
            'customization': customization_request
        }

    def generate_product_instruction(self, request):
        """Convert customer request to editing instruction"""
        color_map = {
            'red': 'change the color to bright red',
            'blue': 'change the color to deep blue',
            'green': 'change the color to forest green'
        }

        if 'color' in request:
            return color_map.get(request['color'], f"change the color to {request['color']}")

        # Add more customization types as needed
        return request.get('instruction', 'enhance the product appearance')
2. Content Creation Automation
class ContentCreator:
    def __init__(self):
        self.editor = AdvancedInstructionEditor()
        self.templates = {
            'social_media': {
                'instagram': 'make it Instagram-ready with vibrant colors and good composition',
                'linkedin': 'make it professional and business-appropriate',
                'twitter': 'optimize for Twitter with clear focal point'
            },
            'seasonal': {
                'spring': 'add spring elements like flowers and green leaves',
                'summer': 'make it bright and summery with warm colors',
                'winter': 'add winter atmosphere with cool tones'
            }
        }

    def create_seasonal_variant(self, base_image, season, platform='instagram'):
        """Create seasonal variant for specific platform"""
        seasonal_instruction = self.templates['seasonal'][season]
        platform_instruction = self.templates['social_media'][platform]

        combined_instruction = f"{seasonal_instruction}, {platform_instruction}"

        return self.editor.edit_image(base_image, combined_instruction)

    def batch_create_variants(self, image_path, platforms, season=None):
        """Create multiple variants for different platforms"""
        results = {}

        for platform in platforms:
            if season:
                result = self.create_seasonal_variant(image_path, season, platform)
            else:
                instruction = self.templates['social_media'][platform]
                result = self.editor.edit_image(image_path, instruction)

            results[platform] = result

        return results
3. Accessibility Enhancement
class AccessibilityEnhancer:
    def __init__(self):
        self.editor = AdvancedInstructionEditor()

    def enhance_for_accessibility(self, image_path, enhancement_type):
        """Enhance images for better accessibility"""
        instructions = {
            'high_contrast': 'increase contrast significantly for better visibility',
            'color_blind_friendly': 'adjust colors to be colorblind-friendly',
            'simplified': 'simplify the image reducing visual complexity',
            'enlarged_text': 'make any text in the image larger and more readable'
        }

        if enhancement_type not in instructions:
            raise ValueError(f"Unknown enhancement type: {enhancement_type}")

        return self.editor.edit_image(image_path, instructions[enhancement_type])

    def generate_alt_descriptions(self, image_path, edit_instruction):
        """Generate accessibility descriptions for edited images"""
        # This would integrate with a vision-language model for descriptions
        # Simplified version here
        return f"Image edited with instruction: {edit_instruction}"
Performance Optimization and Best Practices
1. Model Optimization
class OptimizedEditor:
    def __init__(self):
        self.setup_optimized_pipeline()

    def setup_optimized_pipeline(self):
        """Setup optimized inference pipeline"""
        # Use smaller precision for faster inference
        self.pipe = StableDiffusionInstructPix2PixPipeline.from_pretrained(
            "timbrooks/instruct-pix2pix",
            torch_dtype=torch.float16,
            use_safetensors=True
        )

        # Enable various optimizations
        self.pipe.enable_attention_slicing()
        self.pipe.enable_model_cpu_offload()  # For low VRAM

        # Use faster scheduler
        from diffusers import DPMSolverMultistepScheduler
        self.pipe.scheduler = DPMSolverMultistepScheduler.from_config(
            self.pipe.scheduler.config
        )

    def optimize_for_batch(self, enable=True):
        """Toggle batch processing optimizations"""
        if enable:
            self.pipe.enable_vae_slicing()
            self.pipe.enable_vae_tiling()
        else:
            self.pipe.disable_vae_slicing()
            self.pipe.disable_vae_tiling()
2. Error Handling and Monitoring
import logging
from functools import wraps

class RobustImageEditor:
    def __init__(self):
        self.editor = OptimizedEditor()
        self.setup_logging()
        self.metrics = {
            'total_requests': 0,
            'successful_edits': 0,
            'failed_edits': 0,
            'average_processing_time': 0
        }

    def setup_logging(self):
        logging.basicConfig(level=logging.INFO)
        self.logger = logging.getLogger(__name__)

    def with_retry(max_retries=3, delay=1):
        """Decorator for retry logic"""
        def decorator(func):
            @wraps(func)
            def wrapper(self, *args, **kwargs):
                for attempt in range(max_retries):
                    try:
                        return func(self, *args, **kwargs)
                    except Exception as e:
                        if attempt == max_retries - 1:
                            raise e
                        self.logger.warning(f"Attempt {attempt + 1} failed: {e}")
                        time.sleep(delay * (2 ** attempt))
                return None
            return wrapper
        return decorator

    @with_retry(max_retries=3)
    def robust_edit(self, image_path, instruction):
        """Edit with comprehensive error handling"""
        start_time = time.time()
        self.metrics['total_requests'] += 1

        try:
            # Validate inputs
            if not os.path.exists(image_path):
                raise FileNotFoundError(f"Image not found: {image_path}")

            if not instruction.strip():
                raise ValueError("Empty instruction provided")

            # Validate image format and size
            with Image.open(image_path) as img:
                if img.size[0] < 64 or img.size[1] < 64:
                    raise ValueError("Image too small (minimum 64x64)")

                if img.size[0] > 2048 or img.size[1] > 2048:
                    # Resize large images
                    img.thumbnail((2048, 2048), Image.Resampling.LANCZOS)
                    img.save(image_path)

            # Perform edit
            result = self.editor.pipe(
                prompt=instruction,
                image=Image.open(image_path),
                num_inference_steps=30,
                guidance_scale=7.5,
                image_guidance_scale=1.5
            ).images[0]

            # Update metrics
            processing_time = time.time() - start_time
            self.update_metrics(processing_time, success=True)

            self.logger.info(f"Edit completed successfully in {processing_time:.2f}s")
            return result

        except Exception as e:
            processing_time = time.time() - start_time
            self.update_metrics(processing_time, success=False)
            self.logger.error(f"Edit failed after {processing_time:.2f}s: {e}")
            raise

    def update_metrics(self, processing_time, success):
        """Update performance metrics"""
        if success:
            self.metrics['successful_edits'] += 1
            # Update rolling average
            total_successful = self.metrics['successful_edits']
            current_avg = self.metrics['average_processing_time']
            self.metrics['average_processing_time'] = (
                (current_avg * (total_successful - 1) + processing_time) / total_successful
            )
        else:
            self.metrics['failed_edits'] += 1

    def get_health_status(self):
        """Get system health status"""
        total = self.metrics['total_requests']
        if total == 0:
            success_rate = 100
        else:
            success_rate = (self.metrics['successful_edits'] / total) * 100

        return {
            'status': 'healthy' if success_rate > 95 else 'degraded',
            'success_rate': success_rate,
            'average_processing_time': self.metrics['average_processing_time'],
            'total_requests': total
        }
Future Directions and Emerging Trends
1. Multimodal Integration
The future of instruction-based editing lies in multimodal systems that can:
- Process voice instructions: "Hey AI, make this photo brighter"
- Understand gesture inputs: Point-and-edit interfaces
- Combine multiple modalities: Sketch + voice + text instructions
2. Real-time Video Editing
Emerging technologies enable:
- Live video filtering: Real-time instruction-based video effects
- Temporal consistency: Maintaining edits across video frames
- Interactive streaming: Viewers can suggest edits in real-time
3. Domain-Specific Specialization
Specialized models for:
- Medical imaging: "Enhance the contrast in the X-ray"
- Satellite imagery: "Highlight the urban areas"
- Scientific visualization: "Make the protein structure more visible"
Conclusion
Instruction-based image editing represents a fundamental shift in how we interact with visual content. By abstracting complex technical operations behind natural language interfaces, these systems democratize professional-level image editing capabilities.
The key technical insights we've covered:
Architecture: Modern systems leverage vision-language models with dual conditioning to balance instruction following and content preservation.
Implementation: Production systems require careful optimization, caching, and error handling to provide reliable performance.
Applications: From e-commerce customization to accessibility enhancement, the applications span numerous domains and use cases.
Future: Continued advances in multimodal AI will further expand the capabilities and accessibility of these systems.
As developers, we're witnessing and participating in a transformation that mirrors the shift from command-line interfaces to graphical user interfaces decades ago. Instruction-based editing isn't just a new tool—it's a new paradigm that makes creative expression more accessible while opening up entirely new possibilities for human-AI collaboration in visual content creation.
The examples and implementations provided in this guide offer a starting point for building your own instruction-based editing systems. As the field continues to evolve rapidly, staying current with the latest models and techniques will be crucial for creating cutting-edge applications that harness the full potential of this transformative technology.