kintone のアプリデータをazure app service で公開してみます。
概要
プラグインを購入いただいたお客様のサポートやプラグインのバージョンアップなどで、kintone アプリを使ってどうにか出来ないかと調べています。
kintone アプリデータを外部に公開する外部サービスがありますが、簡単にできる反面、いろいろ制約があったりします。
azure app service で、kintone アプリデータを外部に公開する試作をしてみます。
- azure app service で kintone アプリデータ公開その1
- azure app service で kintone アプリデータ公開その2(環境変数利用)
- azure app service で kintone アプリデータ公開その3(REST API)
- azure app service で kintone アプリデータ公開その4(JS API)
- azure app service で kintone アプリデータ公開その5(グリッド表示)
こんな感じで、しくみを試作します。

環境
いつも使っている PC 環境で開発・テストして、azure へデプロイ。
-
開発環境
- Windows 10
- Visual source code
- node.js, Express, pug
- kintone JS SDK
-
azure環境
- east asia (東京)
開発準備
vscode, node, npm あたりがそろっていれば OK。
Express ジェネレーター
アプリ名を指定すれば、基本的な一式をそろえてくれる優れもの。
アプリ名 kintone-view-test1 で作ってみます。
$ mkdir webapp
$ cd webapp
$ npx express-generator kintone-view-test1 --view pug --git
$ cd kintone-view-test1
$ npm install
...
アプリケーションの実行
npm start すると、http://localhost:3000 で参照できます。
CTL+C で、終了。
$ npm start
表示されるページ

アプリケーションのデバッグ
vscode で、デバッグが出来るのがうれしい。
下記で、 wwww ファイルを起点とした設定が出来ます。
- vscode で、kintone-view-test1\bin\www を開きます。
- vscode の「デバッグと実行」をクリック
- 「lunch.json ファイルを作成します。」をクリック
- 「Node.js の実行とデバッグ(F5)」をクリック

- ブレークポイント
- index.js にブレークポイントを設定
- ブラウザから、http://localhost:3000 で参照

- ブレークポイントで停止中は、変数にカーソルを当てると内容が表示されます
- デバッグコンソール上で、変数を入力すると内容が確認できます。

アプリケーションのデプロイ
azure 環境へ、デプロイしてみます。
- azure のアカウントを持っていて、以前からvscode で開発していれば、「Deploy to web app」をクリックするとデプロイが始まります。

- kintone-view-test1 のフォルダーを指定

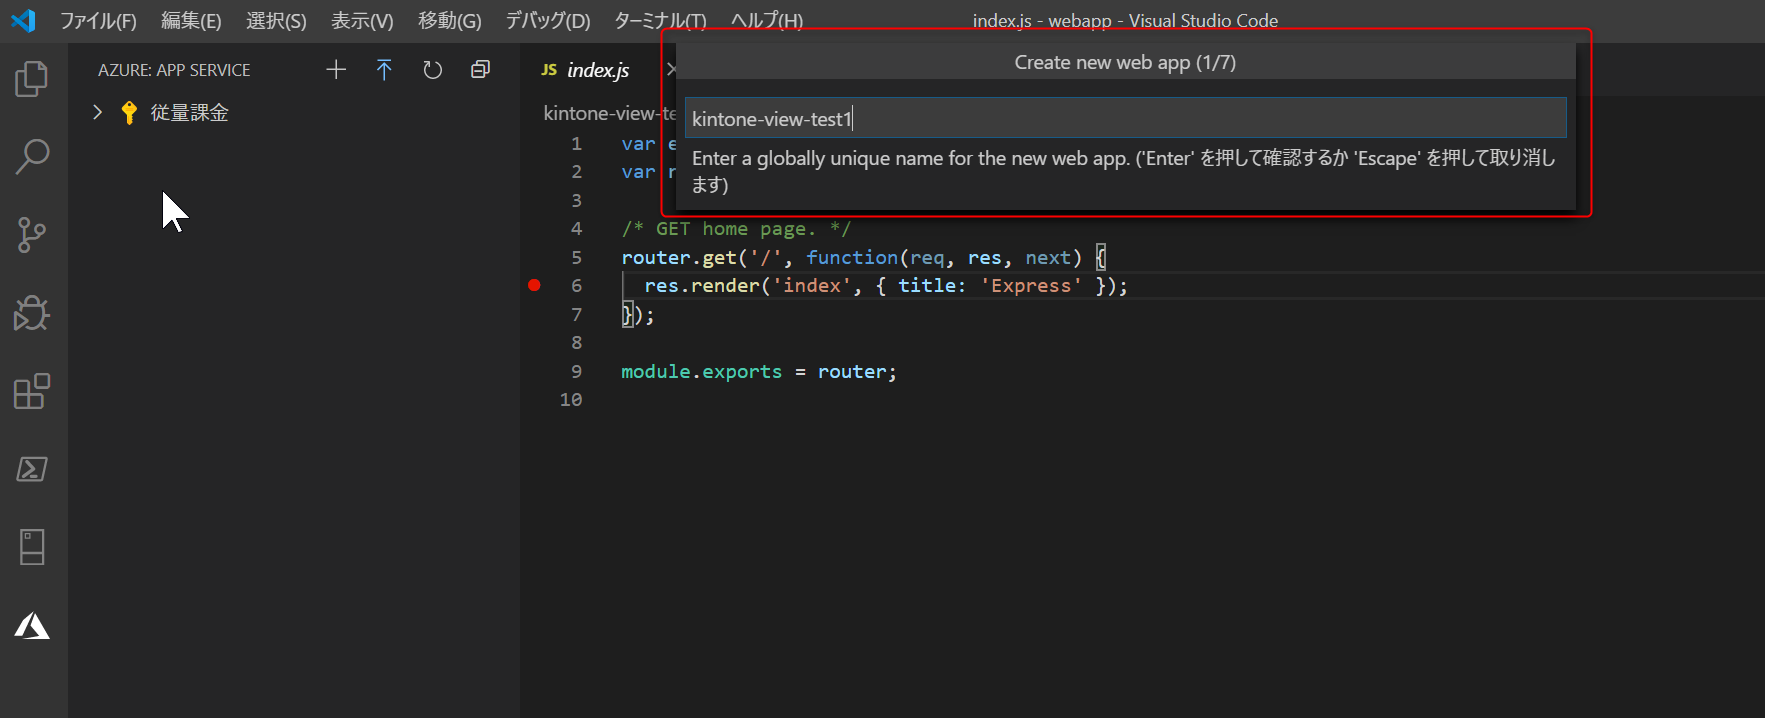
- あとは、順番に node.js のバージョン等を指定します。
- デプロイされた app をazure 上で確認

- アプリの URL をクリックすると、実行結果が確認できます。

kintone アプリのレコード取得を組み込み
ここまでの作業で、azure 上でアプリを動作することが出来ました。
いよいよ kintone アプリのレコードを取得して、公開してみます。
kintone JS SDK のインストール
$ cd kintone-view-test1
$ npm install --save @kintone/kintone-js-sdk@v0.6.1
app.js の変更
とりあえず、kintone アプリレコードの照会画面用に、app.js 等を変更していきます。
「/customer」の URL でアクセスされたら、kintone の顧客アプリを表示するイメージです。
既存の「/users」と同じように処理を追加します。
var createError = require('http-errors');
var express = require('express');
var path = require('path');
var cookieParser = require('cookie-parser');
var logger = require('morgan');

var indexRouter = require('./routes/index');
var usersRouter = require('./routes/users');
var customerRouter = require('./routes/customer');

var app = express();

// view engine setup
app.set('views', path.join(__dirname, 'views'));
app.set('view engine', 'pug');

app.use(logger('dev'));
app.use(express.json());
app.use(express.urlencoded({ extended: false }));
app.use(cookieParser());
app.use(express.static(path.join(__dirname, 'public')));

app.use('/', indexRouter);
app.use('/users', usersRouter);
app.use('/customer', usersRouter);

// catch 404 and forward to error handler
app.use(function(req, res, next) {
  next(createError(404));
});

// error handler
app.use(function(err, req, res, next) {
  // set locals, only providing error in development
  res.locals.message = err.message;
  res.locals.error = req.app.get('env') === 'development' ? err : {};

  // render the error page
  res.status(err.status || 500);
  res.render('error');
});

module.exports = app;
index.pug
index から、顧客一覧へのリンクを追加しておきます。
extends layout

block content
  h1= title
  p Welcome to #{title}
  br
  a(href="./customer", title="顧客一覧") 顧客一覧
customer.js
アプリIDやURLなどは、開発用・本番用で切り替えが必要のので
kintone 接続用の情報は、モジュール化してまとめたほうがよさそうです。
var express = require('express');
var router = express.Router();
const kintone = require('@kintone/kintone-js-sdk');

/* GET customers listing. */
router.get('/', function (req, res, next) {

    const kintoneAuth = new kintone.Auth();
    const username = 'xxxxxxxxx';
    const password = 'xxxxxxxxx';
    kintoneAuth.setPasswordAuth({ username: username, password: password });

    const domainName = 'xxxxxxxxx.cybozu.com';
    const kintoneConnection = new kintone.Connection({ domain: domainName, auth: kintoneAuth });
    const kintoneRecord = new kintone.Record({ connection: kintoneConnection });

    const finfos = [
        { label: '会社名', fcode: '会社名'},
        { label: '担当者名', fcode: '担当者名' },
        { label: 'メールアドレス', fcode: 'メールアドレス' }
    ];
    const fields = finfos.map((finfo) => {
        return finfo.fcode;
    });

    const appId = 549; // target appID
    const parm = {
        app: appId,
        query: 'order by $id',
        fields: fields
    };

    kintoneRecord.getRecords(parm).then((rsp) => {
        console.log('rsp', rsp);
        res.render('customer', {
            title: '顧客一覧',
            finfos: finfos,
            records: rsp.records
        });

    }).catch((err) => {
        // The promise function always reject with KintoneAPIExeption
        console.log(err.get());
        // res.render('forum', { title: 'rex0220 forum', user: 'error' });
    });

});

module.exports = router;
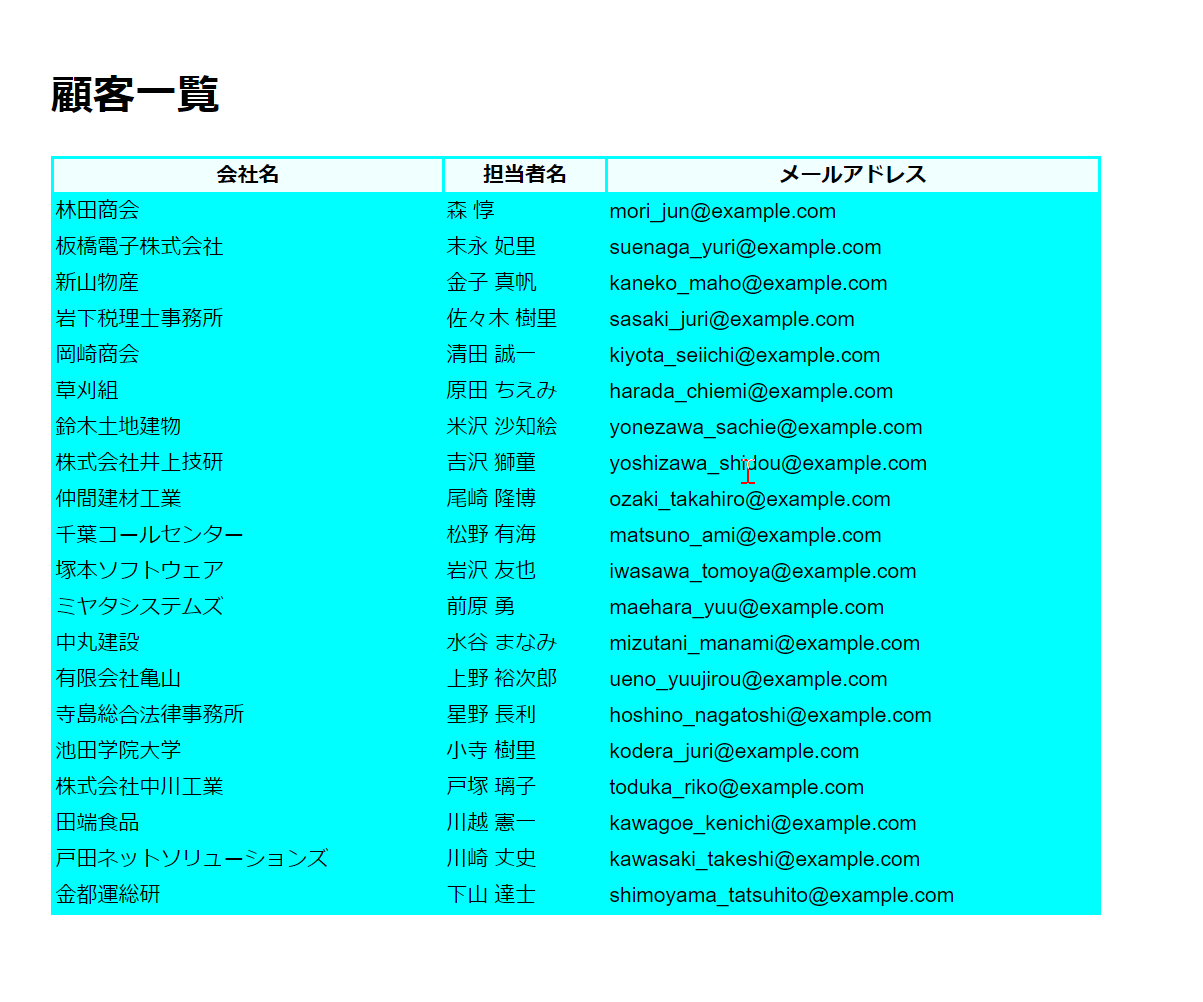
customer.pug
顧客一覧用のテンプレートです。
単純なテーブル構造だと簡単ですが、データ量が多くページ制御等があると少し面倒なので、グリッドライブラリを使ったほうがいいかもしれません。
extends layout

block content
  h1= title

  table(class="xp-customer-list")
    thead
      each finfo in finfos
        th #{finfo.label}
    tbody
      each rec in records
        tr
          each finfo in finfos
            td #{rec[finfo.fcode].value}
style sheet
顧客一覧用に少し手直し
見映えをよくする場合は、地道に手直し。
body {
  padding: 50px;
  font: 14px "Lucida Grande", Helvetica, Arial, sans-serif;
}

a {
  color: #00B7FF;
}

.xp-customer-list {
  background-color: aqua;
  width: 700px;
  font-size: 14px;
}

.xp-customer-list thead {
  background-color: azure;
}
取得結果
素のテーブルだけだと、いまいち。
azure へデプロイ
初回と同様に「Deploy to web app」をクリックすると、デプロイされます。
2回目以降は、入力なしにそのまま続行します。
azure app service のログ
vscode から azure app service のログを確認できます。
console.log で、kintone レコードを出力したのが、表示されています。
保守・運用のことも考慮して、必要な情報を見やすくログに残したいですね。

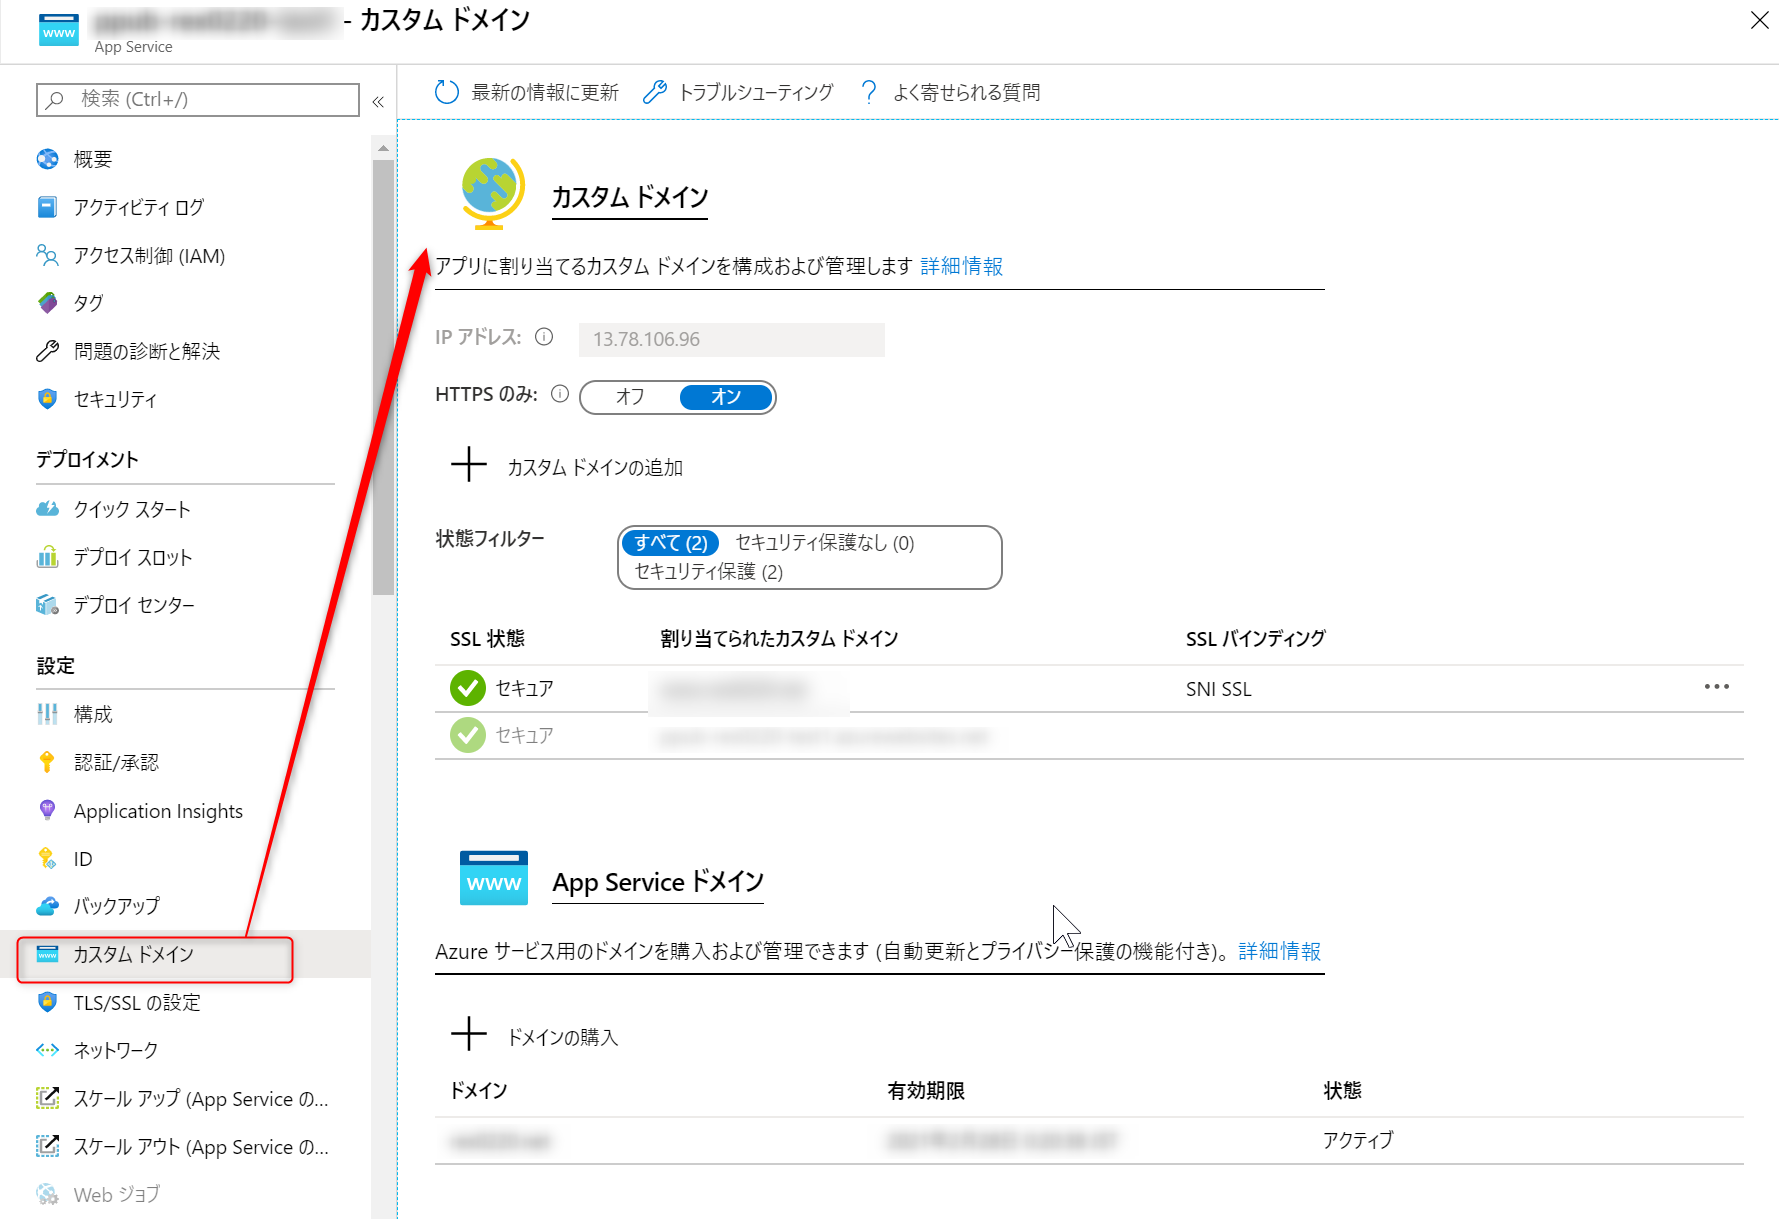
カスタムドメインでの公開
azure app service 内で、カスタムドメインの購入・割り当てが可能です。
チュートリアルに従って、手順を進めるだけなので簡単です。
お手軽に kintone アプリデータを一般に公開できますね。
参考サイト
あとがき
vscode でデバッグ出来るのが、一番うれしい。
azure へのデプロイも vscode から簡単に実行できる。
Express の構成に慣れれば、開発が楽かもしれません。