第4章 Webサービス
本章ではNode.jsを利用して、TwitterライクなサービスのUIを作成していきます。
分量が多いので、実装の細かい部分の説明は省略しますが、もし気になる方がいれば、BFF部分と認証部分を以下の記事で詳細に説明しているので、ご参照ください。
Nuxt.jsとPassport.jsでマイクロサービス用の認証機能をもったフロントエンド + BFFを構築する
チュートリアル全体
構成
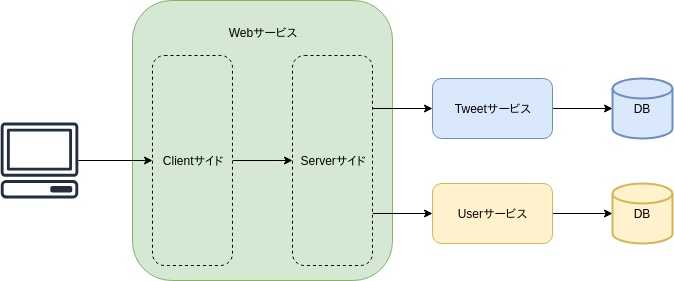
アーキテクチャ
Webサービスでは下記のフレームワーク/モジュールを利用します。
リンクをつけておくので、気になる方はチェックしてみてください。
- Vue.js モダンなjs向けUIライブラリ
- Vuetify.js Vue.js用マテリアルデザインライブラリ
- Nuxt.js SPA/SSRも簡単にできるVue.jsフレームワーク
- Express.js Node.js向けサーバー
- Passport.js GitHubやGoogleなどとのOAuth連携を簡単に導入できる
サイト構成
画面
まずは画面構成のイメージ図を確認しましょう。
-
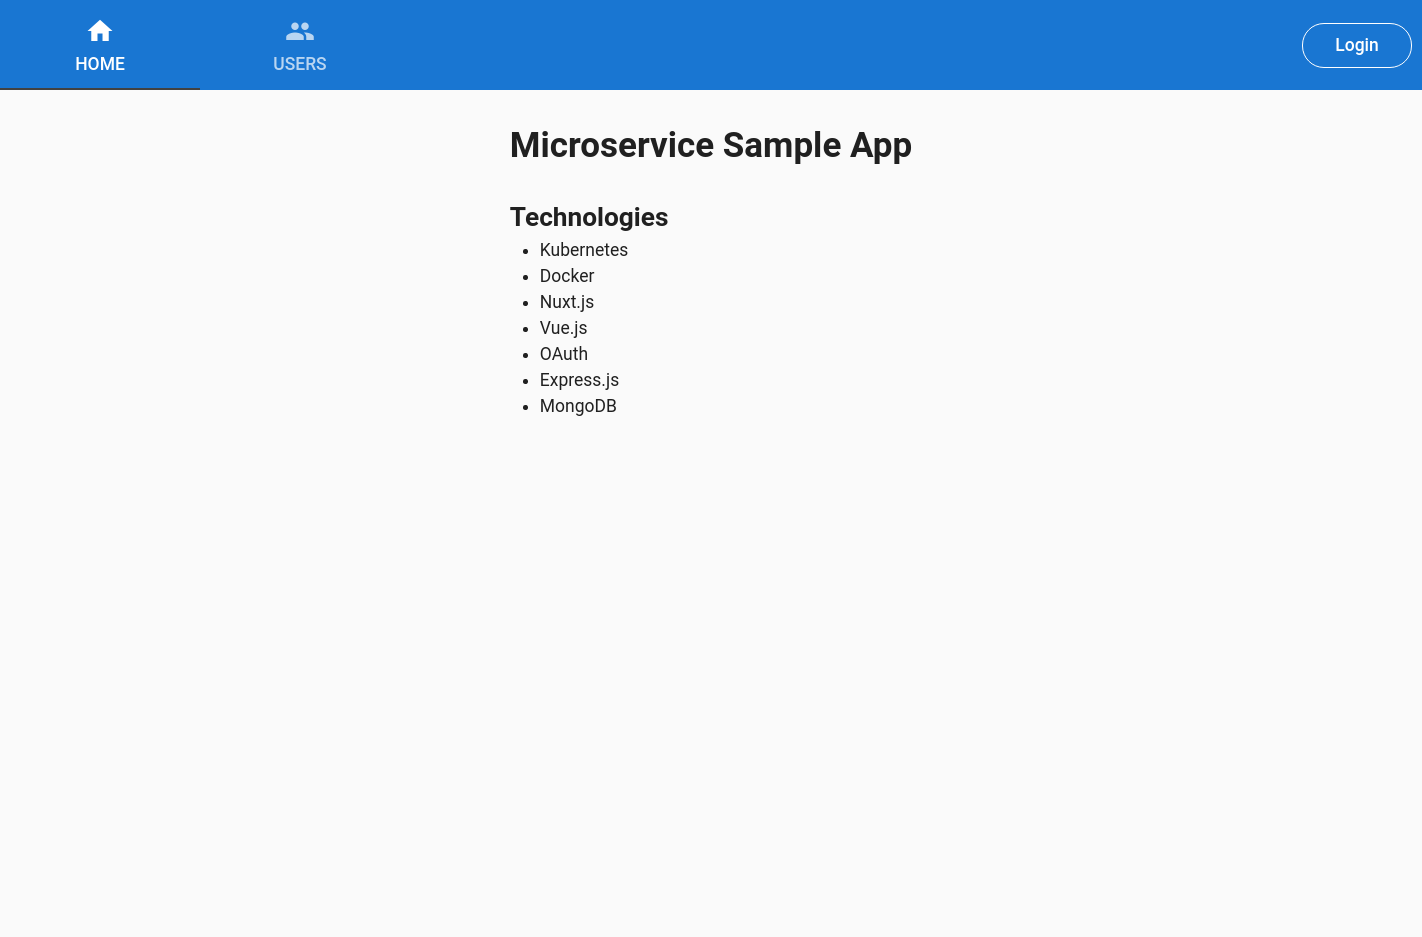
トップページ(path:
/)
未ログイン状態で表示されるトップページです。
特に表示するロゴとかイメージはないので、採用技術などを並べています。
-
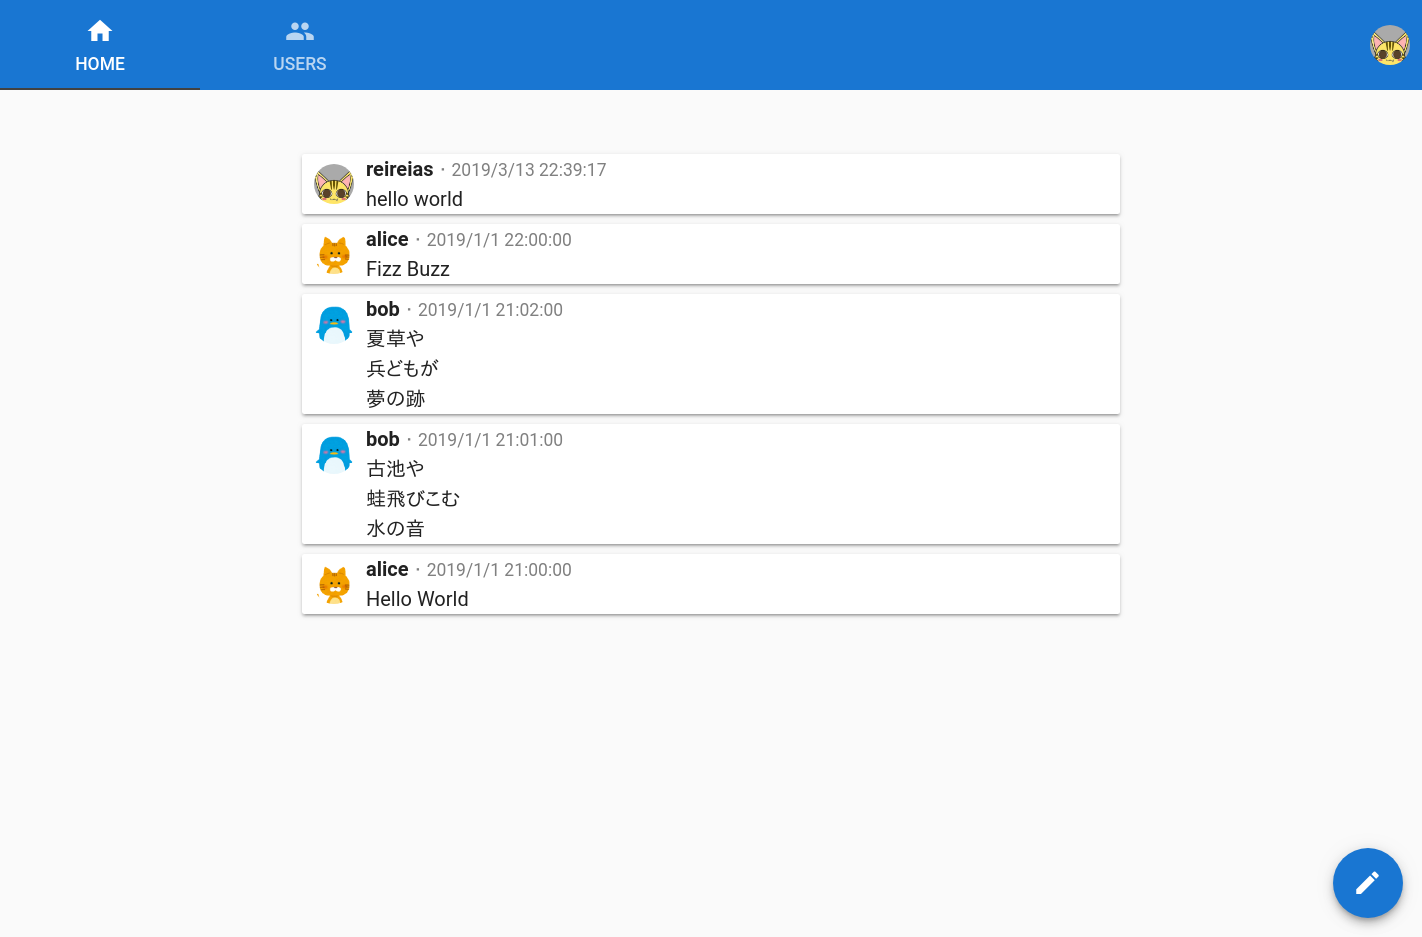
ホーム画面(path:
/home)
いわゆるタイムラインです。
右下のボタンを押すことで、下記のTweetダイアログを開きます。
このページは未認証状態でアクセスすると/へリダイレクトするように設定します。
-
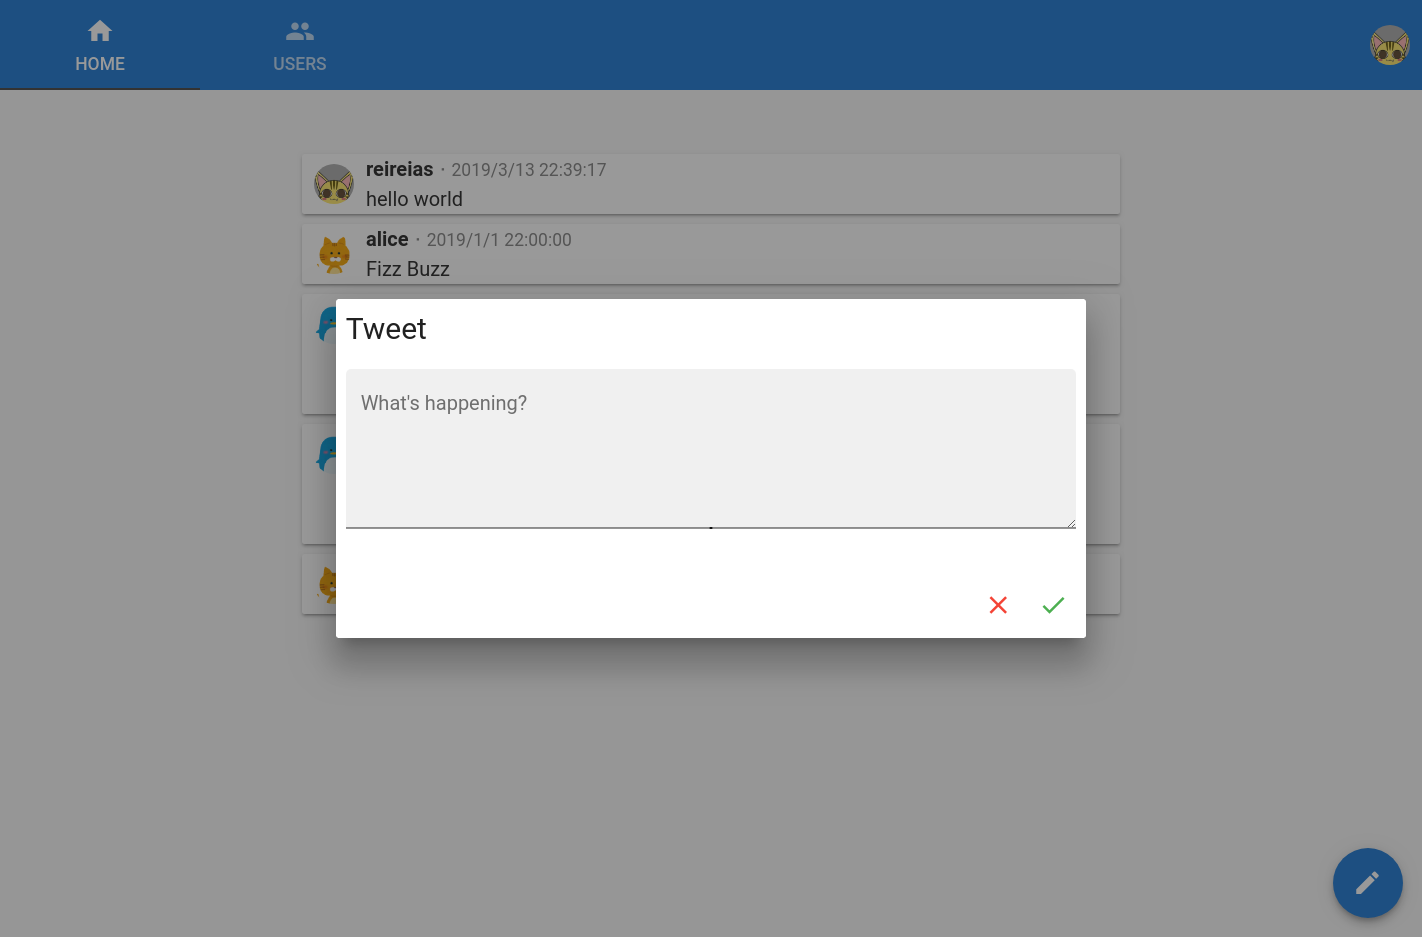
Tweetダイアログ(path:
/home)
Tweetを投稿するためのダイアログです。
右下のボタンを押すか、Ctrl + Enterで投稿できるようにします。
-
ユーザー一覧(path:
/users)
本家のように検索を実装するのは面倒なので、全ユーザー一覧を表示します。
フォロー/アンフォローをボタンにより実施できます。
このページは未認証状態でアクセスすると/へリダイレクトするように設定します。

-
認証用コールバックページ(
/callback)
GitHubとのOAuth認証を行うために、コールバック用のページも必要となります。
このページはシンプルにローディングのアニメを出すだけとします。
実装
それでは実装していきましょう。
Node.jsによるUI実装に興味が無い場合は、下記のファイルはすべてこのリポジトリ中にあるので、forkすればOKです。
リポジトリ作成
GitHubにて、microservice-sample-webという名前で作成しましょう。
プロジェクトの初期化
create-nuxt-appを利用してプロジェクトを初期化します。
yarn create nuxt-app
# 対話に下記のように答えていく
? Project name web
? Project description Web service.
? Use a custom server framework express
? Choose features to install Linter / Formatter, Prettier, Axios
? Use a custom UI framework vuetify
? Use a custom test framework ava
? Choose rendering mode Universal
? Author name reireias
? Choose a package manager yarn
まずはプロジェクトが作成されているか、サーバーを起動して確認してみましょう。
yarn dev
起動後、http://localhost:3000へアクセスすると、下記のような画面が表示されればOKです。
yarn lintでnuxt.config.jsにeslintの警告が出てしまうので抑制しておきます。
express側にnuxt.config.jsを読みこませる都合でimport構文は利用できないためです。
/* eslint nuxt/no-cjs-in-config: 0 */
const VuetifyLoaderPlugin = require('vuetify-loader/lib/plugin')
const pkg = require('./package')

module.exports = {
  mode: 'universal',

  /*
  ** Headers of the page
  */
  head: {
    title: pkg.name,
    meta: [
      { charset: 'utf-8' },
      { name: 'viewport', content: 'width=device-width, initial-scale=1' },
      { hid: 'description', name: 'description', content: pkg.description }
    ],
    link: [
      { rel: 'icon', type: 'image/x-icon', href: '/favicon.ico' },
      {
        rel: 'stylesheet',
        href:
          'https://fonts.googleapis.com/css?family=Roboto:300,400,500,700|Material+Icons'
      }
    ]
  },

  /*
  ** Customize the progress-bar color
  */
  loading: { color: '#fff' },

  /*
  ** Global CSS
  */
  css: ['~/assets/style/app.styl'],

  /*
  ** Plugins to load before mounting the App
  */
  plugins: ['@/plugins/vuetify'],

  /*
  ** Nuxt.js modules
  */
  modules: [
    // Doc: https://axios.nuxtjs.org/usage
    '@nuxtjs/axios'
  ],
  /*
  ** Axios module configuration
  */
  axios: {
    // See https://github.com/nuxt-community/axios-module#options
  },

  /*
  ** Build configuration
  */
  build: {
    transpile: ['vuetify/lib'],
    plugins: [new VuetifyLoaderPlugin()],
    loaders: {
      stylus: {
        import: ['~assets/style/variables.styl']
      }
    },

    /*
    ** You can extend webpack config here
    */
    extend(config, ctx) {
      // Run ESLint on save
      if (ctx.isDev && ctx.isClient) {
        config.module.rules.push({
          enforce: 'pre',
          test: /\.(js|vue)$/,
          loader: 'eslint-loader',
          exclude: /(node_modules)/
        })
      }
    }
  }
}
また、huskyによるpre-commit時の自動lintも設定しておきましょう。
yarn add -D husky
...
  "husky": {
    "hooks": {
      "pre-commit": "yarn lint"
    }
  },
...
stylusとstylus-loaderというパッケージがdevDependenciesにありますが、これらは後述のproductionビルドで必要になるため、次のコマンドでdependencies側に移しておきます。
yarn remove stylus stylus-loader
yarn add stylus stylus-loader
以上でプロジェクトの初期設定は完了です。
indexページの作成
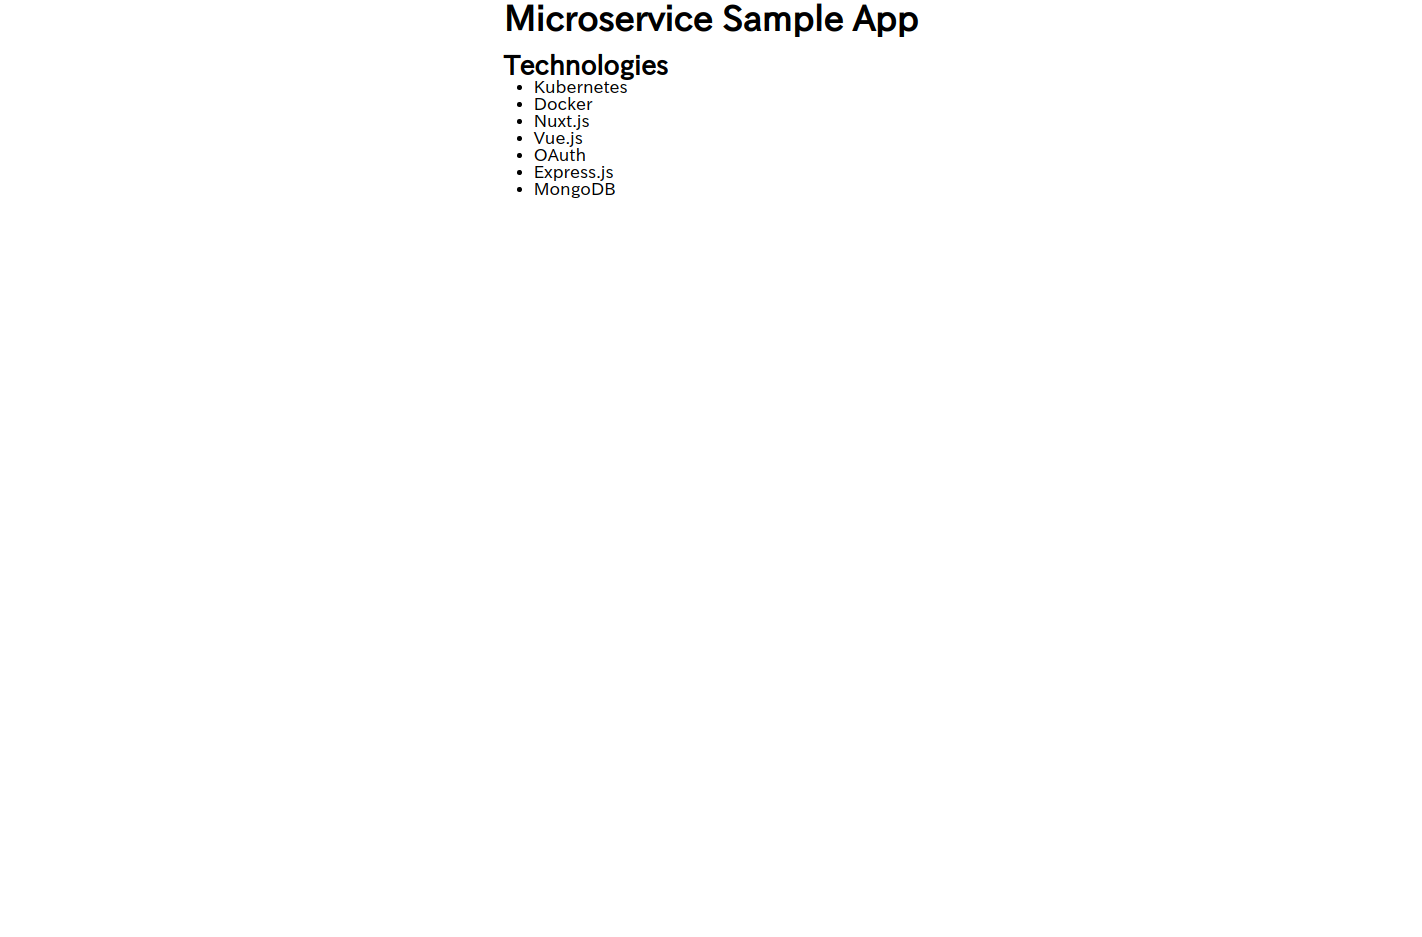
続いてトップページ(パスは/)から作成していきます。
まずは不要なページやコンポーネントを削除しましょう。
rm pages/*.vue
rm components/*.vue
全ページに共通するレイアウトを作成します。
<template>
  <nuxt />
</template>
pages/index.vueを実装していきます。
トップページに記載したい内容は特に無いので、今回は採用技術を列挙しています。
<template>
  <v-layout column justify-center align-center>
    <v-flex xs12 sm8 md6>
      <div class="text-xs-center">
        <h1>Microservice Sample App</h1>
      </div>
      <br>
      <h2>Technologies</h2>
      <ul>
        <li>Kubernetes</li>
        <li>Docker</li>
        <li>Nuxt.js</li>
        <li>Vue.js</li>
        <li>OAuth</li>
        <li>Express.js</li>
        <li>MongoDB</li>
      </ul>
    </v-flex>
  </v-layout>
</template>
以上でトップページの実装は完了です。
yarn devでサーバーを起動し、アクセスしてみましょう。
layoutとstoreの作成
vuexのstoreを作成します。
このstoreを利用して、ログイン状態を保持します。
export const state = () => ({
  user: null,
  auth: false
})

export const mutations = {
  login(state, payload) {
    state.auth = true
    state.user = payload
  },
  logout(state) {
    state.auth = false
    state.user = null
  }
}
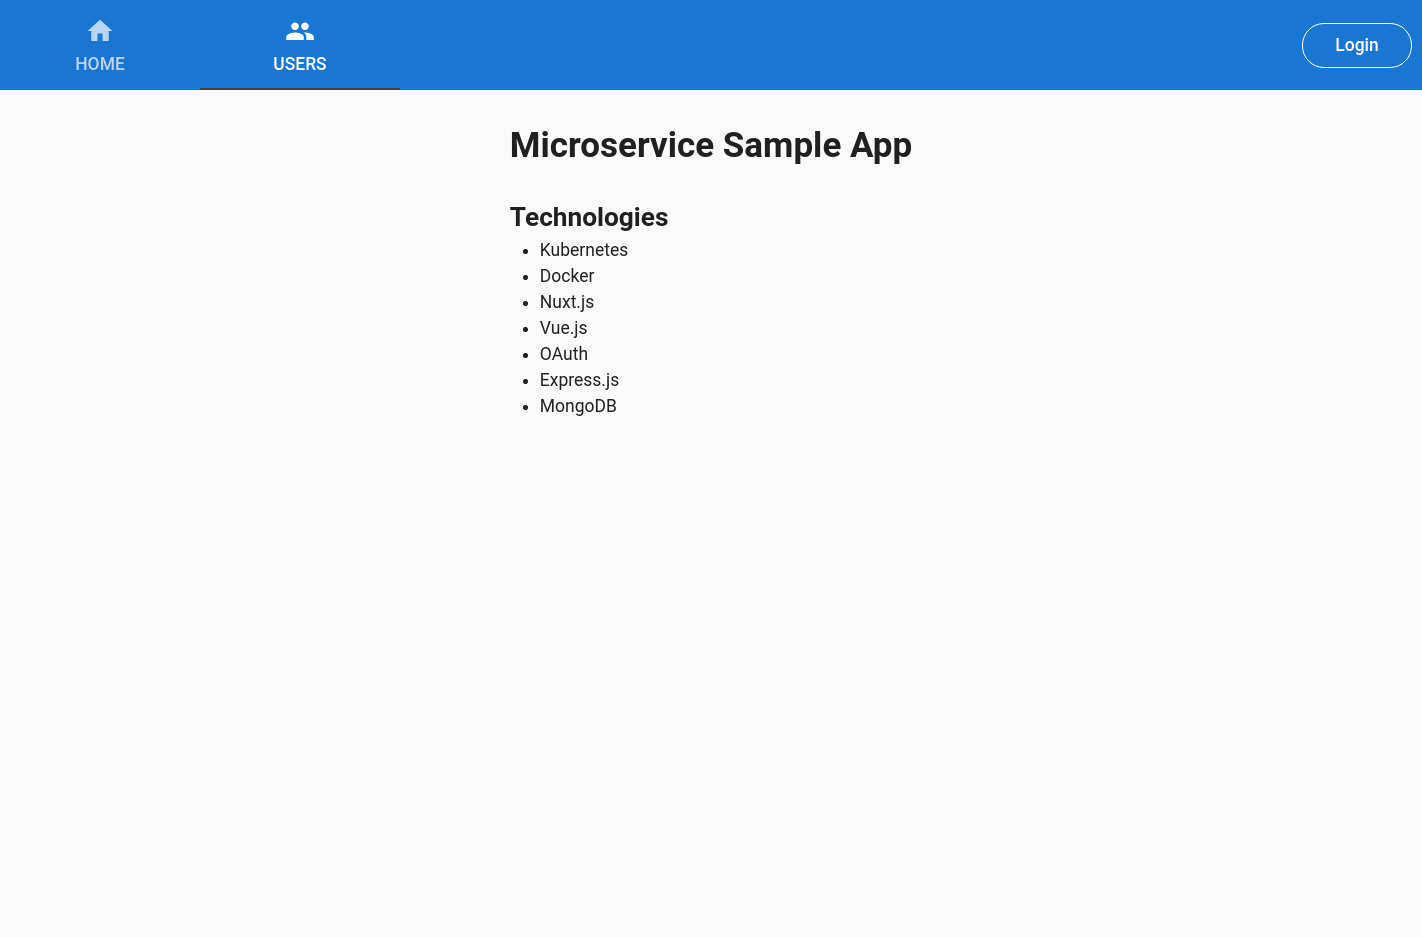
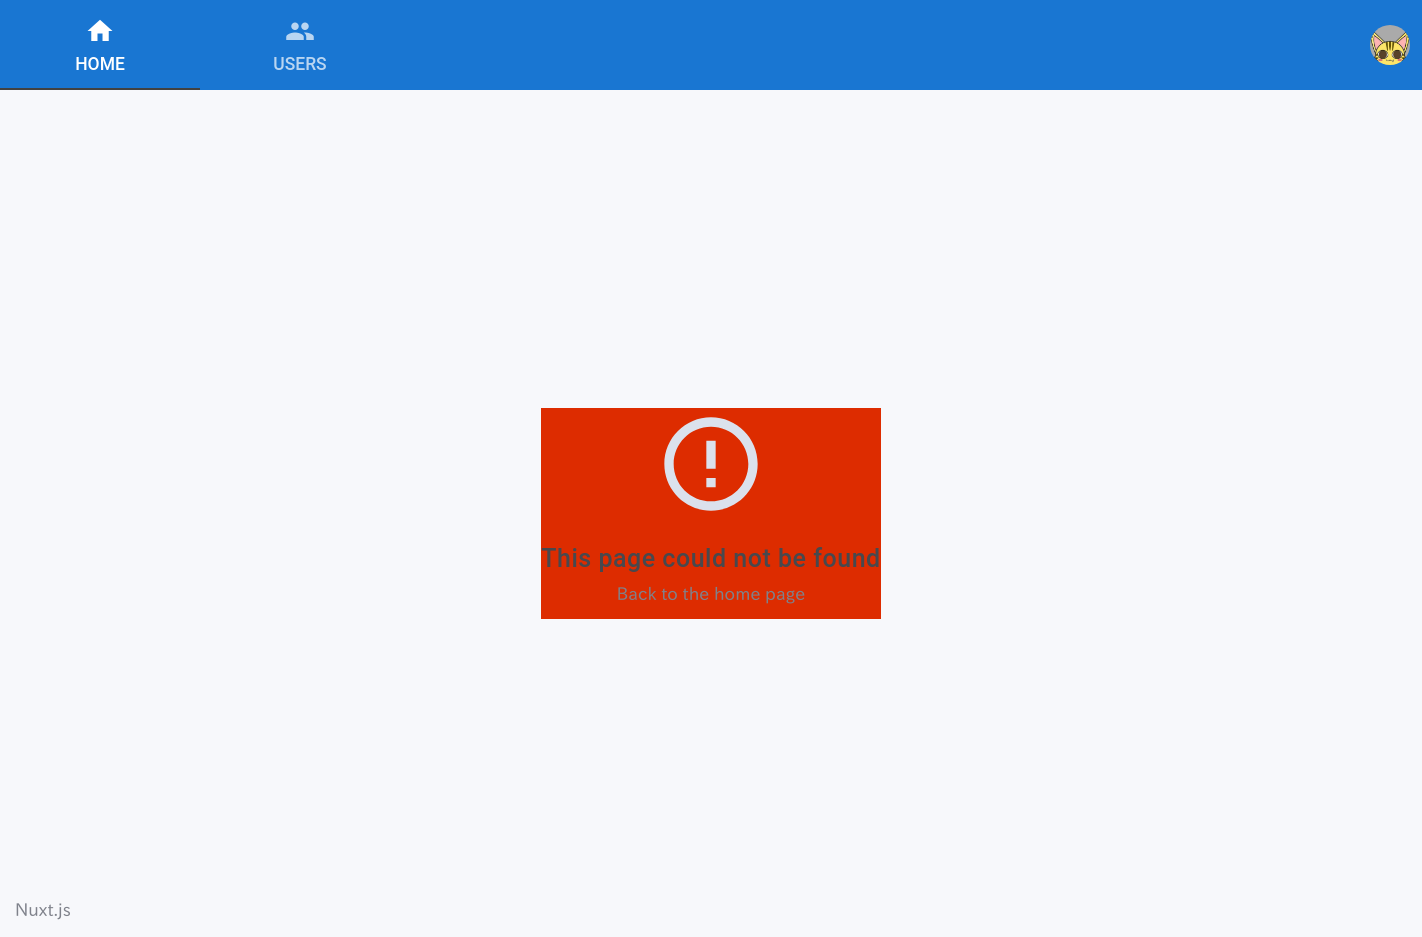
レイアウトも実装してしまいましょう。
全ページ共通として、HomeタブとUsersタブ、右上のログインボタンを表示します。
ログインボタン下の画像のように、はログイン時にはアバターアイコン兼ログアウトボタンとして表示されるものとします。
ログイン前

ログイン後

ログインボタンはコンポーネントとして切り出して実装します。
<template>
  <v-app>
    <v-tabs
      icons-and-text
      dark
      color="primary"
      slider-color="accent"
    >
      <v-tab to="/home">
        Home
        <v-icon>home</v-icon>
      </v-tab>
      <v-tab to="/users">
        Users
        <v-icon>people</v-icon>
      </v-tab>
      <v-spacer />
      <avatar />
    </v-tabs>
    <v-content>
      <v-container>
        <nuxt />
      </v-container>
    </v-content>
  </v-app>
</template>

<script>
import Avatar from '~/components/Avatar.vue'
export default {
  components: {
    Avatar
  },
  data() {
    return {
      title: 'Microservice Sample'
    }
  }
}
</script>
ログインボタン/アバターアイコンのコンポーネントを下記のように実装します。
<template>
  <div class="avatar">
    <template v-if="$store.state.auth">
      <v-menu bottom left>
        <v-btn slot="activator" icon>
          <v-avatar size="32px">
            <img :src="$store.state.user.avatarUrl">
          </v-avatar>
        </v-btn>
        <v-list>
          <v-list-tile href="/api/auth/logout">
            <v-list-tile-title>Logout</v-list-tile-title>
          </v-list-tile>
        </v-list>
      </v-menu>
    </template>
    <template v-else>
      <v-btn
        round
        outline
        href="/api/auth/github"
      >
        Login
      </v-btn>
    </template>
  </div>
</template>


<style>
.v-tabs .v-btn {
  text-transform: none;
}
.avatar {
  align-self: center;
}
.v-menu__activator {
  height: 100%;
}
</style>
ここまでできたらyarn devでサーバーを起動してアクセスしてみましょう。
トップページにタブやログインボタンが表示されるはずです。
ただ、ログイン機能を実装していないので、実際にログインすることはまだできません。
Passport.jsによるGitHub認証の追加
続いてログイン機能を実装します。
必要なモジュールを追加します。
yarn add passport passport-github2 express-session morgan body-parser
Passport.jsによるログイン処理を行うサーバーサイドを実装します。
このあたりはPassport.jsのサンプルを参考に実装しています。
const express = require('express')
const morgan = require('morgan')
const session = require('express-session')
const passport = require('passport')
const { Strategy } = require('passport-github2')
const bodyParser = require('body-parser')
const { Nuxt, Builder } = require('nuxt')
const app = express()

app.use(morgan('short'))
app.use(bodyParser.urlencoded({ extended: true }))
app.use(bodyParser.json())
app.use(
  session({
    secret: process.env.SESSION_SECRET || 'secret',
    resave: false,
    saveUninitialized: false,
    cookie: {
      secure: 'auto'
    }
  })
)
app.use(passport.initialize())
app.use(passport.session())

passport.use(
  new Strategy(
    {
      clientID: process.env.GITHUB_CLIENT_ID,
      clientSecret: process.env.GITHUB_CLIENT_SECRET,
      callbackURL: process.env.CALLBACK_URL || 'http://localhost:3000/callback'
    },
    (accessToken, refreshToken, profile, done) => {
      process.nextTick(() => {
        const name = profile.username
        const avatarUrl = profile.photos[0].value
        // TODO: create or update user data
        return done(null, {
          _id: 'dummy',
          name: name,
          avatarUrl: avatarUrl
        })
      })
    }
  )
)

passport.serializeUser((user, done) => {
  done(null, user)
})
passport.deserializeUser((obj, done) => {
  done(null, obj)
})

app.get(
  '/api/auth/github',
  passport.authenticate('github', { scope: ['user:email'] })
)
app.get(
  '/api/auth/github/callback',
  passport.authenticate('github'),
  (req, res) => {
    res.json({ user: req.user })
  }
)
app.get('/api/auth/logout', (req, res) => {
  req.logout()
  res.redirect('/')
})
app.get('/api/session', (req, res) => {
  res.json({ user: req.user })
})

// Import and Set Nuxt.js options
const config = require('../nuxt.config.js')
config.dev = !(process.env.NODE_ENV === 'production')

async function start() {
  // Init Nuxt.js
  const nuxt = new Nuxt(config)

  const {
    host = process.env.HOST || '127.0.0.1',
    port = process.env.PORT || 3000
  } = nuxt.options.server

  // Build only in dev mode
  if (config.dev) {
    const builder = new Builder(nuxt)
    await builder.build()
  } else {
    await nuxt.ready()
  }

  // Give nuxt middleware to express
  app.use(nuxt.render)

  // Listen the server
  app.listen(port, host)
}
start()
GitHubからリダイレクトするcallbackページを実装します。
<template>
  <center>
    <v-progress-circular
      :size="70"
      :width="7"
      color="primary"
      indeterminate
    />
  </center>
</template>

<script>
export default {
  data() {
    return {
      user: null
    }
  },
  async mounted() {
    const res = await this.$axios.get('/api/auth/github/callback', {
      params: this.$route.query
    })
    const user = {
      _id: res.data.user._id,
      name: res.data.user.name,
      avatarUrl: res.data.user.avatarUrl
    }
    this.$store.commit('login', user)
    this.$router.push('/home')
  }
}
</script>
こちらを参考に、GitHubでOAuth用のClientIDとClientSecretを取得してください。
その際、callbackURLはhttp://localhost:3000/callbackとします。
上記で発行したClientIDとClientSecretを指定しながらサーバーを起動します。
GITHUB_CLIENT_ID=xxx GITHUB_CLIENT_SECRET=yyy yarn dev
トップページへアクセスし、ログインボタンを押してみましょう。
GitHub側のOAuthの認証画面へ遷移し、実際にログインができるはずです。
しかし、ログイン成功後に遷移する/homeが未実装のため、ログイン後に画面にはエラーが表示されます。
ログイン状態の場合のみアクセス可能なページの実現
/homeと/usersを実装していきましょう。
まずは、/homeで表示するタイムラインをコンポーネントとして実装します。
<template>
  <v-container fluid grid-list-xs>
    <v-layout justify-center row wrap>
      <v-flex
        v-for="tweet in timeline"
        :key="tweet._id"
        class="tweet"
        xs12
      >
        <tweet :tweet="tweet" />
      </v-flex>
    </v-layout>
  </v-container>
</template>

<script>
import Tweet from '~/components/Tweet.vue'
export default {
  components: {
    Tweet
  },
  data() {
    return {
      timeline: []
    }
  },
  async mounted() {
    this.timeline = await this.$axios.$get('/api/timeline')
  },
  methods: {
    async update() {
      this.timeline = await this.$axios.$get('/api/timeline')
    }
  }
}
</script>

<style>
.tweet {
  margin: 4px;
}
</style>
タイムライン中の1Tweetもコンポーネントとして実装します。
<template>
  <v-card>
    <v-layout row wrap>
      <v-btn icon>
        <v-avatar size="32px">
          <img :src="tweet.avatarUrl">
        </v-avatar>
      </v-btn>
      <div>
        <span class="name">
          {{ tweet.name }}
        </span>
        <span class="created-at">
          ・ {{ formatDate(tweet.createdAt) }}
        </span>
        <span class="content">
          {{ tweet.content }}
        </span>
      </div>
    </v-layout>
  </v-card>
</template>

<script>
export default {
  props: {
    tweet: {
      type: Object,
      required: true
    }
  },
  methods: {
    formatDate(date) {
      return new Date(date).toLocaleString('ja-JP')
    }
  }
}
</script>

<style>
.name {
  font-size: 16px;
  font-weight: bold;
}
.created-at {
  color: gray;
}
.content {
  margin: 0px;
  font-size: 16px;
  white-space: pre-line;
}
</style>
画面右下に表示するのTweetボタンと、開かれるダイアログをコンポーネントとして実装します。
<template>
  <v-fab-transition>
    <v-dialog v-model="dialog" max-width="600px">
      <v-btn
        slot="activator"
        fixed
        bottom
        right
        fab
        dark
        color="primary"
      >
        <v-icon>edit</v-icon>
      </v-btn>
      <v-card>
        <v-card-title>
          <span class="headline">
            Tweet
          </span>
        </v-card-title>
        <v-card-text>
          <v-textarea
            v-model="content"
            label="What's happening?"
            box
            autofocus
            @keyup.enter="tweetEnter"
          />
        </v-card-text>
        <v-card-actions>
          <v-spacer />
          <v-btn
            icon
            flat
            color="red"
            @click="dialog = false"
          >
            <v-icon>close</v-icon>
          </v-btn>
          <v-btn
            icon
            flat
            color="green"
            @click="tweet"
          >
            <v-icon>check</v-icon>
          </v-btn>
        </v-card-actions>
      </v-card>
    </v-dialog>
  </v-fab-transition>
</template>

<script>
export default {
  data() {
    return {
      dialog: false,
      content: null
    }
  },
  methods: {
    async tweet() {
      this.dialog = false
      await this.$axios.post('/api/tweets', { content: this.content })
      this.content = null
      this.$emit('tweeted')
    },
    async tweetEnter(event) {
      if (event.ctrlKey) {
        await this.tweet()
      }
    }
  }
}
</script>

<style>
.v-card__title {
  padding: 8px;
}
.v-card__text {
  padding: 8px;
}
.v-card__actions {
  padding: 8px;
}
</style>
これらを表示するpages/home.vueを実装しましょう。
<template>
  <v-flex xs10 offset-xs1>
    <timeline ref="timeline" />
    <tweet-dialog @tweeted="tweeted" />
  </v-flex>
</template>

<script>
import Timeline from '~/components/Timeline.vue'
import TweetDialog from '~/components/TweetDialog.vue'
export default {
  components: {
    Timeline,
    TweetDialog
  },
  methods: {
    tweeted() {
      this.$refs.timeline.update()
    }
  }
}
</script>
続いて/usersの実装をします。
まず、1ユーザーの表示をコンポーネント化します。
<template>
  <v-card>
    <v-btn icon>
      <v-avatar size="32px">
        <img :src="user.avatarUrl">
      </v-avatar>
    </v-btn>
    <span class="name">
      {{ user.name }}
    </span>
    <v-card-actions>
      <v-spacer />
      <v-btn
        v-if="user.follow"
        color="red"
        outline
        @click="unfollow(user)"
      >
        unfollow
      </v-btn>
      <v-btn
        v-else
        color="primary"
        outline
        @click="follow(user)"
      >
        follow
      </v-btn>
    </v-card-actions>
  </v-card>
</template>

<script>
export default {
  props: {
    user: {
      type: Object,
      required: true
    }
  },
  methods: {
    async follow(user) {
      const res = await this.$axios.post('/api/follow', { _id: user._id })
      if (res.status === 200) {
        user.follow = true
      }
    },
    async unfollow(user) {
      const res = await this.$axios.delete('/api/follow', {
        params: { _id: user._id }
      })
      if (res.status === 200) {
        user.follow = false
      }
    }
  }
}
</script>

<style>
.name {
  font-size: 16px;
  font-weight: bold;
}
</style>
上記を利用して、ユーザー一覧を表示するページを実装します。
<template>
  <v-flex xs10 offset-xs1>
    <v-container fluid grid-list-xs>
      <v-layout justify-start row wrap>
        <v-flex
          v-for="user in users"
          :key="user._id"
          class="users"
          xs6
        >
          <user :user="user" />
        </v-flex>
      </v-layout>
    </v-container>
  </v-flex>
</template>

<script>
import User from '~/components/User.vue'
export default {
  components: {
    User
  },
  data() {
    return {
      users: []
    }
  },
  async asyncData({ app }) {
    const res = await app.$axios.get('/api/users')
    return {
      users: res.data
    }
  }
}
</script>
ここまでできたら、ローカルでこれまでに実装した3つのサービスを起動して動作を確認してみましょう。
それぞれ別ターミナルを使って起動します。
また、MongoDBはlocalhost:27017で起動している必要があります。
# (ターミナル1で)Userサービスをポート3001で起動
PORT=3001 yarn dev
# (ターミナル2で)Tweetサービスをポート3002で起動
PORT=3002 yarn dev
# (ターミナル3で)UserサービスとTweetサービスのエンドポイントと、GitHubのOAuth認証情報を指定しながらWebサービスを起動
GITHUB_CLIENT_ID=xxx GITHUB_CLIENT_SECRET=yyy USER_SERVICE=http://localhost:3001 TWEET_SERVICE=http://localhost:3002 yarn dev
以下を確認してみましょう。
- ユーザー一覧からフォロー/アンフォローできる
- タイムラインにフォローしたユーザーのツイートが表示される
- ツイートができる
リロード時のsession取得
現状の実装ではF5キー等で画面をリロードすると、ログイン状態が解除されてしまいます。
これはブラウザ側で持っているvuexのstore中の情報がリロードでクリアされてしまうためです。
そこで、nuxtServerInitという機能を利用してリロードを含むページへの最初のアクセス時に、サーバーサイドのsession情報を取得してstoreへロードする実装を行います。
nuxtServerInitに関する詳しい情報はこちらを参照してください。
export const state = () => ({
  user: null,
  auth: false
})

export const mutations = {
  login(state, payload) {
    state.auth = true
    state.user = payload
  },
  logout(state) {
    state.auth = false
    state.user = null
  }
}

export const actions = {
  nuxtServerInit({ dispatch }, { req }) {
    return dispatch('getSession')
  },
  async getSession({ commit }) {
    const session = await this.$axios.$get('/api/session')
    if (session && session.user) {
      commit('login', session.user)
    }
  }
}
サーバーを起動し、ログイン後、F5を押してリページをリロードしてみましょう。
先程までとは異なり、ログイン状態が保持されるはずです。
未認証時のリダイレクト
現状、未認証状態でも画面上部のタブを押すことにより、/homeや/usersページへアクセスできてしまいます。(ユーザーIDが取得できないので、APIのレスポンスがエラーになりますが)
これを回避するために、特定のページ以外は未認証状態でアクセスすると、トップページへリダイレクトするように実装しましょう。
この設定にはNuxt.jsのrouterの設定を利用します。
middleware/session.jsにリダイレクトの実装を行います。
export default ({ store, route, redirect }) => {
  if (!store.state.auth && !['/', '/callback'].includes(route.path)) {
    return redirect('/')
  }
}
上記を設定ファイル中でrouterに設定します。
...
  router: {
    middleware: 'session'
  },
  /*
  ** Axios module configuration
  */
  axios: {
    proxy: true
  },
...
これだけでリダイレクトの設定は完了です。
サーバーを起動し、未認証状態で/homeや/usersへアクセスしてみましょう。
リダイレクトされるようになったはずです。
まとめ
第4章では作成済みのTweetサービスとUserサービスをバックエンドとして利用するWebサービスを構築しました。
ローカルでそれぞれのサービスを起動し、動作することを確認しました。
次の章では、Dockerイメージを作成し、Docker上でこれらのサービスを動かしてみます。