概要
公式ドキュメントの「サンプルワークフローの作成」に沿ってGitHub Actionsを実行しました。
手順
1. ディレクトリを作成する
mkdir -p .github/workflows
2. 作成したディレクトリに移動する
cd .github/workflows
3. ワークフローファイルを作成する
.github/workflows/github-actions-demo.yml
name: learn-github-actions #ワークフローの名前
run-name: ${{ github.actor }} is learning GitHub Actions #GitHub が提供してくれる実行時の情報(コンテキスト)を変数のように使える
on:
  push: #pushされたときに実行される(全部ブランチが対象)
  workflow_dispatch: #GitHub Actionsを手動で実行できるようにする設定

jobs:
  check-bats-version: #ジョブの名前
    runs-on: ubuntu-latest #実行環境の指定(GitHubが用意するマネージド仮想マシン)
    steps:
      #GitHubの公式アクション
      - uses: actions/checkout@v4 #このリポジトリをGitHubが用意したマネージド仮想マシンのワーキングディレクトリにクローンする
      - uses: actions/setup-node@v4 #GitHubが用意したマネージド仮想マシンにnode.jsをインストールしてパスを通す
        with:
          node-version: '20' #node.jsのバージョンを指定する
      - run: npm install -g bats #シェルスクリプトのテストフレームワークbatsをnpmでインストールする
      - run: bats -v #batsのバージョンを表示する
※疑問ポイント
run-nameに設定した(${{ github.actor }})
usesに設定したactions/
4. 作成したファイルをインデックスに登録する
git add .
5. 作成したファイルをcommitする
git commit -m "ワークフローファイルの作成"
5. 作成したファイルをpushする
git push origin main
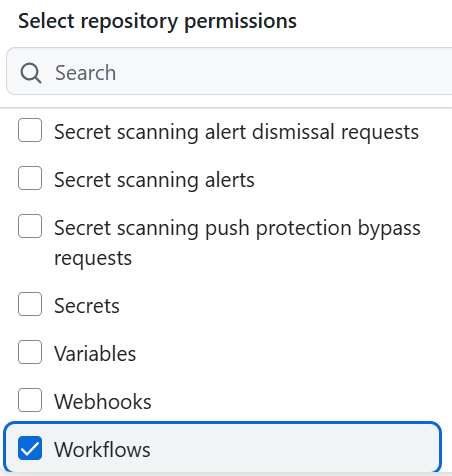
※push時に以下のエラーが発生した場合、トークンにWorkflowsの権限を付与する必要がある

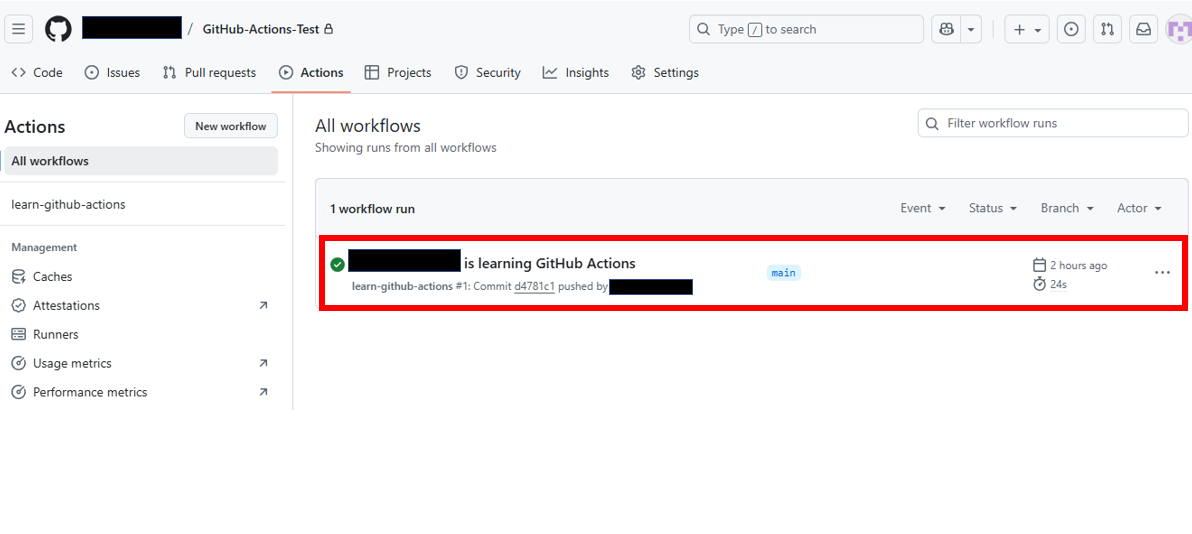
6. GitHubの対象リポジトリでActionsタブをクリックする

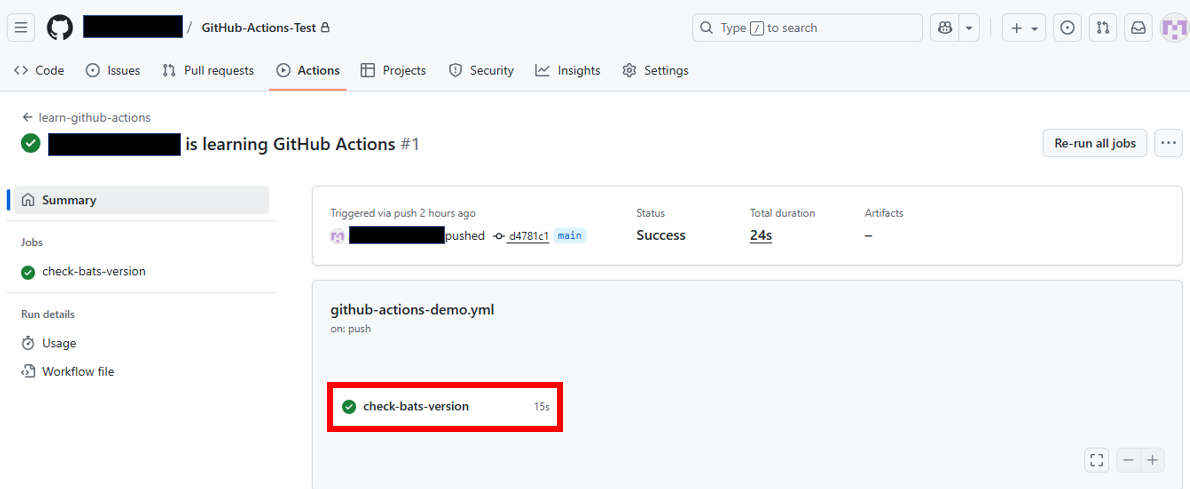
7. 実行したワークフローをクリックする
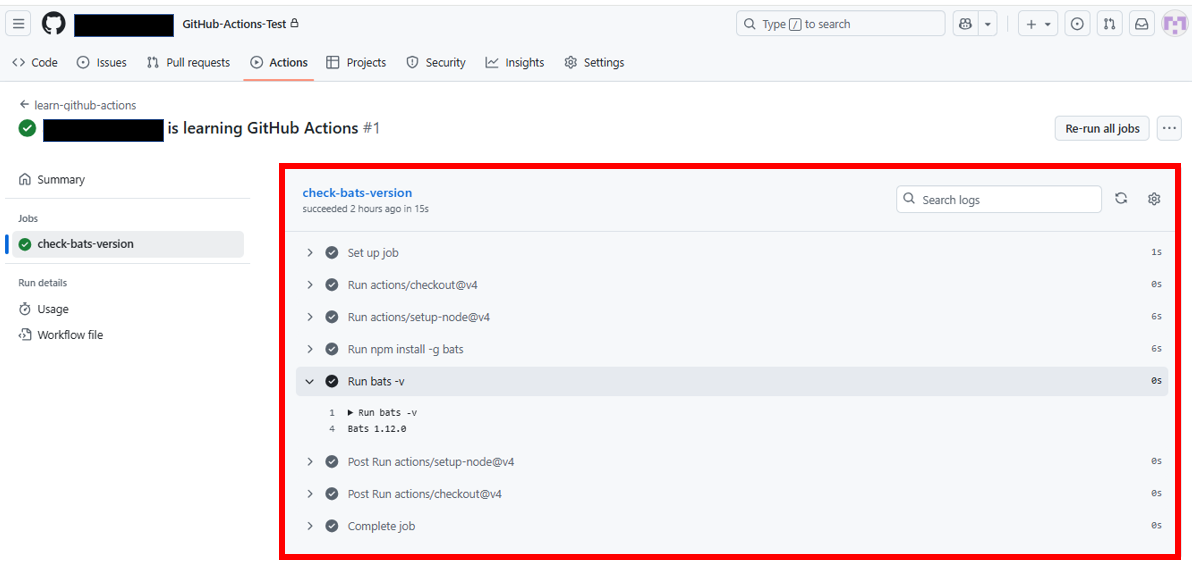
7. ジョブをクリックする
7. 実行されたジョブのログを確認することが出来る