今回はSpringJDBCを使ってDBを操作します。
環境
クライアント側
OS: macOS Big Sur バージョン11.1
STS: Spring Tool Suite 4 Version: 4.9.0.RELEASE
DBサーバー側
OS: Amazon Linux
DB: mariaDB Ver 15.1
DB環境構築の参考サイト
・AWSのEC2でmariaDBを使う方法
・CentOS7にMariaDBをインストールして外部ホストから接続する方法
・Macのhomebrewでmysqlクライアントのみインストールする
参考ライブラリ
mvnrepository
前提
・STSでHelloWorldを出せる。
・DB環境が構築が完了してる(ローカルでも可)。
・lombokが使える状態。(lombokインストール)
SpringJDBCとは一言で
JavaEE標準のJDBCを簡単に実装できるようにしたものです!
事前に作成したテーブル
事前にサンプル用ユーザーテーブルを作成しておく。
mysql> use sampledb;
Database changed
mysql> show fields from m_user;
+-----------+-------------+------+-----+---------+-------+
| Field     | Type        | Null | Key | Default | Extra |
+-----------+-------------+------+-----+---------+-------+
| user_id   | int(11)     | NO   | PRI | NULL    |       |
| password  | varchar(10) | YES  |     | NULL    |       |
| user_name | varchar(10) | YES  |     | NULL    |       |
| age       | int(11)     | YES  |     | NULL    |       |
| role      | varchar(10) | YES  |     | NULL    |       |
+-----------+-------------+------+-----+---------+-------+
mysql> select * from m_user;
+---------+----------+-----------+------+---------+
| user_id | password | user_name | age  | role    |
+---------+----------+-----------+------+---------+
|       1 | 1pass    | Benimaru  |   24 | admin   |
|       2 | 2pass    | Senku     |   17 | general |
|       3 | 3pass    | Garp      |   60 | general |
+---------+----------+-----------+------+---------+
application.properties
application.propertiesにDBの設定を入れます。
spring.datasource.url=jdbc:mysql://(接続先IPアドレス):3306/sampledb
spring.datasource.username=testuser
spring.datasource.password=password
spring.datasource.driverClassName=org.mariadb.jdbc.Driver
build.gradle編集
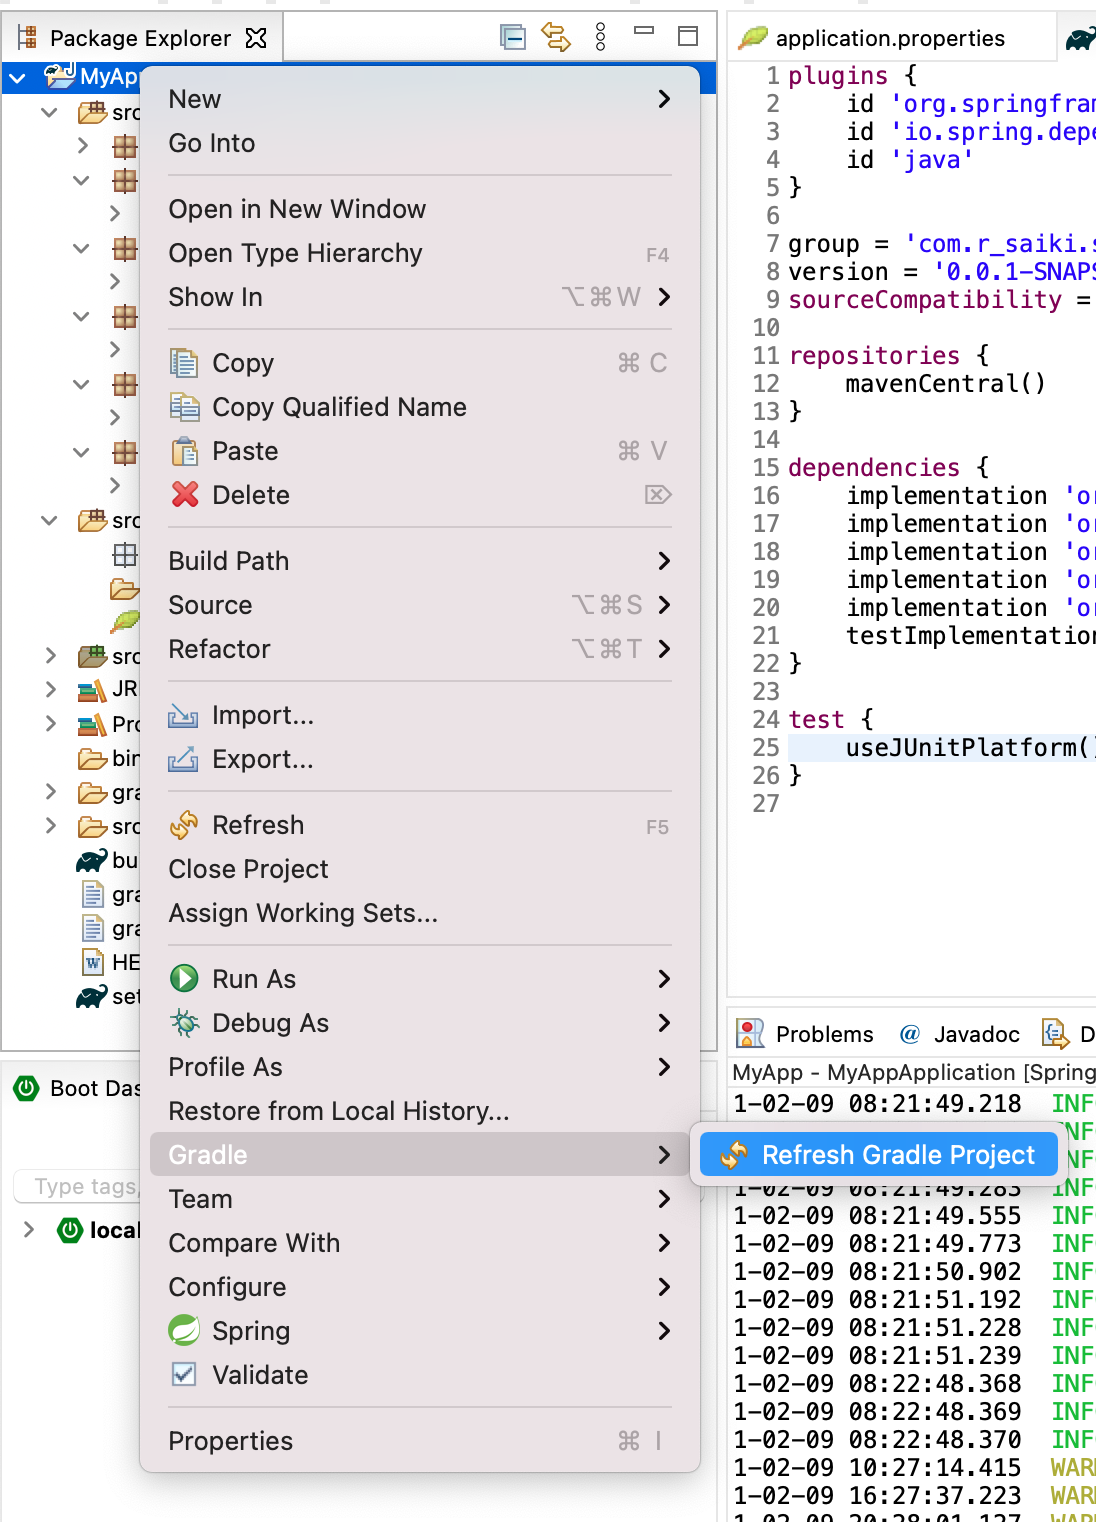
build.gradleにSpringJDBCとMariaDBのライブラリを追加。dependenciesに以下を追加。
implementation 'org.springframework.boot:spring-boot-starter-data-jdbc'
implementation 'org.mariadb.jdbc:mariadb-java-client'
プロジェクト構成
MyAppプロジェクトソースはここ
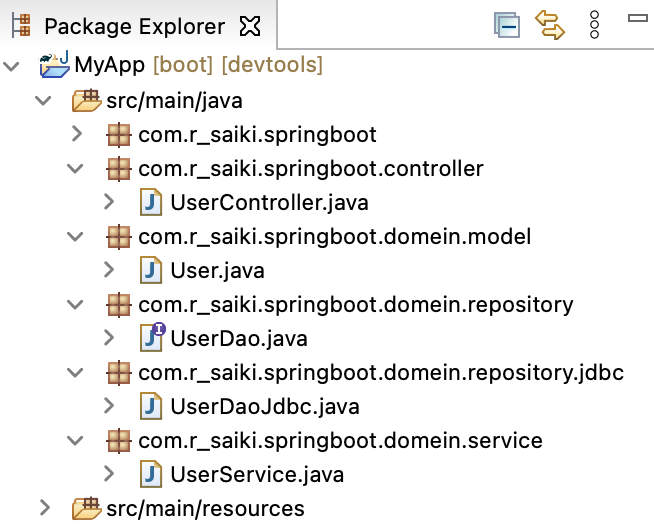
下のような感じで、パッケージを作成する。
controller・・・ここにユーザーリクエストを受け付けるRESTコントローラークラスを作成。
domein.model・・ユーザーテーブルと対応したデータクラスを作成。
domein.repository・・・DB操作をするインターフェースを作成。
domein.repository.jdbc・・・上記を実装したクラスを作成。
domein.service・・・DBデータ取得後、データを加工するクラスを作成。

モデル作成
package com.r_saiki.springboot.domein.model;

import lombok.Data;

@Data
public class User {
    private int userId; // ユーザーID
    private String password; // パスワード
    private String userName; // ユーザー名
    private int age; // 年齢
    private String role; // ロール
}
リポジトリ作成
インターフェース作成
package com.r_saiki.springboot.domein.repository;

import java.util.List;
import com.r_saiki.springboot.domein.model.User;

import org.springframework.dao.DataAccessException;

public interface UserDao {
	// Userテーブルにデータを1件insert
    public int insertOne(User user) throws DataAccessException;

    // Userテーブルのデータを1件取得
    public User selectOne(String userId) throws DataAccessException;

    // Userテーブルの全データを取得
    public List<User> selectMany() throws DataAccessException;

    // Userテーブルを1件更新
    public int updateOne(User user) throws DataAccessException;

    // Userテーブルを1件削除
    public int deleteOne(String userId) throws DataAccessException;
}
実装クラス作成
JdbcTemplateオブジェクトを使ってDB操作する。
updateメソッド・・・更新系処理(insert,delete,update)。戻り値は更新件数。
queryForMapメソッド・・・取得件数が一件のselect文。戻り値はMap。
queryForListメソッド・・・取得件数が複数のselect文。戻り値はList。
package com.r_saiki.springboot.domein.repository.jdbc;

import java.util.ArrayList;
import java.util.List;
import java.util.Map;

import org.springframework.beans.factory.annotation.Autowired;
import org.springframework.dao.DataAccessException;
import org.springframework.jdbc.core.JdbcTemplate;
import org.springframework.stereotype.Repository;

import com.r_saiki.springboot.domein.repository.UserDao;
import com.r_saiki.springboot.domein.model.User;

@Repository("UserDaoJdbc")
public class UserDaoJdbc implements UserDao {

	@Autowired
	JdbcTemplate jdbc;

	// Userテーブルにデータを1件insert.
	@Override
	public int insertOne(User user) throws DataAccessException {
		// 1件登録
		int rowNumber = jdbc.update(
				"INSERT INTO m_user(user_id," + " password," + " user_name," + " age," + " role)"
						+ " VALUES(?, ?, ?, ?, ?)",
				user.getUserId(), user.getPassword(), user.getUserName(), user.getAge(), user.getRole());
		return rowNumber;
	}

	// Userテーブルのデータを1件取得
	@Override
	public User selectOne(String userId) throws DataAccessException {
		// 1件取得
		Map<String, Object> map = jdbc.queryForMap("SELECT * FROM m_user" + " WHERE user_id = ?", userId);
		// 結果返却用の変数
		User user = new User();
		// 取得したデータを結果返却用の変数にセットしていく
		user.setUserId((Integer) map.get("user_id")); // ユーザーID
		user.setPassword((String) map.get("password")); // パスワード
		user.setUserName((String) map.get("user_name")); // ユーザー名
		user.setAge((Integer) map.get("age")); // 年齢
		user.setRole((String) map.get("role")); // ロール
		return user;
	}

	// Userテーブルの全データを取得
	@Override
	public List<User> selectMany() throws DataAccessException {
		// M_USERテーブルのデータを全件取得
		List<Map<String, Object>> getList = jdbc.queryForList("SELECT * FROM m_user");
		// 結果返却用の変数
		List<User> userList = new ArrayList<>();
		// 取得したデータを結果返却用のListに格納していく
		for (Map<String, Object> map : getList) {
			// Userインスタンスの生成
			User user = new User();
			// Userインスタンスに取得したデータをセットする
			user.setUserId((Integer) map.get("user_id")); // ユーザーID
			user.setPassword((String) map.get("password")); // パスワード
			user.setUserName((String) map.get("user_name")); // ユーザー名
			user.setAge((Integer) map.get("age")); // 年齢
			user.setRole((String) map.get("role")); // ロール
			// 結果返却用のListに追加
			userList.add(user);
		}
		return userList;
	}

	// Userテーブルを1件更新.
	@Override
	public int updateOne(User user) throws DataAccessException {
		// 1件更新
		int rowNumber = jdbc.update(
				"UPDATE m_user" + " SET" + " password = ?," + " user_name = ?," + " age = ?" + " WHERE user_id = ?",
				user.getPassword(), user.getUserName(), user.getAge(), user.getUserId());
		return rowNumber;
	}

	// Userテーブルを1件削除
	@Override
	public int deleteOne(String userId) throws DataAccessException {
		// 1件削除
		int rowNumber = jdbc.update("DELETE FROM m_user WHERE user_id = ?", userId);
		return rowNumber;
	}
}
サービス作成
リポジトリクラスから受け取った更新処理の結果を真偽値で返すように加工する。select結果はそのまま返す。
ork.transaction.annotation.Transactional;

import com.r_saiki.springboot.domein.model.User;
import com.r_saiki.springboot.domein.repository.UserDao;

@Transactional
@Service
public class UserService {
    @Autowired
    @Qualifier("UserDaoJdbc")
    UserDao dao;

    // 一件追加用メソッド
    public boolean insert(User user) {
        // insert実行
        int rowNumber = dao.insertOne(user);
        // 判定用変数
        boolean result = false;
        if (rowNumber > 0) {
            // insert成功
            result = true;
        }
        return result;
    }

    // 全件取得用メソッド
    public List<User> selectMany() {
        // 全件取得
        return dao.selectMany();
    }

    // 1件取得用メソッド
    public User selectOne(String userId) {
        // selectOne実行
        return dao.selectOne(userId);
    }

    // 1件更新メソッド
    public boolean updateOne(User user) {
        // 1件更新
        int rowNumber = dao.updateOne(user);
        // 判定用変数
        boolean result = false;
        if (rowNumber > 0) {
            // update成功
            result = true;
        }
        return result;
    }

    // 1件削除メソッド
    public boolean deleteOne(String userId) {
        // 1件削除
        int rowNumber = dao.deleteOne(userId);
        // 判定用変数
        boolean result = false;
        if (rowNumber > 0) {
            // delete成功
            result = true;
        }
        return result;
    }
}
コントローラー作成
サービスクラスから受け取った結果を元に、更新処理はユーザーに文字列を返し、select処理はjsonオブジェクトを返す。
package com.r_saiki.springboot.controller;

import java.util.List;

import org.springframework.beans.factory.annotation.Autowired;
import org.springframework.web.bind.annotation.GetMapping;
import org.springframework.web.bind.annotation.PathVariable;
import org.springframework.web.bind.annotation.PostMapping;
import org.springframework.web.bind.annotation.RequestBody;
import org.springframework.web.bind.annotation.RestController;

import com.r_saiki.springboot.domein.model.User;
import com.r_saiki.springboot.domein.service.UserService;

@RestController
public class UserController {

	@Autowired
	UserService userService;

	// 一件追加用メソッド
	@PostMapping("/insert")
	public String insert(@RequestBody User user) {
		String result = "";
		if (userService.insert(user))
			result = "一件追加しました!";
		else
			result = "追加失敗しました!";
		return result;
	}

	// 全件取得用メソッド
	@GetMapping("/selectMany")
	public List<User> selectMany() {
		// 全件取得
		return userService.selectMany();
	}

	// 1件取得用メソッド
	@GetMapping("/selectOne/{id:[0-9]+}")
	public User selectOne(@PathVariable("id") String userId) {
		// selectOne実行
		return userService.selectOne(userId);
	}

	// 1件更新メソッド
	@PostMapping("/updateOne")
	public String updateOne(@RequestBody User user) {
		String result = "";
		if (userService.updateOne(user))
			result = "一件更新しました!";
		else
			result = "更新失敗しました!";
		return result;
	}

	// 1件削除メソッド
	@PostMapping("/deleteOne/{id:.+}")
	public String deleteOne(@PathVariable("id") String userId) {
		String result = "";
		if (userService.deleteOne(userId))
			result = "一件削除しました!";
		else
			result = "削除しました!";
		return result;
	}
}
実行結果
Spring Bootを実行し、curlコマンドでリクエストを飛ばして確認する。
一件追加
userIdが4のデータを追加。次の全件取得で確認。
$ curl -X POST -H 'Content-Type: application/json' http://localhost:8080/insert -d '{"userId":4,"password":"4pass","userName":"Maki","age":17,"role":"general"}'
一件追加しました!
全件取得
先程、追加した4件目のデータも取得できている。
$ curl http://localhost:8080/selectMany
[{"userId":1,"password":"1pass","userName":"Benimaru","age":24,"role":"admin"},
{"userId":2,"password":"2pass","userName":"Senku","age":17,"role":"general"},
{"userId":3,"password":"3pass","userName":"Garp","age":60,"role":"general"},
{"userId":4,"password":"4pass","userName":"Maki","age":17,"role":"general"}]
1件更新
userIdが4のデータを更新。次の1件取得で確認。
$ curl -X POST -H 'Content-Type: application/json' http://localhost:8080/updateOne -d '{"userId":4,"password":"UpdPass4","userName":"Yuzuriha","age":88}'
一件更新しました!
1件取得
userIdが4のデータが更新されていることを確認。
$ curl http://localhost:8080/selectOne/4
{"userId":4,"password":"UpdPass4","userName":"Yuzuriha","age":88,"role":"general"}
1件削除
userIdが4のデータを削除。selectManyで確認。
$ curl -X POST http://localhost:8080/deleteOne/4
一件削除しました!
$ curl http://localhost:8080/selectMany
[{"userId":1,"password":"1pass","userName":"Benimaru","age":24,"role":"admin"},
{"userId":2,"password":"2pass","userName":"Senku","age":17,"role":"general"},
{"userId":3,"password":"3pass","userName":"Garp","age":60,"role":"general"}]
終わりに
JavaEEの時と比べたら、とても楽でした。次はもっと楽するためにJPAを使います!!
Spring DATA JPAでDB接続
参考
電子書籍:【後悔しないための入門書】Spring解体新書
