初めに
ECSのことは一切書いてありません。初心者エンジニアの備忘録です。
準備
公式ドキュメントにあるDockerfile(ubuntuイメージ)を使う。
https://docs.aws.amazon.com/ja_jp/AmazonECS/latest/developerguide/docker-basics.html
このDockerfileにpython3インストールを追加しておく。
RUN apt-get update && \
 apt-get -y install apache2 && \
 apt-get -y install python3
HTMLファイル用意
/var/www/html/index.html
<!DOCTYPE html>
<html lang="en">
<head>
  <meta charset="UTF-8">
  <meta name="viewport" content="width=device-width, initial-scale=1.0">
  <title>index</title>
</head>
<body>
  <input id="plane" type="text" value="">
  <input id="button" type="button" value="button">
  <p id="string"></p>
  <script src="https://code.jquery.com/jquery-3.5.1.js"></script>
  <script>
    $(function(){
      $("#button").click(
        function() {
          var plane = document.getElementById("plane").value;
          $.ajax({
            url: "./test.py",
            type: "post",
            data: {data: plane},
            success: function(data) {
                    document.getElementById("string").innerText = data;
            },
            error: function(data) {
              alert("failed");
            }
          });
        }
      );
    });
</script>
</body>
</html>
pythonファイル用意
/var/www/html/test.py
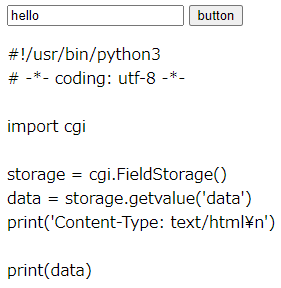
# !/usr/bin/python3
# -*- coding: utf-8 -*-

import cgi

storage = cgi.FieldStorage()
data = storage.getvalue('data')
print('Content-Type: text/html\n')

print(data)
Apache2設定
公式通りビルド・ラン
docker build -t hello-world .
docker run --name hello -it -p 80:80 hello-world
ブラウザアクセス
Ctrl + P + Q で抜けたあと、入りなおす。
docker exec -it hello /bin/bash
/etc/apache2/apache2.confを編集。
- 編集前
<Directory /var/www/>
        Options Indexes FollowSymLinks
        AllowOverride None
        Require all granted
</Directory>
- 編集後
<Directory /var/www/>
        Options Indexes FollowSymLinks ExecCGI
        AllowOverride None
        Require all granted
        AddHandler cgi-script .cgi .py
</Directory>
test.pyの権限をゆるめる。
chmod 777 /var/www/html/test.py
cgi有効化、再起動。
a2enmod cgid
service apache2 restart
一旦コンテナは停止するので再起動。
docker restart hello
再度ブラウザアクセス
感想
最初/etc/apache2/conf-available/serve-cgi-bin.confを編集していた。下記コードのコメントアウト部分だが、コメントアウトしても動いている。cgi有効化と/etc/apache2/apache2.confがcgiを動かすポイントだったと思うが、その仕組みは理解していない。こういったところも面白そうなので調べてみたい。
<IfModule mod_alias.c>
        <IfModule mod_cgi.c>
                Define ENABLE_USR_LIB_CGI_BIN
        </IfModule>

        <IfModule mod_cgid.c>
                Define ENABLE_USR_LIB_CGI_BIN
        </IfModule>

        <IfDefine ENABLE_USR_LIB_CGI_BIN>
                ScriptAlias /cgi-bin/ /usr/lib/cgi-bin/
                <Directory "/usr/lib/cgi-bin">
                        AllowOverride None
                        Options +ExecCGI -MultiViews +SymLinksIfOwnerMatch
                        Require all granted
                        # AddHandler cgi-script .cgi .py
                        # AddType text/html .shtml .html .htm
                </Directory>
        </IfDefine>
</IfModule>
test.pyの権限だが、これをゆるめる必要があると気づいたのはログを見たからだった。それまでChromeのDevToolsのコンソールログのエラーを見ていただけだったので、しばらくハマった。ログはls /var/log/apache2/にある。
参考記事
AWS公式ドキュメント
https://docs.aws.amazon.com/ja_jp/AmazonECS/latest/developerguide/docker-basics.html
Apache2 : CGI スクリプトを利用する
https://www.server-world.info/query?os=Ubuntu_20.04&p=httpd&f=5
AjaxでPythonからデータを受け取るまで
https://note.com/kanken/n/n91fc3b1d9d98

