WinUI 3.0 を使って、C++ のデスクトップアプリを作ってみました。
参考リンク
- About WinUI
- Windows アプリ開発用ツールのインストール
- Windows App SDK を使ってデスクトップ Windows アプリを作成する
- Windows App SDK を使用して新しいプロジェクトを作成する
- 「Project Reunion」の正式名称は「Windows App SDK」に ~v0.8が一般公開
- WindowsAppSDK/roadmap.md at GitHub microsoft/WindowsAppSDK
- Windows Controls and patterns - Windows app development
- Windows アプリの設計とコーディング
- Windows 10 Fall Creators Updateで導入された「Fluent Design System」の4つの機能とは?
はじめに
Windows 11 で全面的に採用されている Fluent Design System。
それを実現する WinUI 3.0 の v0.8 (stable) が 2021年6月にリリースされました。
Windows 10 でも 1809 以降では、WinUI 3.0 が使えるようになっています。
ということで、実際にどんな感じになっているのか作ってみます。
環境準備
Visual Studio 拡張機能の Project Reunion を導入します。
Project Reunion から Windows App SDK へ
現在は、「Windows App SDK」という名称に変わりましたが、機能拡張を含む多くの部分に未だ「Project Reunion」が残っています。
これまで Store アプリには UWP が必須でしたが、将来的には Win32 アプリなども Store アプリとして配布できるようになるらしいです。そういう統合の意味を含めた Reunion という名前だったらしいです。
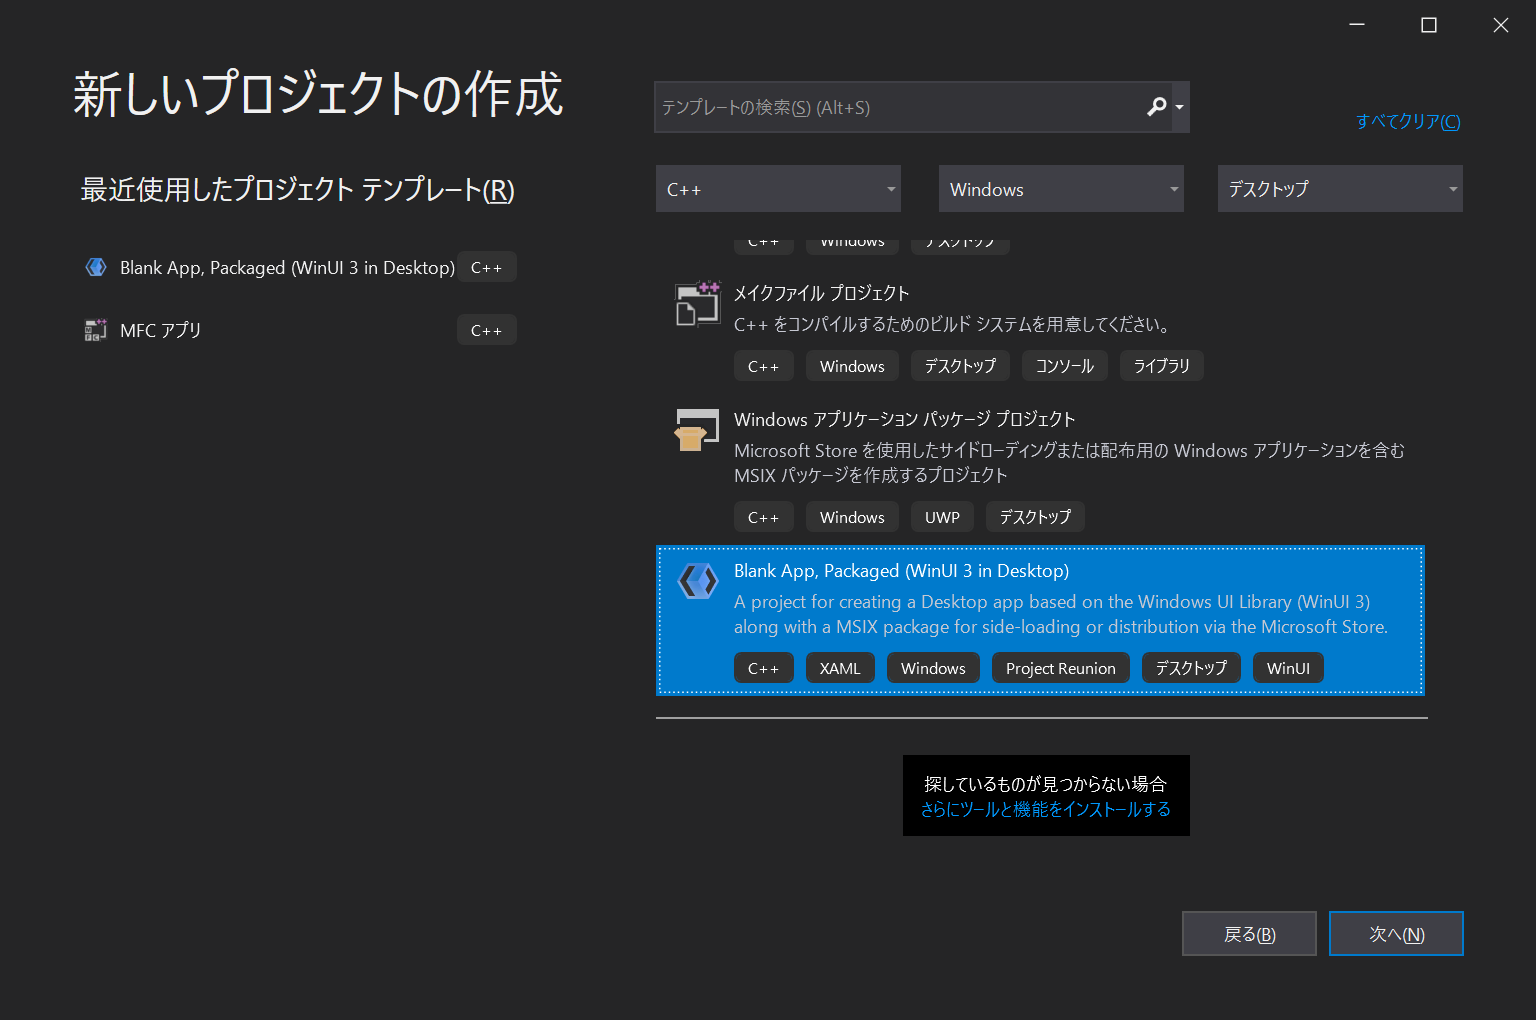
プロジェクトの作成
WinUI 3 in Desktop を選びます。
作成されたアプリ
「Click Me」ボタンしかなく寂しかったので、いくつか追加してみました。
XAML いじるだけなので、この辺りは簡単です。
背景色が黒ですが、これは 設定 の 色 で ダーク を選んでいるためです。
設定を ライト に変えれば、背景色は動的に白に変わります。
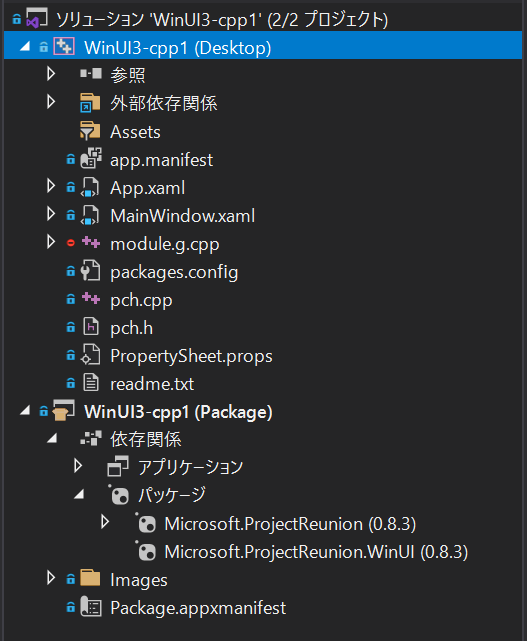
プロジェクト
ソースとパッケージの2つのプロジェクトから構成されています。
この時点では、Windows App SDK は v0.83 だとわかります。
※ 現時点の Windows App SDK では、MSIX パッケージでないと動きません。
作成したソースは、こちら。
ソースコード抜粋(XAML)
<Window
x:Class="WinUI3_cpp1.MainWindow"
xmlns="http://schemas.microsoft.com/winfx/2006/xaml/presentation"
xmlns:x="http://schemas.microsoft.com/winfx/2006/xaml"
xmlns:local="using:WinUI3_cpp1"
xmlns:d="http://schemas.microsoft.com/expression/blend/2008"
xmlns:mc="http://schemas.openxmlformats.org/markup-compatibility/2006"
mc:Ignorable="d">
<StackPanel Orientation="Vertical" HorizontalAlignment="Center" VerticalAlignment="Center">
<Button x:Name="myButton" Click="myButton_Click">Click Me</Button>
<ColorPicker
ColorSpectrumShape="Ring"
IsMoreButtonVisible="True"
IsColorSliderVisible="True"
IsColorChannelTextInputVisible="True"
IsHexInputVisible="True"
IsAlphaEnabled="False"
IsAlphaSliderVisible="True"
IsAlphaTextInputVisible="True" />
<ToggleSwitch>トグルボタン</ToggleSwitch>
<DropDownButton AutomationProperties.Name="Email">
<DropDownButton.Content>
<FontIcon FontFamily="Segoe MDL2 Assets" Glyph=""/>
</DropDownButton.Content>
<DropDownButton.Flyout>
<MenuFlyout Placement="Bottom">
<MenuFlyoutItem x:Name="mySendMail" Text="Send" Click="mySendMail_Click">
<MenuFlyoutItem.Icon>
<FontIcon FontFamily="Segoe MDL2 Assets" Glyph=""/>
</MenuFlyoutItem.Icon>
</MenuFlyoutItem>
<MenuFlyoutItem Text="Reply">
<MenuFlyoutItem.Icon>
<FontIcon FontFamily="Segoe MDL2 Assets" Glyph=""/>
</MenuFlyoutItem.Icon>
</MenuFlyoutItem>
<MenuFlyoutItem Text="Reply All">
<MenuFlyoutItem.Icon>
<FontIcon FontFamily="Segoe MDL2 Assets" Glyph=""/>
</MenuFlyoutItem.Icon>
</MenuFlyoutItem>
</MenuFlyout>
</DropDownButton.Flyout>
</DropDownButton>
<AppBarButton x:Name="myAppBarButton" Icon="Like" Label="シンボルボタン" Click="myAppBarButton_Click"/>
<RatingControl AutomationProperties.Name="Simple RatingControl" IsClearEnabled="True" IsReadOnly="False" />
</StackPanel>
</Window>
ソースコード抜粋(C++)
# include "pch.h"
# include "MainWindow.xaml.h"
# if __has_include("MainWindow.g.cpp")
# include "MainWindow.g.cpp"
# endif

using namespace winrt;
using namespace Microsoft::UI::Xaml;

// To learn more about WinUI, the WinUI project structure,
// and more about our project templates, see: http://aka.ms/winui-project-info.

namespace winrt::WinUI3_cpp1::implementation
{
    MainWindow::MainWindow()
    {
        InitializeComponent();
    }

    int32_t MainWindow::MyProperty()
    {
        throw hresult_not_implemented();
    }

    void MainWindow::MyProperty(int32_t /* value */)
    {
        throw hresult_not_implemented();
    }

    void MainWindow::myButton_Click(IInspectable const&, RoutedEventArgs const&)
    {
        myButton().Content(box_value(L"Clicked"));
    }

    void MainWindow::myAppBarButton_Click(IInspectable const&, RoutedEventArgs const&)
    {
        myAppBarButton().Label(L"イイネ");
    }

    void MainWindow::mySendMail_Click(IInspectable const&, RoutedEventArgs const&)
    {
        mySendMail().Text(L"Sended!");
    }

}
感想
- まだ v0.8 であり、MSIX パッケージ化が必要など制約も残っている。
- XAML ベースの開発に慣れるにはいいかも。
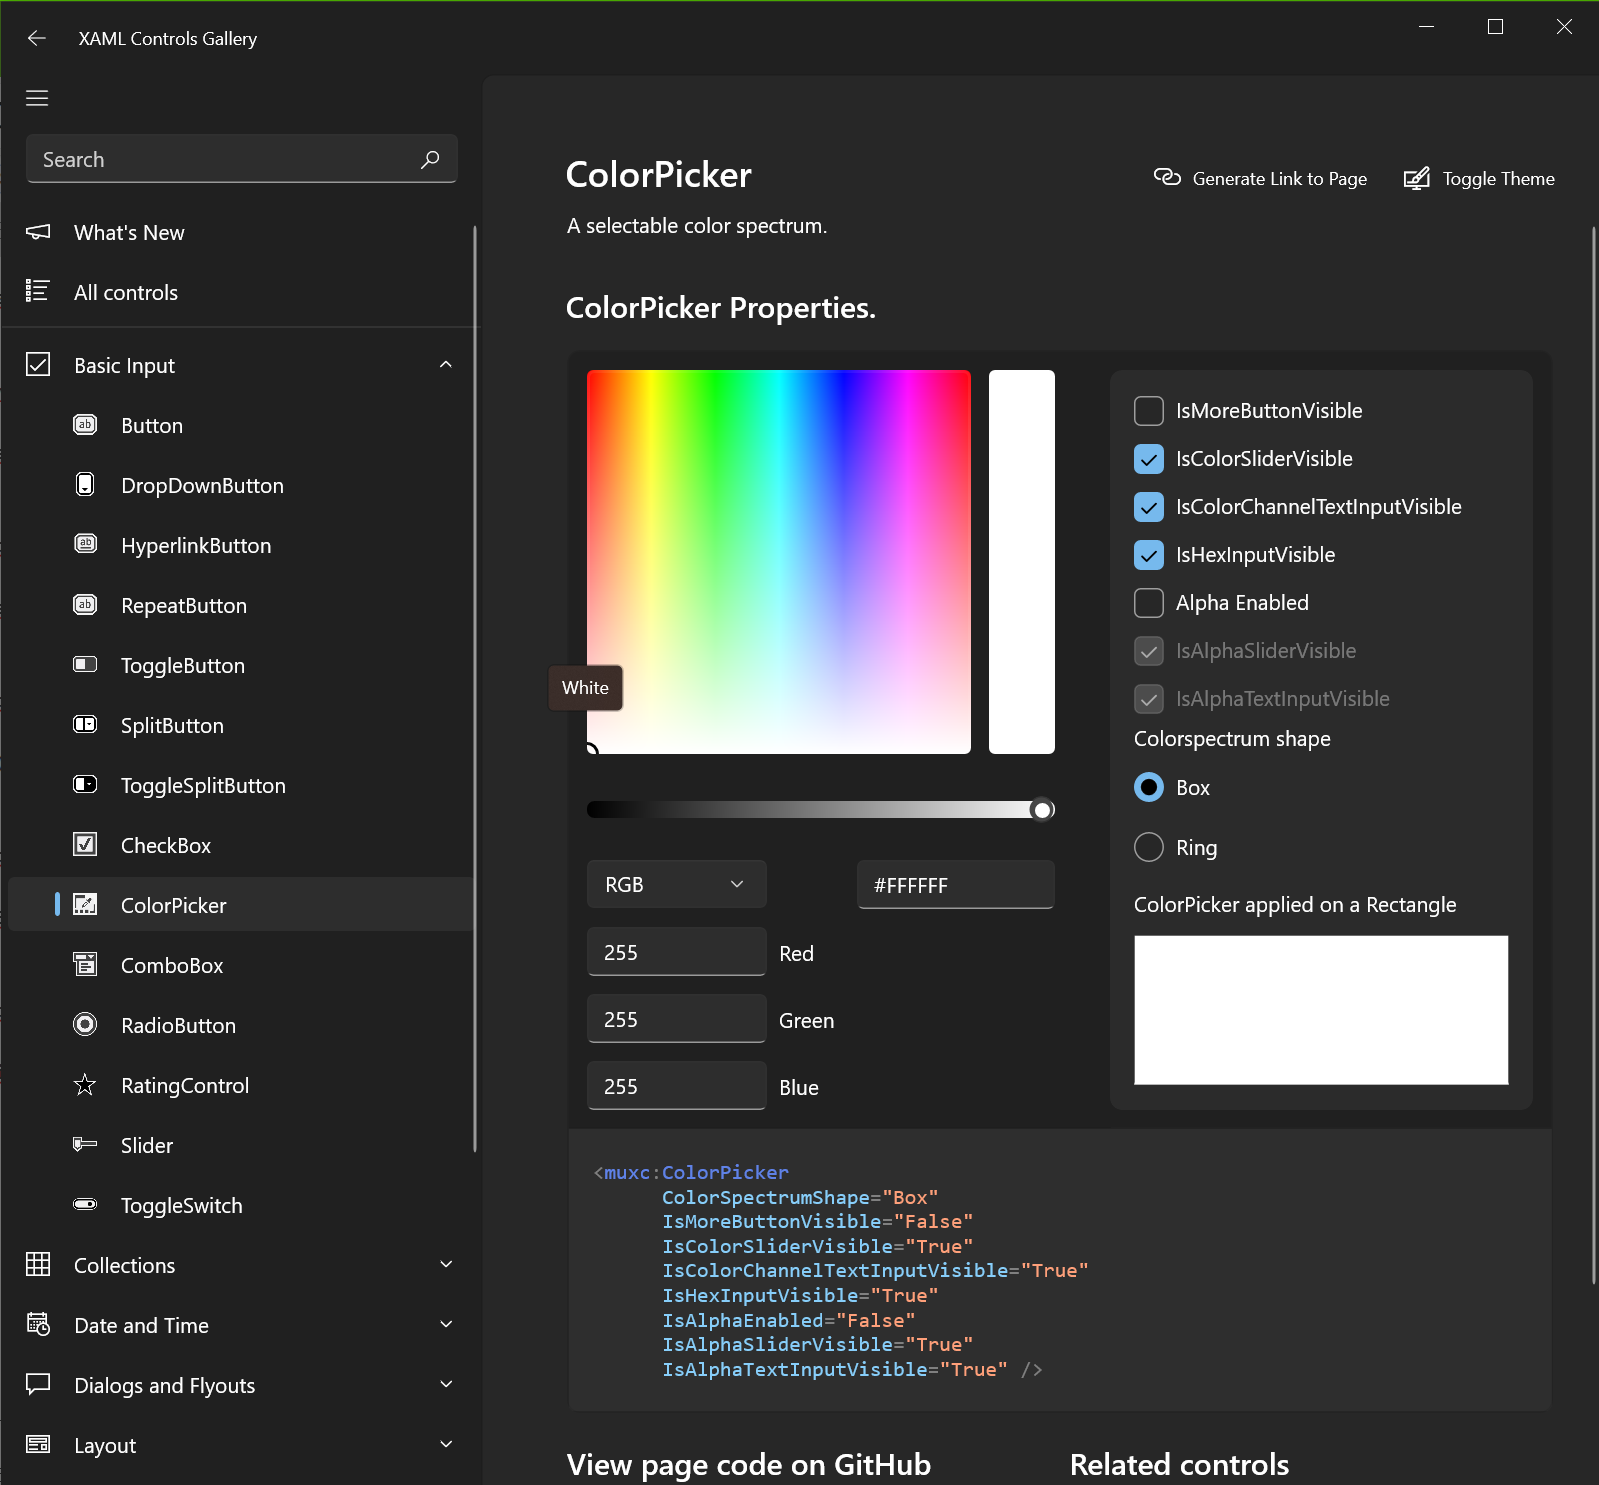
- XAML の GUI エディターがないので、XAML は全部手で編集が必要でちょっとげんなり。でも XAML Controls Gallery を Microsoft Store から入手すれば、XAML の編集もかなり楽にはなります。
XAML Controls Gallery
コントロールやそのオプションを選ぶと、その XAML 表現がリアルタイムで表示されます。


