androidアプリでイベント処理##
次にandroid studioで簡単なイベント処理のアプリを作ってみます。
Hello Worldアプリについては、下記を参照して下さい。
初心者がandroid studioを使ってみる その1(Hello World)
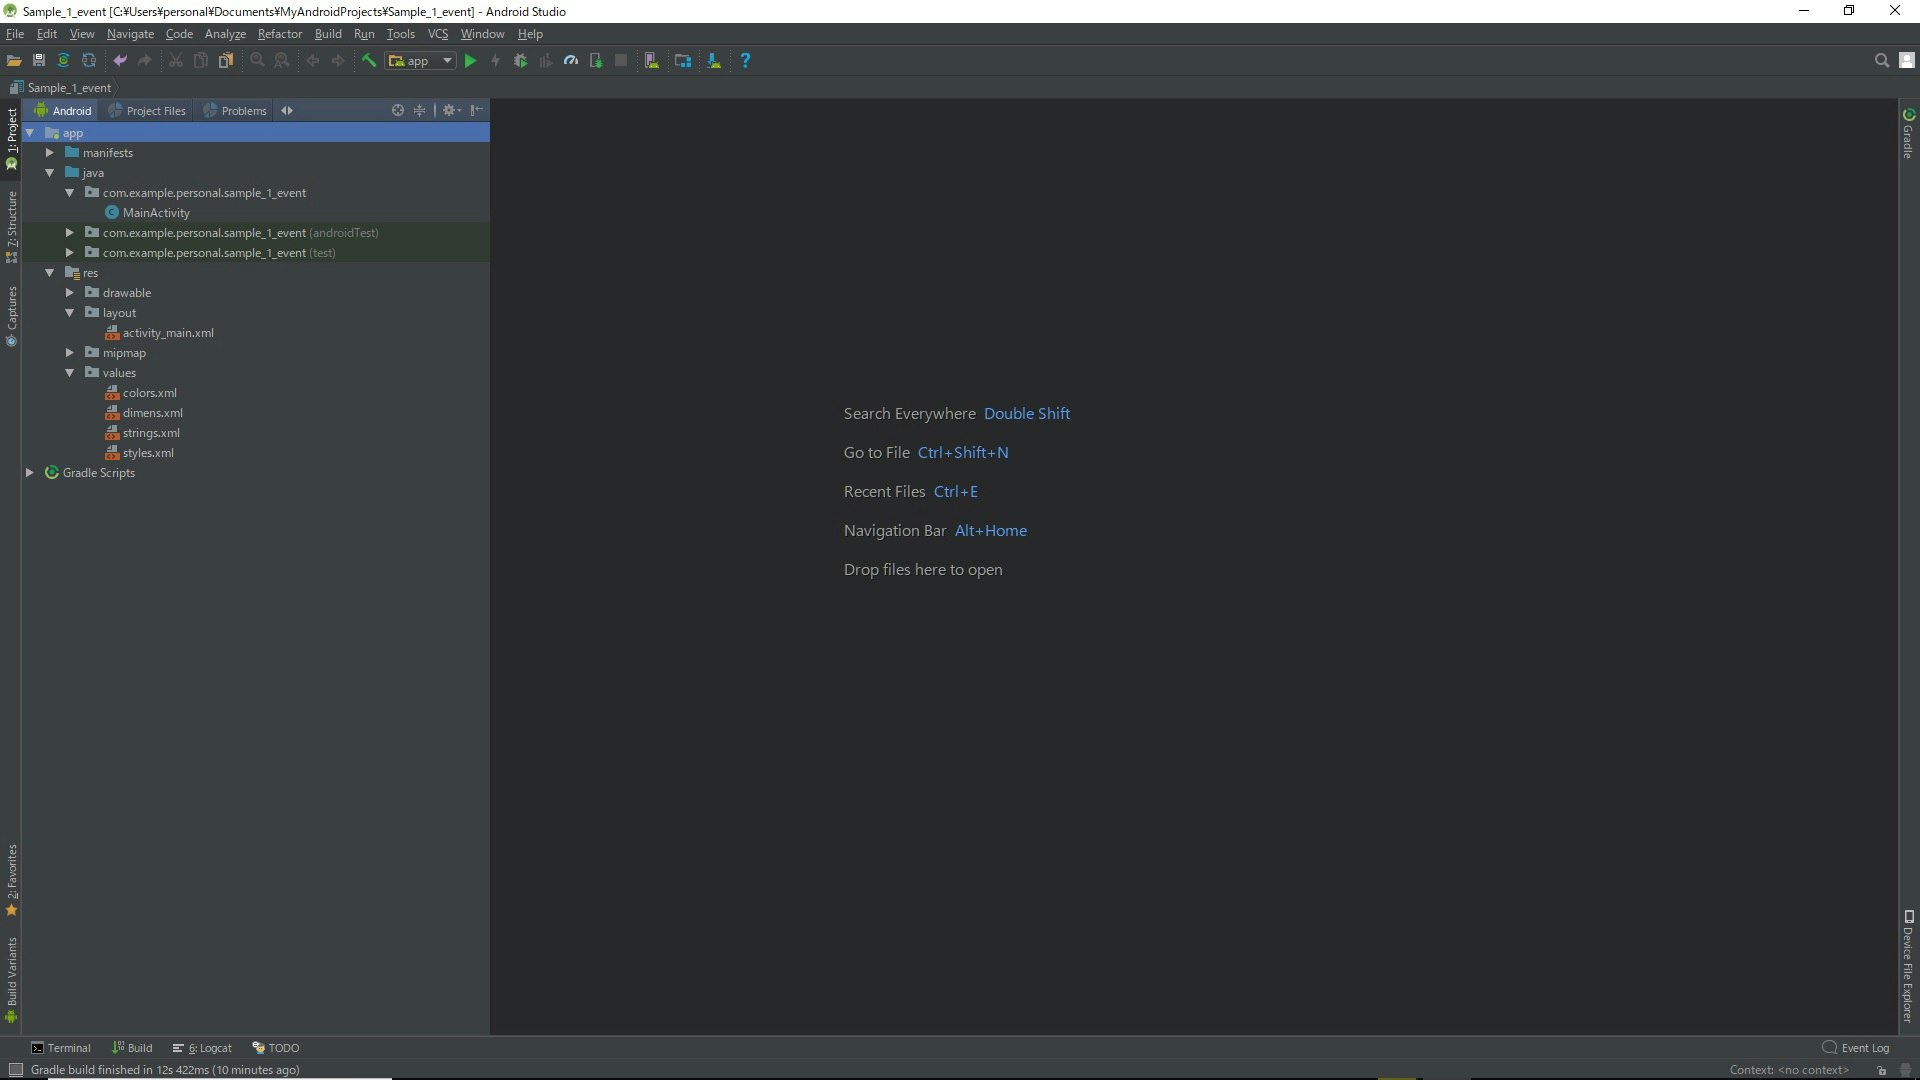
android studio起動##
最初にandroid studioを起動して、Empty Activityでプロジェクトを新規作成して下さい。
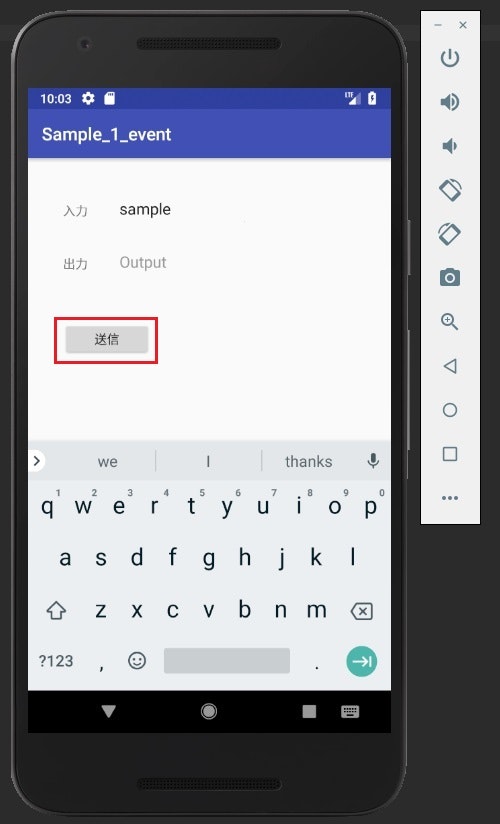
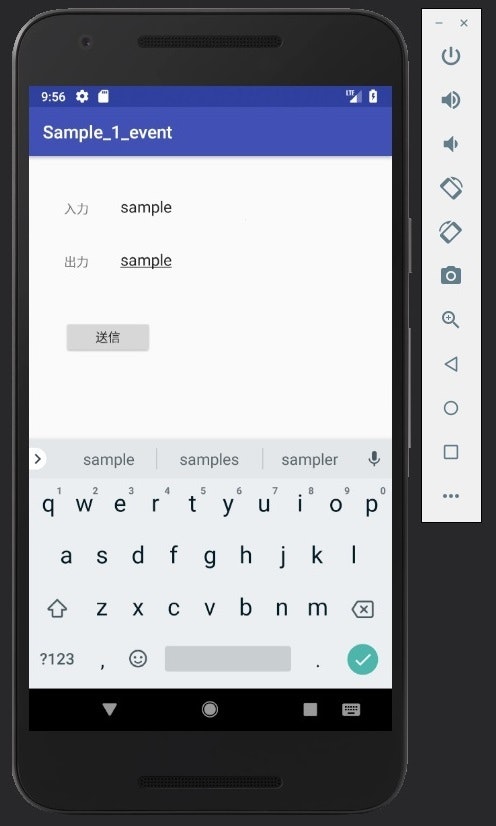
動作画面##
動作結果はこんな感じ。
入力欄に文字を入力して、送信ボタンを押すと出力欄に文字が表示されます。
イベント側のコーディング##
ボタンを押した際の動作などを記述します。
MainActivity.java
package com.example.personal.sample_1_event;

import android.support.v7.app.AppCompatActivity;
import android.os.Bundle;
import android.view.View;
import android.widget.Button;
import android.widget.TextView;

public class MainActivity extends AppCompatActivity {

    //オブジェクト
    private Button   btnSend;
    private TextView textInput;
    private TextView textOutput;

    @Override
    protected void onCreate(Bundle savedInstanceState) {
        super.onCreate(savedInstanceState);

        //レイアウト読み込み
        setContentView(R.layout.activity_main);

        //オブジェクト取得
        btnSend    = findViewById(R.id.btnSend);
        textInput  = findViewById(R.id.textInput);
        textOutput = findViewById(R.id.textOutput);

        /////////////////////////////////////////////////////////////////////
        //  リスナ
        /////////////////////////////////////////////////////////////////////

        //ボタン
        btnSend.setOnClickListener(new View.OnClickListener() {
            @Override
            public void onClick(View view) {

                //テキスト取得
                //CharSequence text = textInput.getText();
                String text = textInput.getText().toString();

                //テキスト設定
                textOutput.setText(text);
            }
        });

    }

}
画面で使用する文字列のコーディング##
画面で使用する文字列はstrings.xmlに登録しておきます。
画面に直接文字列を書くのではなく、textBtnSend等の変数を入力します。
strings.xml
<resources>
    <string name="app_name">Sample_1_event</string>

    <!-- 追記 -->
    <string name="textBtnSend"        >送信</string>
    <string name="textTextLabelInput" >入力</string>
    <string name="textTextLabelOutput">出力</string>
    <string name="textTextInput"      >Input</string>
    <string name="textTextOutput"     >Output</string>

</resources>
画面側のコーディング##
基本的には直接コーディングはしません(と思います)。
テキストフィールドやボタン等のパーツをドラッグ&ドロップで配置していきます。
配置後の画面はこんな感じ。
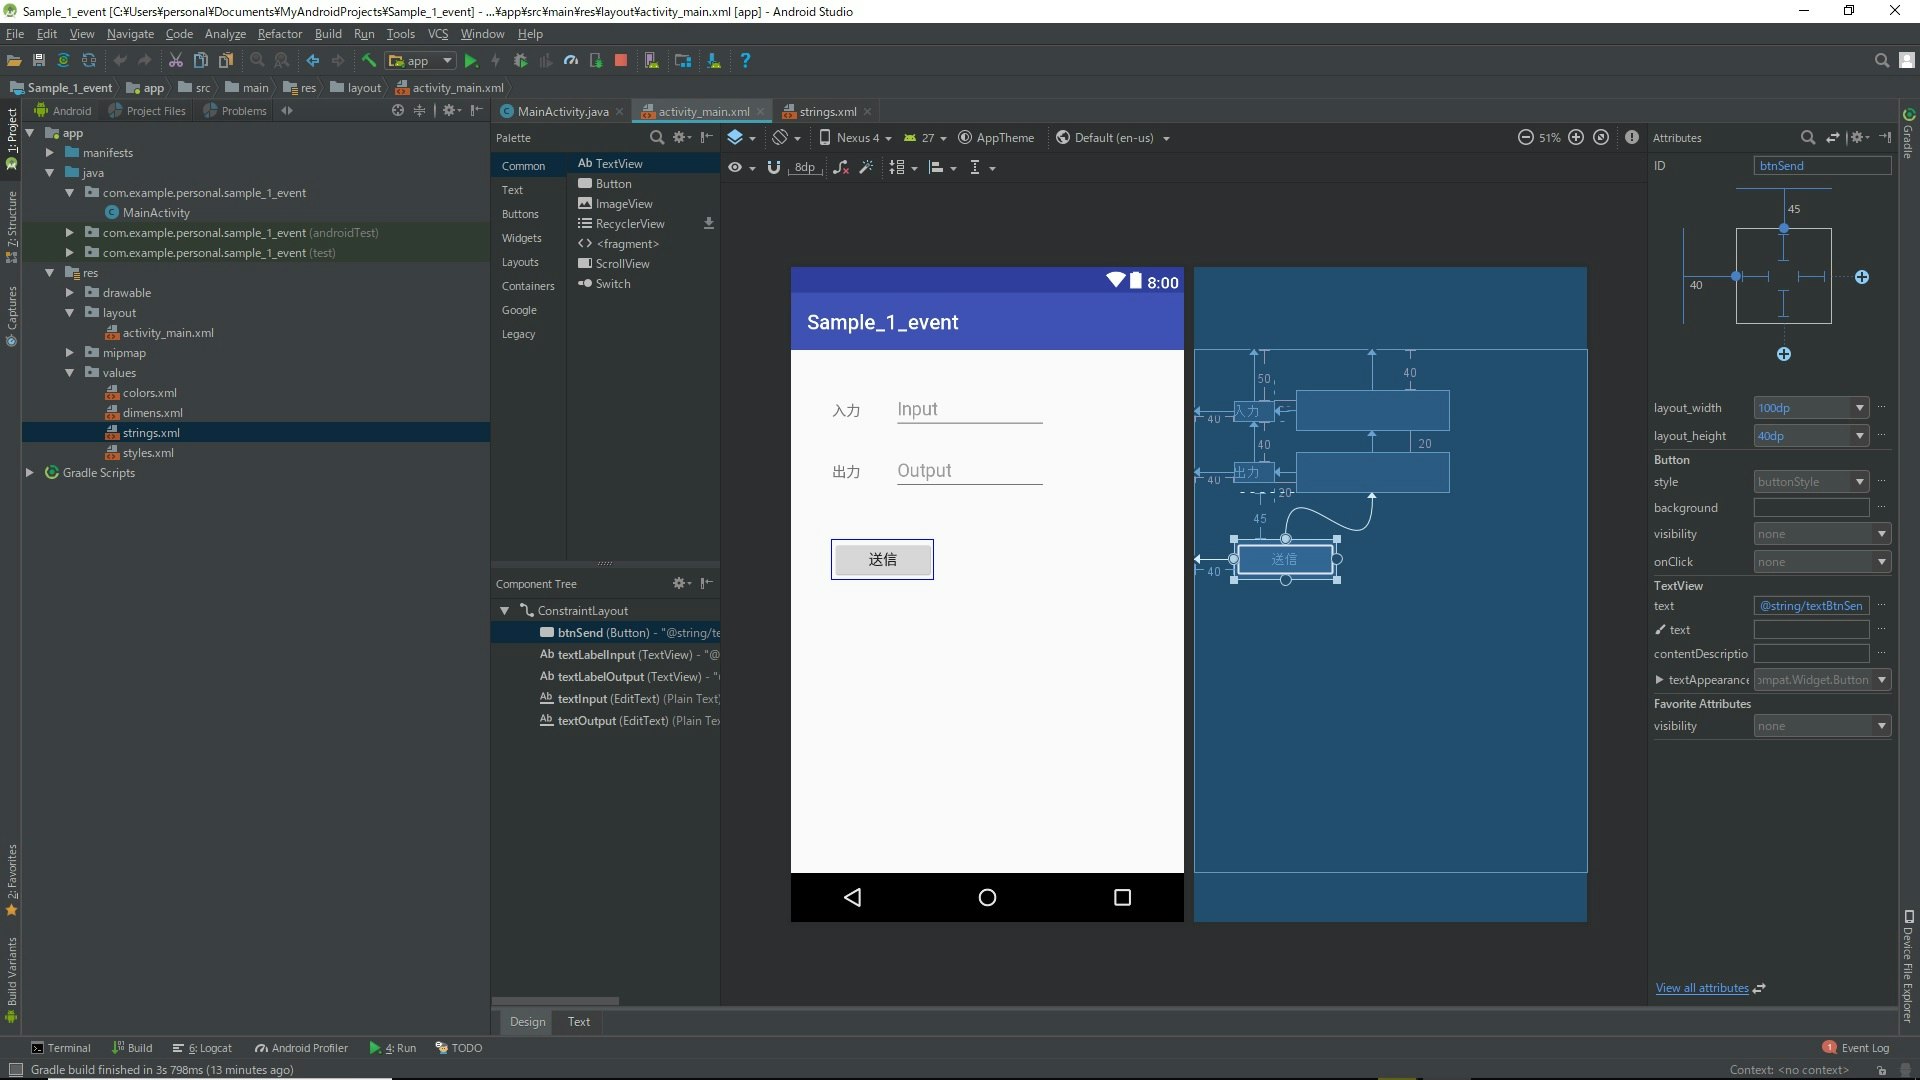
パーツの配置方法
1.ボタンなどを選択する。
2.ドラッグ&ドロップで画面上に配置する。
3.配置したパーツを選択する
4.画面右上のIDを入力する(一意)
5.ID下の位置の+ボタンを押して、基準位置を決める。
→ここでは左壁、上壁基準。
6.TextView -> textで、strings.xmlで登録した変数を入力する。
一応、ソースも載せておきます。
activity_main.xml
<?xml version="1.0" encoding="utf-8"?>
<android.support.constraint.ConstraintLayout xmlns:android="http://schemas.android.com/apk/res/android"
    xmlns:app="http://schemas.android.com/apk/res-auto"
    xmlns:tools="http://schemas.android.com/tools"
    android:layout_width="match_parent"
    android:layout_height="match_parent"
    tools:context=".MainActivity"
    tools:layout_editor_absoluteY="81dp">

    <Button
        android:id="@+id/btnSend"
        android:layout_width="@dimen/btnSendWidth"
        android:layout_height="@dimen/btnSendHeight"
        android:layout_marginLeft="40dp"
        android:layout_marginStart="40dp"
        android:layout_marginTop="45dp"
        android:text="@string/textBtnSend"
        app:layout_constraintStart_toStartOf="parent"
        app:layout_constraintTop_toBottomOf="@+id/textOutput" />

    <TextView
        android:id="@+id/textLabelInput"
        android:layout_width="40dp"
        android:layout_height="20dp"
        android:layout_marginLeft="40dp"
        android:layout_marginStart="40dp"
        android:layout_marginTop="50dp"
        android:text="@string/textTextLabelInput"
        app:layout_constraintStart_toStartOf="parent"
        app:layout_constraintTop_toTopOf="parent" />

    <TextView
        android:id="@+id/textLabelOutput"
        android:layout_width="40dp"
        android:layout_height="20dp"
        android:layout_marginLeft="40dp"
        android:layout_marginStart="40dp"
        android:layout_marginTop="40dp"
        android:text="@string/textTextLabelOutput"
        app:layout_constraintStart_toStartOf="parent"
        app:layout_constraintTop_toBottomOf="@+id/textLabelInput" />

    <EditText
        android:id="@+id/textInput"
        android:layout_width="150dp"
        android:layout_height="40dp"
        android:layout_marginLeft="20dp"
        android:layout_marginStart="20dp"
        android:layout_marginTop="40dp"
        android:ems="10"
        android:hint="@string/textTextInput"
        android:inputType="textPersonName"
        android:text=""
        app:layout_constraintStart_toEndOf="@+id/textLabelInput"
        app:layout_constraintTop_toTopOf="parent" />

    <EditText
        android:id="@+id/textOutput"
        android:layout_width="150dp"
        android:layout_height="40dp"
        android:layout_marginLeft="20dp"
        android:layout_marginStart="20dp"
        android:layout_marginTop="20dp"
        android:ems="10"
        android:hint="@string/textTextOutput"
        android:inputType="textPersonName"
        android:text=""
        app:layout_constraintStart_toEndOf="@+id/textLabelOutput"
        app:layout_constraintTop_toBottomOf="@+id/textInput" />

</android.support.constraint.ConstraintLayout>