今回やること
以下の機能を追加します。
- 鑑賞記録に記録を追加する。
追加するデータは、ダイアログボックスを表示して各項目のデータを入力する様にする。
ダイアログボックスの表示
ダイアログボックスは、Bootstrapの新しいバージョンで対応しているのでそれを使用します。
Index.html
Bootstrapのバージョンをv4.xxにする為、リンクを変更します。
  <!-- Bootstrap -->
  <link rel="stylesheet" href="https://stackpath.bootstrapcdn.com/bootstrap/4.4.1/css/bootstrap.min.css" integrity="sha384-Vkoo8x4CGsO3+Hhxv8T/Q5PaXtkKtu6ug5TOeNV6gBiFeWPGFN9MuhOf23Q9Ifjh" crossorigin="anonymous">
  <script src="https://code.jquery.com/jquery-3.4.1.slim.min.js" integrity="sha384-J6qa4849blE2+poT4WnyKhv5vZF5SrPo0iEjwBvKU7imGFAV0wwj1yYfoRSJoZ+n" crossorigin="anonymous"></script>
  <script src="https://cdn.jsdelivr.net/npm/popper.js@1.16.0/dist/umd/popper.min.js" integrity="sha384-Q6E9RHvbIyZFJoft+2mJbHaEWldlvI9IOYy5n3zV9zzTtmI3UksdQRVvoxMfooAo" crossorigin="anonymous"></script>
  <script src="https://stackpath.bootstrapcdn.com/bootstrap/4.4.1/js/bootstrap.min.js" integrity="sha384-wfSDF2E50Y2D1uUdj0O3uMBJnjuUD4Ih7YwaYd1iqfktj0Uod8GCExl3Og8ifwB6" crossorigin="anonymous"></script>
ダイアログボックスを表示する為のボタンとダイアログボックスを追加します。
<p></p>
<div style="text-align: center;">
<button type="button" class="btn btn-primary" data-toggle="modal" data-target="#exampleModal" data-processing-type="記録追加">記録追加</button>
</div>
<div class="modal fade" id="exampleModal" tabindex="-1" role="dialog" aria-labelledby="exampleModalLabel" aria-hidden="true">
<div class="modal-dialog" role="document">
<div class="modal-content">
<div class="modal-header">
<h5 class="modal-title" id="exampleModalLabel">New message</h5>
<button type="button" class="close" data-dismiss="modal" aria-label="Close">
<span aria-hidden="true">×</span>
</button>
</div>
<div class="modal-body">
<form>
<div class="form-group">
<label for="viewing-date" class="col-form-label">鑑賞日:</label>
<input type="text" class="form-control" id="viewing-date">
</div>
<div class="form-group">
<label for="movie-name" class="col-form-label">タイトル:</label>
<input type="text" class="form-control" id="movie-name">
</div>
<div class="form-group">
<label for="theater-name" class="col-form-label">映画館:</label>
<input type="text" class="form-control" id="theater-name">
</div>
<div class="form-group">
<label for="first-look" class="col-form-label">初見:</label>
<input type="text" class="form-control" id="first-look">
</div>
<div class="form-group">
<label for="viewing-type" class="col-form-label">鑑賞種別:</label>
<input type="text" class="form-control" id="viewing-type">
</div>
</form>
</div>
<div class="modal-footer">
<button type="button" class="btn btn-secondary" data-dismiss="modal">閉じる</button>
<button type="button" class="btn btn-primary" id="add-btn" data-dismiss="modal"> 追 加 </button>
</div>
</div>
</div>
</div>
記録追加の処理
Index.html
ダイアログボックス用のJavascriptを追加します。
ここでのaddData(cond)は、javascript.html の同名の関数です。
  <script>
  $('#exampleModal').on('show.bs.modal', function (event) {
    var button = $(event.relatedTarget) // Button that triggered the modal
    var processingType = button.data('processing-type') // 処理
    var modal = $(this)
    modal.find('.modal-title').text('◆' + processingType)
    var today = moment(new Date())
    modal.find('#viewing-date').val((today.month() + 1) + '/' + today.date())
  });

  $('#add-btn').on('click', function() {
    var viewingDate = $('#viewing-date').val()
    var movieName = $('#movie-name').val()
    var theaterName = $('#theater-name').val()
    var firstLook = $('#first-look').val()
    var viewingType = $('#viewing-type').val()
    var cond = {};
    cond.viewingDate = viewingDate;
    cond.movieName = movieName;
    cond.theaterName = theaterName;
    cond.firstLook = firstLook;
    cond.viewingType = viewingType;
    addData(cond);
  });
  </script>
javascript.html
クライアント側で、ダイアログボックスの〔追加〕ボタンがクリックされた際の処理を追加する。
ここでのaddData(cond)は、ViewingRecord.gs の同名の関数です。
  function addData(cond) {
    google.script.run.withSuccessHandler(
          function(v, element) {
            searchResults();
          })
        .withFailureHandler(
          function(msg, element) {
            showError(msg);
          })
        .withUserObject(this)
        .addData(cond);
  }
ViewingRecord.gs
サーバ側で、スプレッドシートにデータを追加する処理を追加する。
function addData(cond) {
  var sheet = SpreadsheetApp.openById(ViewingRecordID).getSheetByName('鑑賞履歴');
  var lastRow = sheet.getLastRow();
  sheet.getRange((lastRow + 1), 2, 1, 6).setValues([[(lastRow - 1), cond.viewingDate, cond.movieName, cond.firstLook, cond.viewingType, cond.theaterName]]);
}
一覧表のデザイン修正
Index.html
一覧表のデザインを整える為に、<table>タグのclassの属性値から"table"を削除します。
見出し行の<th>タグのclassの属性値("head01"~"head06")を変更します。
<tr>タグのclassの属性値を"alert-primary"に変更します。
    <table id="resultList" class="table-striped table-bordered table-headerfixed">
      <thead class="scrollHead">
        <tr class="alert-primary">
          <th class="head01">ID</th>
          <th class="head02">鑑賞日</th>
          <th class="head03">タイトル</th>
          <th class="head04">初見</th>
          <th class="head05">鑑賞種別</th>
          <th class="head06">映画館</th>
        </tr>
javascript.html
drawTable()で設定している<td>タグのclassの属性値("col01"~"col06")を変更します。
  function drawTable(data) {
    var records = JSON.parse(data)
    //console.log(records);
    var tag = '';
    for(var i = 0; i < records.length; i++) {
      tag += '<tr>';
      tag += '<td class="col01">'+ records[i][0] + '</td>';
      tag += '<td class="col02">'+ convDate(records[i][1]) + '</td>';
      tag += '<td class="col03">'+ records[i][2] + '</td>';
      tag += '<td class="col04">'+ records[i][3] + '</td>';
      tag += '<td class="col05">'+ records[i][4] + '</td>';
      tag += '<td class="col06">'+ records[i][5] + '</td>';
      tag += '</tr>';
    }
    $('#resultList tbody').html(tag);
  }
css.html
.head01~.head06セレクターと.col01~.col06セレクターの設定を全体的に変更します。
<style>
  :
  .head01 {
    width: 50px;
    text-align: center;
  }
  .head02 {
    width: 70px;
    text-align: center;
  }
  .head03 {
    width: 500px;
    text-align: center;
  }
  .head04 {
    width: 50px;
    text-align: center;
  }
  .head05 {
    width: 50px;
    text-align: center;
  }
  .head06 {
    width: 360px;
    text-align: center;
  }
  .col01 {
    width: 50px;
    display: table-cell;
    text-align: center;
    vertical-align: middle;
  }
  .col02 {
    width: 70px;
    display: table-cell;
    text-align: center;
    vertical-align: middle;
  }
  .col03 {
    width: 500px;
    display: table-cell;
    text-align: left;
    vertical-align: middle;
  }
  .col04 {
    width: 50px;
    display: table-cell;
    text-align: center;
    vertical-align: middle;
  }
  .col05 {
    width: 50px;
    display: table-cell;
    text-align: center;
    vertical-align: middle;
  }
  .col06 {
    width: 360px;
    display: table-cell;
    text-align: left;
    vertical-align: middle;
  }
</style>
◆参考サイト 「Bootstrap 公式サイト」部品/モダール
結果
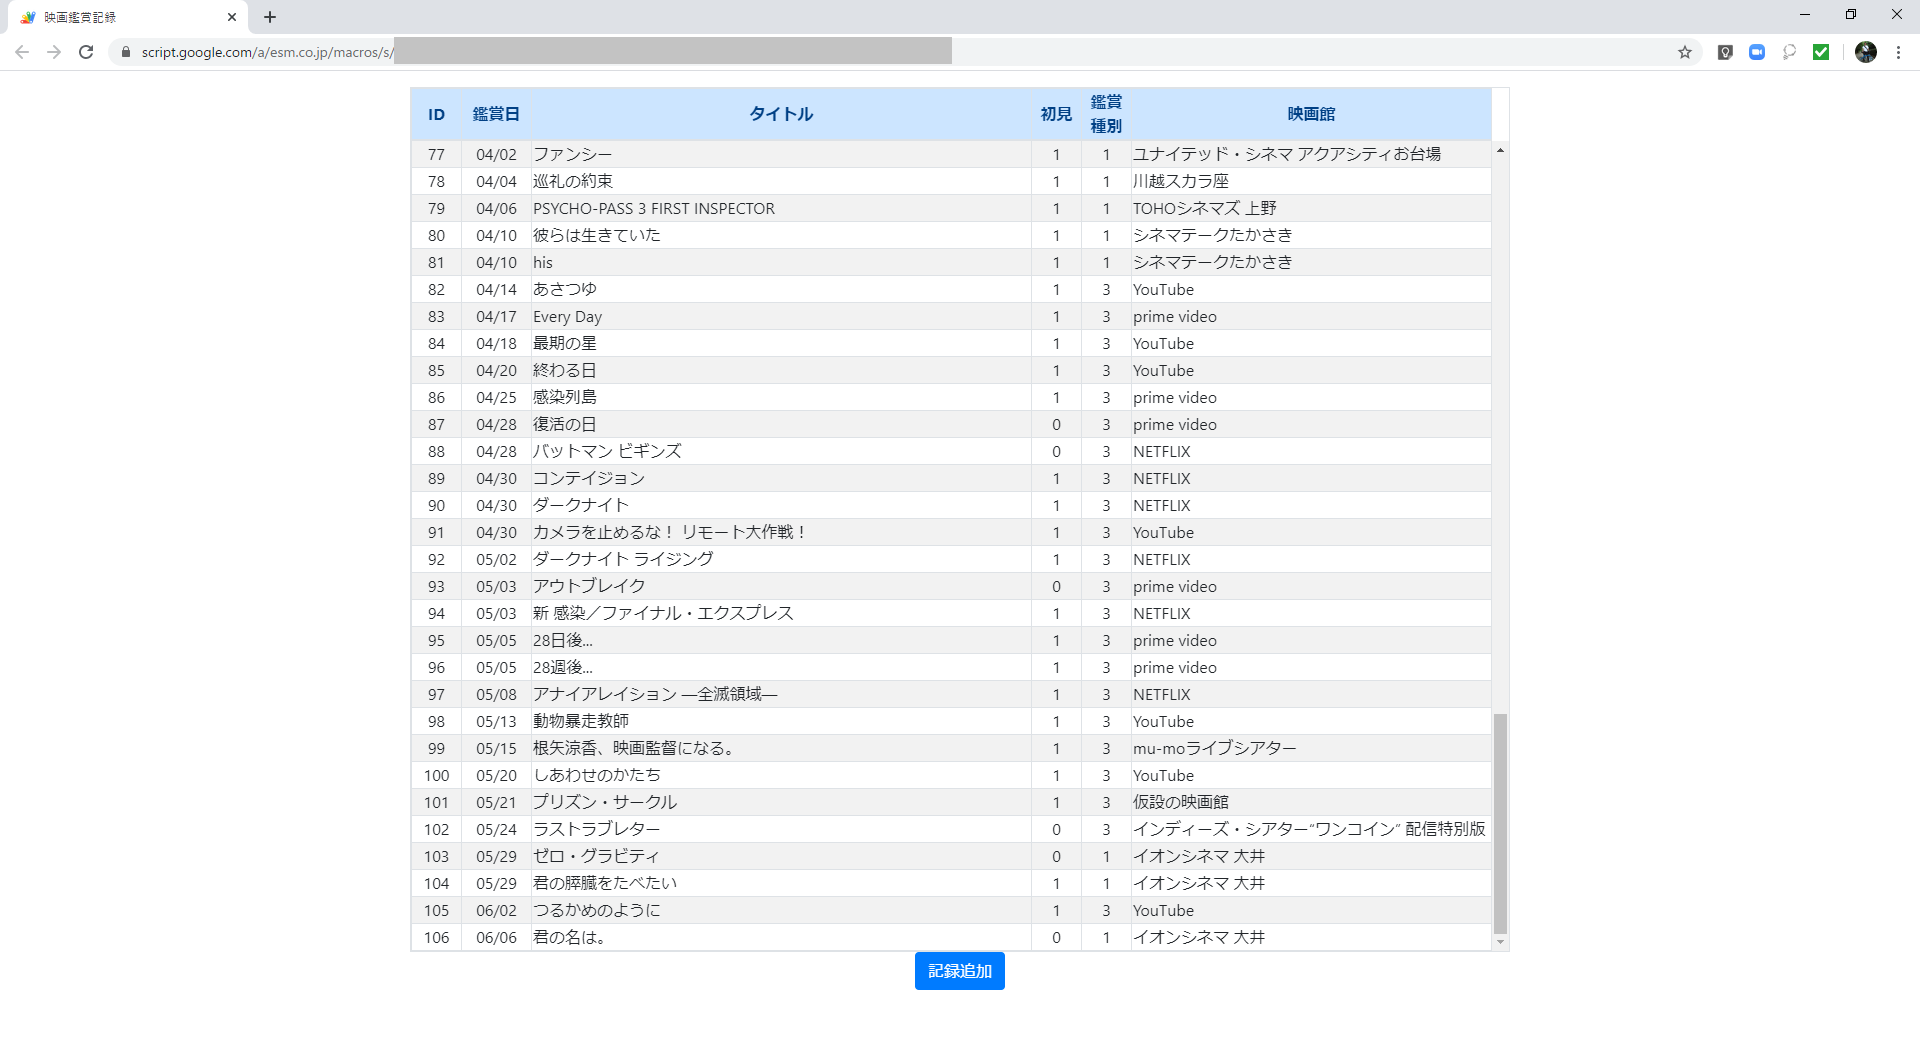
画面の下部に〔記録追加〕ボタンが表示されました。
〔記録追加〕ボタンをクリックすると、ダイアログボックスが表示されます。
各項目にデータを入力します。
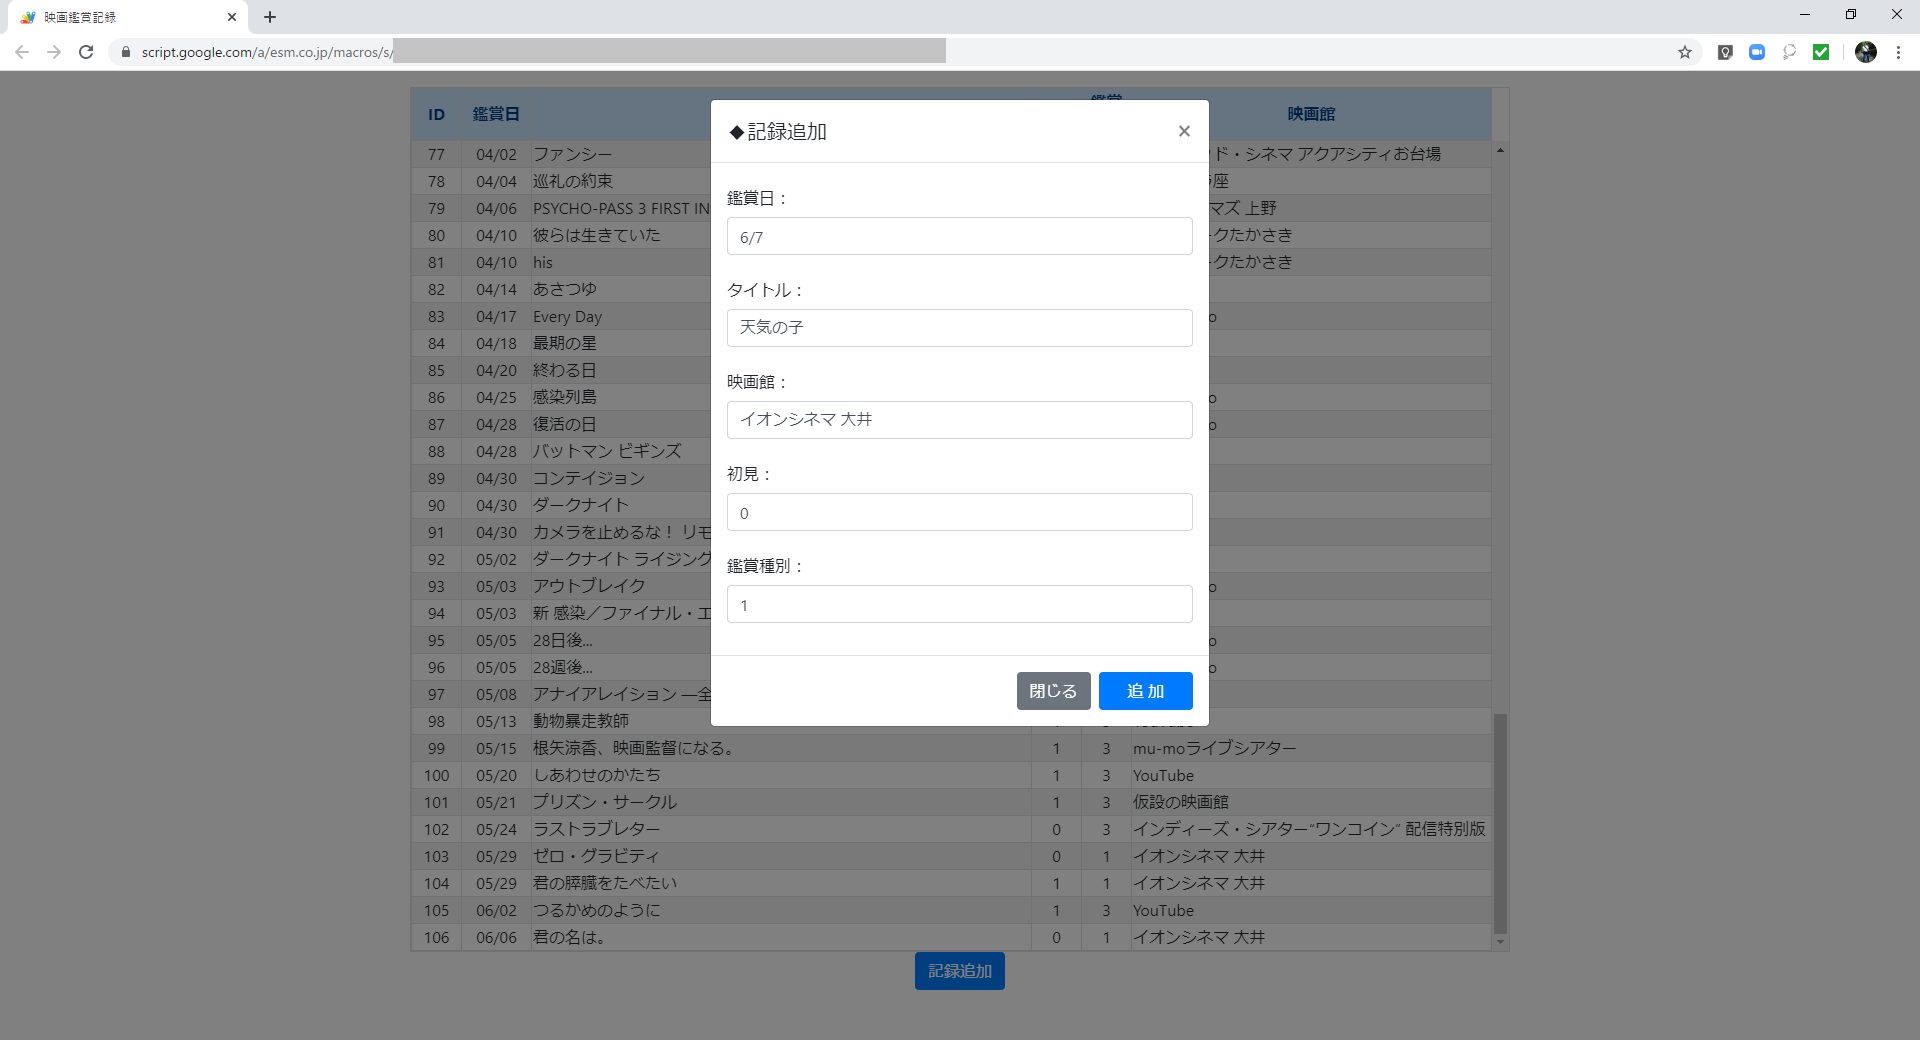
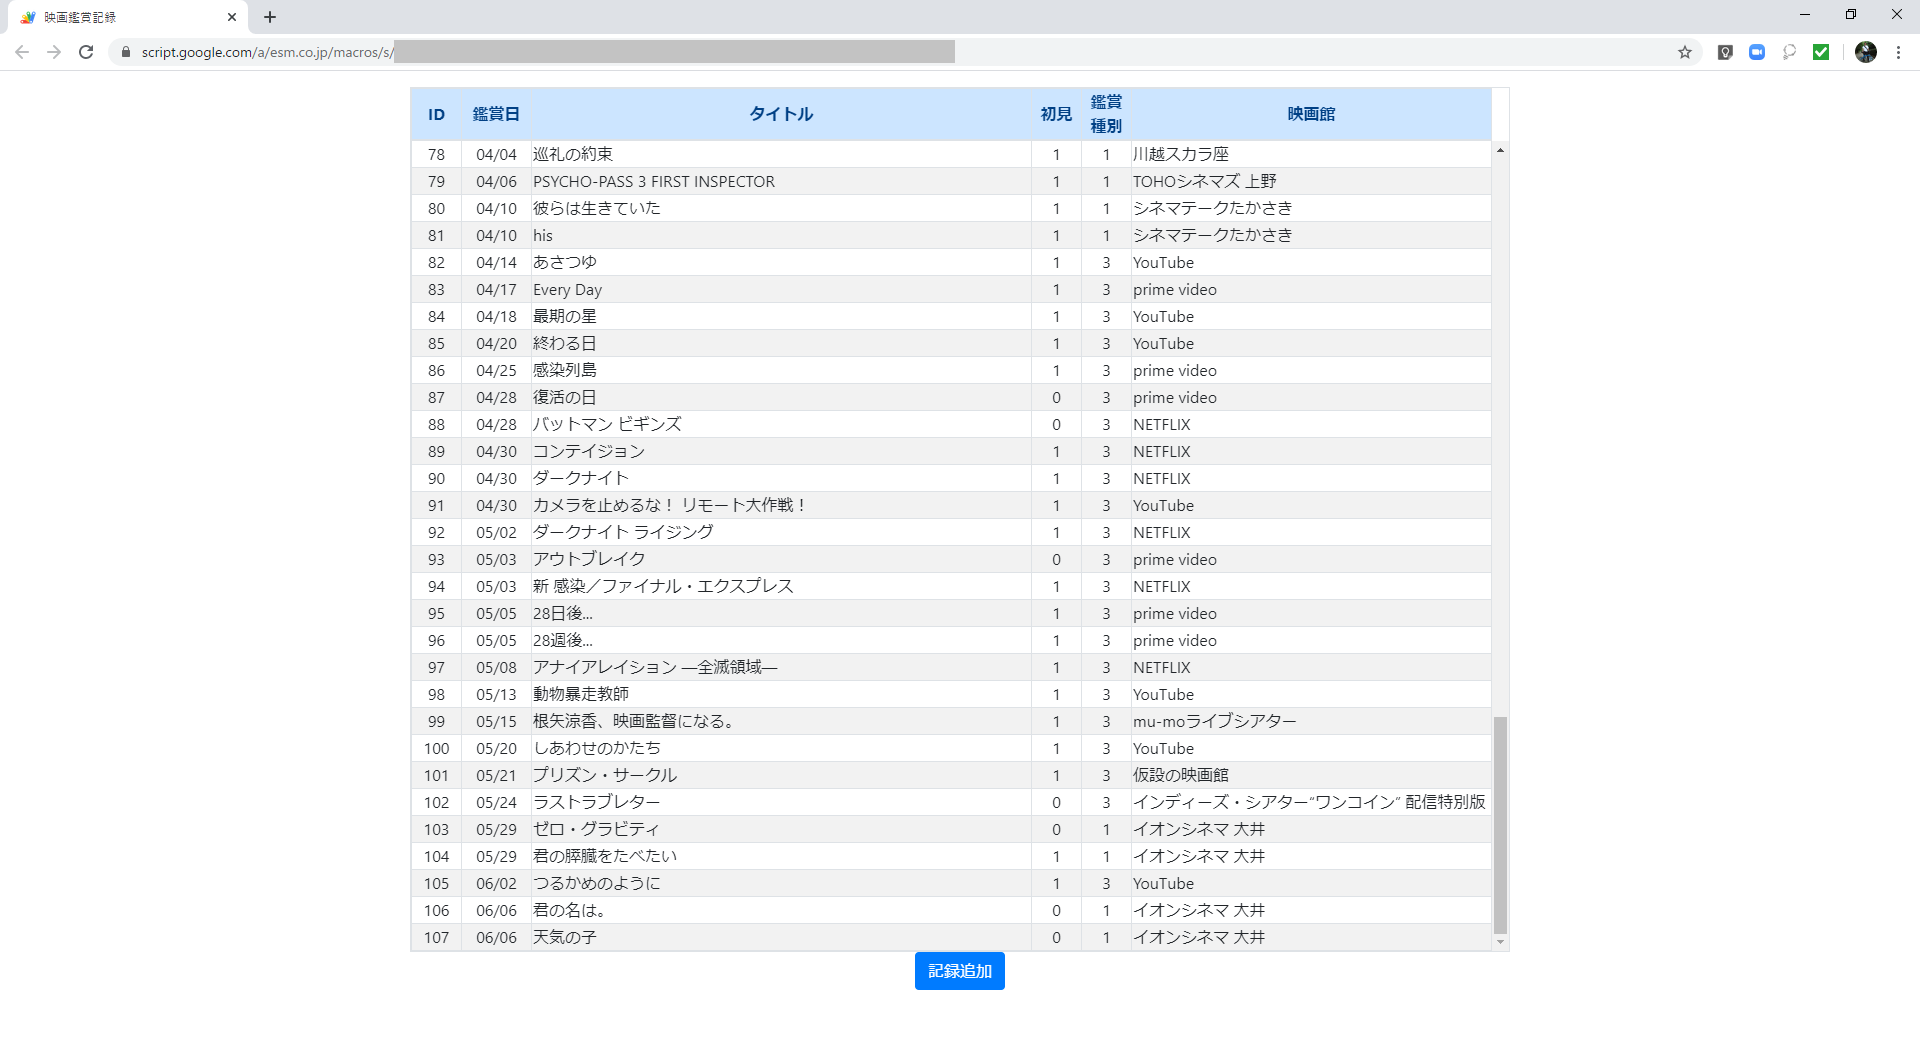
〔追加〕ボタンをクリックすると、データが追加されます。
◆前の記事 GASでWebアプリ「映画鑑賞記録」を作る②
◆次の記事 GASでWebアプリ「映画鑑賞記録」を作る④