はじめに
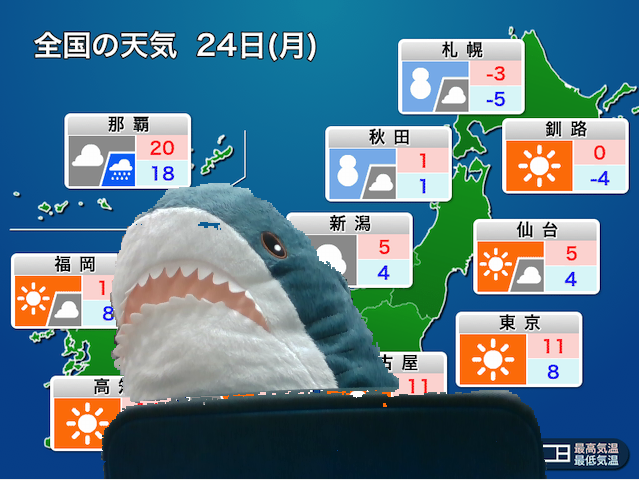
realsenseSDKのお勉強がてら作ってみました.動かすとこんな感じになります.

意外とpythonで扱うための情報が少なかったので,皆さんの役に立つかどうかわかりませんがメモとして残しておきます.
RealSenseとは?
Intelが出してる深度カメラ.Kinectみたいなものだけどめちゃくちゃ小さい.あと安い(3万)
USB-Cを1本繋げるだけで動くのも良い.
詳細はこちら→ https://www.intel.co.jp/content/www/jp/ja/architecture-and-technology/realsense-overview.html
動作確認環境
- RealSense D435
- Ubuntu 18.04.2 LTS
- Python (3.6.7)
- opencv-python (4.1.0.25)
- pyrealsense2 (2.22.0.864)
準備
realsenseSDKのpythonラッパであるpyrealsense2とopencvを使用します.
pipenvとかで環境を揃えると楽.
$ pipenv install pyrealsense2 opencv-python
方針
深度カメラの情報を用いて,一定距離以上の画素をマスクして背景を合成する.
ソースコード
import pyrealsense2 as rs
import numpy as np
import cv2

WIDTH = 640
HEIGHT = 480
FPS = 60
THRESHOLD = 1.5  # これより遠い距離の画素を無視する
BG_PATH = "./image.png"  # 背景画像のパス


def main():
    align = rs.align(rs.stream.color)
    config = rs.config()
    config.enable_stream(rs.stream.color, WIDTH, HEIGHT, rs.format.bgr8, FPS)
    config.enable_stream(rs.stream.depth, WIDTH, HEIGHT, rs.format.z16, FPS)

    pipeline = rs.pipeline()
    profile = pipeline.start(config)
    depth_scale = profile.get_device().first_depth_sensor().get_depth_scale()
    max_dist = THRESHOLD/depth_scale

    bg_image = cv2.imread(BG_PATH, cv2.IMREAD_COLOR)

    try:
        while True:
            # フレーム取得
            frames = pipeline.wait_for_frames()
            aligned_frames = align.process(frames)

            color_frame = aligned_frames.get_color_frame()
            depth_frame = aligned_frames.get_depth_frame()
            if not depth_frame or not color_frame:
                continue
            # RGB画像
            color_image = np.asanyarray(color_frame.get_data())

            # 深度画像
            depth_color_frame = rs.colorizer().colorize(depth_frame)
            depth_color_image = np.asanyarray(depth_color_frame.get_data())

            # 指定距離以上を無視した深度画像
            depth_image = np.asanyarray(depth_frame.get_data())
            depth_filtered_image = (depth_image < max_dist) * depth_image
            depth_gray_filtered_image = (depth_filtered_image * 255. / max_dist).reshape((HEIGHT, WIDTH)).astype(np.uint8)

            # 指定距離以上を無視したRGB画像
            color_filtered_image = (depth_filtered_image.reshape((HEIGHT, WIDTH, 1)) > 0) * color_image

            # 背景合成
            background_masked_image = (depth_filtered_image.reshape((HEIGHT, WIDTH, 1)) == 0) * bg_image
            composite_image = background_masked_image + color_filtered_image

            # 表示
            cv2.namedWindow('demo', cv2.WINDOW_AUTOSIZE)
            cv2.imshow('demo', composite_image)

            if cv2.waitKey(1) & 0xff == 27:
                break

    finally:
        pipeline.stop()
        cv2.destroyAllWindows()


if __name__ == "__main__":
    main()
解説
順番に解説していきます
初期化
align = rs.align(rs.stream.color)
realsenseのRGBカメラと深度カメラは,それぞれの画像をそのまま取得すると**画角が異なるためピクセル同士の対応付けができません.**そのために補正をかけてやる必要があるのですが,rs.alignはそのときに用います.
(参考:https://github.com/IntelRealSense/librealsense/tree/master/examples/align)
config = rs.config()
config.enable_stream(rs.stream.color, WIDTH, HEIGHT, rs.format.bgr8, FPS)
config.enable_stream(rs.stream.depth, WIDTH, HEIGHT, rs.format.z16, FPS)

pipeline = rs.pipeline()
realsenseからデータを受信するための準備をします.config.enable_streamでRGB(正確にはOpenCVで用いるためBGRですが,便宜上RGBと呼称します)と深度のそれぞれの解像度とデータ形式(rs.format),フレームレートを指定します.
(rs.formatについて:http://docs.ros.org/kinetic/api/librealsense/html/namespacers.html#a447cba2f10f1dc5aac305658756c238b)
profile = pipeline.start(config)
depth_scale = profile.get_device().first_depth_sensor().get_depth_scale()
max_dist = THRESHOLD/depth_scale
深度画像の画素値をメートルに変換するにはdepth scale * pixel valueの計算をしろ,と上記のリンクには書いてあります.それに従ってdepth scaleを取得します.
これは端末ごとに固有の値(キャリブレーションした値かな?)なので最初に一度取得するだけで問題ありません.
また,max_distは後に一定距離以上の画素をマスクするために使用します.サンプルコードでは1.5[m]以上の距離を無視するようにしてあります.
bg_image = cv2.imread(BG_PATH, cv2.IMREAD_COLOR)
背景に使用する画像をopencvで取得します.
フレームの取得
# フレーム取得
frames = pipeline.wait_for_frames()
aligned_frames = align.process(frames)

color_frame = aligned_frames.get_color_frame()
depth_frame = aligned_frames.get_depth_frame()
if not depth_frame or not color_frame:
    continue
pipeline.wait_for_frames()でフレームの取得を行います.ただし,取得したフレームをそのまま使うと前述のように画角に差が出てしまうため,rs.alignを用いて補正します.
あとは補正したフレームに対してget_color_frame()およびget_depth_frame()を用いてRGB画像と深度画像のフレームを切り分けます.
RGB画像の生成
# RGB画像
color_image = np.asanyarray(color_frame.get_data())
RGB画像のフレームから画素値をnumpy配列に変換します.
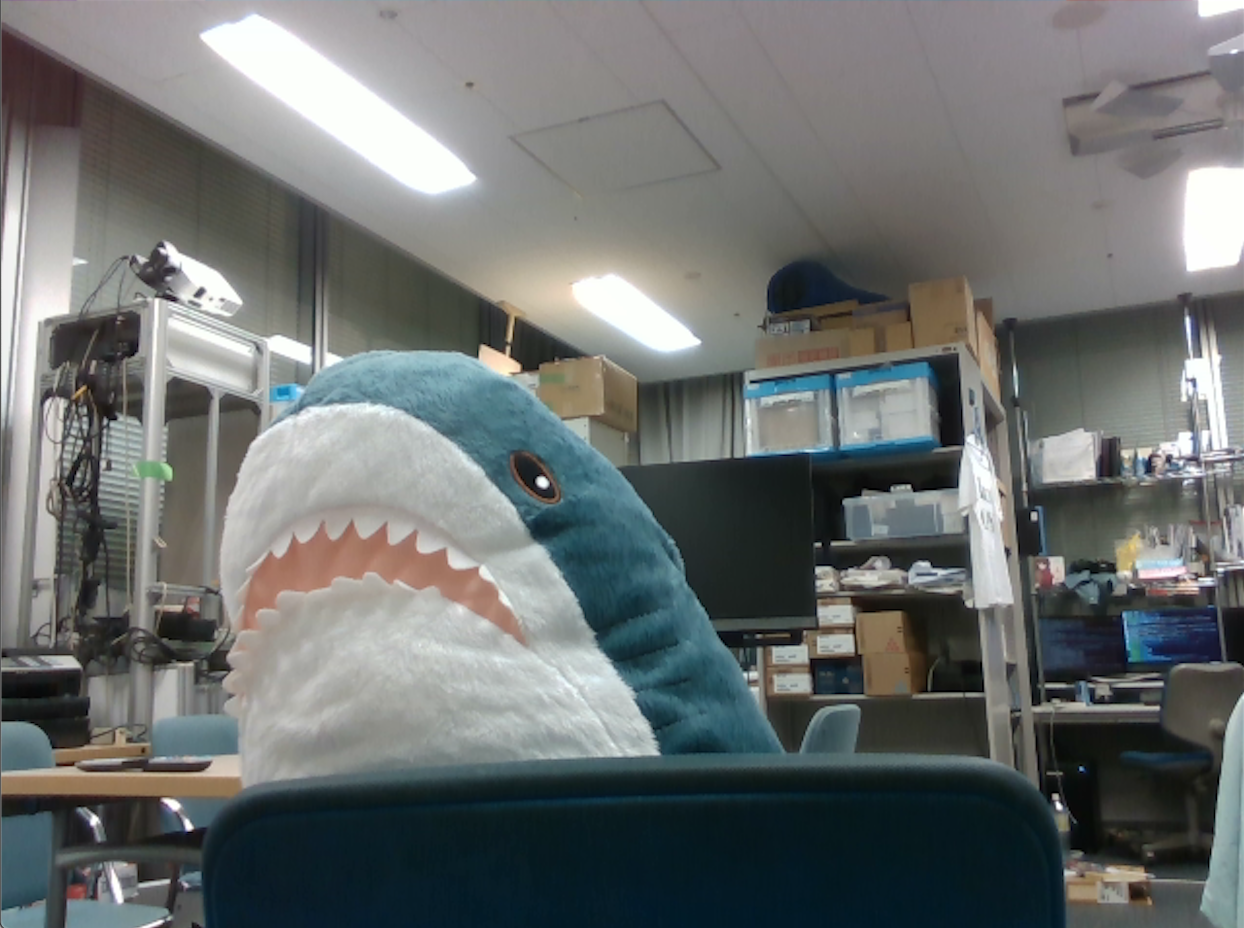
以上の処理で取得できる画像は以下のようになります.(普通のRGB画像です)

深度画像の生成
# 深度画像
depth_color_frame = rs.colorizer().colorize(depth_frame)
depth_color_image = np.asanyarray(depth_color_frame.get_data())
深度画像の各画素値には深度が保存されている(当然)ので,そのままでは画像として表示することができません.そこでrs.colorizerを用いて視覚的にわかりやすい深度画像に変換します.
以上の処理で取得できる画像は以下のようになります.

赤くなるほど近く,青くなるほど遠くなっていることがわかります.黒は情報が欠損している部分です.
指定距離以上を無視した深度画像の生成
# 指定距離以上を無視した深度画像
depth_image = np.asanyarray(depth_frame.get_data())
depth_filtered_image = (depth_image < max_dist) * depth_image
depth_gray_filtered_image = (depth_filtered_image * 255. / max_dist).reshape((HEIGHT, WIDTH)).astype(np.uint8)
先程定義したmax_distを用いて一定距離以上の深度情報を削除したうえで,残りの部分の画素を0~255に収まるように変換します.
以上の処理で取得できる画像は以下のようになります.

なんとなく取れてる…
指定距離以上を無視したRGB画像の生成
# 指定距離以上を無視したRGB画像
color_filtered_image = (depth_filtered_image.reshape((HEIGHT, WIDTH, 1)) > 0) * color_image
深度画像を用いてRGB画像を切り取ります.
以上の処理で取得できる画像は以下のようになります.

…
背景合成
# 背景合成
background_masked_image = (depth_filtered_image.reshape((HEIGHT, WIDTH, 1)) == 0) * bg_image
composite_image = background_masked_image + color_filtered_image
背景画像を先程の範囲を反転して切り取り,撮影した画像と足し合わせます.多分もうちょっと頭のいい方法があると思います.
以上の処理で取得できる画像は以下のようになります.

おわりに
境界がガビガビしたり所々ノイズが乗ったりしているので,よしなにフィルタをかけてやったりすることである程度改善されると思います(他力本願).