先日、obnizOSがリリースされたので、さっそく手元にあったESP32に入れてみました。
obnizOS
https://obniz.io/ja/doc/obnizos/os_overview
ちょうどそのESP32には、OLEDディスプレイがついているので、それを制御してみようと思います。
(本当はM5Stick-Cでやろうとしたのですが、CoreDumpを吐いて動きませんでした。。。)
私が買っていたのはこれです。
ESP32 OLED開発ボードWiFi Bluetoothデュアルコアディスプレイモジュール、ケーブルESP WROOM 32 Wemos Lolin for Arduino
obnizOSのインストールは、他の方の記事を参考にさせていただきました。例えば、
obnizOSをM5Stack(M5StickC)にインストールする手順
obniz OSをESP32(NefryBT)に入れて動かそう!
ESP32 OLED開発ボードとOLEDディスプレイについて
ESP32 OLED開発ボードには、WeMosという刻印があり、それをもとに調べてみると、以下の参考ページがありました。
Wemos Lolin board (ESP32 with 128x64 SSD1306 I2C OLED display)
ESP32 OLED開発ボードについているディスプレイは以下だそうです。
SSD1306
128x64ドットのモノクロです。
接続I/Fはいろいろあるのですが、その中のI2Cで接続されているようです。
スレーブアドレスは0x3Cでした。
PINの関係がいまいちわからないのですが、以下にしたら動きました。
・SDA:5
・SCL:4
SSD1306ドライバの作成
以下を参考にさせていただき、obnizに移植しました。
oled-js-pi
https://github.com/juddflamm/oled-js-pi/blob/master/oled.js
以下、ソースコードです。
'use strict';

class WeMos{
	constructor(obniz){
		this.display = new WeMos_display(obniz);
	}
}

class WeMos_display{
	constructor(obniz, addr, sda, scl){
		this.obniz = obniz;

    this.ADDRESS = addr || 0x3C;
    this.SDA = sda || 5;
    this.SCL = scl || 4;

    this.obniz.i2c0.start({mode: "master", sda: this.SDA, scl: this.SCL, clock: 400000});

    this.WIDTH = 128;
    this.HEIGHT = 64;

    this.width = this.WIDTH;
    this.height = this.HEIGHT;

		this.mode = false;
		this.buffer = [];
		this.clear();

		this.TRANSFER_SIZE = 16;

		this.DISPLAY_OFF = 0xAE;
		this.DISPLAY_ON = 0xAF;
		this.SET_DISPLAY_CLOCK_DIV = 0xD5;
		this.SET_MULTIPLEX = 0xA8;
		this.SET_DISPLAY_OFFSET = 0xD3;
		this.SET_START_LINE = 0x00;
		this.CHARGE_PUMP = 0x8D;
		this.EXTERNAL_VCC = false;
		this.MEMORY_MODE = 0x20;
		this.SEG_REMAP = 0xA1; // using 0xA0 will flip screen
		this.COM_SCAN_DEC = 0xC8;
		this.COM_SCAN_INC = 0xC0;
		this.SET_COM_PINS = 0xDA;
		this.SET_CONTRAST = 0x81;
		this.SET_PRECHARGE = 0xd9;
		this.SET_VCOM_DETECT = 0xDB;
		this.DISPLAY_ALL_ON_RESUME = 0xA4;
		this.NORMAL_DISPLAY = 0xA6;
		this.COLUMN_ADDR = 0x21;
		this.PAGE_ADDR = 0x22;
		this.INVERT_DISPLAY = 0xA7;
		this.ACTIVATE_SCROLL = 0x2F;
		this.DEACTIVATE_SCROLL = 0x2E;
		this.SET_VERTICAL_SCROLL_AREA = 0xA3;
		this.RIGHT_HORIZONTAL_SCROLL = 0x26;
		this.LEFT_HORIZONTAL_SCROLL = 0x27;
		this.VERTICAL_AND_RIGHT_HORIZONTAL_SCROLL = 0x29;
		this.VERTICAL_AND_LEFT_HORIZONTAL_SCROLL = 0x2A;

    /* initialze */
    this.obniz.i2c0.write(this.ADDRESS, [0x00, this.DISPLAY_OFF]);
    this.obniz.i2c0.write(this.ADDRESS, [0x00, this.SET_DISPLAY_CLOCK_DIV, 0x80]);
    this.obniz.i2c0.write(this.ADDRESS, [0x00, this.SET_MULTIPLEX, 0x3F]);
    this.obniz.i2c0.write(this.ADDRESS, [0x00, this.SET_DISPLAY_OFFSET, 0x00]);
    this.obniz.i2c0.write(this.ADDRESS, [0x00, this.SET_START_LINE]);
    this.obniz.i2c0.write(this.ADDRESS, [0x00, this.CHARGE_PUMP, 0x14]);
    this.obniz.i2c0.write(this.ADDRESS, [0x00, this.MEMORY_MODE, 0x00]);
    this.obniz.i2c0.write(this.ADDRESS, [0x00, this.SEG_REMAP]);
    this.obniz.i2c0.write(this.ADDRESS, [0x00, this.COM_SCAN_DEC]);
    this.obniz.i2c0.write(this.ADDRESS, [0x00, this.SET_COM_PINS, 0x12]);
    this.obniz.i2c0.write(this.ADDRESS, [0x00, this.SET_CONTRAST, 0x8F]);
    this.obniz.i2c0.write(this.ADDRESS, [0x00, this.SET_PRECHARGE, 0xF1]);
    this.obniz.i2c0.write(this.ADDRESS, [0x00, this.SET_VCOM_DETECT, 0x40]);
    this.obniz.i2c0.write(this.ADDRESS, [0x00, this.DISPLAY_ALL_ON_RESUME]);
    this.obniz.i2c0.write(this.ADDRESS, [0x00, this.NORMAL_DISPLAY]);
    this.obniz.i2c0.write(this.ADDRESS, [0x00, this.DISPLAY_ON]);

    this.mode = true;
  }

  async clear(){
    for( var y = 0 ; y < this.fl(this.HEIGHT / 8) ; y++ ){
      for( var x = 0 ; x < this.WIDTH ; x++ ){
        this.buffer[ y * this.WIDTH + x ] = 0x00;
      }
    }

    if( this.mode ){
      return this.update();
    }else{
      return Promise.resolve();
    }
  }

  async drawing(mode){
    this.mode = mode;
    if( this.mode ){
      return this.update();
    }else{
      return Promise.resolve();
    }
  }

  async raw(ary){
    for( var y = 0 ; y < this.HEIGHT ; y++ ){
      for( var x = 0 ; x < this.WIDTH ; x += 8 ){
        var val = ary[y * this.fl(this.WIDTH / 8) + this.fl(x / 8)];
        for( var i = 0 ; i < 8 ; i++ )
          this.put_pixel(x + i, y, (val & (0x01 << i)) != 0x00);
      }
    }

    if( this.mode ){
      return this.update();
    }else{
      return Promise.resolve();
    }
  }

  async draw(ctx){
      var img = ctx.getImageData(0, 0, this.WIDTH, this.HEIGHT);

    for (var y = 0; y < this.HEIGHT; y++ ) {
      for (var x = 0; x < this.WIDTH; x++) {
        var val = this.to_mono(img.data[(x + y * this.WIDTH) * 4], img.data[(x + y * this.WIDTH) * 4 + 1], img.data[(x + y * this.WIDTH) * 4 + 2], img.data[(x + y * this.WIDTH) * 4 + 3]);
        this.put_pixel(x, y, val);
      }
    }

    if( this.mode ){
      return this.update();
    }else{
      return Promise.resolve();
    }
  }

  put_pixel(x, y, val){
    var temp = this.buffer[this.fl(y / 8) * this.WIDTH + x];
    var index = y % 8;
    if(val)
      temp |= 0x01 << index;
    else
      temp &= (~(0x01 << index)) & 0xff;
    this.buffer[this.fl(y / 8) * this.WIDTH + x] = temp;
  }

  async update(){
    var ret = await this.obniz.i2c0.readWait(this.ADDRESS, 1);
    if( (ret[0] >> 7) & 0x01 != 0x00 ){
      console.log('busy');
      return;
    }

    this.obniz.i2c0.write(this.ADDRESS, [0x00, this.COLUMN_ADDR, 0, this.WIDTH - 1]);
    this.obniz.i2c0.write(this.ADDRESS, [0x00, this.PAGE_ADDR, 0, this.fl(this.HEIGHT / 8) - 1]);
    for( var y = 0 ; y < this.fl(this.HEIGHT / 8) ; y++ ){
      for( var x = 0 ; x < this.WIDTH ; x += this.TRANSFER_SIZE ){
        var data = this.buffer.slice( y * this.WIDTH + x, y * this.WIDTH + x + this.TRANSFER_SIZE);
        data.unshift(0x40);
        this.obniz.i2c0.write(this.ADDRESS, data);
      }
    }
  }

  fl(f){
    return Math.floor(f);
  }

  to_mono(r, g, b, a){
    var grey = r * 0.299 + g * 0.587 + b * 0.114;
    if( a > 127 || grey > 127.5)
      return 1;
    else
      return 0;
  }
}
obniz.displayの仕様に似せて作ってみました。
線の描画や文字列の描画機能はなく、canvasを使うことを前提にしています。
使うときには、以下のような流れになります。
var wemos = new WeMos(obniz); /* これで初期化 */
wemos.display.clear(); /* 必要に応じて画面クリア */
const ctx = obniz.util.createCanvasContext(wemos.display.width, wemos.display.height); /* canvasを作成 */
/* ここでいろいろcanvasの描画 */
wemos.display.draw(ctx); /* OLEDに描画 */
HTMLサンプル
ついでに、ブラウザから操作するHTMLページを載せておきます。
<!DOCTYPE html>
<html lang="ja">
<head>
  <meta http-equiv="Content-Type" content="text/html; charset=utf-8" />
  <meta http-equiv="Content-Security-Policy" content="default-src * data: gap: https://ssl.gstatic.com 'unsafe-eval' 'unsafe-inline'; style-src * 'unsafe-inline'; media-src *; img-src * data: content: blob:;">
  <meta name="format-detection" content="telephone=no">
  <meta name="msapplication-tap-highlight" content="no">
  <meta name="apple-mobile-web-app-capable" content="yes" />
  <meta name="viewport" content="user-scalable=no, initial-scale=1, maximum-scale=1, minimum-scale=1, width=device-width">

  <!-- jQuery (necessary for Bootstrap's JavaScript plugins) -->
  <script src="https://ajax.googleapis.com/ajax/libs/jquery/1.12.4/jquery.min.js"></script>
  <!-- Latest compiled and minified CSS -->
  <link rel="stylesheet" href="https://maxcdn.bootstrapcdn.com/bootstrap/3.3.7/css/bootstrap.min.css" integrity="sha384-BVYiiSIFeK1dGmJRAkycuHAHRg32OmUcww7on3RYdg4Va+PmSTsz/K68vbdEjh4u" crossorigin="anonymous">
  <!-- Optional theme -->
  <link rel="stylesheet" href="https://maxcdn.bootstrapcdn.com/bootstrap/3.3.7/css/bootstrap-theme.min.css" integrity="sha384-rHyoN1iRsVXV4nD0JutlnGaslCJuC7uwjduW9SVrLvRYooPp2bWYgmgJQIXwl/Sp" crossorigin="anonymous">
  <!-- Latest compiled and minified JavaScript -->
  <script src="https://maxcdn.bootstrapcdn.com/bootstrap/3.3.7/js/bootstrap.min.js" integrity="sha384-Tc5IQib027qvyjSMfHjOMaLkfuWVxZxUPnCJA7l2mCWNIpG9mGCD8wGNIcPD7Txa" crossorigin="anonymous"></script>

  <title>obniz + WeMos</title>

  <script src="js/methods_utils.js"></script>
  <script src="js/vue_utils.js"></script>

  <script src="https://unpkg.com/obniz@2.2.0/obniz.js" crossorigin="anonymous"></script>
  <script src="js/wemos.js"></script>
  <script src="https://unpkg.com/vue"></script>
</head>
<body>
    <div id="top" class="container">
        <h1>obniz + WeMos</h1>
        <label>connected</label> {{connected}}<br>
        <label>string</label> <input type="text" class="form-control" v-model="string">
        <button class="btn btn-primary" v-on:click="print_string()">print_string</button>
        <button class="btn btn-primary" v-on:click="clear_screen()">clear_screen</button>

        <div class="modal fade" id="progress">
            <div class="modal-dialog">
                <div class="modal-content">
                    <div class="modal-header">
                        <h4 class="modal-title">{{progress_title}}</h4>
                    </div>
                    <div class="modal-body">
                        <center><progress max="100" /></center>
                    </div>
                </div>
            </div>
        </div>
    </div>

    <script src="js/start.js"></script>
</body>
'use strict';

var obniz = new Obniz("【obnizのid】");
var wemos = null;

var vue_options = {
    el: "#top",
    data: {
        progress_title: '',

        connected: false,
        string: ''
    },
    computed: {
    },
    methods: {
        initialize: function(){
            obniz.onconnect = async () => {
                console.log('obniz.onconnect');

                this.connected = true;
                wemos = new WeMos(obniz);
                wemos.display.clear();
            };
            obniz.onclose = () =>{
                console.log('obniz.onclose');
                wemos = null;
                this.connected = false;
            };
        },
        print_string: function(){
            const ctx = obniz.util.createCanvasContext(wemos.display.width, wemos.display.height);

            ctx.fillStyle = "white";
            ctx.font = "20px Avenir";
            ctx.fillText(this.string, 0, 40);

            wemos.display.draw(ctx);
        },
        clear_screen: function(){
            wemos.display.clear();
        }
    },
    created: function(){
    },
    mounted: function(){
        proc_load();

        this.initialize();
    }
};
vue_add_methods(vue_options, methods_utils);
var vue = new Vue( vue_options );
【obnizのid】の部分は、お手持ちのobnizデバイスに合わせてください。
その他、足りないソースは こちら です。
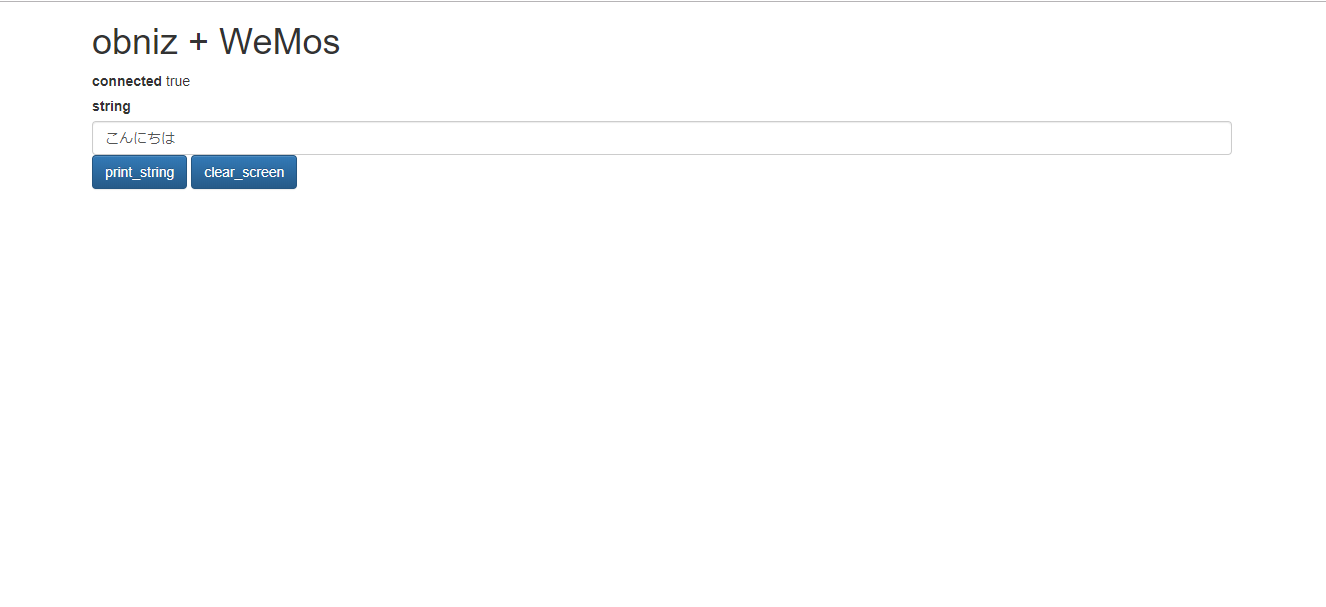
ブラウザから参照すると、obnizデバイスと接続されて、connectedがtrueになります。
stringのテキストボックスに適当な文字を入れて、「print_string」ボタンを押下すると、obnizのディスプレイにその文字が表示されます。
「clear_screen」ボタンを押下すると、ディスプレイがクリアされます。
以上
