ESP32にMongoose OSをいれて、Javascriptでいじったり、リモートからWebAPIでたたいたりします。
あまり需要はないのかもしれませんが、今後何かと使えそうなので、この機会に備忘録として残しておきます。
[Mongoose OS]
https://mongoose-os.com/mos.html
(ちなみに、本当はM5Stick-Cに入れるつもりで調べたのですが、入れてみたら動作が不安定でしたので、またの機会にしたいと思います。)
(参考)以下の投稿もご参考まで。
Mongoose OSを本当に使いこなす(1/2):ESP32にRPCエンドポイントを作る
Mongoose OSとは
・Javascriptで動かせます。
Webサーバ上にJavascriptを置くObnizと違って、ESP32にJavascriptソースコードを書き込んで単独で動作します。C言語も書けます。
・代表的なIoTにすでに対応しています。
AWS IoT、Microsoft Azure IoT、Google IoT Core など、すでに対応しています。
・RPCで呼び出されます。
WebSocket、RESTful、MQTTなどで呼び出すことができるので、Obnizと同じように、サーバ側からJavascriptなどで制御できます。
Mongoose OSを書き込む
基本的に以下に書いてある通りに進めれば、何も難しいことはなかったです。
https://mongoose-os.com/docs/mongoose-os/quickstart/setup.md
以下から、mosツールをダウンロードします。以下はWindowsの場合です。
https://mongoose-os.com/downloads/mos-release/win/mos.exe
例えば、以下に保存します。
c:\mos\mos.exe
そして実行します。
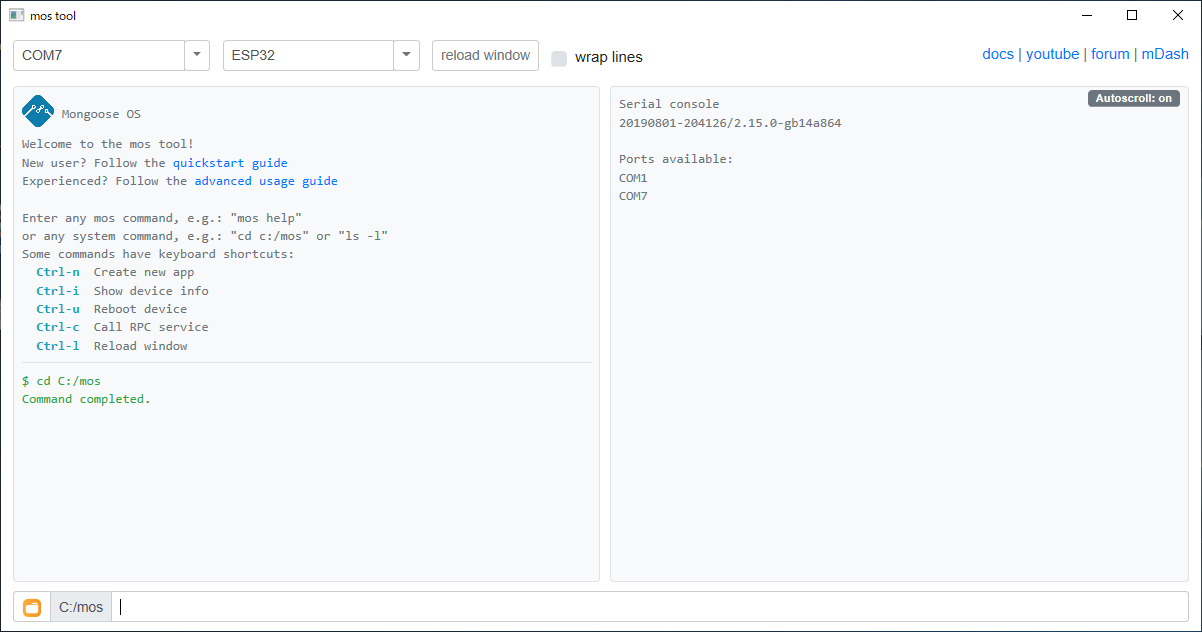
まずは、キーボードから、Ctrl-n を押します。そうすると、下の方に、
mos clone https://github.com/mongoose-os-apps/demo-js app1
と入力されます。
app1は任意のアプリ名なので、好きな名前に変えます。
そうすると、c:\mos\app1というフォルダが作られて、ファイルがダウンロードされて、app1フォルダに移動してくれます。
左下のフォルダボタンを押すと、エクスプローラで開いてくれます。
次に、書き込むMongoose OSの内容をカスタマイズするために、mos.ymlを編集します。
author: mongoose-os
description: A JS-enabled demo Mongoose OS firmware
# arch: PLATFORM
version: 1.0
manifest_version: 2017-05-18
libs_version: ${mos.version}
modules_version: ${mos.version}
mongoose_os_version: ${mos.version}

config_schema:
  - ["i2c.enable", true]
  - ["i2c.sda_gpio", 5]
  - ["i2c.scl_gpio", 4]

tags:
  - js

filesystem:
  - fs

libs:
  - origin: https://github.com/mongoose-os-libs/boards
  - origin: https://github.com/mongoose-os-libs/ca-bundle
  - origin: https://github.com/mongoose-os-libs/core
  - origin: https://github.com/mongoose-os-libs/dash
  - origin: https://github.com/mongoose-os-libs/fstab
  - origin: https://github.com/mongoose-os-libs/http-server
  - origin: https://github.com/mongoose-os-libs/provision
  - origin: https://github.com/mongoose-os-libs/rpc-service-config
  - origin: https://github.com/mongoose-os-libs/rpc-service-fs
  - origin: https://github.com/mongoose-os-libs/rpc-service-gpio
  - origin: https://github.com/mongoose-os-libs/rpc-service-i2c
  - origin: https://github.com/mongoose-os-libs/rpc-uart
  - origin: https://github.com/mongoose-os-libs/rpc-ws
  - origin: https://github.com/mongoose-os-libs/sntp
  - origin: https://github.com/mongoose-os-libs/mjs
  - origin: https://github.com/mongoose-os-libs/rpc-loopback
  - origin: https://github.com/mongoose-os-libs/rpc-mqtt
  - origin: https://github.com/mongoose-os-libs/rpc-service-ota
  - origin: https://github.com/mongoose-os-libs/rpc-service-wifi
  - origin: https://github.com/mongoose-os-libs/spi
  - origin: https://github.com/mongoose-os-libs/i2c
libsのところは、お好みで追加削除してください。
init.jsも不要なコードがたくさんあるので削除します。(今後参考にはなりますが)
load('api_config.js');
load('api_dash.js');
load('api_events.js');
load('api_gpio.js');
load('api_timer.js');
load('api_sys.js');

let state = {};  // Device state
let online = false;                               // Connected to the cloud?

// Update state every second, and report to cloud if online
Timer.set(10000, Timer.REPEAT, function() {
  state.uptime = Sys.uptime();
  state.ram_free = Sys.free_ram();
  print('online:', online, JSON.stringify(state));
}, null);

Event.on(Event.CLOUD_CONNECTED, function() {
  online = true;
}, null);

Event.on(Event.CLOUD_DISCONNECTED, function() {
  online = false;
}, null);
あとは、以下を実行するだけです。
左上のポート番号とデバイスの種類を設定するのを忘れずに。
mos build
mos flash
これで、OSが書き込まれて、再起動します。右側のConsoleにその様子が出力されます。
WiFiのアクセスポイントは以下で設定できます。
mos wifi [AP名] [パスワード]
mDashというサービス( https://mdash.net )を使う場合は以下を設定します。
mos mdash-setup [Device ID] [Device token]
以下のところは、必要に応じて設定してください。SDAを5、SCLを4に設定しています。何も設定しないと、SDAが32、SCLが33になります。
- ["i2c.sda_gpio", 5]
- ["i2c.scl_gpio", 4]
以下のように、実行すると、
mos call I2C.Scan
以下のように表示されて、I2Cデバイスが検出されているのがわかります。
[
60
]
Command completed.
スレーブアドレス=60(0x3C)です。
これで、起動が完了し、Wifiにも接続されていると思いますので、準備完了です。
I2C接続のOLEDディスプレイにつなげる
それじゃあ、fs/init.js にI2Cを操作するJavascriptを書きましょう、という方法もあるのですが、Javascriptを変更するたびに、mos build、mos flashするのはめんどうなので、Mongoose OSのRPCを使って、クライアントPCからリモートで操作してみます。
I2C操作は、mongoose.jsにおいて、以下の関数にまとめました。
class Mongoose
this.i2c0 = class I2C
this.write(addr, data)
this.readWait(addr, len)
上記のI2C操作関数を、OLEDディスプレイドライバwemos.jsの中で呼び出しています。
実際のI2C関数の中身はというと、ここで、Mongoose OSのRPCがCROSS Domain対応していないことがわかりました。。。
なので、いったんRESTful APIサーバに渡して、そこからMongoose OSのRPCを呼び出すようにしました。
サーバからESP32のRPCへの呼び出し方は単純です。
I2C Writeの場合
{
"addr": 60,
"data_hex": "000102030405"
}
を
http://XXXXXXX/rpc/I2C.Write
にPOSTするだけです。
I2C Readの場合は、
{
"addr": 60,
"len": 10
}
を
http://XXXXXXX/rpc/I2C.Read
にPOSTするだけです。
(参考情報)
https://mongoose-os.com/docs/mongoose-os/api/rpc/rpc-service-i2c.md
ソース一式
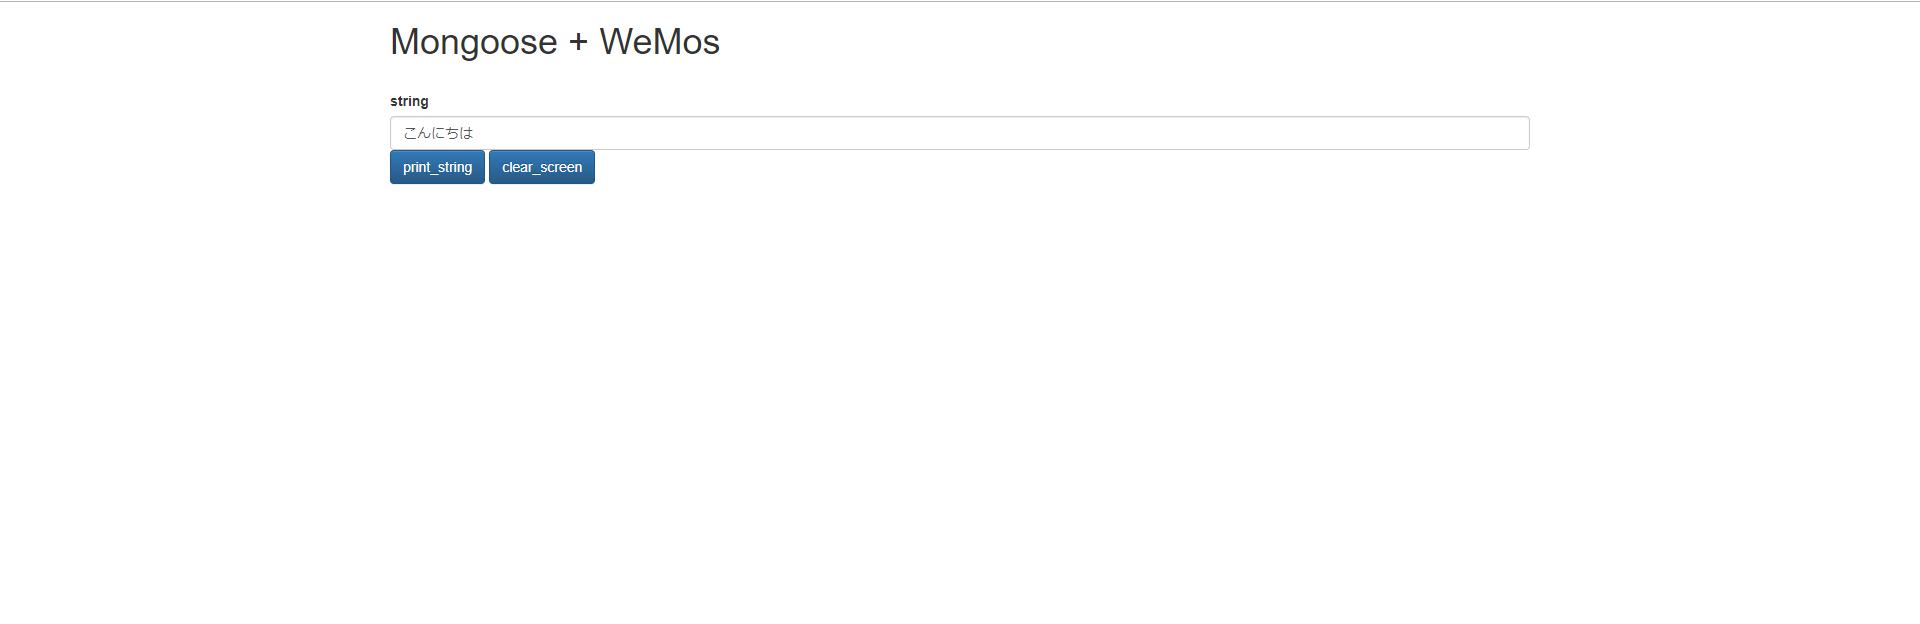
クライアント側のWebページはこんな感じに見えます。
クライアント側ソースコードです。
<!DOCTYPE html>
<html lang="ja">
<head>
  <meta http-equiv="Content-Type" content="text/html; charset=utf-8" />
  <meta http-equiv="Content-Security-Policy" content="default-src * data: gap: https://ssl.gstatic.com 'unsafe-eval' 'unsafe-inline'; style-src * 'unsafe-inline'; media-src *; img-src * data: content: blob:;">
  <meta name="format-detection" content="telephone=no">
  <meta name="msapplication-tap-highlight" content="no">
  <meta name="apple-mobile-web-app-capable" content="yes" />
  <meta name="viewport" content="user-scalable=no, initial-scale=1, maximum-scale=1, minimum-scale=1, width=device-width">

  <!-- jQuery (necessary for Bootstrap's JavaScript plugins) -->
  <script src="https://ajax.googleapis.com/ajax/libs/jquery/1.12.4/jquery.min.js"></script>
  <!-- Latest compiled and minified CSS -->
  <link rel="stylesheet" href="https://maxcdn.bootstrapcdn.com/bootstrap/3.3.7/css/bootstrap.min.css" integrity="sha384-BVYiiSIFeK1dGmJRAkycuHAHRg32OmUcww7on3RYdg4Va+PmSTsz/K68vbdEjh4u" crossorigin="anonymous">
  <!-- Optional theme -->
  <link rel="stylesheet" href="https://maxcdn.bootstrapcdn.com/bootstrap/3.3.7/css/bootstrap-theme.min.css" integrity="sha384-rHyoN1iRsVXV4nD0JutlnGaslCJuC7uwjduW9SVrLvRYooPp2bWYgmgJQIXwl/Sp" crossorigin="anonymous">
  <!-- Latest compiled and minified JavaScript -->
  <script src="https://maxcdn.bootstrapcdn.com/bootstrap/3.3.7/js/bootstrap.min.js" integrity="sha384-Tc5IQib027qvyjSMfHjOMaLkfuWVxZxUPnCJA7l2mCWNIpG9mGCD8wGNIcPD7Txa" crossorigin="anonymous"></script>

  <title>Mongoose + WeMos</title>

  <script src="js/methods_utils.js"></script>
  <script src="js/vue_utils.js"></script>

  <script src="js/mongoose.js"></script>
  <script src="js/wemos.js"></script>
  <script src="https://unpkg.com/vue"></script>
</head>
<body>
    <div id="top" class="container">
        <h1>Mongoose + WeMos</h1>
        <br>
        <label>string</label> <input type="text" class="form-control" v-model="string">
        <button class="btn btn-primary" v-on:click="print_string()">print_string</button>
        <button class="btn btn-primary" v-on:click="clear_screen()">clear_screen</button>


        <div class="modal fade" id="progress">
            <div class="modal-dialog">
                <div class="modal-content">
                    <div class="modal-header">
                        <h4 class="modal-title">{{progress_title}}</h4>
                    </div>
                    <div class="modal-body">
                        <center><progress max="100" /></center>
                    </div>
                </div>
            </div>
        </div>
    </div>

    <script src="js/start.js"></script>
</body>
'use strict';

var mongoose = null;
var wemos = null;

const device_url = "http://192.168.1.219";

var vue_options = {
    el: "#top",
    data: {
        progress_title: '',

        string: '',
    },
    computed: {
    },
    methods: {
        connect_mongoose: async function(){
            mongoose = new Mongoose({ url: device_url } );
            wemos = new WeMos(mongoose);
            await wemos.display.clear();
        },
        print_string: function(){
            if( wemos == null ){
                alert('wemosと接続していません。');
                return;
            }

            try{
                var canvas = document.createElement('canvas');
                canvas.setAttribute("width", wemos.display.width.toString());
                canvas.setAttribute("height", wemos.display.height.toString());
                var ctx = canvas.getContext('2d');
                ctx.clearRect(0, 0, wemos.display.width, wemos.display.height);

                ctx.fillStyle = "white";
                ctx.font = "20px Avenir";
                ctx.fillText(this.string, 0, 40);

                wemos.display.draw(ctx);
            }catch( error ){
                alert(error);
            }
        },
        clear_screen: function(){
            if( wemos == null ){
                alert('wemosと接続していません。');
                return;
            }

            try{
                wemos.display.clear();
            }catch( error ){
                alert(error);
            }
        }
    },
    created: function(){
    },
    mounted: function(){
        proc_load();

        this.connect_mongoose();
    }
};
vue_add_methods(vue_options, methods_utils);
var vue = new Vue( vue_options );
device_url には、ESP32のIPアドレスをURLで指定してください。
'use strict';

const forward_url = 'http://localhost:10080/mongoose';

class Mongoose{
	constructor(params){
		this.i2c0 = new I2C(params);
	}
}

class I2C{
	constructor(params){
    this.url = params.url;
  }

  async start(params){
  }

  async write(addr, data){
    var params = {
      addr: addr,
      data_hex: byteAry2hexStr(data)
    };
    return do_post_forward(this.url + '/rpc/I2C.Write', params );
  }

  async readWait(addr, len){
    var params = {
      addr: addr,
      len: len
    };
    return do_post_forward(this.url + '/rpc/I2C.Read', params )
    .then(ret =>{
      return hexStr2byteAry(ret.data_hex);
    });
  }

  async end(){
  }
}

function do_post_forward(url, body){
  const headers = new Headers( { "Content-Type" : "application/json" } );

  body.url = url;

  return fetch(forward_url, {
      method : 'POST',
      body : JSON.stringify(body),
      headers: headers
  })
  .then((response) => {
      if( !response.ok )
          throw 'response is not ok.';
      return response.json();
  });
}

function byteAry2hexStr(bytes, sep = '', pref = '') {
  if( bytes instanceof ArrayBuffer )
      bytes = new Uint8Array(bytes);
  if( bytes instanceof Uint8Array )
      bytes = Array.from(bytes);

  return bytes.map((b) => {
      var s = b.toString(16);
      return pref + (b < 0x10 ? '0'+s : s);
  })
  .join(sep);
}


function hexStr2byteAry(hexs, sep = '') {
  hexs = hexs.trim(hexs);
  if( sep == '' ){
      var array = [];
      for( var i = 0 ; i < hexs.length / 2 ; i++)
          array[i] = parseInt(hexs.substr(i * 2, 2), 16);
      return array;
  }else{
      return hexs.split(sep).map((h) => {
          return parseInt(h, 16);
      });
  }
}
forward_url には、RESTfulサーバを立ち上げたURLを指定してください。
'use strict';

class WeMos{
	constructor(obniz){
		this.display = new WeMos_display(obniz);
	}
}

class WeMos_display{
	constructor(obniz, addr, sda, scl){
    this.obniz = obniz;

    this.ADDRESS = addr || 0x3C;
    this.SDA = sda || 5;
    this.SCL = scl || 4;

    this.obniz.i2c0.start({mode: "master", sda: this.SDA, scl: this.SCL, clock: 400000});

    this.WIDTH = 128;
    this.HEIGHT = 64;

    this.width = this.WIDTH;
    this.height = this.HEIGHT;

		this.mode = false;
		this.buffer = [];
		this.clear();

		this.TRANSFER_SIZE = 64;

		this.DISPLAY_OFF = 0xAE;
		this.DISPLAY_ON = 0xAF;
		this.SET_DISPLAY_CLOCK_DIV = 0xD5;
		this.SET_MULTIPLEX = 0xA8;
		this.SET_DISPLAY_OFFSET = 0xD3;
		this.SET_START_LINE = 0x00;
		this.CHARGE_PUMP = 0x8D;
		this.EXTERNAL_VCC = false;
		this.MEMORY_MODE = 0x20;
		this.SEG_REMAP = 0xA1; // using 0xA0 will flip screen
		this.COM_SCAN_DEC = 0xC8;
		this.COM_SCAN_INC = 0xC0;
		this.SET_COM_PINS = 0xDA;
		this.SET_CONTRAST = 0x81;
		this.SET_PRECHARGE = 0xd9;
		this.SET_VCOM_DETECT = 0xDB;
		this.DISPLAY_ALL_ON_RESUME = 0xA4;
		this.NORMAL_DISPLAY = 0xA6;
		this.COLUMN_ADDR = 0x21;
		this.PAGE_ADDR = 0x22;
		this.INVERT_DISPLAY = 0xA7;
		this.ACTIVATE_SCROLL = 0x2F;
		this.DEACTIVATE_SCROLL = 0x2E;
		this.SET_VERTICAL_SCROLL_AREA = 0xA3;
		this.RIGHT_HORIZONTAL_SCROLL = 0x26;
		this.LEFT_HORIZONTAL_SCROLL = 0x27;
		this.VERTICAL_AND_RIGHT_HORIZONTAL_SCROLL = 0x29;
		this.VERTICAL_AND_LEFT_HORIZONTAL_SCROLL = 0x2A;

    new Promise(async (resolve, reject) =>{
      /* initialze */
      try{
        await this.obniz.i2c0.write(this.ADDRESS, [0x00, this.DISPLAY_OFF]);
        await this.obniz.i2c0.write(this.ADDRESS, [0x00, this.SET_DISPLAY_CLOCK_DIV, 0x80]);
        await this.obniz.i2c0.write(this.ADDRESS, [0x00, this.SET_MULTIPLEX, 0x3F]);
        await this.obniz.i2c0.write(this.ADDRESS, [0x00, this.SET_DISPLAY_OFFSET, 0x00]);
        await this.obniz.i2c0.write(this.ADDRESS, [0x00, this.SET_START_LINE]);
        await this.obniz.i2c0.write(this.ADDRESS, [0x00, this.CHARGE_PUMP, 0x14]);
        await this.obniz.i2c0.write(this.ADDRESS, [0x00, this.MEMORY_MODE, 0x00]);
        await this.obniz.i2c0.write(this.ADDRESS, [0x00, this.SEG_REMAP]);
        await this.obniz.i2c0.write(this.ADDRESS, [0x00, this.COM_SCAN_DEC]);
        await this.obniz.i2c0.write(this.ADDRESS, [0x00, this.SET_COM_PINS, 0x12]);
        await this.obniz.i2c0.write(this.ADDRESS, [0x00, this.SET_CONTRAST, 0x8F]);
        await this.obniz.i2c0.write(this.ADDRESS, [0x00, this.SET_PRECHARGE, 0xF1]);
        await this.obniz.i2c0.write(this.ADDRESS, [0x00, this.SET_VCOM_DETECT, 0x40]);
        await this.obniz.i2c0.write(this.ADDRESS, [0x00, this.DISPLAY_ALL_ON_RESUME]);
        await this.obniz.i2c0.write(this.ADDRESS, [0x00, this.NORMAL_DISPLAY]);
        await this.obniz.i2c0.write(this.ADDRESS, [0x00, this.DISPLAY_ON]);

        this.mode = true;

        resolve();
      }catch(error){
        reject(error);
      }
    });
  }

  async clear(){
    for( var y = 0 ; y < this.fl(this.HEIGHT / 8) ; y++ ){
      for( var x = 0 ; x < this.WIDTH ; x++ ){
        this.buffer[ y * this.WIDTH + x ] = 0x00;
      }
    }

    if( this.mode ){
      return this.update();
    }else{
      return Promise.resolve();
    }
  }

  async drawing(mode){
    this.mode = mode;
    if( this.mode ){
      return this.update();
    }else{
      return Promise.resolve();
    }
  }

  async raw(ary){
    for( var y = 0 ; y < this.HEIGHT ; y++ ){
      for( var x = 0 ; x < this.WIDTH ; x += 8 ){
        var val = ary[y * this.fl(this.WIDTH / 8) + this.fl(x / 8)];
        for( var i = 0 ; i < 8 ; i++ )
          this.put_pixel(x + i, y, (val & (0x01 << i)) != 0x00);
      }
    }

    if( this.mode ){
      return this.update();
    }else{
      return Promise.resolve();
    }
  }

  async draw(ctx){
      var img = ctx.getImageData(0, 0, this.WIDTH, this.HEIGHT);

    for (var y = 0; y < this.HEIGHT; y++ ) {
      for (var x = 0; x < this.WIDTH; x++) {
        var val = this.to_mono(img.data[(x + y * this.WIDTH) * 4], img.data[(x + y * this.WIDTH) * 4 + 1], img.data[(x + y * this.WIDTH) * 4 + 2], img.data[(x + y * this.WIDTH) * 4 + 3]);
        this.put_pixel(x, y, val);
      }
    }

    if( this.mode ){
      return this.update();
    }else{
      return Promise.resolve();
    }
  }

  put_pixel(x, y, val){
    var temp = this.buffer[this.fl(y / 8) * this.WIDTH + x];
    var index = y % 8;
    if(val)
      temp |= 0x01 << index;
    else
      temp &= (~(0x01 << index)) & 0xff;
    this.buffer[this.fl(y / 8) * this.WIDTH + x] = temp;
  }

  async update(){
    var ret = await this.obniz.i2c0.readWait(this.ADDRESS, 1);
    if( (ret[0] >> 7) & 0x01 != 0x00 ){
      console.log('busy');
      return;
    }

    this.obniz.i2c0.write(this.ADDRESS, [0x00, this.COLUMN_ADDR, 0, this.WIDTH - 1]);
    this.obniz.i2c0.write(this.ADDRESS, [0x00, this.PAGE_ADDR, 0, this.fl(this.HEIGHT / 8) - 1]);
    for( var y = 0 ; y < this.fl(this.HEIGHT / 8) ; y++ ){
      for( var x = 0 ; x < this.WIDTH ; x += this.TRANSFER_SIZE ){
        var data = this.buffer.slice( y * this.WIDTH + x, y * this.WIDTH + x + this.TRANSFER_SIZE);
        data.unshift(0x40);
        await this.obniz.i2c0.write(this.ADDRESS, data);
      }
    }
  }

  fl(f){
    return Math.floor(f);
  }

  to_mono(r, g, b, a){
    var grey = r * 0.299 + g * 0.587 + b * 0.114;
    if( a > 128 || grey > 128.5)
      return 1;
    else
      return 0;
	}
}
サーバ側ソースコードも載せておきます。
'use strict';

const HELPER_BASE = process.env.HELPER_BASE || '../../helpers/';
const Response = require(HELPER_BASE + 'response');
const Redirect = require(HELPER_BASE + 'redirect');

const fetch = require('node-fetch');

exports.handler = async (event, context, callback) => {
	var body = JSON.parse(event.body);
	console.log(body);

  const headers = { "Content-Type" : "application/json" };

  return fetch(body.url, {
      method : 'POST',
      body : JSON.stringify(body),
      headers: headers
  })
  .then((response) => {
      if( !response.ok )
          throw 'response is not ok.';
      return response.json();
  })
  .then(json =>{
    return new Response(json);
  });
};
最後に
Mongoose OSは、いろんな機能が実装されていて、それらをRPCでremote呼び出しできるようなので、いったんESP32で立ち上げた後でも、いろんな用途に使えそうです。
以上